Picklz’s First Reef – A slow and steady 112g SCA Mixed Reef Build

picklz

Community Member
View Badges
Joined
Oct 8, 2019
Messages
57
Reaction score
108
Location
Punta Gorda, FL
Rating - 0%
0   0   0
Welcome and thanks for visiting my build thread! :)

As the title eludes to this is probably going to be a somewhat slow process as I collect all of the required equipment, build a stand, and work through the process of starting a new (and my first!) reef tank. After all a wise reefer or three once told me 'nothing good happens fast in a reef tank!'

First some quick background - I have owned a couple freshwater tanks including a 55g African Cichlid tank back when I was in school, I had always wanted a saltwater tank but never got around to investing the time and money in one. After graduating college and getting my own place I started collecting the equipment to setup a reef tank, but eventually abandoned the project as I decided I was too busy with other things at the time to do it justice. Fast forward a dozen years or more to today and I'm married, have a son, a dog, moved into a new home last year, and decided I wanted to revisit the reef tank idea again.

I posed the idea of setting up a smaller 20-30g cube adjacent to our dining area for a new mixed reef tank to my wife and she didn't seem extremely thrilled with the location, but was open to the idea of having one. She suggested a larger tank on the wall near our front door entry area, which is also easily visible from our living room, couch, kitchen etc. I loved the location but admitted that the larger tank would be quite a bit more expensive, along with all the supporting gear - lighting, pumps, sump, other equipment, ongoing costs, etc. To my surprise she said yep, let’s do it. I took a brief moment to consider if this was some kind of a trap...then quickly said alright and got to planning.

Future Tank Location - replacing the entry table
SHHfgkcxj73uzYhSVpoo7QWQunJo4TnpY08MXCPLR08qattafE2U09-n84SeXhIQIlL2W1wJNO90fhF1m4YxwNbnBU6lHphzeN9BrRNCc1bXV9KT4CMcjoASrcygB9zkwJMwBPVAWFA=w2400

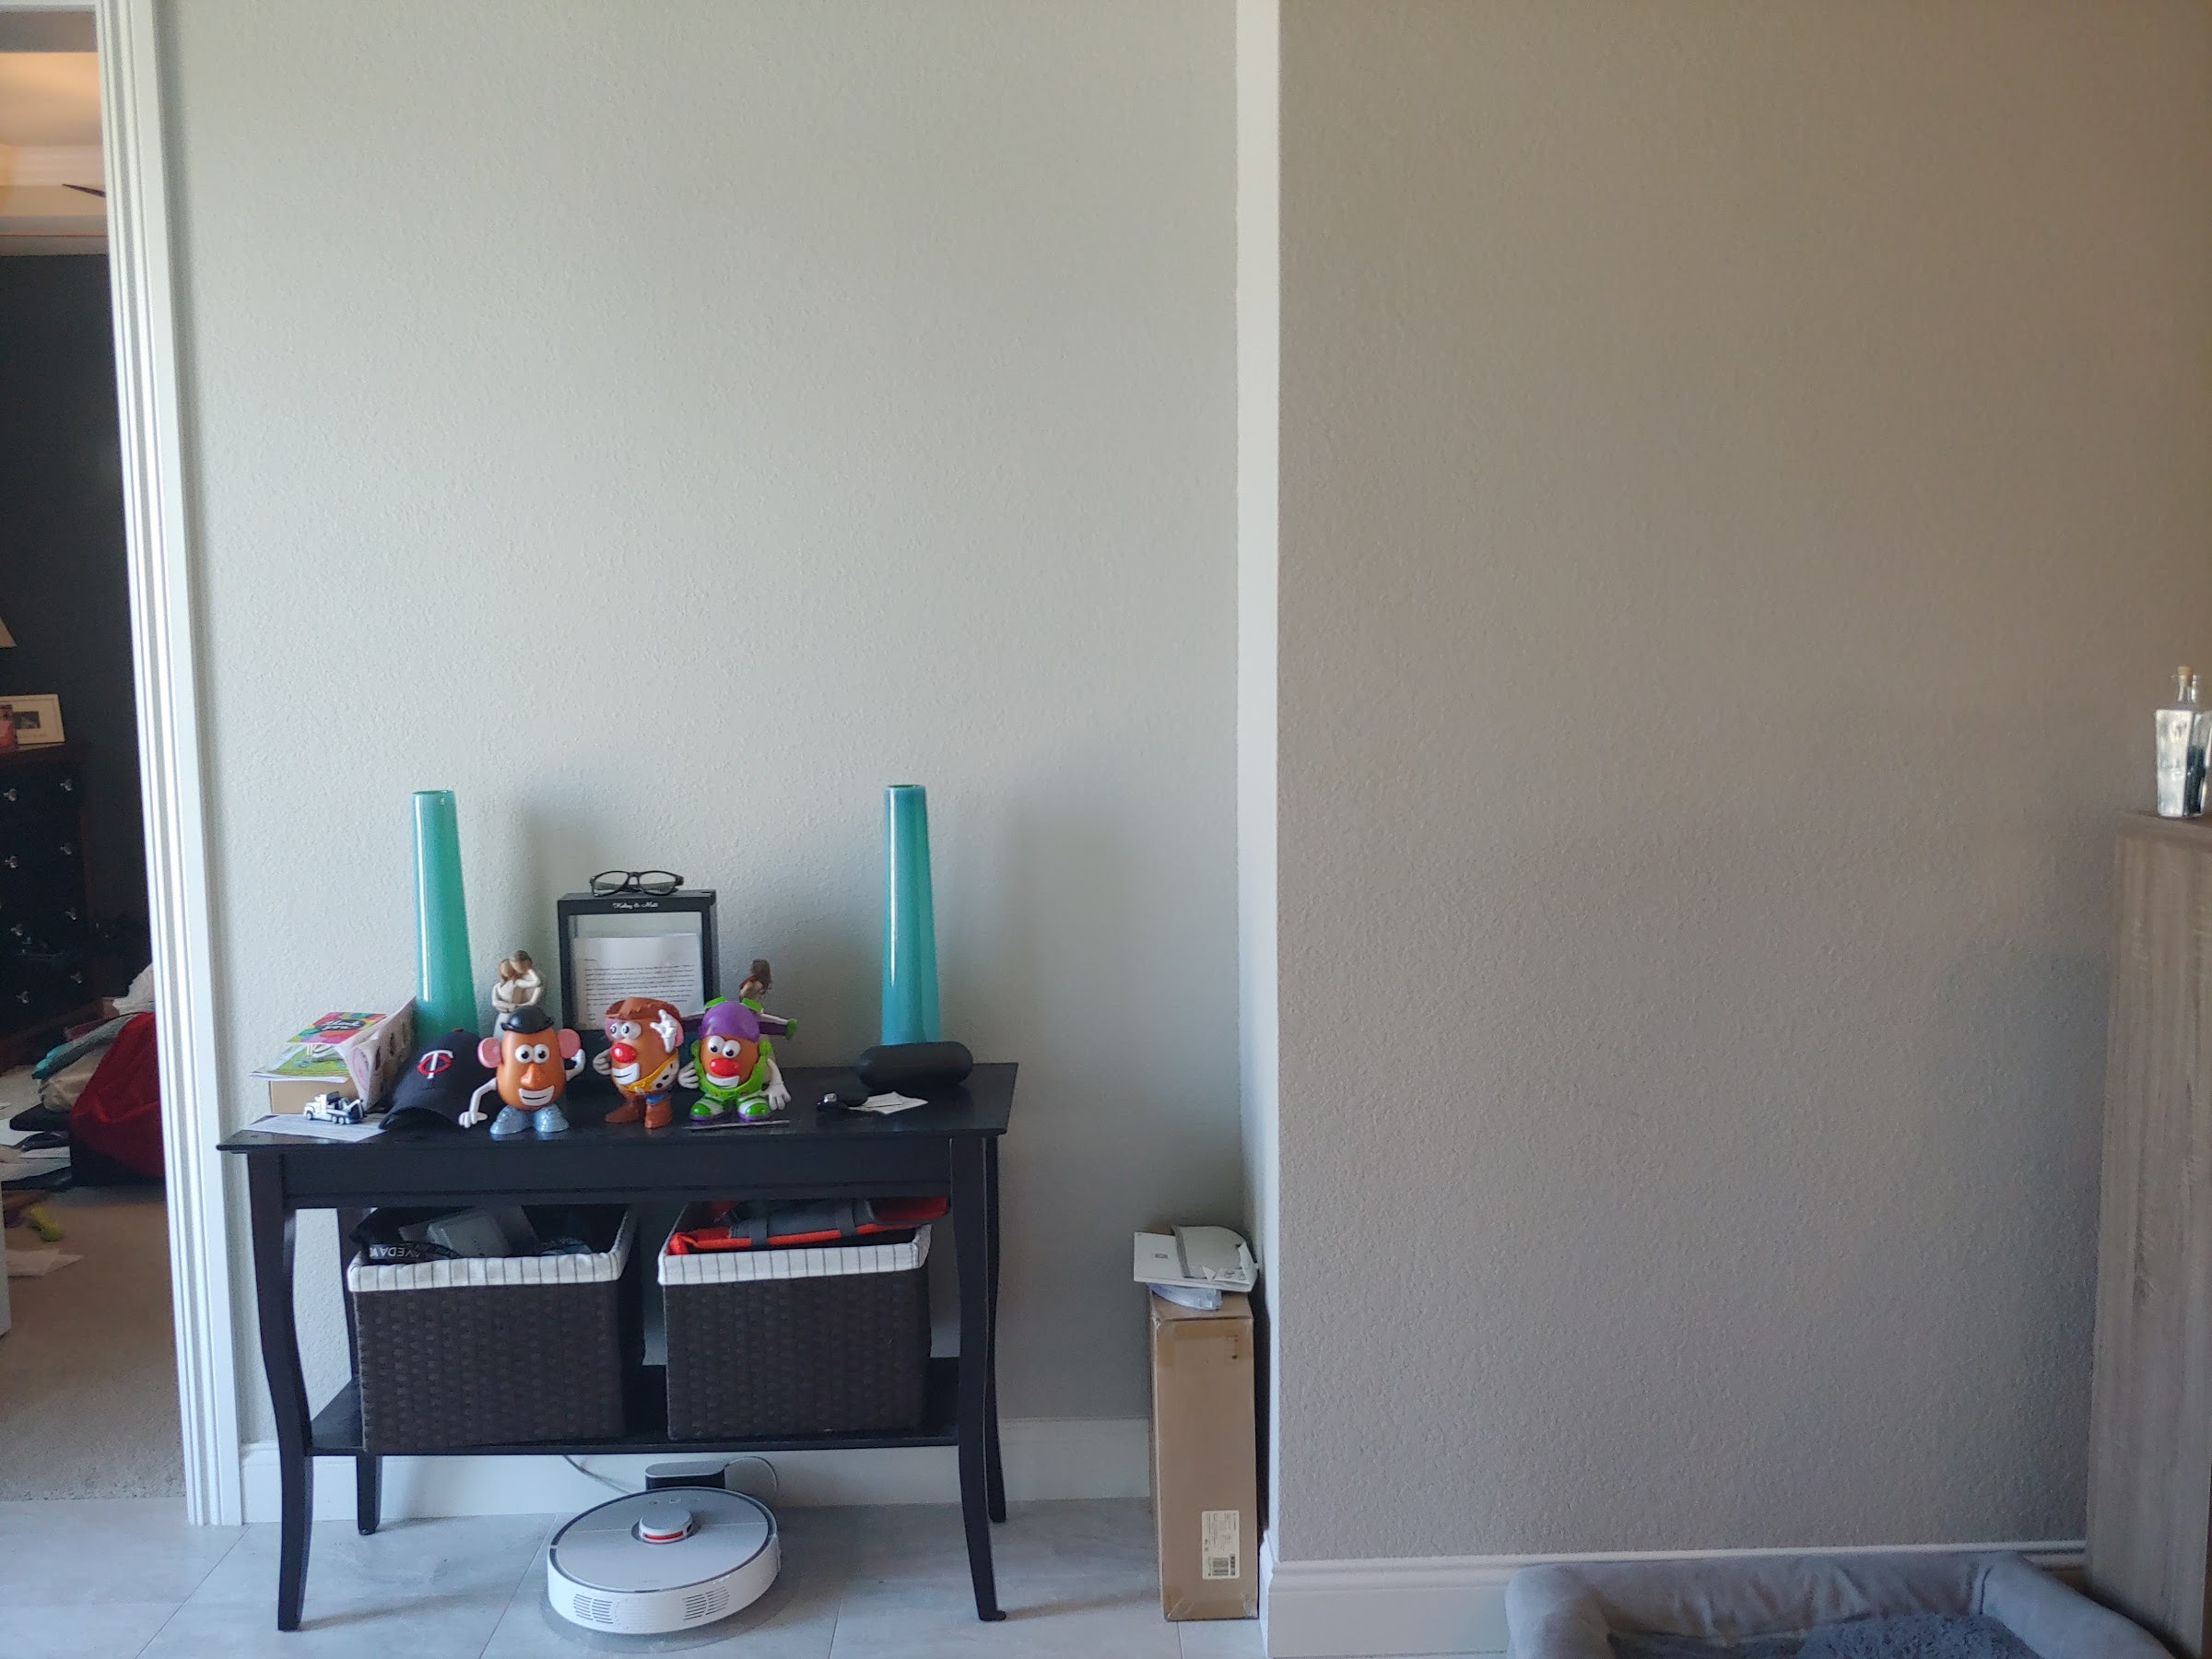
Excuse my son's Mr Potato Head collection, they will be relocated haha

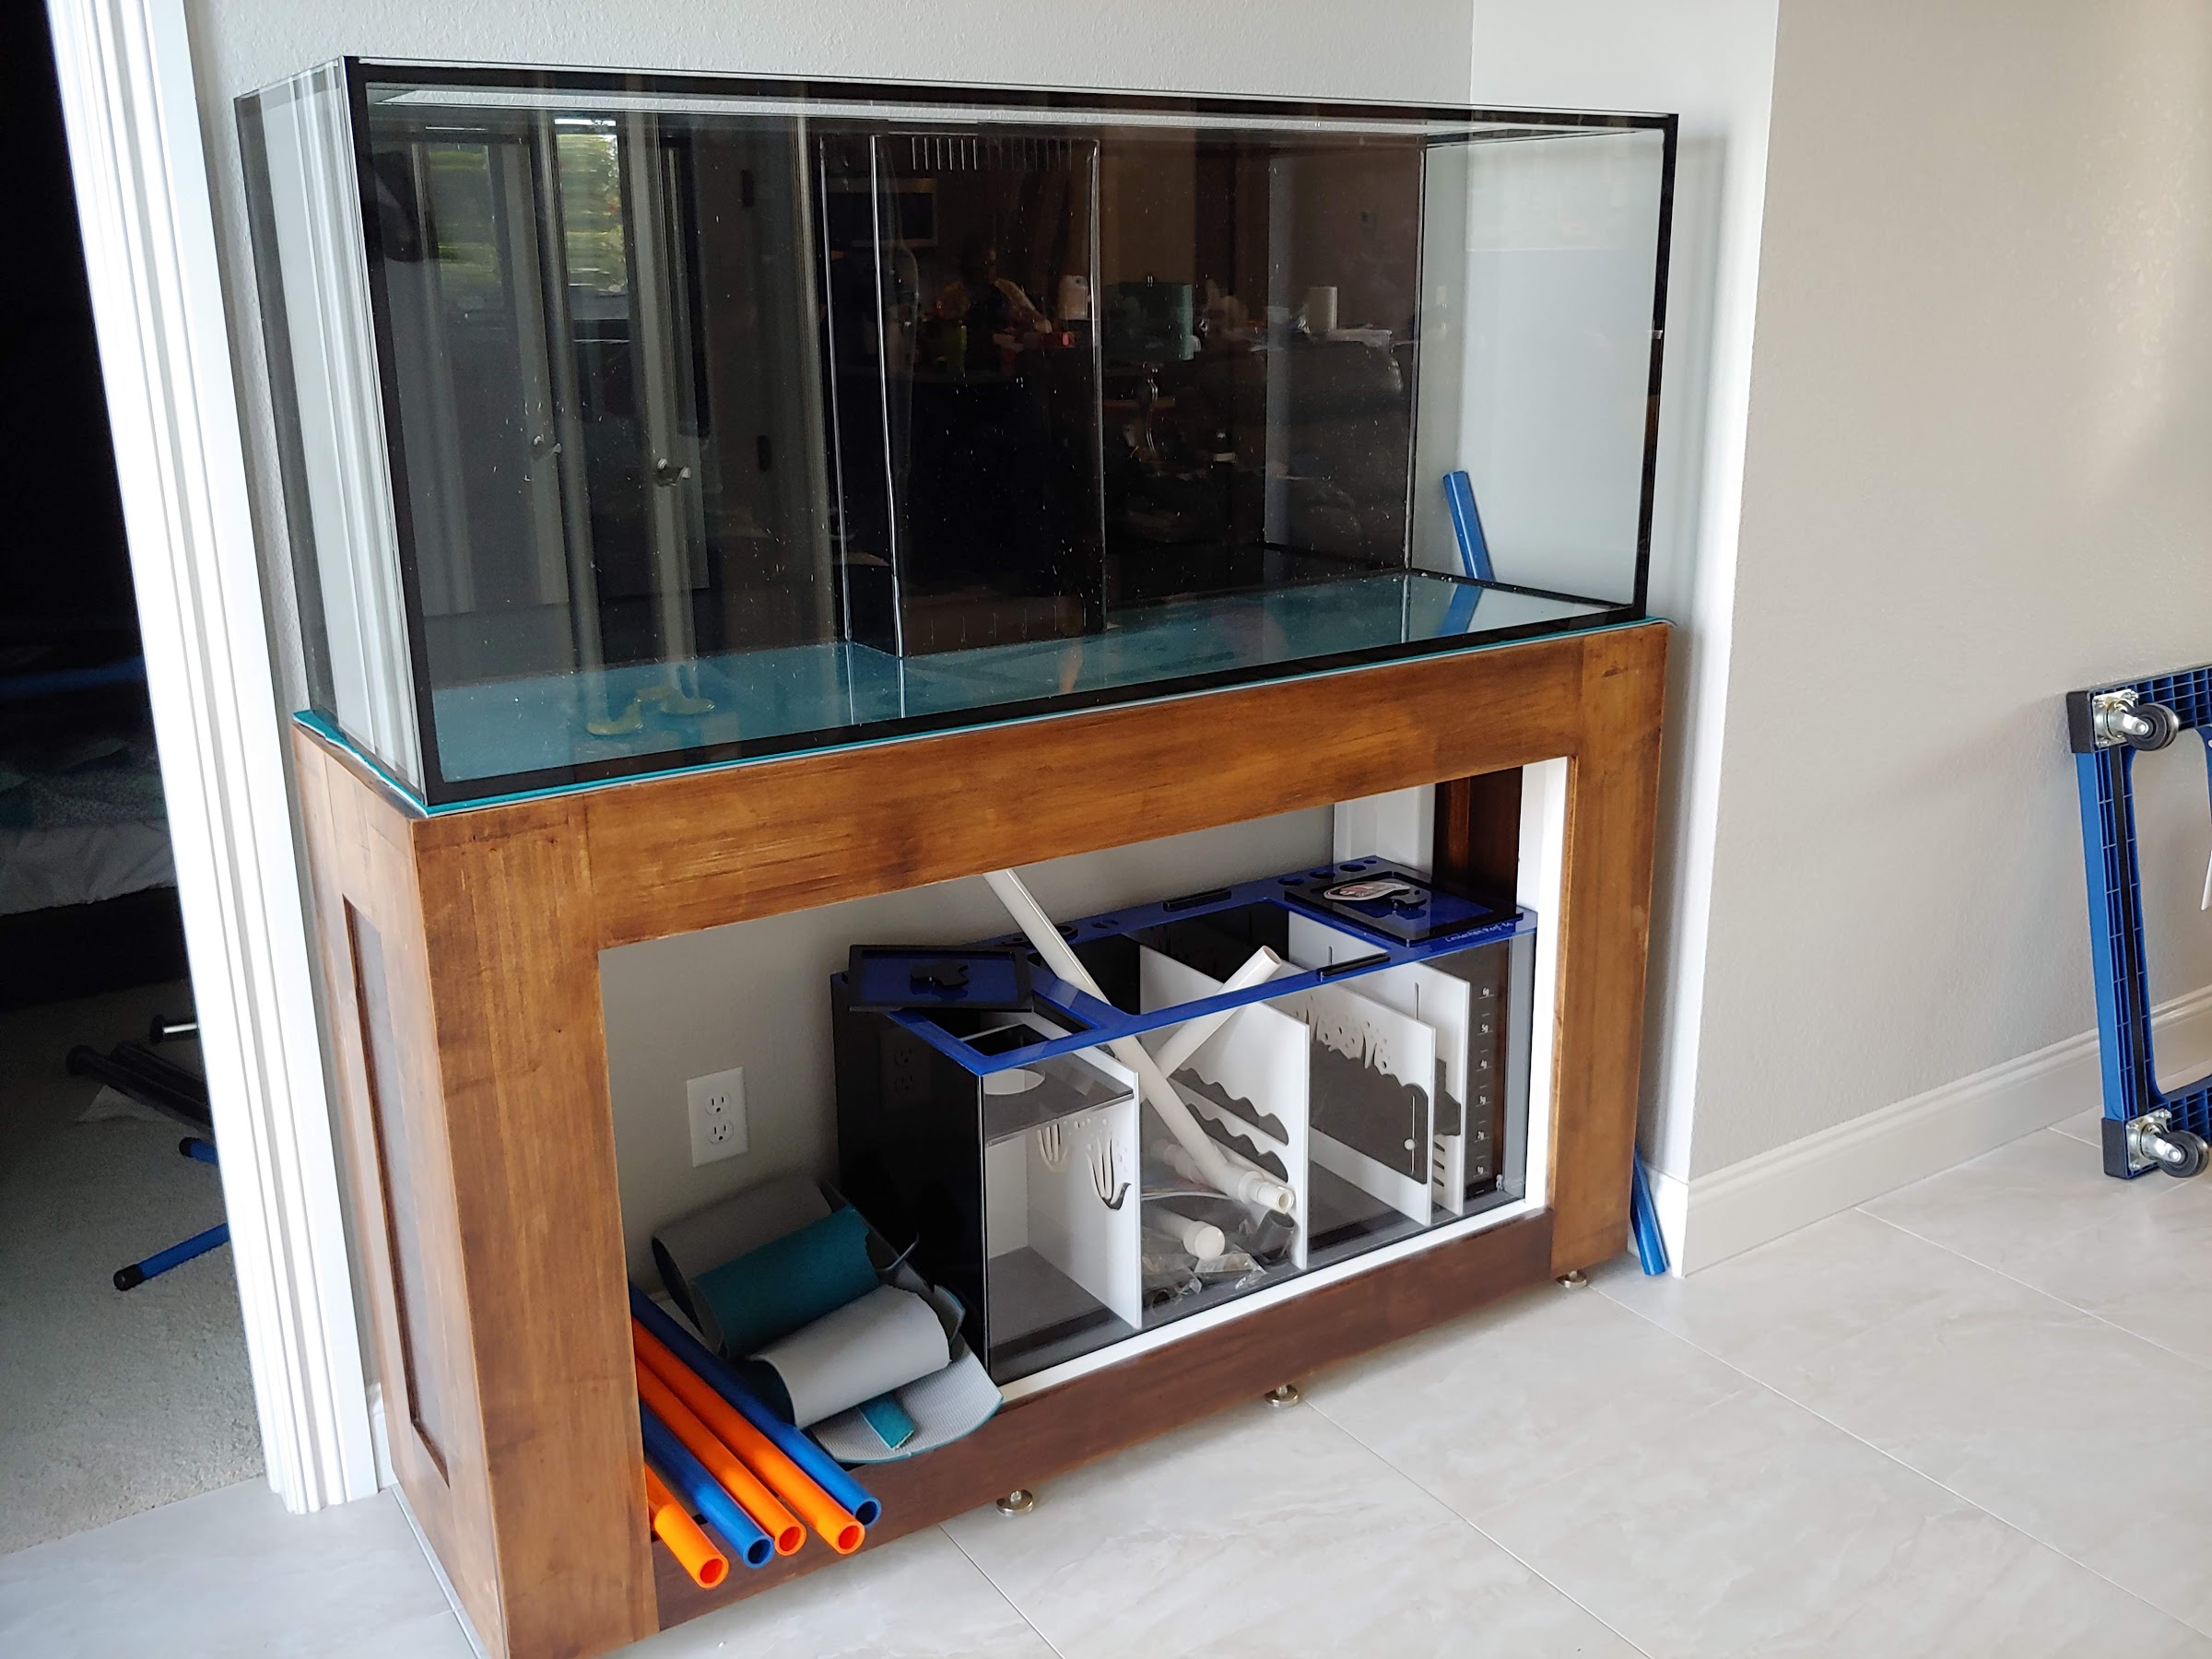
The space for the tank is somewhat limiting in that I won’t be able to go with a tank much wider (front to back) than about 20" or so and no more than a 60" long tank, taking the standard 150g tank size I was hoping to go with out of the mix. I found SCA made a 112g tank in a stock size of 60" x 18" x 24" (Length x Width x Height), I considered having a custom tank a couple inches wider made, but the lead time and additional cost didn't seem worth the hassle. I see a lot of people recommending 24" wide tanks (or even wider) over the 18" tanks all the time, and I 100% agree but in this case the space simply does not allow for it.Having combed through the house looking for any other potential locations for a tank, trying to find a spot we could fit a larger tank into (now or in the future), and so on we decided that this was about the only workable location and the tank size is as big as we’re going to be able to go.

With that in mind I contacted Steve at SCA who was quick to respond and very helpful so I ended up ordering the 112g euro braced tank with internal overflow from him yesterday - 10/15/2019.

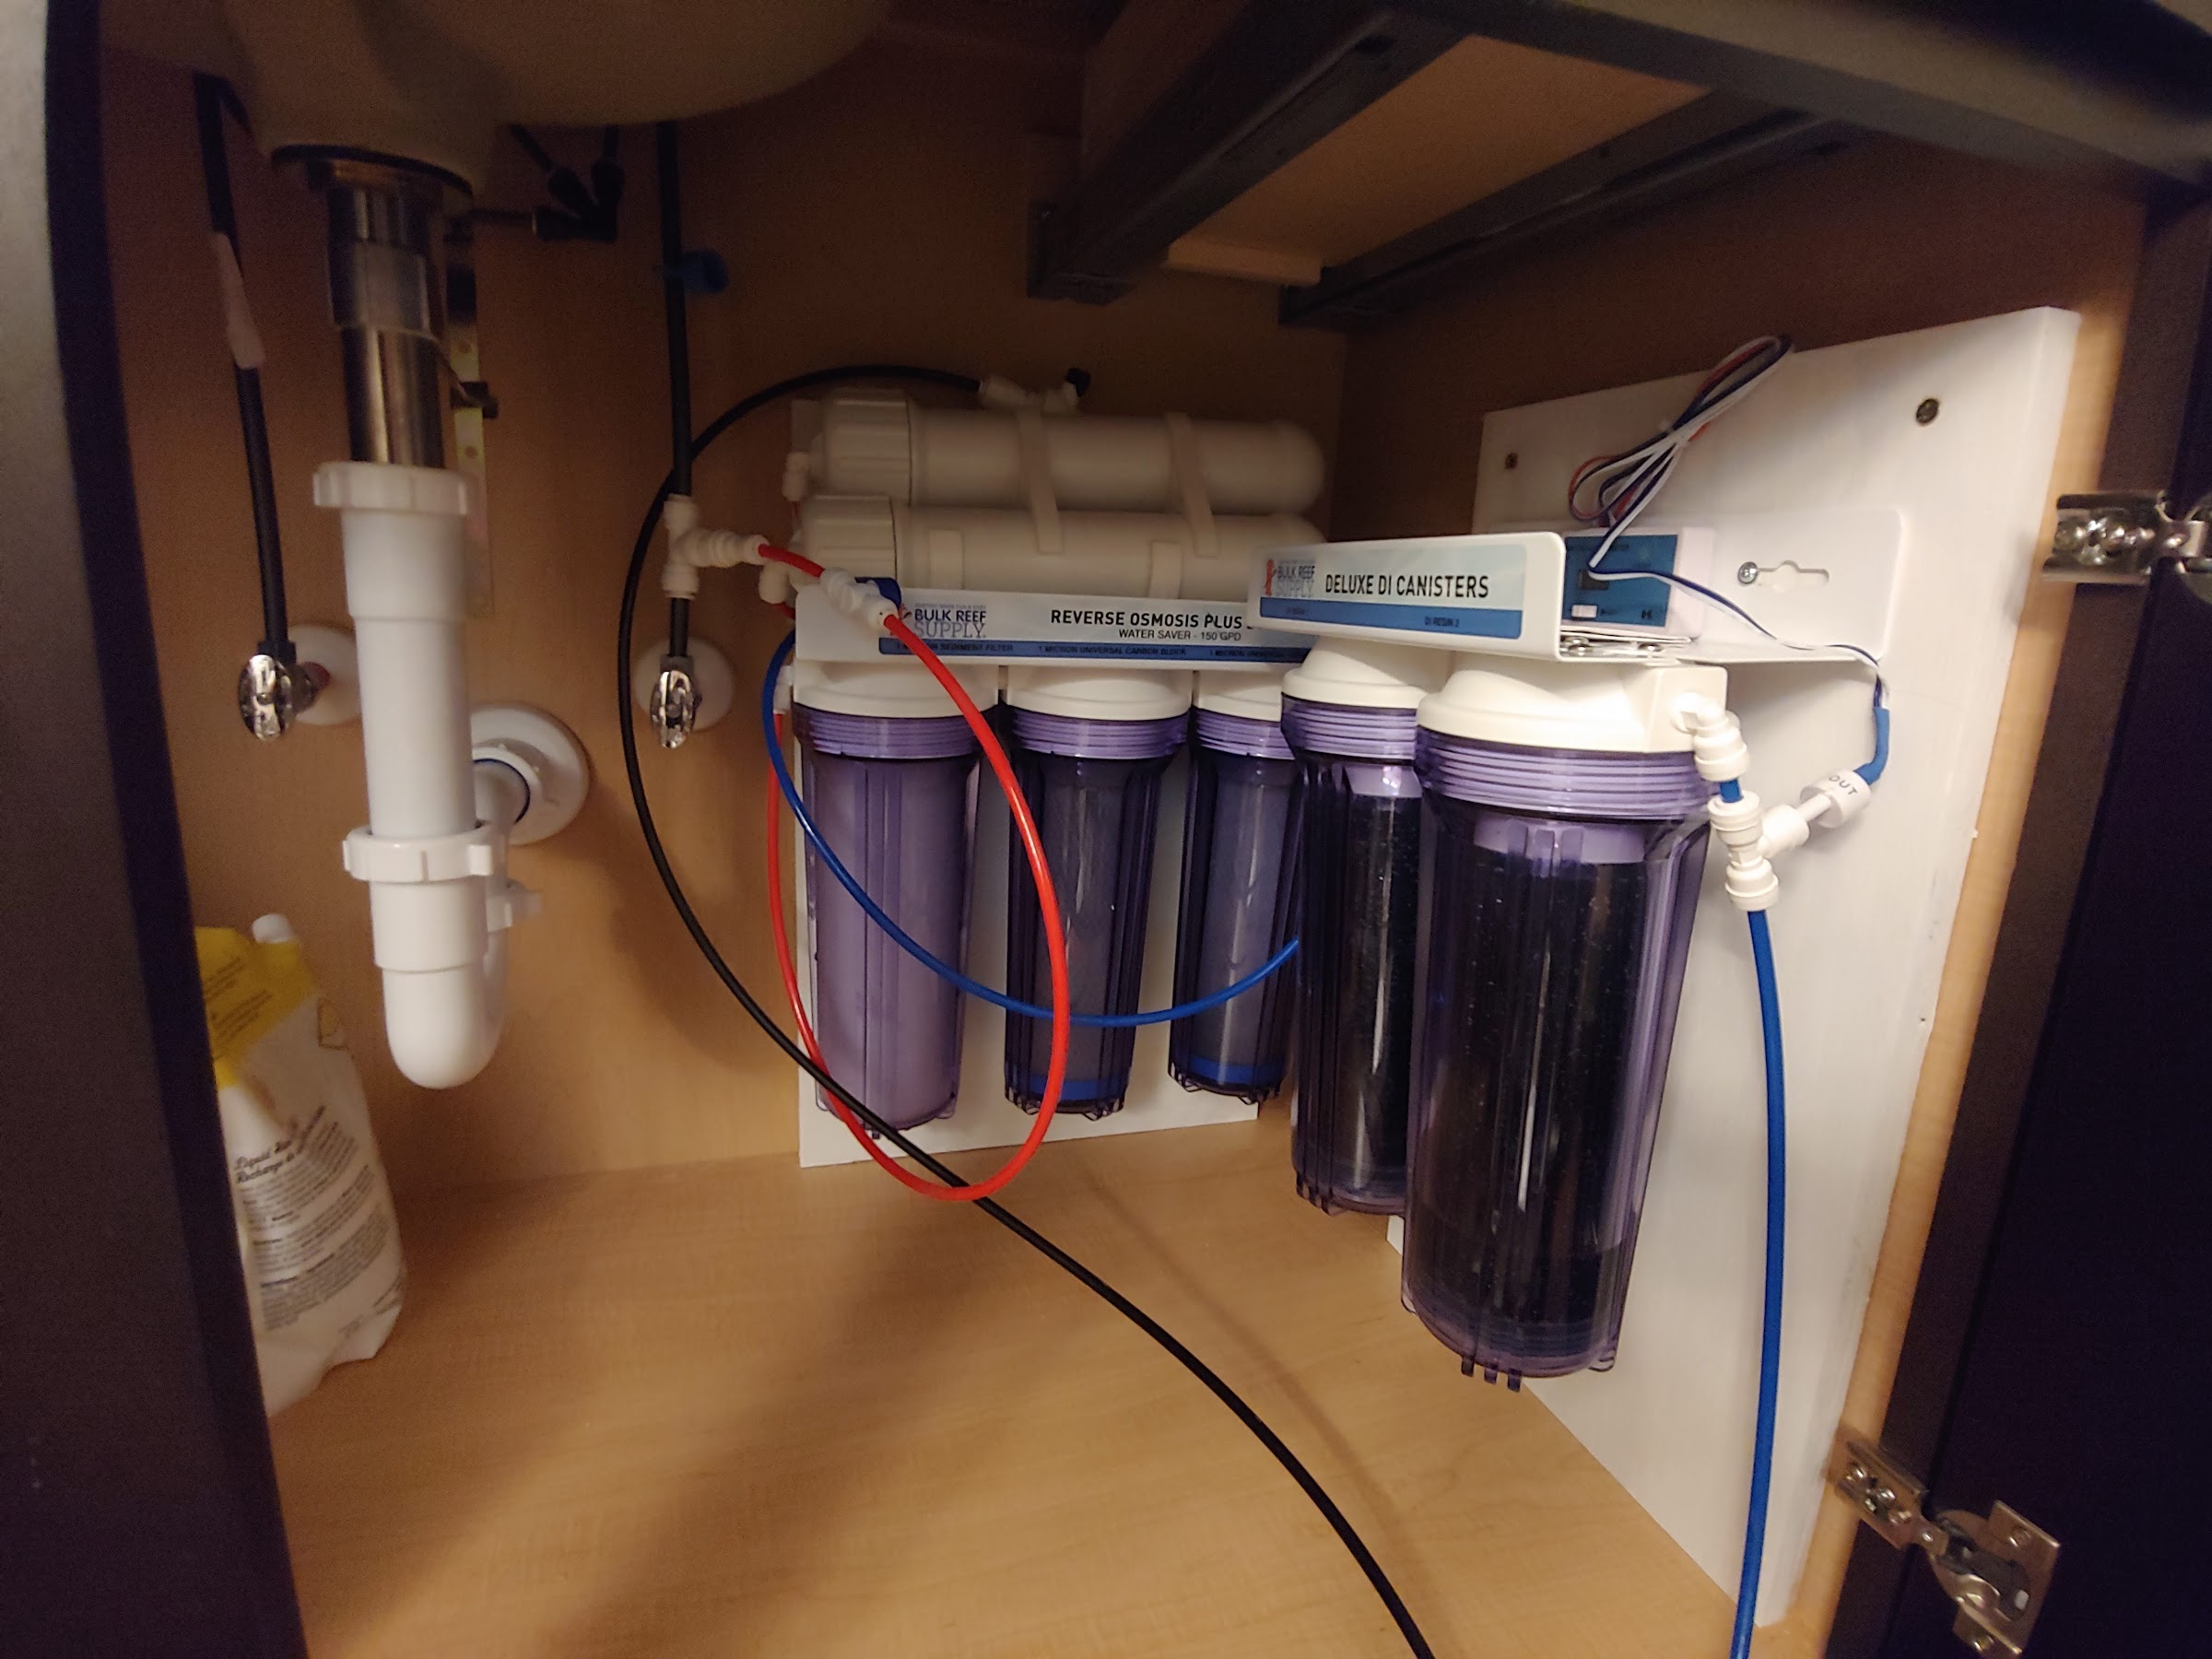
I’ve started some additional planning for equipment as well as the overall setup. The tank is going along a wall that is a little over 5' long and inset about 21" deep compared to the remaining wall of our living room, luckily for me the wall directly adjacent to the right side of the tank borders one of our walk in closets (mine) which I've decided to give up some real estate in to allow space for RODI storage, a salt water mixing station and a couple small ~15 gallon quarantine tanks. This will allow me to incorporate ATO as well as Auto water changes into the design. I plan to install a BRS RODI unit under my vanity (which also borders the closet) so a fresh supply of RODI water and easy access to a drain will be available.

And a little Floor Plan
9e2WDh3mdld8-HfED8Au0CMpqXUC9sjAX4lINcxdbhpy8H_DC_Kl0wNjPf0n9D-USz3o8SfHMIaWrCiSkg7U8DEoR-F70ErhBzmXvDTUy0pCqz0E3zC1Tdxvv64S-fJtP4EzV5z2kHY=w2400

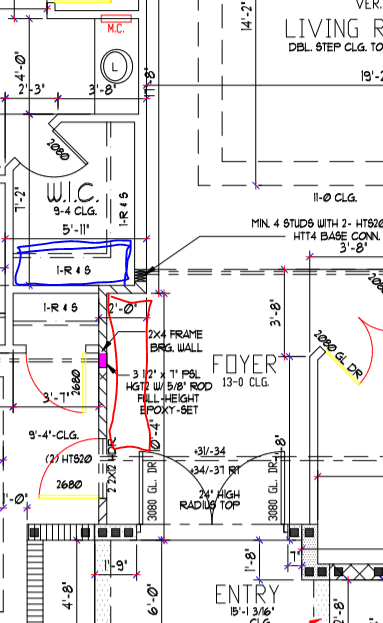
The Red box represents the Aquarium location and the blue box will be the water mixing station and QT tanks. Hoses/Cables will run through the wall.

Automation and making ongoing maintenance as easy as possible in this build is going to be top of mind. I am going to try and save money where it makes sense either looking for high value offerings (bang for your buck), sales, and/or used equipment however I recognize the value in reliability and quality equipment so I’m open to splurging where it makes sense.

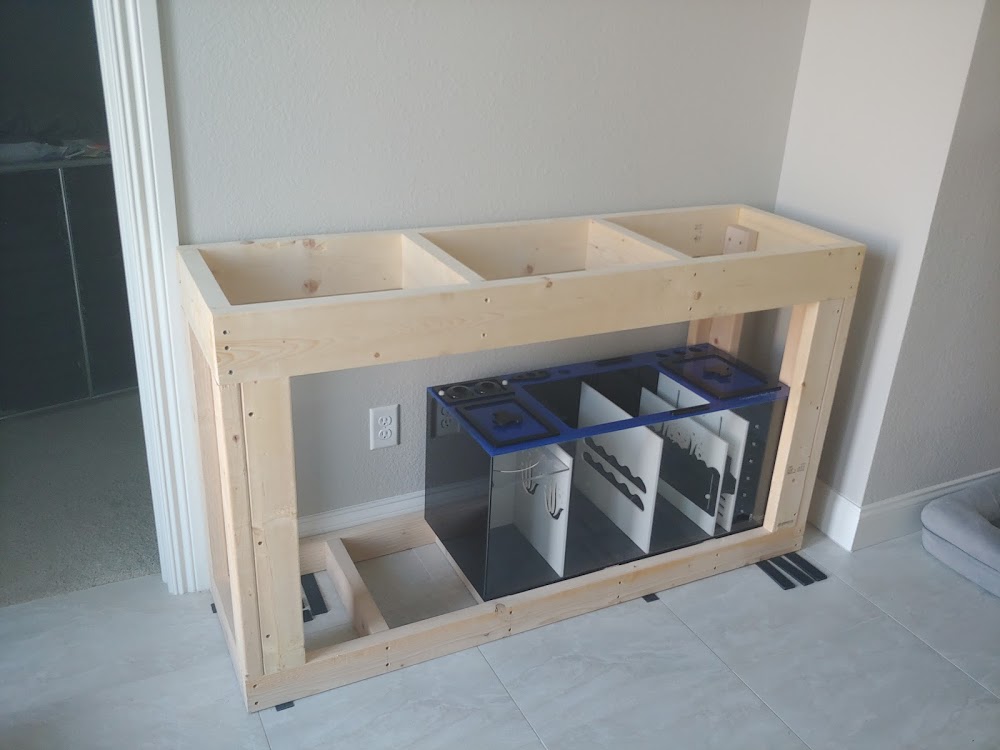
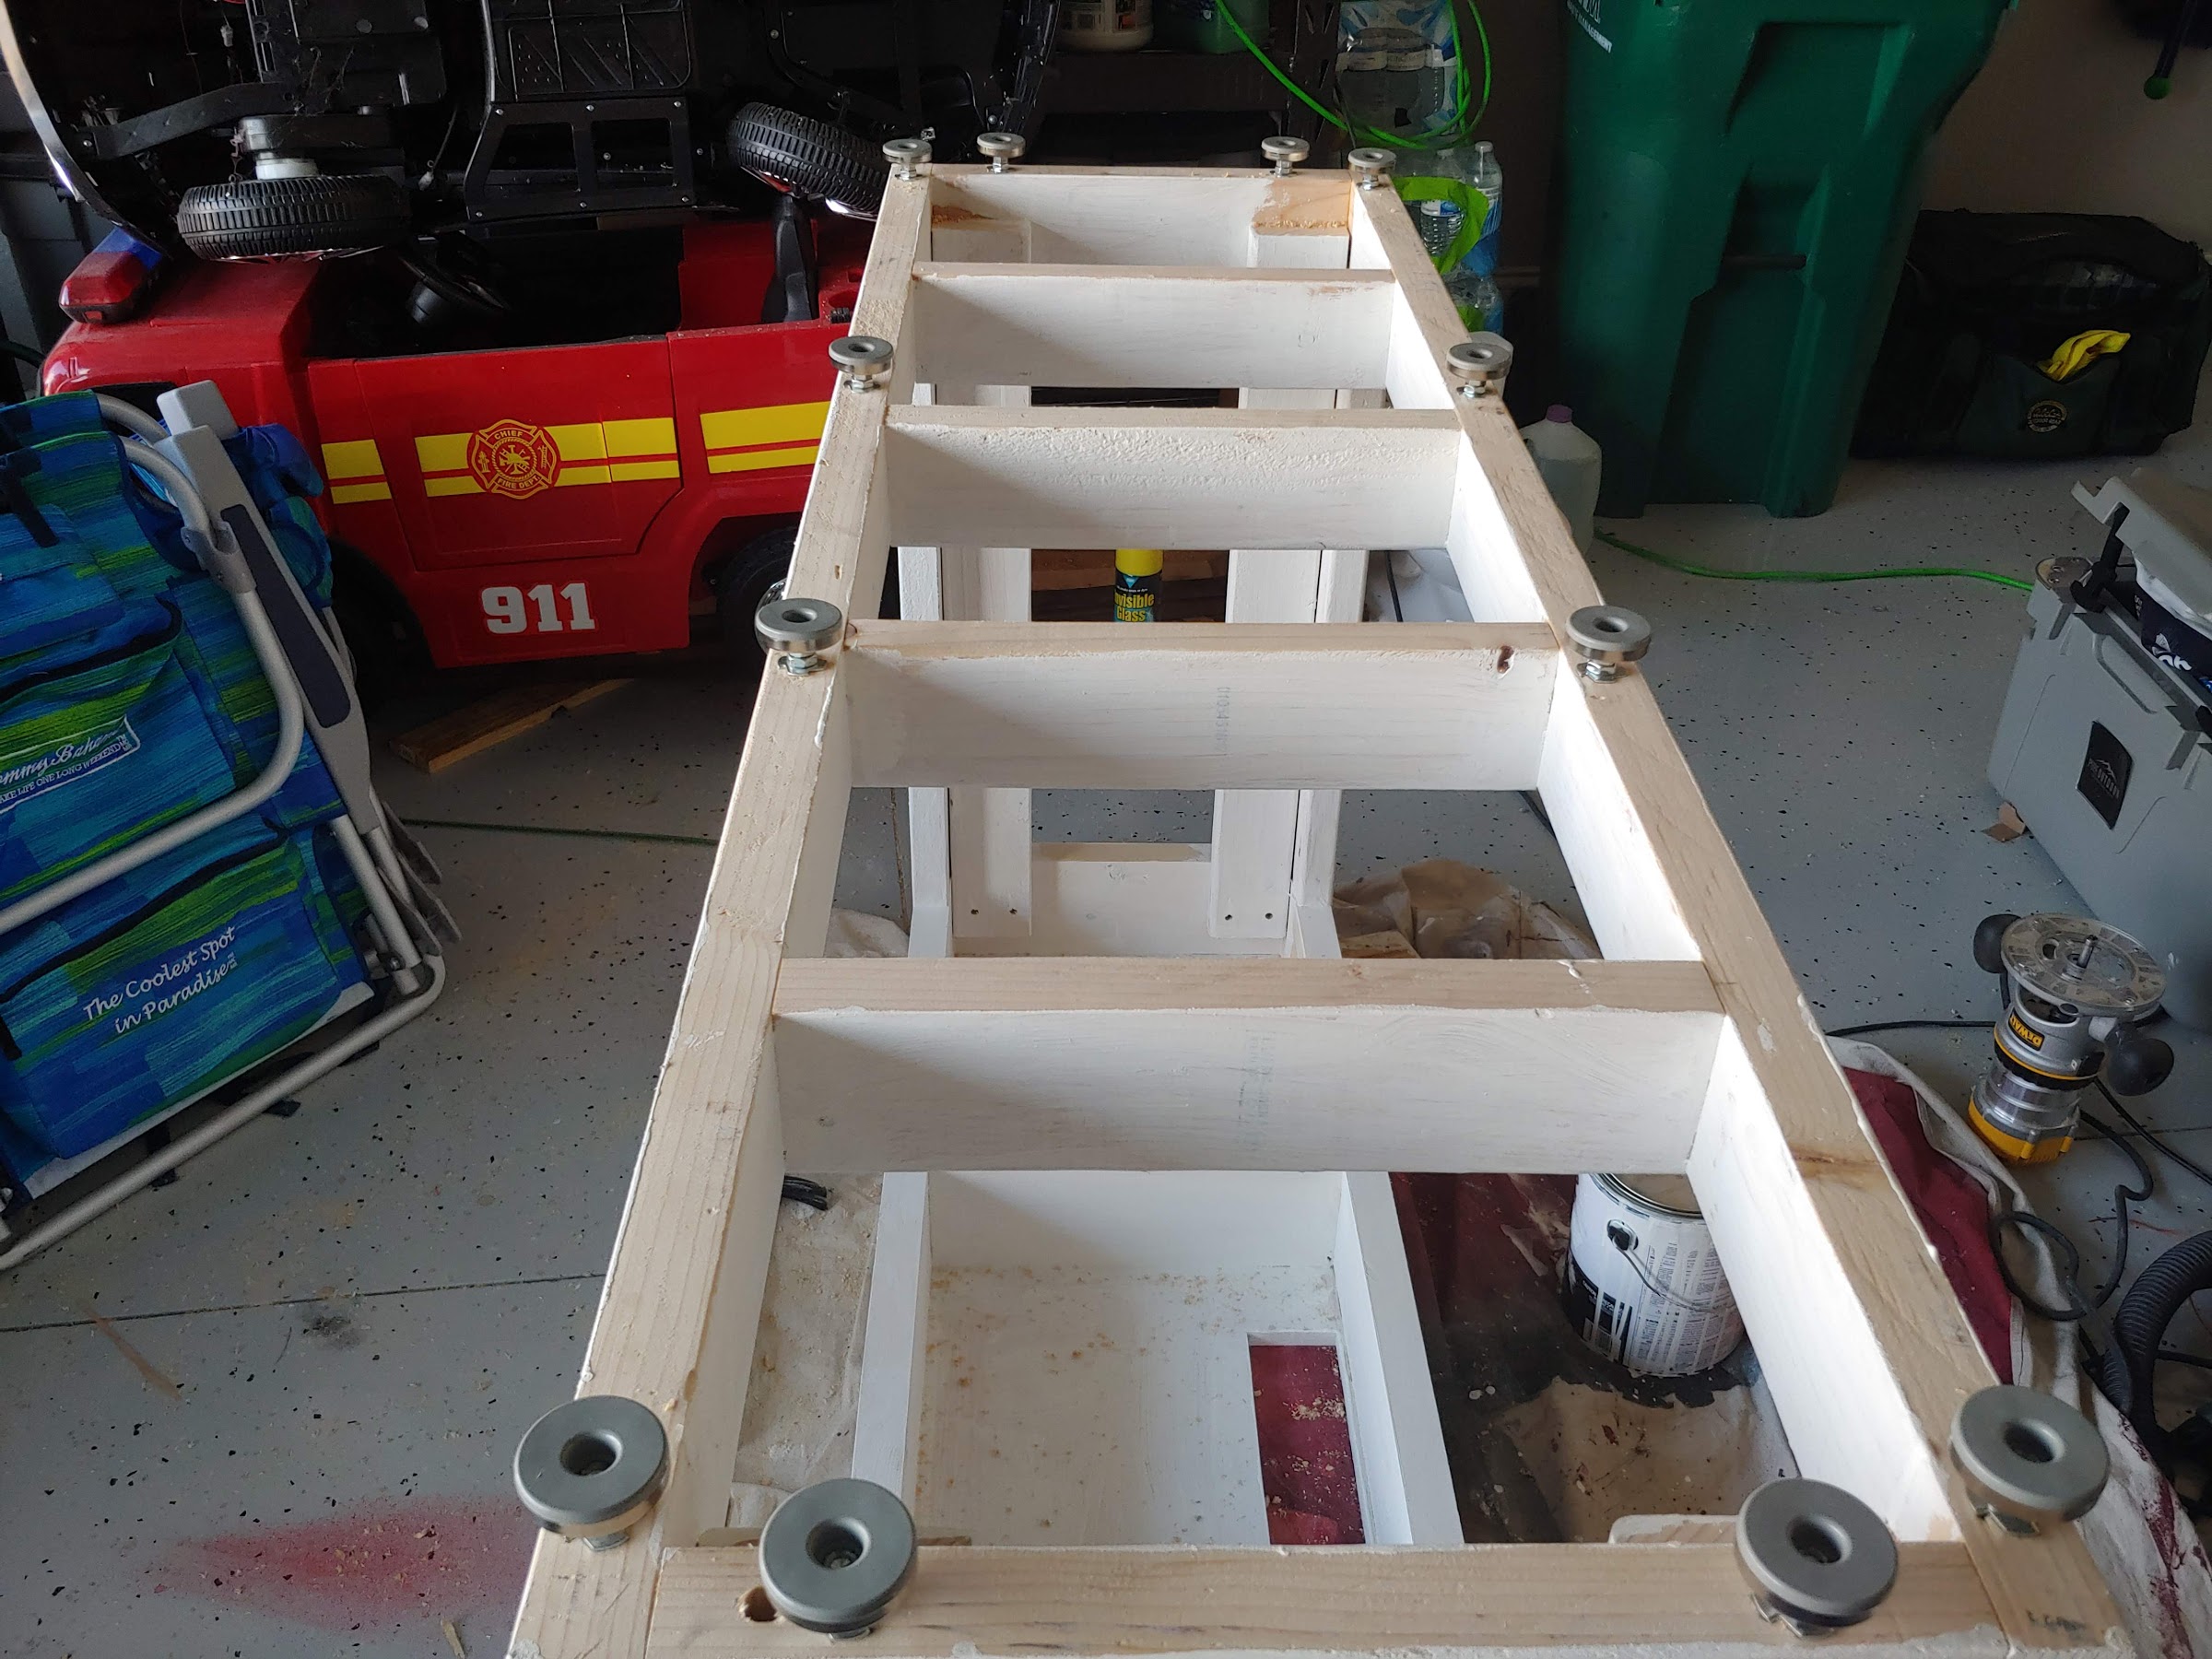
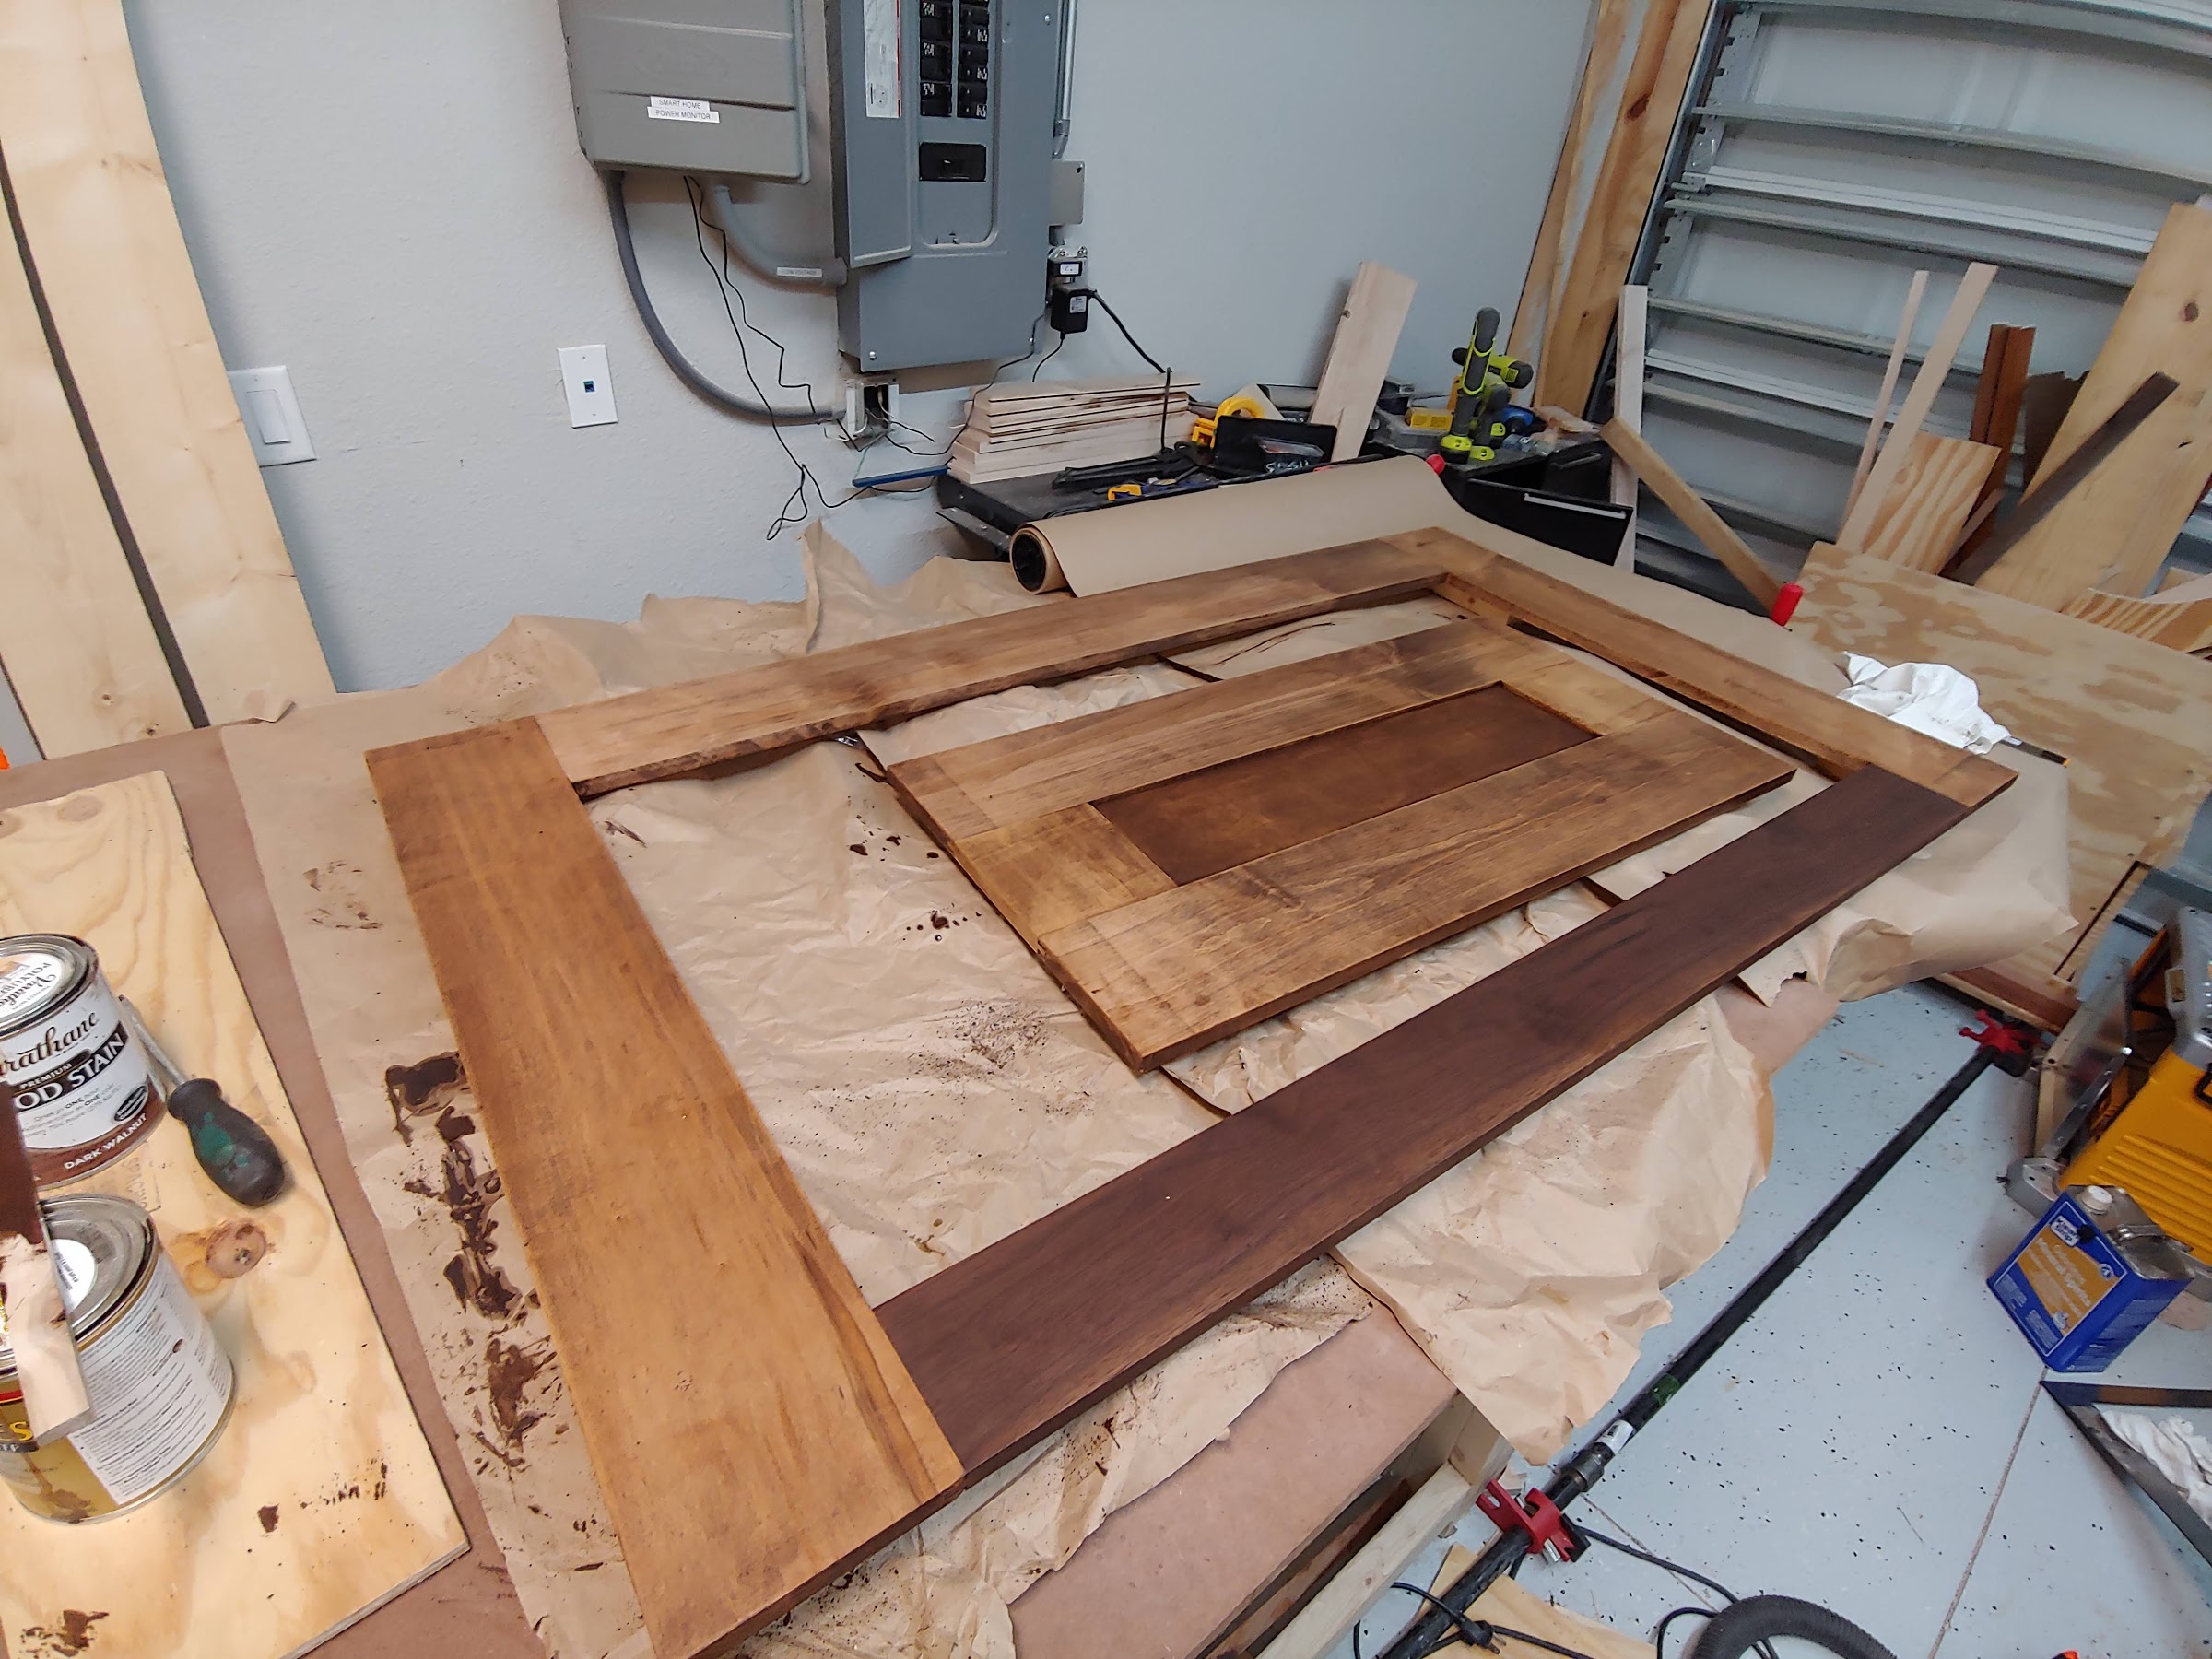
The plan will be to build a custom DIY stand with the sump housed underneath, electronics will probably mostly be contained in a separate compartment under the stand to protect them from salt/moisture. I will be using the Rocket Engineer design with a 2x6 top frame supported by 2x4 uprights which should allow me to span the full 60” without any center supports in the front. I haven’t fully decided how I am going to finish it; I will likely skin it with plywood and then use some hardwood to trim out the edges but still noodling on my options for that. Here is a sketchup model of the structural bits:

0pTwoEGob8CZePCs00UYQwCC6MDWbUJltd0LBGGJXCGbZM4KdBjNi2oGJcfebshfzUSiE91tvEGxjNxU_tR-RwiGFVDWOeIePiuhcNY16dGMoP7Z1eIMIfcnaQZNNN3w_v3L01LwzZ4=w2400


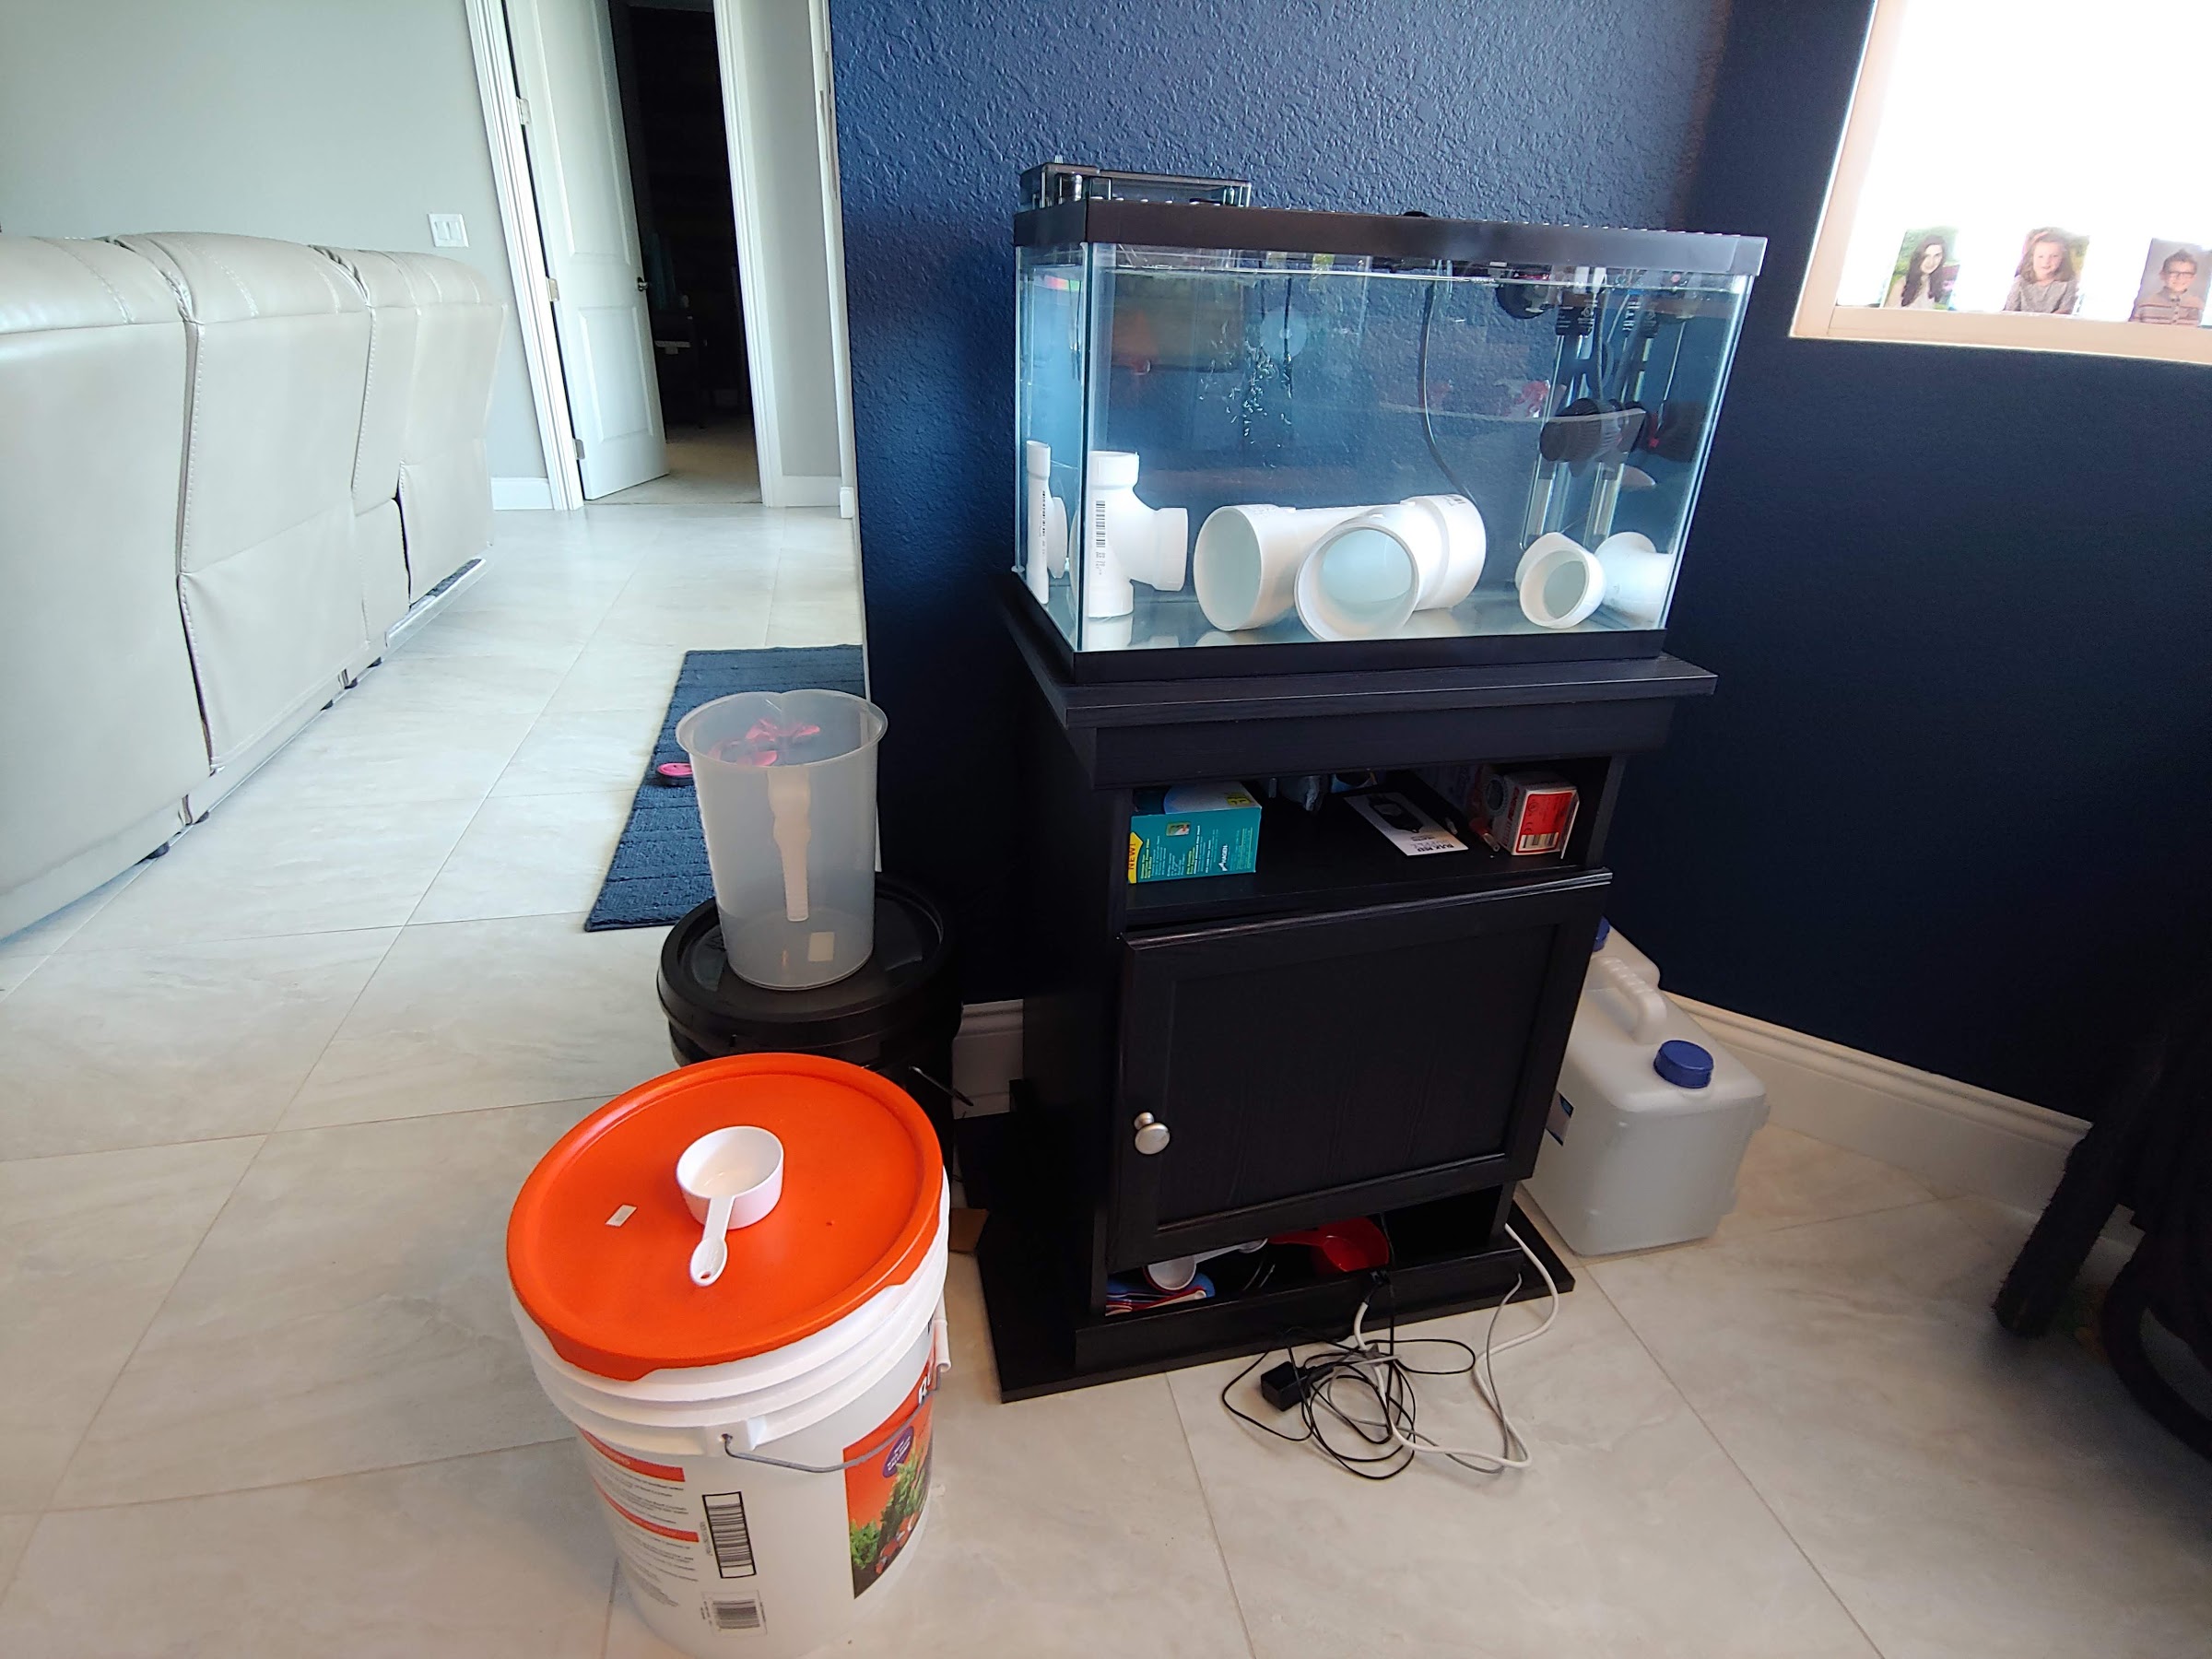
Beyond the tank being ordered I also purchased a Leviathan 36 Sump by Wind Rider Creations, I found this for sale locally at a fantastic price ($200), it wasn’t exactly what I would have designed myself but it should work fine for my purposes and saved me quite a bit over what I was expecting to pay. It has sections for input from the overflow, a filter sock (4 or 7”), skimmer, refugium, and return pump.

fRscM9w3sBFhvoqoO756eWWTksAJ4hW7Q6upZIIz4QWZJzmQ6LpMXRSDfpj1VWOEk-aqvZBFyOxzXlErmCABgYYl_Uw4ULlVN9hUMXwAxn40Hr9WVB2YIdl9PAHWzI-yhqKbWjmGCLQ=w2400
 
Last edited:
OP
OP
picklz

picklz

Community Member
View Badges
Joined
Oct 8, 2019
Messages
57
Reaction score
108
Location
Punta Gorda, FL
Rating - 0%
0   0   0
Equipment

Time to start talking about equipment, I thought I would list out some items I’m considering / leaning towards to see if anyone has feedback and/or suggestions:

Heaters
I believe I will be getting two 300w BRS heaters, already have the BRS controller.
Still not 100% sure here, but I’m leaning towards Two Finnex HMO 300w

in-tank flow
Tunze Nanostream 6095 Powerheads I’m thinking 2 to start with, maybe add 1 or 2 additional eventually. I really like the safety connector option for an easy battery backup solution. I had also considered Two Gyre XF330’s here, but I’m not sure if I’m as sold on their reliability / longevity, thoughts here?

Return Pump
Again, very much undecided here. if I go with an Apex controller the COR series is attractive if I could pick one up at a good price, but I’d really like to try and stick to $200-250 at most for this. Sicce Syncra ADV 7.0, Sicce Silent 5.0, Varios 4 or 6, and some others have been considered. I am thinking trying to stay at 1000-1500gph rated or higher is probably going to work well.

Skimmer
I really have no idea here. My skimmer chamber is 9.5 x 14 or so though the top rim on the sump is a little smaller. I really would like something somewhat affordable ($300 and under), quiet, energy efficient, stable once tuned, able to handle a 112g tank at a higher bio load, and easy to clean. I’m sure this is a pick 2 or 3 of the above type situation but I can dream I had looked at the Bubble Magus Curve 7 Elite and Tunze 9410 DC, I really like the LifeReef SVS2-24 with its ability to function with any pump basically, just not sure about spending almost $500 on a skimmer.

RODI - Purchased BRS 6 Stage Deluxe 150GPD System.
BRS 6 stage system is what I plan to go with. I like the ability to alternate the DI container locations and get the full useful life out of the resin. I also expect at some point in the future that our city water may contain chloramines so want to be setup to deal with that.


Water Storage / Mixing - Tanks (2 x 20g Norwesco 44854's) have been purchased.
This will be a more detailed discussion later, but I think I’m going to get a pair of these Norwesco 20-gallon tanks for RODI and Saltwater. They are relatively narrow and should leave enough room on the back wall of the closet to setup two 15g QT tanks (one above the other) next to the holding tanks.
https://www.ntotank.com/media/documents/norwesco-tank_44854.pdf


Lighting
Lighting is another area I am undecided on, I am leaning towards getting four Noopsyche K7 Pro II fixtures and either the tank arm mounts or trying to find a rail system that would span the length of the tank resting on each end. They seem to have received pretty decent reviews outside of the somewhat hard to use controller and the performance seems to be there for coral. I do plan to have a mixed reef so I want decent lighting but I have a hard time investing $1500-2000+ on lighting at this point in my reefing career, so these seem like a good alternative especially at the price point. I am open to other suggestions though.

Update: Also considering a ReefBreeders Photon 50 V2 fixture. Still undecided though.

Control
I am on the fence here, I like the size of the community behind apex as well as the availability of modules/parts and the more developed UI’s, however I think GHL is better built. I found some Apex modules at a great price that I picked up so I'm leaning more and more that way, but I have not 100% committed yet.


I left out a lot of the small stuff (QT equipment, nets, scrapers, plumbing, testing, etc at this point, but if there is anything I’ve missed or left out that you have suggestions / comments on, I’m all ears.
 
Last edited:

Devaji

5000 Club Member
View Badges
Joined
Aug 27, 2016
Messages
7,205
Reaction score
6,711
Location
Jackson Hole, WY
Rating - 0%
0   0   0
welcome to reefing my friend!
sounds like you are off to a great start.

I love the quality of SCA tanks there price is great to. I have been looking at the 112 but wish the was 24" wide and 18" tall. I had there 90 cube build quality was spot on, you are going to love it.

tons of options for equipment. black Friday /cyber monday is the best time of the year to buy. most brand go on sale at least 10% off some more.

some thoughts are:
check out Logan at reefbreeders for quality "cheaper" lighting RT pumps.
I will be runing the photon V2 on my red sea 750XXL and ran it on the SCA 90 cube good lights at a great price.
also will be runing there DC Return pump. now these dont have all the features of some top brands out there but IMHO they do just fine. worth looking it to.
reefbreeders.com

also the Hydros controller will be out Q1 of 2020 another option in the controller market.

best of luck keep us posted!
 

Jason boles

Active Member
View Badges
Joined
Jul 7, 2018
Messages
473
Reaction score
421
Location
Houston
Rating - 100%
1   0   0
welcome!! I’m excited for your build

One thing I wish I would have done when starting is research my local reef club. They have a for sale / trade section on there where you can score all kinds of great equipment. Some used and some new.
My club also has a parter you can use for a few days and return as well as some events.
 
OP
OP
picklz

picklz

Community Member
View Badges
Joined
Oct 8, 2019
Messages
57
Reaction score
108
Location
Punta Gorda, FL
Rating - 0%
0   0   0
Mini Update - My SCA 112g tank is scheduled to be delivered on Friday so I'm pretty excited about that.

I also made a little bit of progress on the stand - framing is done and I moved it into it's new home temporarily to see how it would look. This is a pretty standard rocket engineer design with a 2x6 top frame and 2x4 uprights and lower frame. I'll be adding 3/4" plywood to the top and finishing it likely in 3/4" purebond plywood and some sort of hardwood trim. I think at this point it's probably going to get painted a dark blue color that we also have as an accent wall on the other side of the living room (breakfast nook) but that is TBD still. Dimensions are 60" long, 18" wide (front to back), and just a hair under 36" tall (with the plywood top).

X1dRLtWilLnPeHVP1virfjrQElL6iIPqP4jDWKqkDPBXG5jfCssPU6bs45Le3wUQNVrtb2s3JS19Vo1kUaWiFLKqhOerDRhGlOjDGZ0DhCXZtMsrguaQbxAx1pJrrzSsvX0zv2HxA1I=w1000


I was very happy that the sump JUST fits between the right side uprights allowing me a couple extra inches of room inside the stand to work with.

P_1OCV0YJ0xDJmJowg4Qc2YMB3QxG1LDBV5wFjDP1qvnADrDYQHP3YjsPQK-xc4Oe26XCTBlzCFaAXPsEWrYOj7mNR_SL6P3uE31_UnDL50igIfaeysW51BRwk6G2fUBMivdc9MiF2w=w1000


Between some imperfections in the lumber and my floor not being 100% flat or level I'm going to need to use some shims. I did a quick test run and it looks like i can get it close without too much trouble so its time to take it back out to the garage to work on finishing it.
 

Devaji

5000 Club Member
View Badges
Joined
Aug 27, 2016
Messages
7,205
Reaction score
6,711
Location
Jackson Hole, WY
Rating - 0%
0   0   0
Mini Update - My SCA 112g tank is scheduled to be delivered on Friday so I'm pretty excited about that.

I also made a little bit of progress on the stand - framing is done and I moved it into it's new home temporarily to see how it would look. This is a pretty standard rocket engineer design with a 2x6 top frame and 2x4 uprights and lower frame. I'll be adding 3/4" plywood to the top and finishing it likely in 3/4" purebond plywood and some sort of hardwood trim. I think at this point it's probably going to get painted a dark blue color that we also have as an accent wall on the other side of the living room (breakfast nook) but that is TBD still. Dimensions are 60" long, 18" wide (front to back), and just a hair under 36" tall (with the plywood top).

X1dRLtWilLnPeHVP1virfjrQElL6iIPqP4jDWKqkDPBXG5jfCssPU6bs45Le3wUQNVrtb2s3JS19Vo1kUaWiFLKqhOerDRhGlOjDGZ0DhCXZtMsrguaQbxAx1pJrrzSsvX0zv2HxA1I=w1000


I was very happy that the sump JUST fits between the right side uprights allowing me a couple extra inches of room inside the stand to work with.

P_1OCV0YJ0xDJmJowg4Qc2YMB3QxG1LDBV5wFjDP1qvnADrDYQHP3YjsPQK-xc4Oe26XCTBlzCFaAXPsEWrYOj7mNR_SL6P3uE31_UnDL50igIfaeysW51BRwk6G2fUBMivdc9MiF2w=w1000


Between some imperfections in the lumber and my floor not being 100% flat or level I'm going to need to use some shims. I did a quick test run and it looks like i can get it close without too much trouble so its time to take it back out to the garage to work on finishing it.

great job on the stand! I was just talking to steve C for a quote on a 112 but rimless and 60x24x18 high.
looking forward seeing this come together.

could also look in to leveling feet. I have build a few rocket stand and never added them just shims like you but there an option.
 
Last edited:
OP
OP
picklz

picklz

Community Member
View Badges
Joined
Oct 8, 2019
Messages
57
Reaction score
108
Location
Punta Gorda, FL
Rating - 0%
0   0   0
great job on the stand! I was just talking to steve C for a quote on a 112 but rimless and 60x24x18 high.
looking forward seeing this come together.

could also look in to leveling feet. I have build a few rocket stand and never added them just shims like you but there an option.


I had strongly considered going custom and rimless, but the lead time and additional cost pushed me to this tank. I don't think you can go wrong either way though. If you have the room I think 60x24x18 is a fantastic size.

I hadn't considered leveling feet, I will have to look into that as a potential option, thanks!
 

andrewkw

2500 Club Member
View Badges
Joined
Jun 1, 2014
Messages
2,895
Reaction score
6,836
Location
Ontario, Canada
Rating - 0%
0   0   0
For whatever reason this tank size is not very common. While I don't love 18" front to back, I've had a miracles 112 gallon since 2006. Still going strong for at least a few more years I hope.
 

Devaji

5000 Club Member
View Badges
Joined
Aug 27, 2016
Messages
7,205
Reaction score
6,711
Location
Jackson Hole, WY
Rating - 0%
0   0   0
one think to think about with the stand is the doors. not sure how you are going to skin but be mindful how close your sump is the front. might be hard to fit hinges. curious to see what you do here. doors on DIY stands I find hard.
 

noopsyche

Valuable Member
View Badges
Joined
Aug 27, 2018
Messages
1,120
Reaction score
2,125
Rating - 100%
1   0   0
Glad to see you thread. ;) Our Fb will have events around Black Friday and Cyber Monday.
 
Last edited:
OP
OP
picklz

picklz

Community Member
View Badges
Joined
Oct 8, 2019
Messages
57
Reaction score
108
Location
Punta Gorda, FL
Rating - 0%
0   0   0
Well I thought it was time I post a quick update. The family (including myself) were sick a good share of October and I had some travel in the first part of November so I haven't made as much progress as I would have liked, but progress is progress.

The tank showed up and I opened it up and inspected it the best I could before accepting delivery, as far as I could tell everything appears to be in good shape I took a bright flashlight and couldn't find any evidence of cracks, chips or scratches. Its sitting in the garage so I have left it in the box on the shipping pallet, hopefully will get it unboxed and moved inside sometime this coming weekend.

I got my 6 stage 150gpd RODI system from BRS installed, this will eventually be plumbed into the SW Mixing station in the closet right on the other side of the wall to the right in this picture but for now I can temporarily pull the lines out and fill containers in the sink or shower.

KtlqW7vj00uzJ6SG6ScOzIXLPmkGk_pOQ4Gf5ZkLt5lbEB7_FDtpb_0AcSm3f9txb_yrrbUZSvw_LQBNtWSewVQ-WlY3i7wc6DQXlw3jEhM2om9fokORJ9VXmT7-dm3n8VCgf0vJWo0=w2400


I also ordered the two 20g Norwesco water containers for the SW mixing station so I can get started on that when those arrive.

On the stand front the frame is complete and has had three coats of killz primer applied, I also purchased some leveling feet and installed those all around to help with getting the stand level.

5l874NX-1G_euhmZ_NXmnrz1DXobeh41e2XabHLD8fl0Rdd58iOV6X4RaxT0EEXc-w5WK_2biX7EFDJ7S0J7D01t4QjcWZ_irX1-VFGca2W2d1AXJfBThbPrMsXcPT9-IA8Et9ENxtE=w2400


I've been working on the skin for the stand and am happy to say that is almost complete, just a little more finishing work and I'll be able to attach them and get the stand and tank into it's permanent home. The skin panels are hard maple and walnut along with 1/4" plywood. I have all the bits for the doors cut but will deal with assembling and installing those at a later date.

nAibOpUuYgkjSMXSw7j6dBToQIxwwp7my8Wd3q9b7OuRZHR2GGe7FsxaUkRltMvF9L71IR84FyCiqz-IGoHtIC5ximF8lT3QNdAhV1SD0_KlFGy6O2NWs1EJwPiAVI0OsOgQudTt04s=w2400


I also now have a temporary QT tank going. The plan is eventually two have two 10g QT tanks in the closet next to the SW mixing station, but that location is not yet ready and I wanted to get at least the first 2-3 fish into QT in the next month or so, so I decided to put something in the dining area for now.

The two QT setups will be pretty close to identical with the following bits:
Tank: 10g tank from Petco ($1/gal)
Filtration: AquaClear 50 w/o Carbon installed
Heater: Jager 50w
Flow: Hydor Koralia Nano 425
Top: Custom cut EggCrate from Home Depot, I may attach screen to it as well.
PVC Bits for 'caves'
Air Pump w/ Airstones for additonal Aeration

jGBvJscEWGWM4ZuhMpHNlomHfBl8nRARL5eqPY2zo3HKY3RyCM0VA3kUYeam5PcLMVroym5aBytzHKnsU_TxBN6qAVmGDO9m6QXrq4XnlaISMN8_C2XVDqW-ukJ3e02oK-m3c-QmvBQ=w2400


I picked up a Tunze Nano ATO for now since i don't have my controller yet. I'll probably continue to use it on one of the QT tanks in the future and if deemed necessary setup a controller based ATO for the second QT Tank. I also am using a BRS controller for the heater right now, that will eventually probably move over to the DT as a backup for the controller.

I used some BioSpira along with Dr Tims Ammonium Chloride treatment to get the cycle started which is going well so far. I had planned to use Brightwell NeoMarine salt and got a bucket at a pretty good price, but Amazon recently had (and still has) 160g buckets of Reef Crystals for $35 so I figured I'd start with that for all the cycling and QT tank duties.

A few other equipment purchases were made - I snagged an EB4 and a couple FMM modules at great prices so i have those waiting, and I also picked up a Hanna Copper tester and a Milwaukee digital refractometer. An order was just made for all the standard meds and such for QT and treatment so those should be here later this week and into next.

I'll try and put a more detailed list of equipment and consumables together at some point in the future for those curious.

I think that about covers it for now. The next update will hopefully have the stand and tank installed!
 
OP
OP
picklz

picklz

Community Member
View Badges
Joined
Oct 8, 2019
Messages
57
Reaction score
108
Location
Punta Gorda, FL
Rating - 0%
0   0   0
Well I'm pretty stoked about this update - finally got the stand to the point where it could be moved into the house and leveled, also managed to get the tank moved in and on the stand as well, I hope I don't have to move it anytime soon because that was an adventure.

Still have to build the doors and then work on the rest of the build but at least it's in!

_rRRc8UspaHKQ4gGljfCsIuD9BSxlN1KP76k2i9JANxQ1T_REgqlDWl4lbVFATGoI70IxAGMwfxysR3e3oGTWJi0zOx6xinQZ2tRgkdaA3i37orU52_Kq1QU_rNBKDlNNXchTuBljIM=w2400
 

High pressure shells: Do you look for signs of stress in the invertebrates in your reef tank?

  • I regularly look for signs of invertebrate stress in my reef tank.

    Votes: 36 31.3%
  • I occasionally look for signs of invertebrate stress in my reef tank.

    Votes: 28 24.3%
  • I rarely look for signs of invertebrate stress in my reef tank.

    Votes: 21 18.3%
  • I never look for signs of invertebrate stress in my reef tank.

    Votes: 30 26.1%
  • Other.

    Votes: 0 0.0%
Back
Top