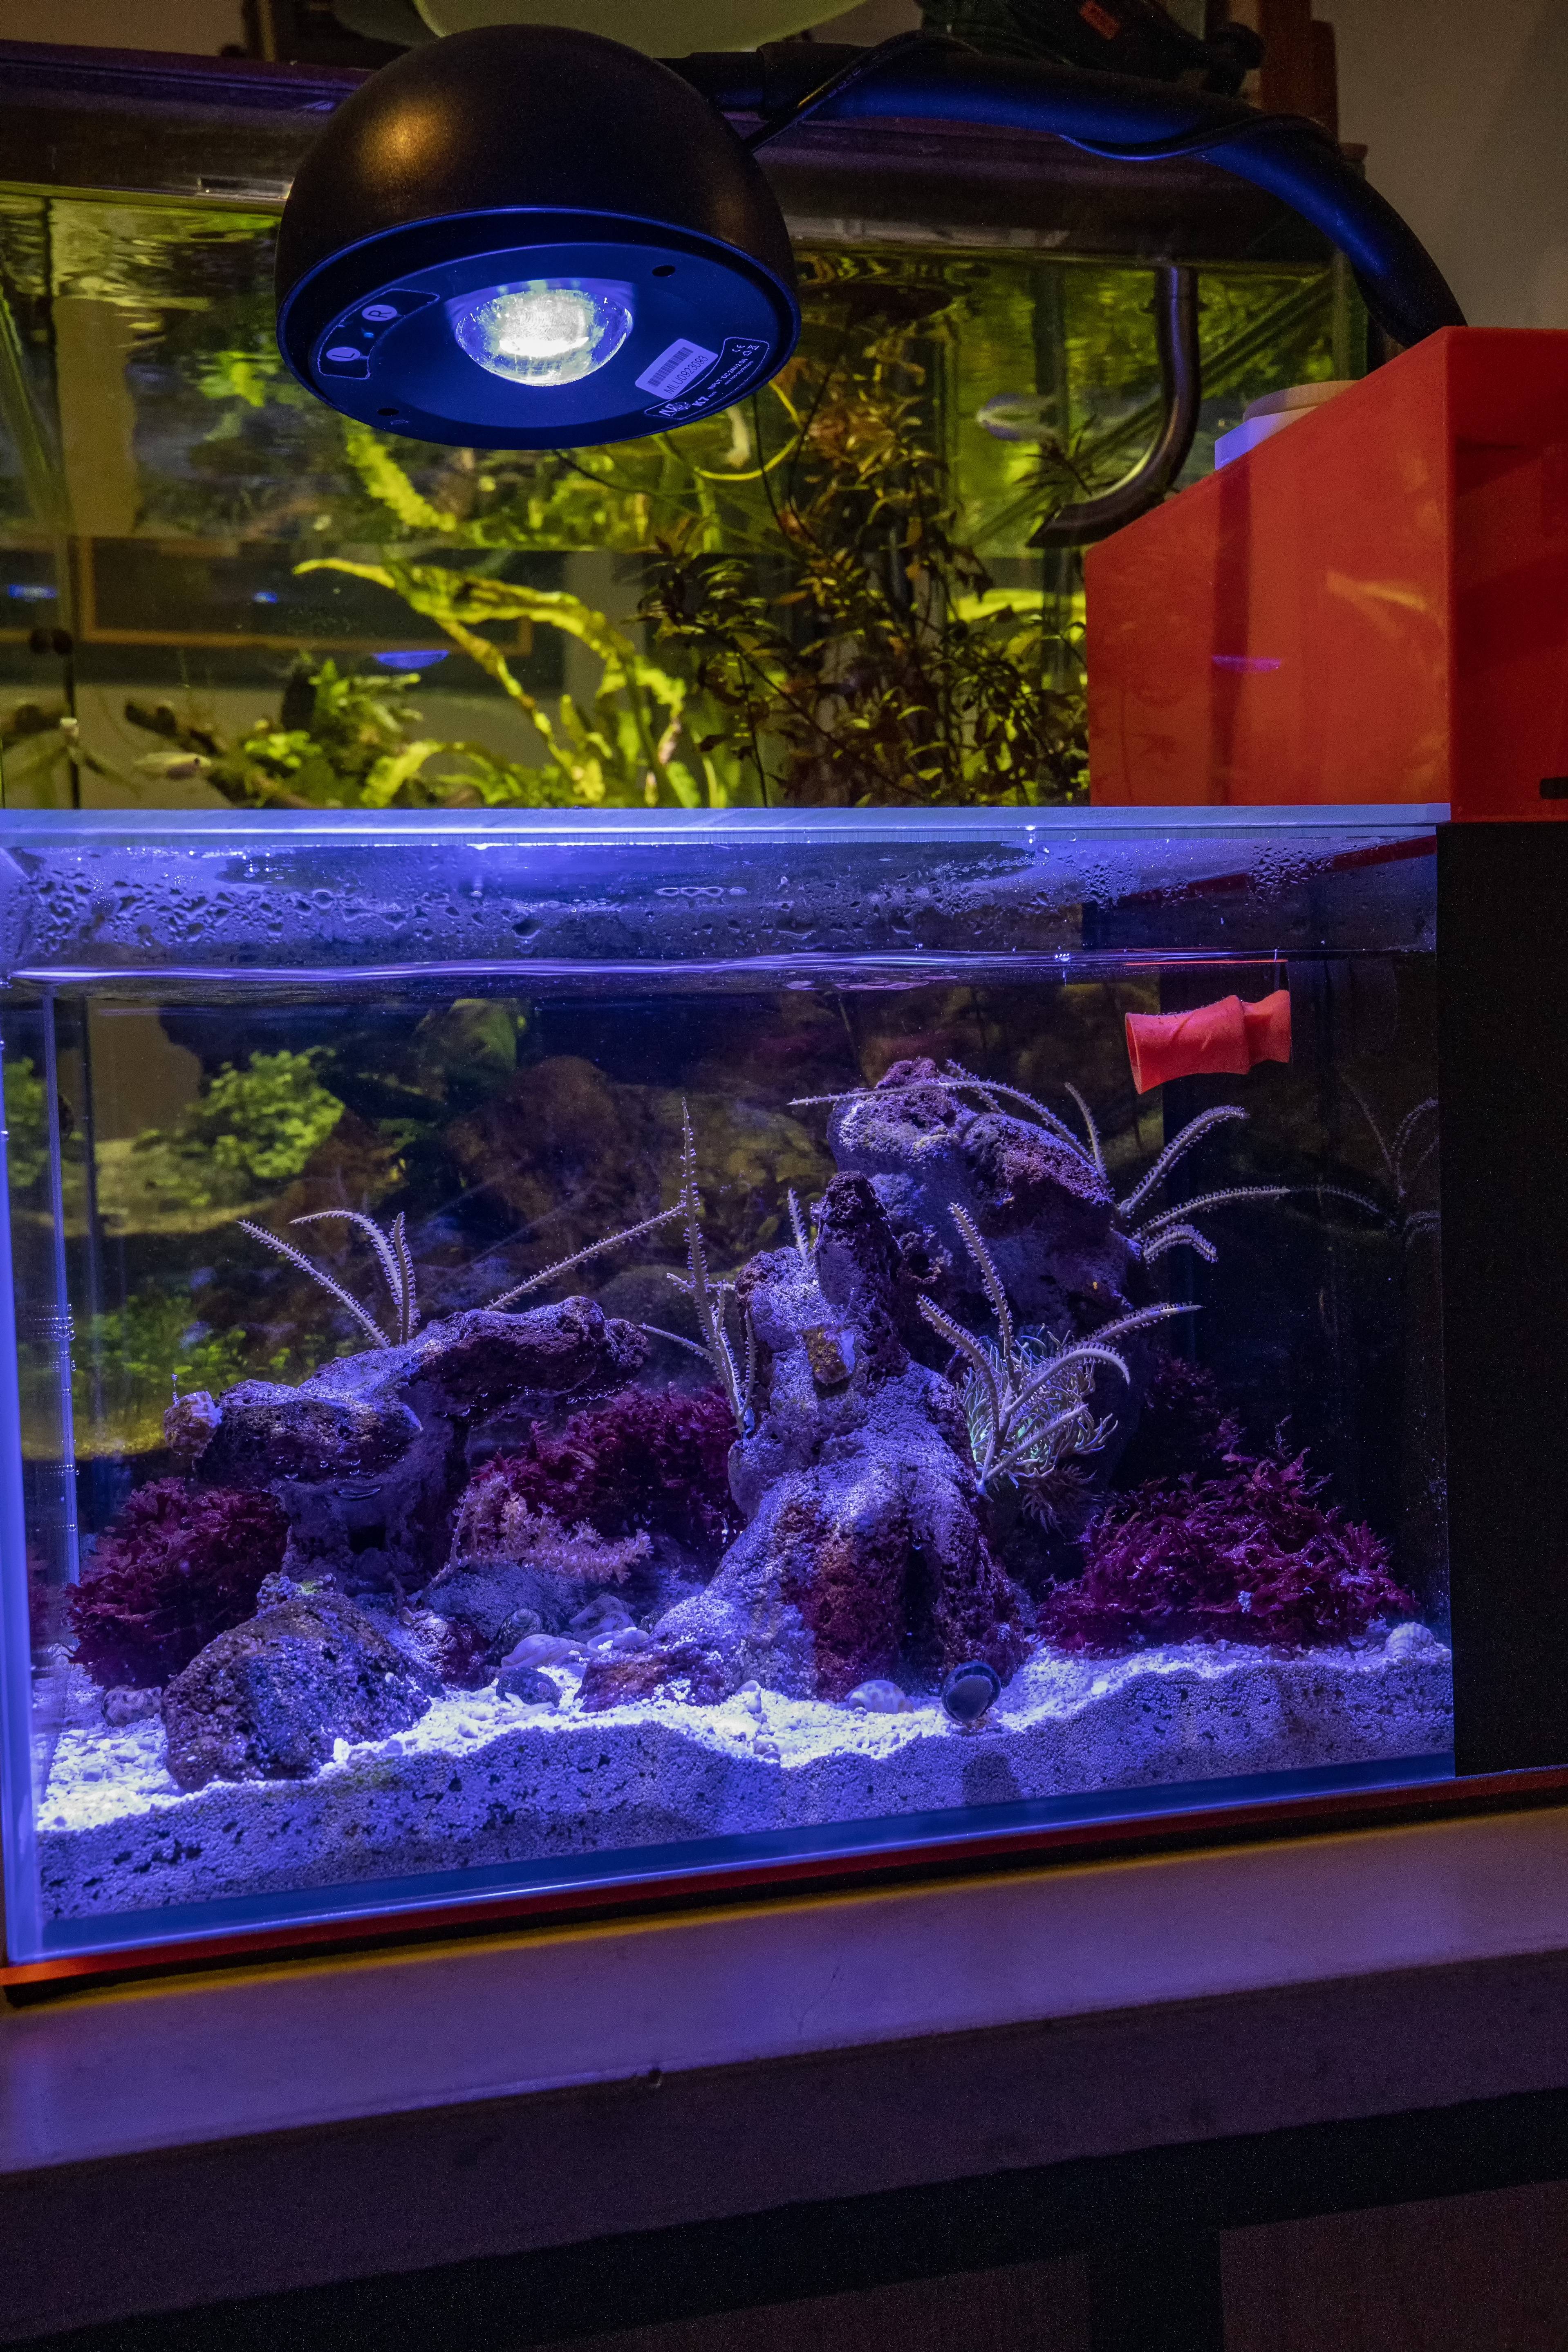
Pico Reef (I had to agree to more cats)

OP
OP
minorhero

minorhero

Active Member
View Badges
Joined
Dec 12, 2021
Messages
191
Reaction score
297
Location
Maryland
Rating - 0%
0   0   0
Update!

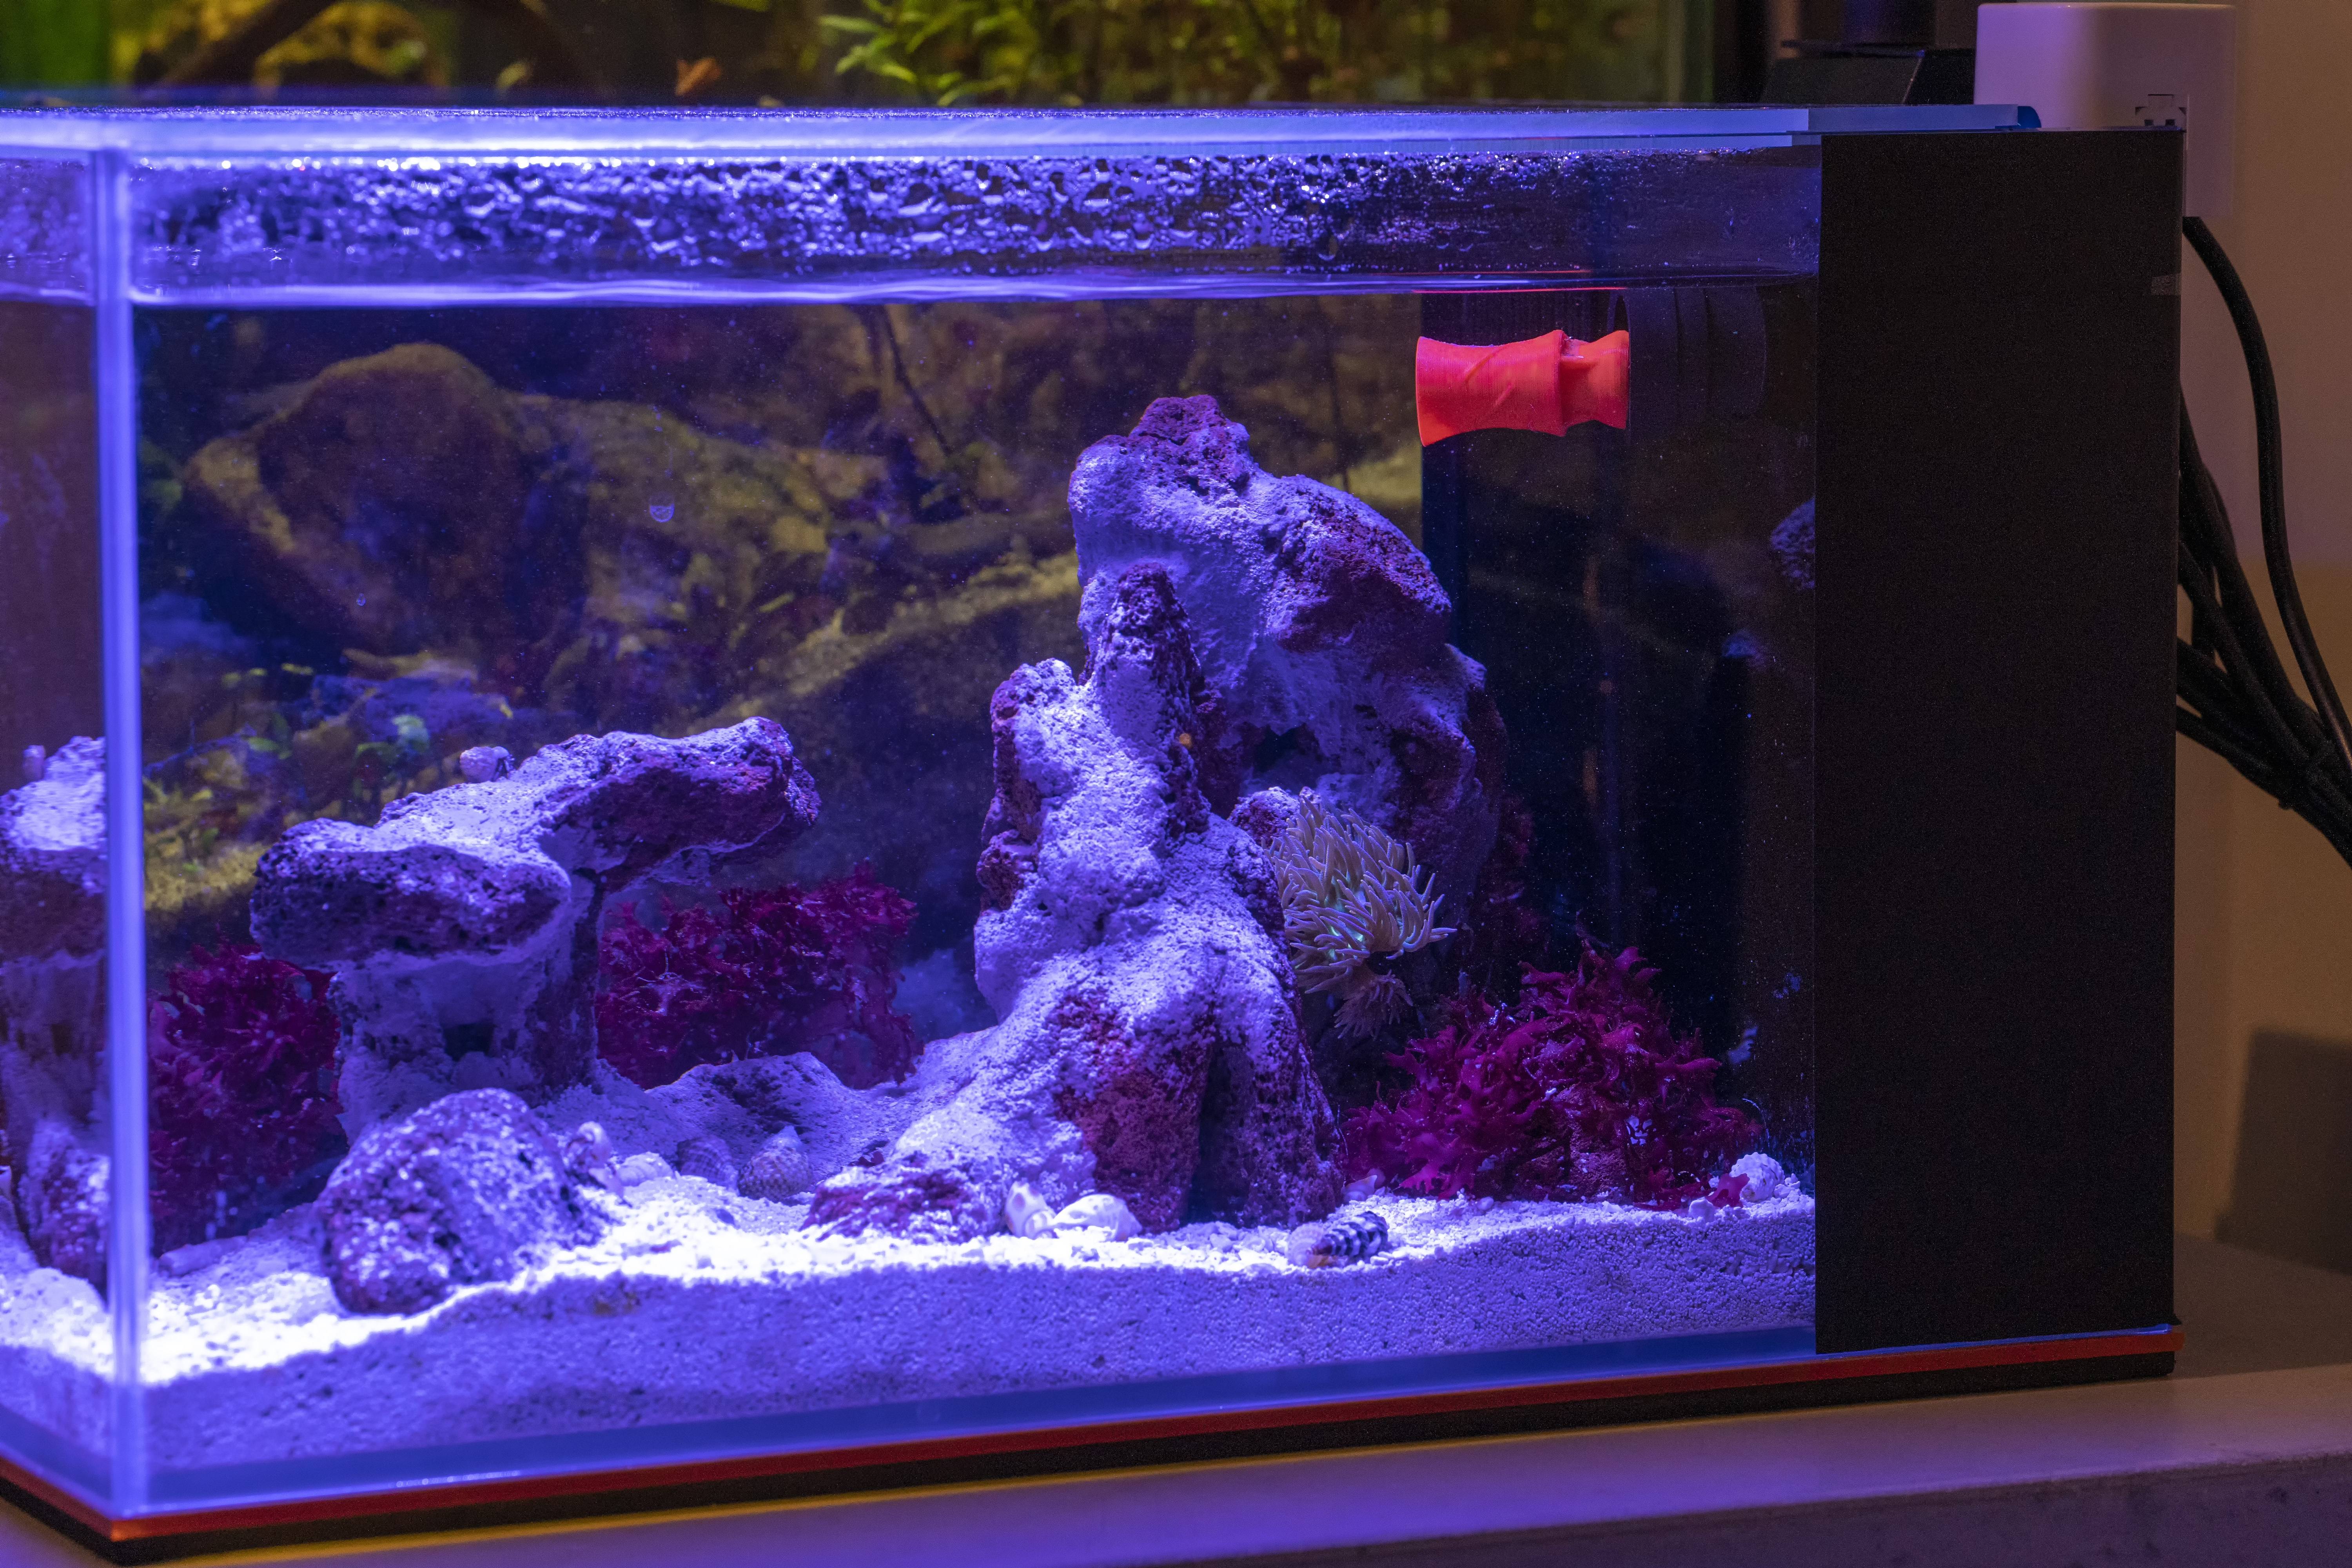
Cycle is done or mostly done based on which test kit you believe. I never added ammonia to this tank, but the clay I used released small amounts over time.

I've done a couple of water changes in this tank so far and its gratifyingly easy changing such a small amount.

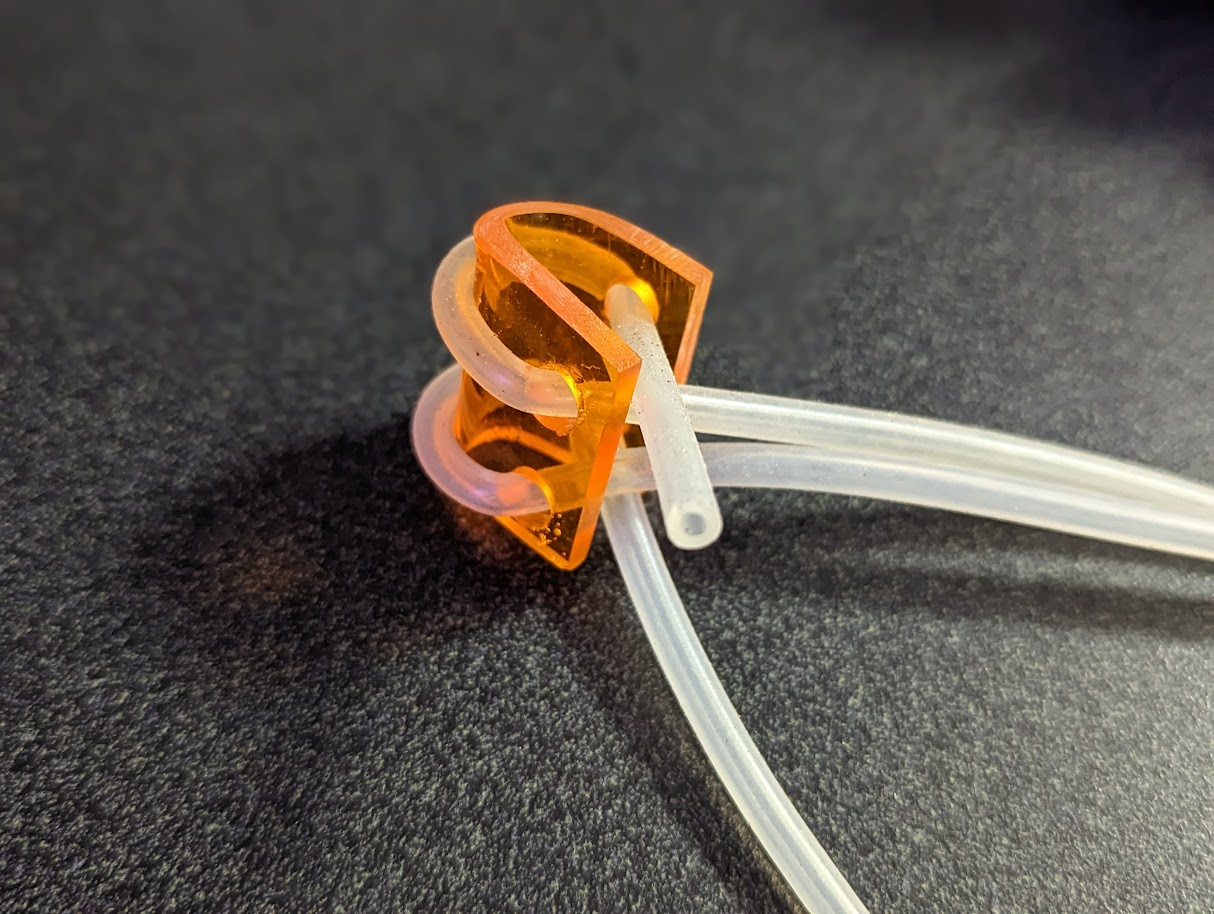
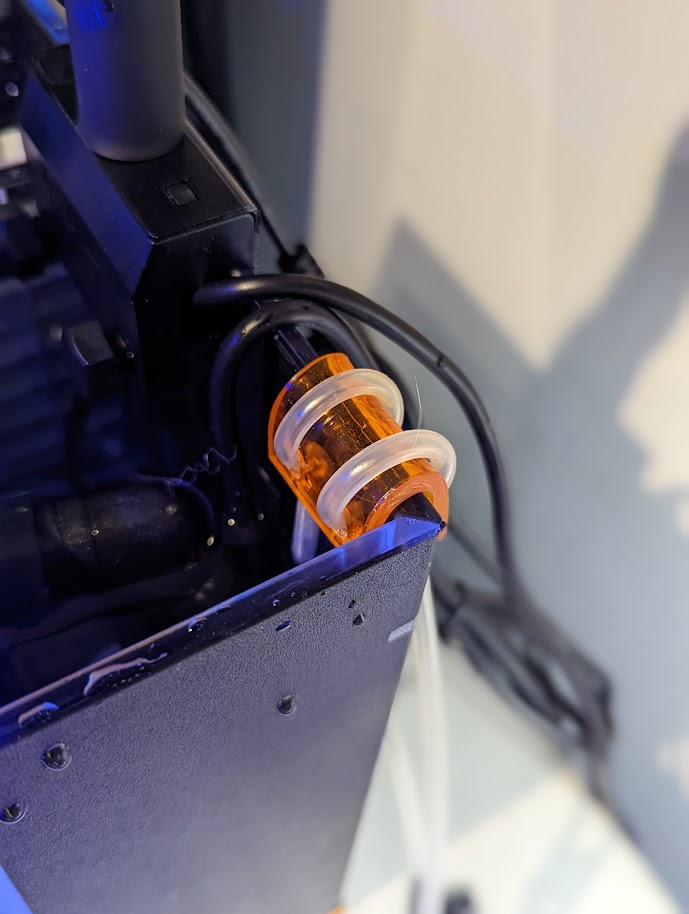
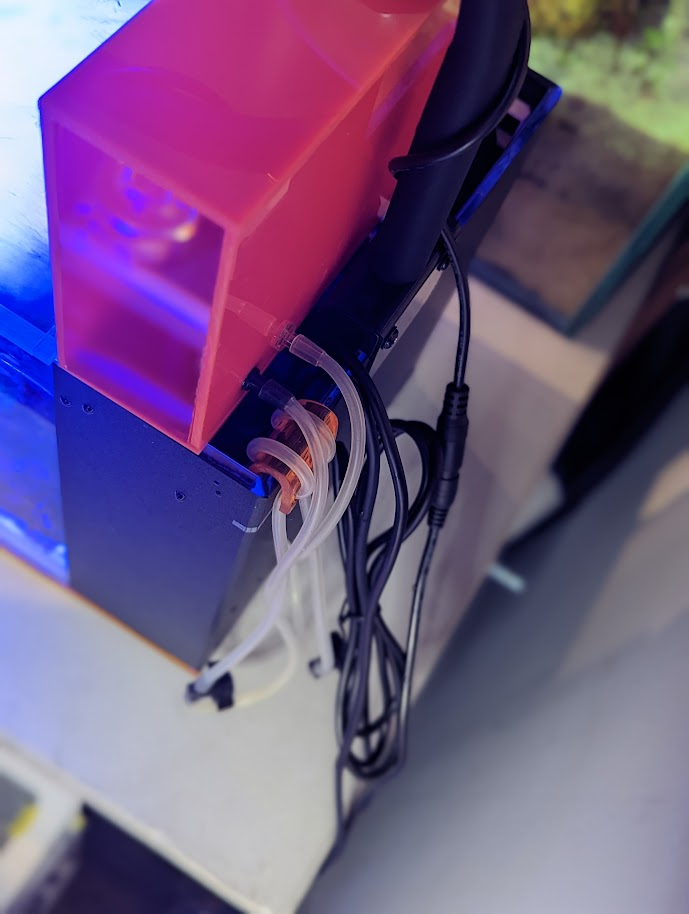
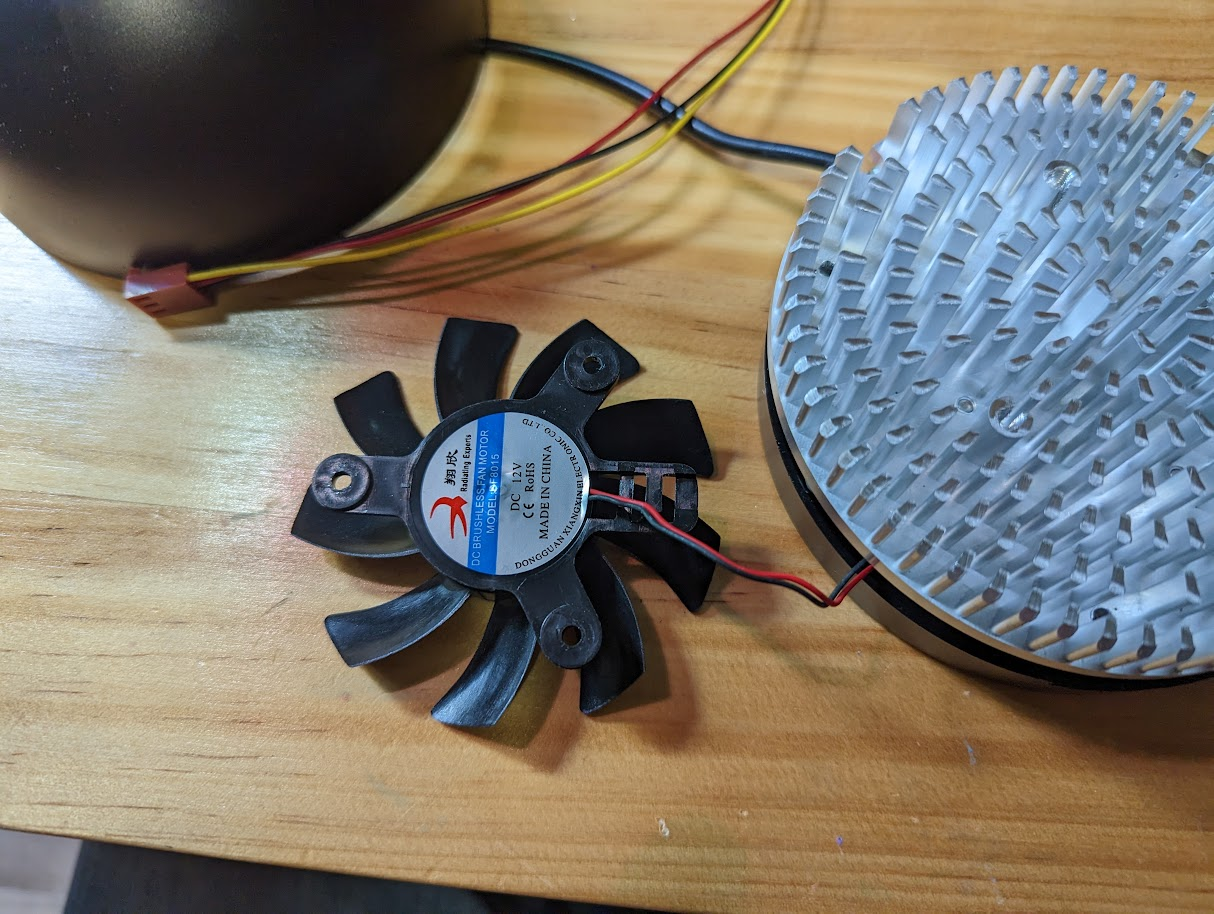
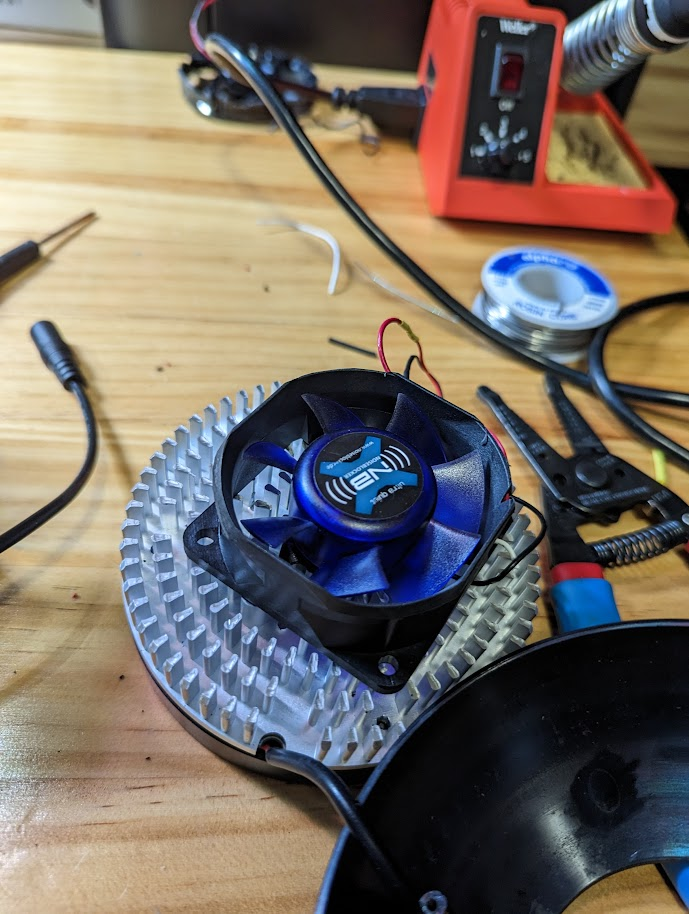
I originally was unsure if I was going to need a heater for this tank since in my reading of other people's journals they mention things like needing fans for these small tanks. Unfortunately my temperature was maxing out at around 69 degrees in this tank, so if I wanted to hit the 72 to 78 I see mentioned for most corals, I need a heater.

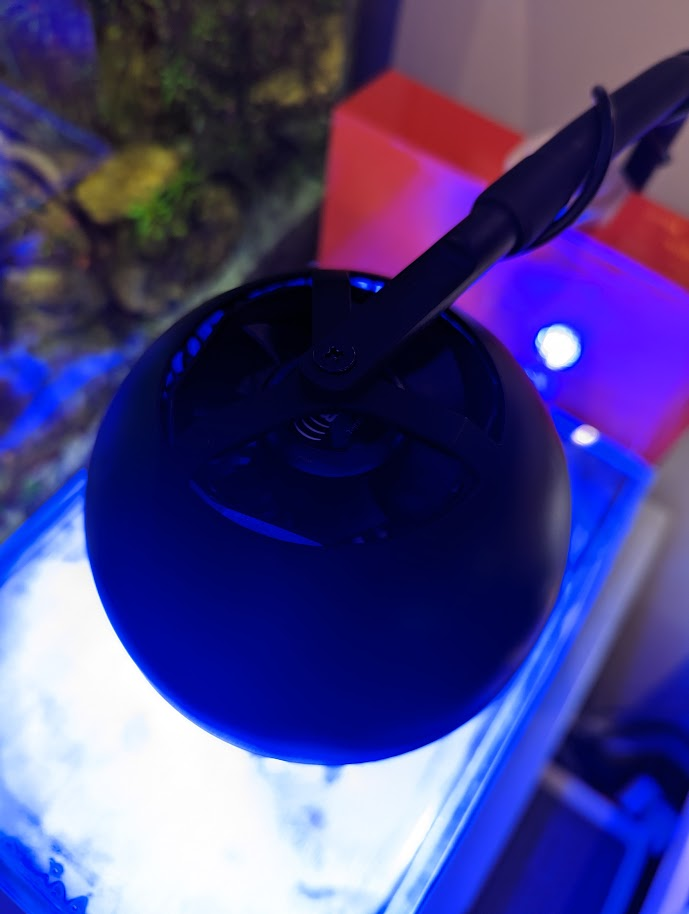
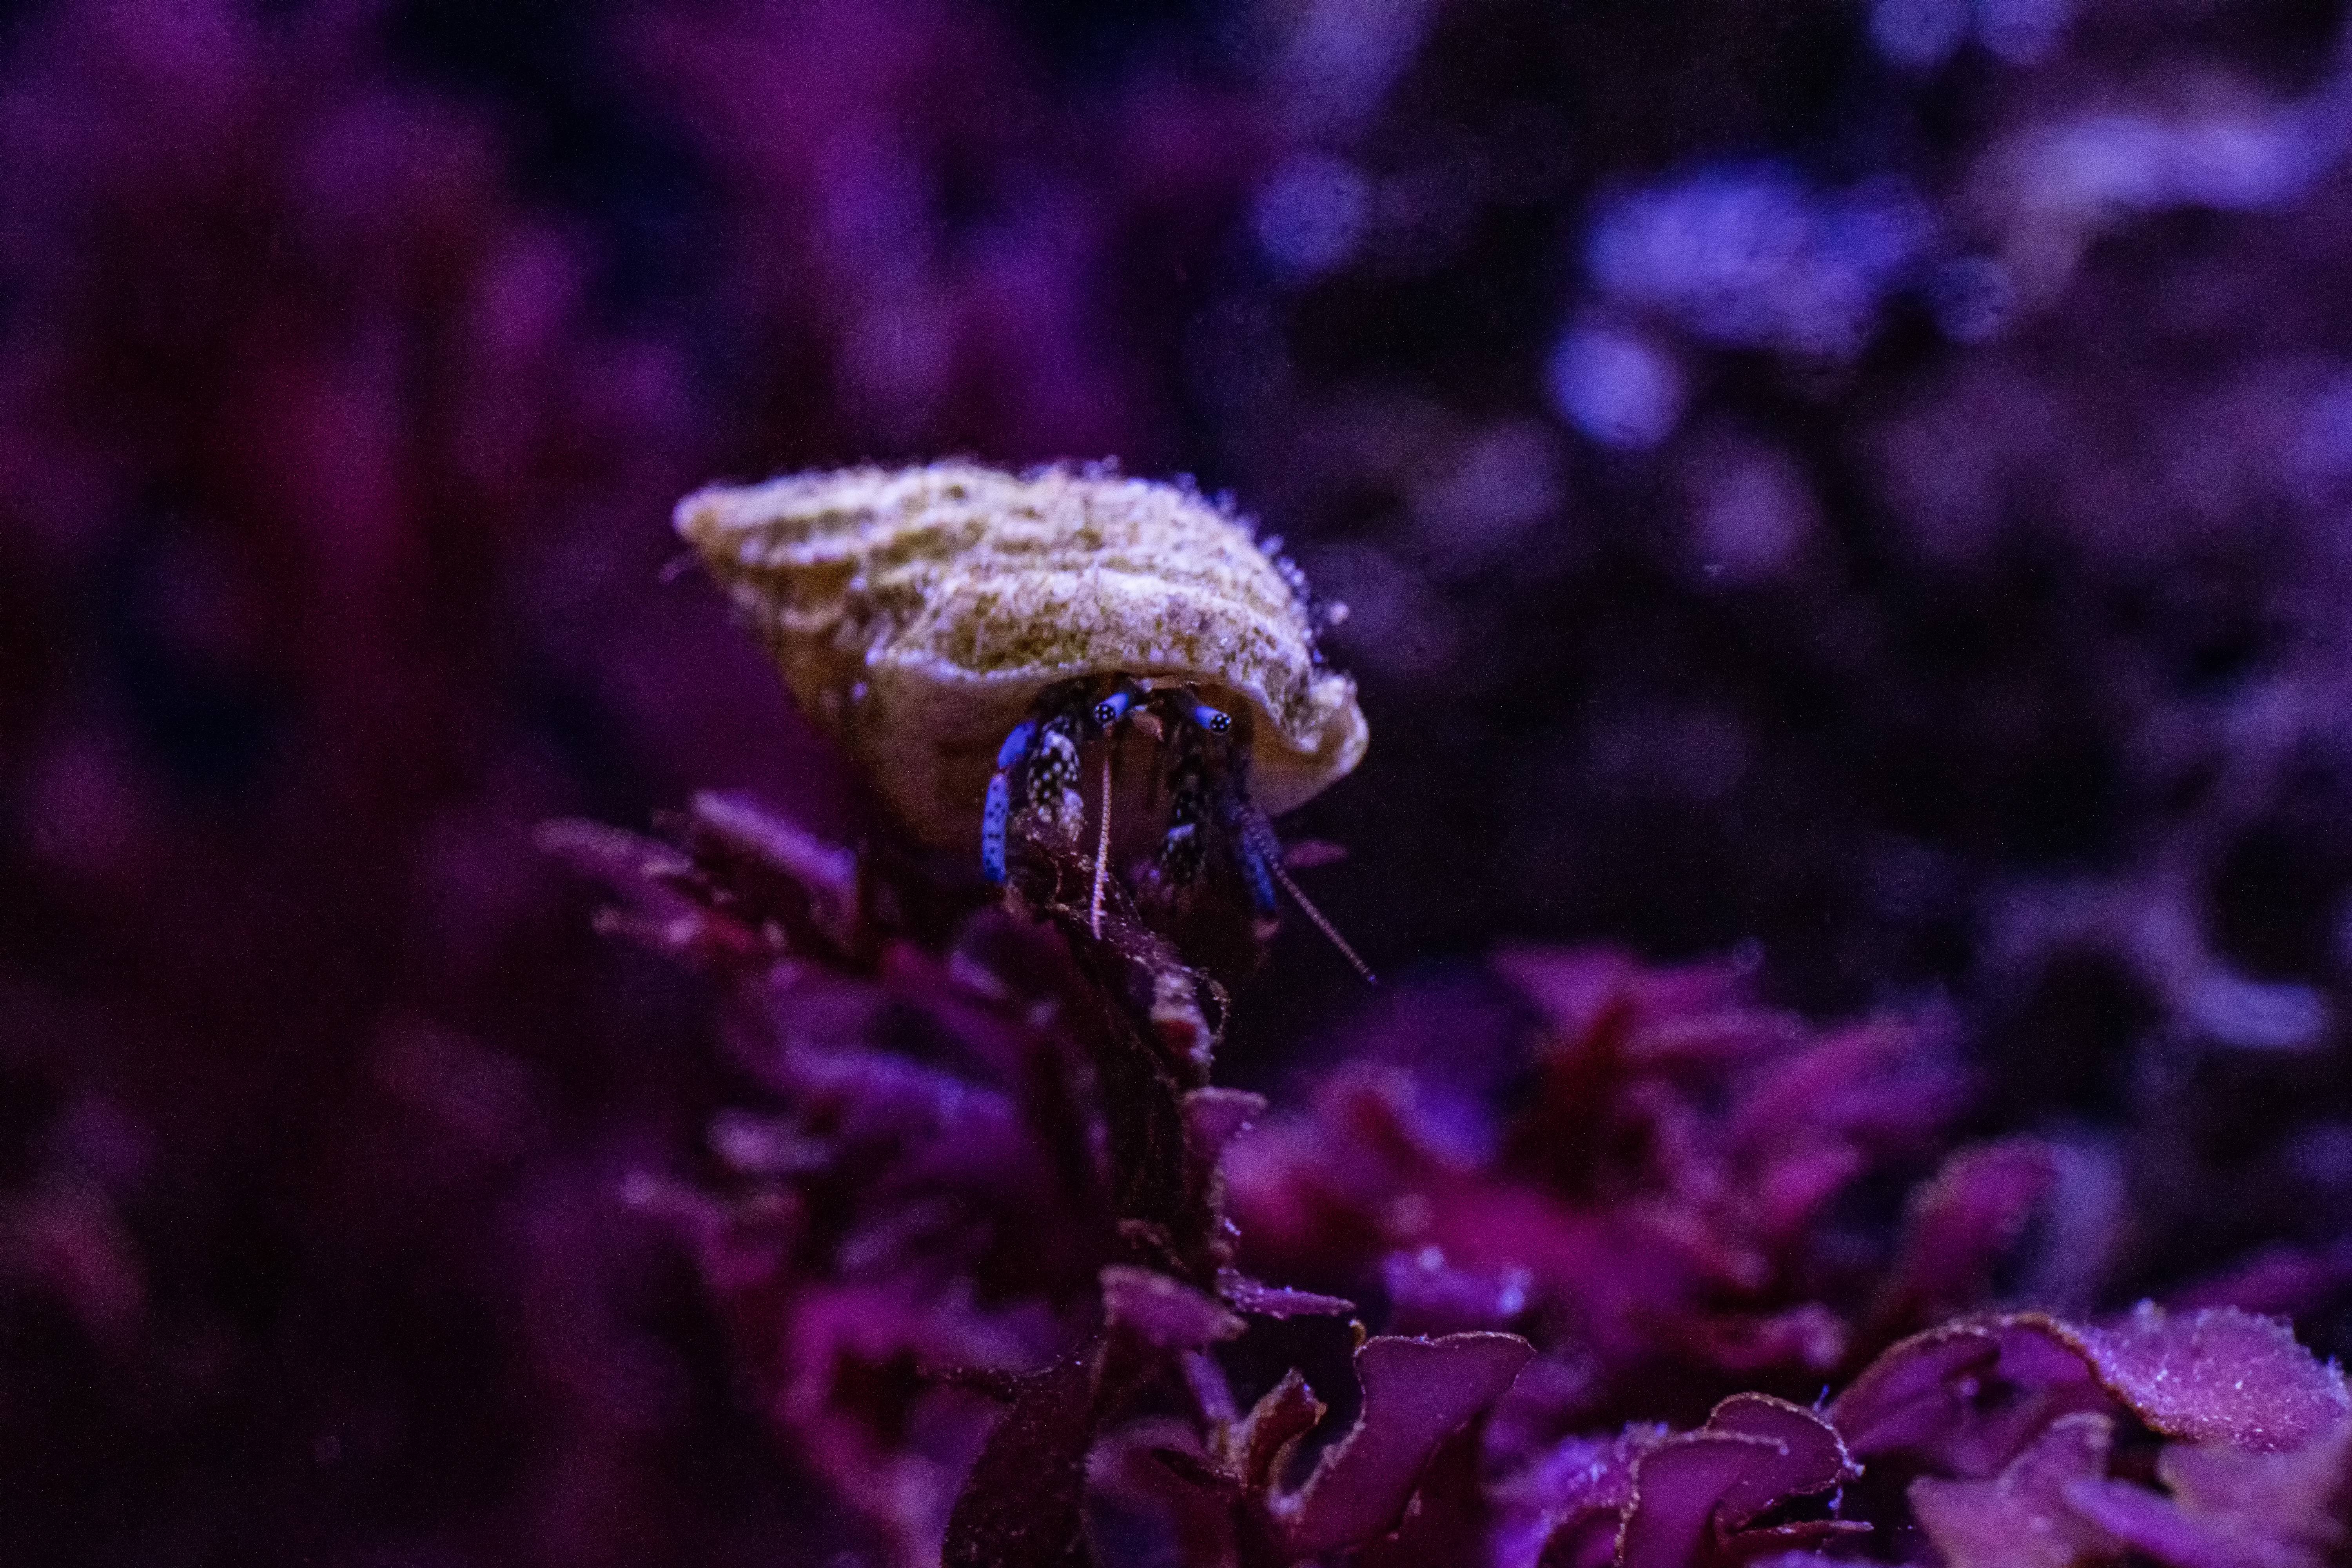
I ended up with this little guy and put him in the pump return chamber in the back. It fits down low enough that it never gets exposed to the air, even during water changes.

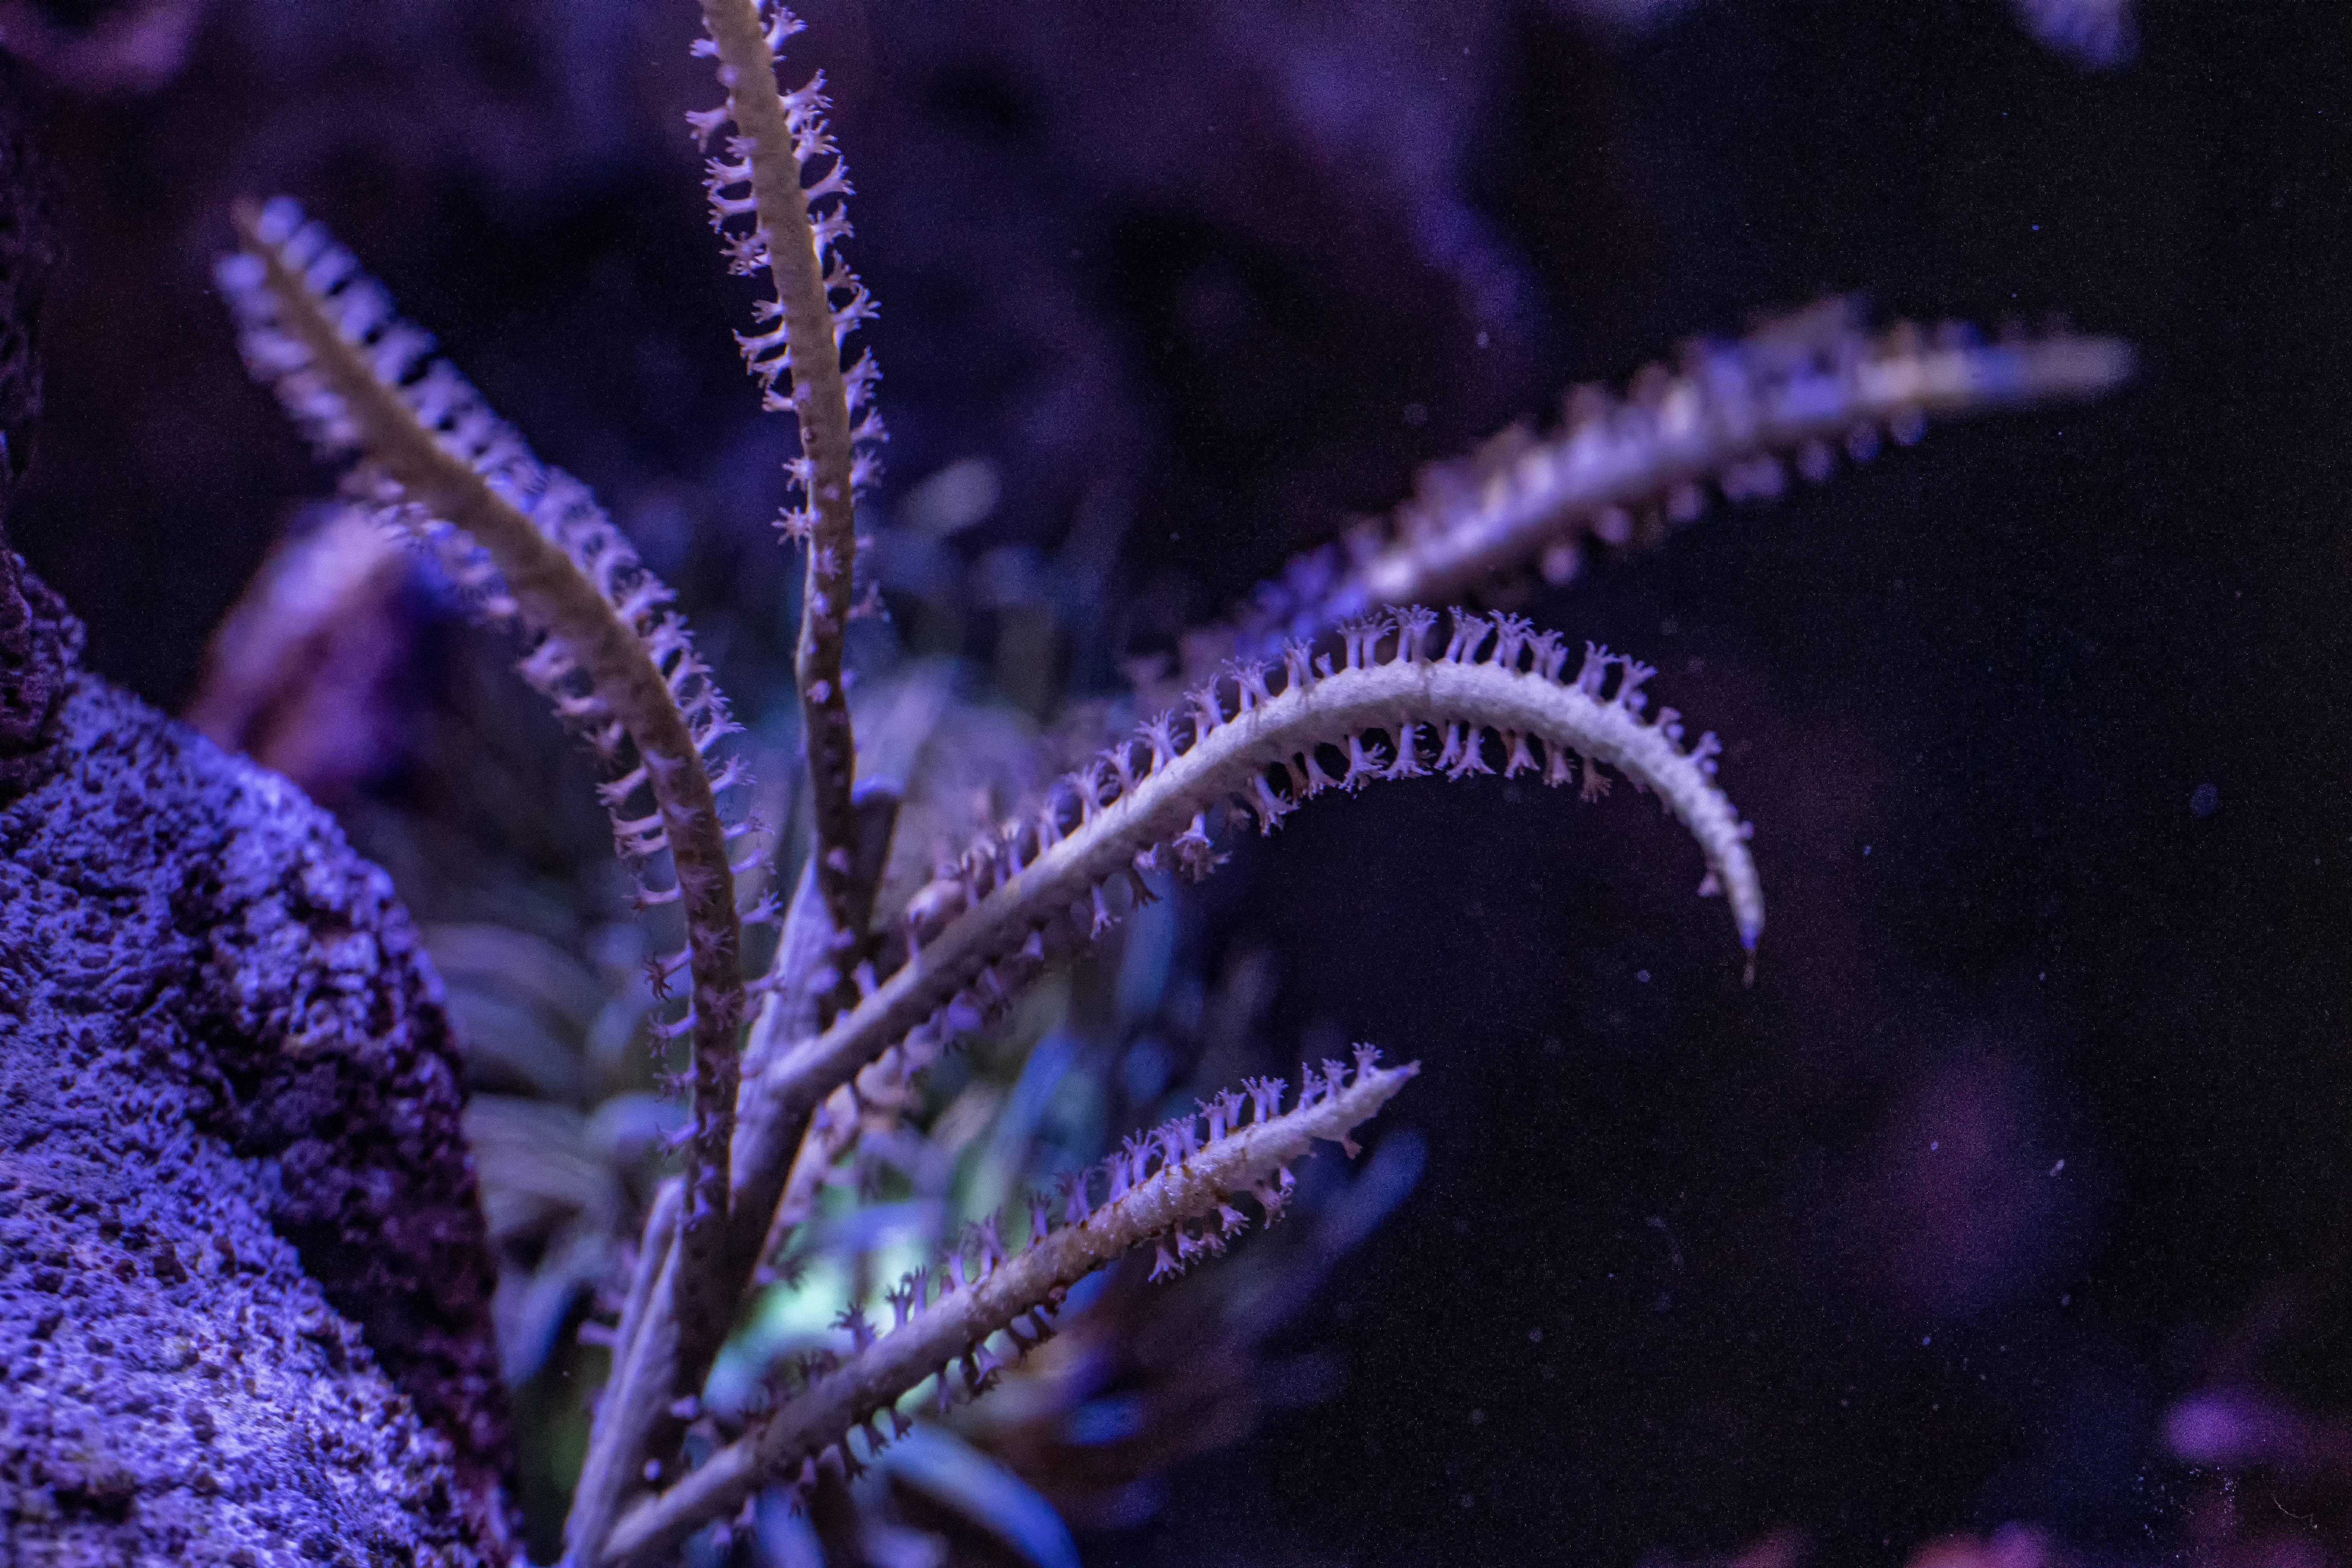
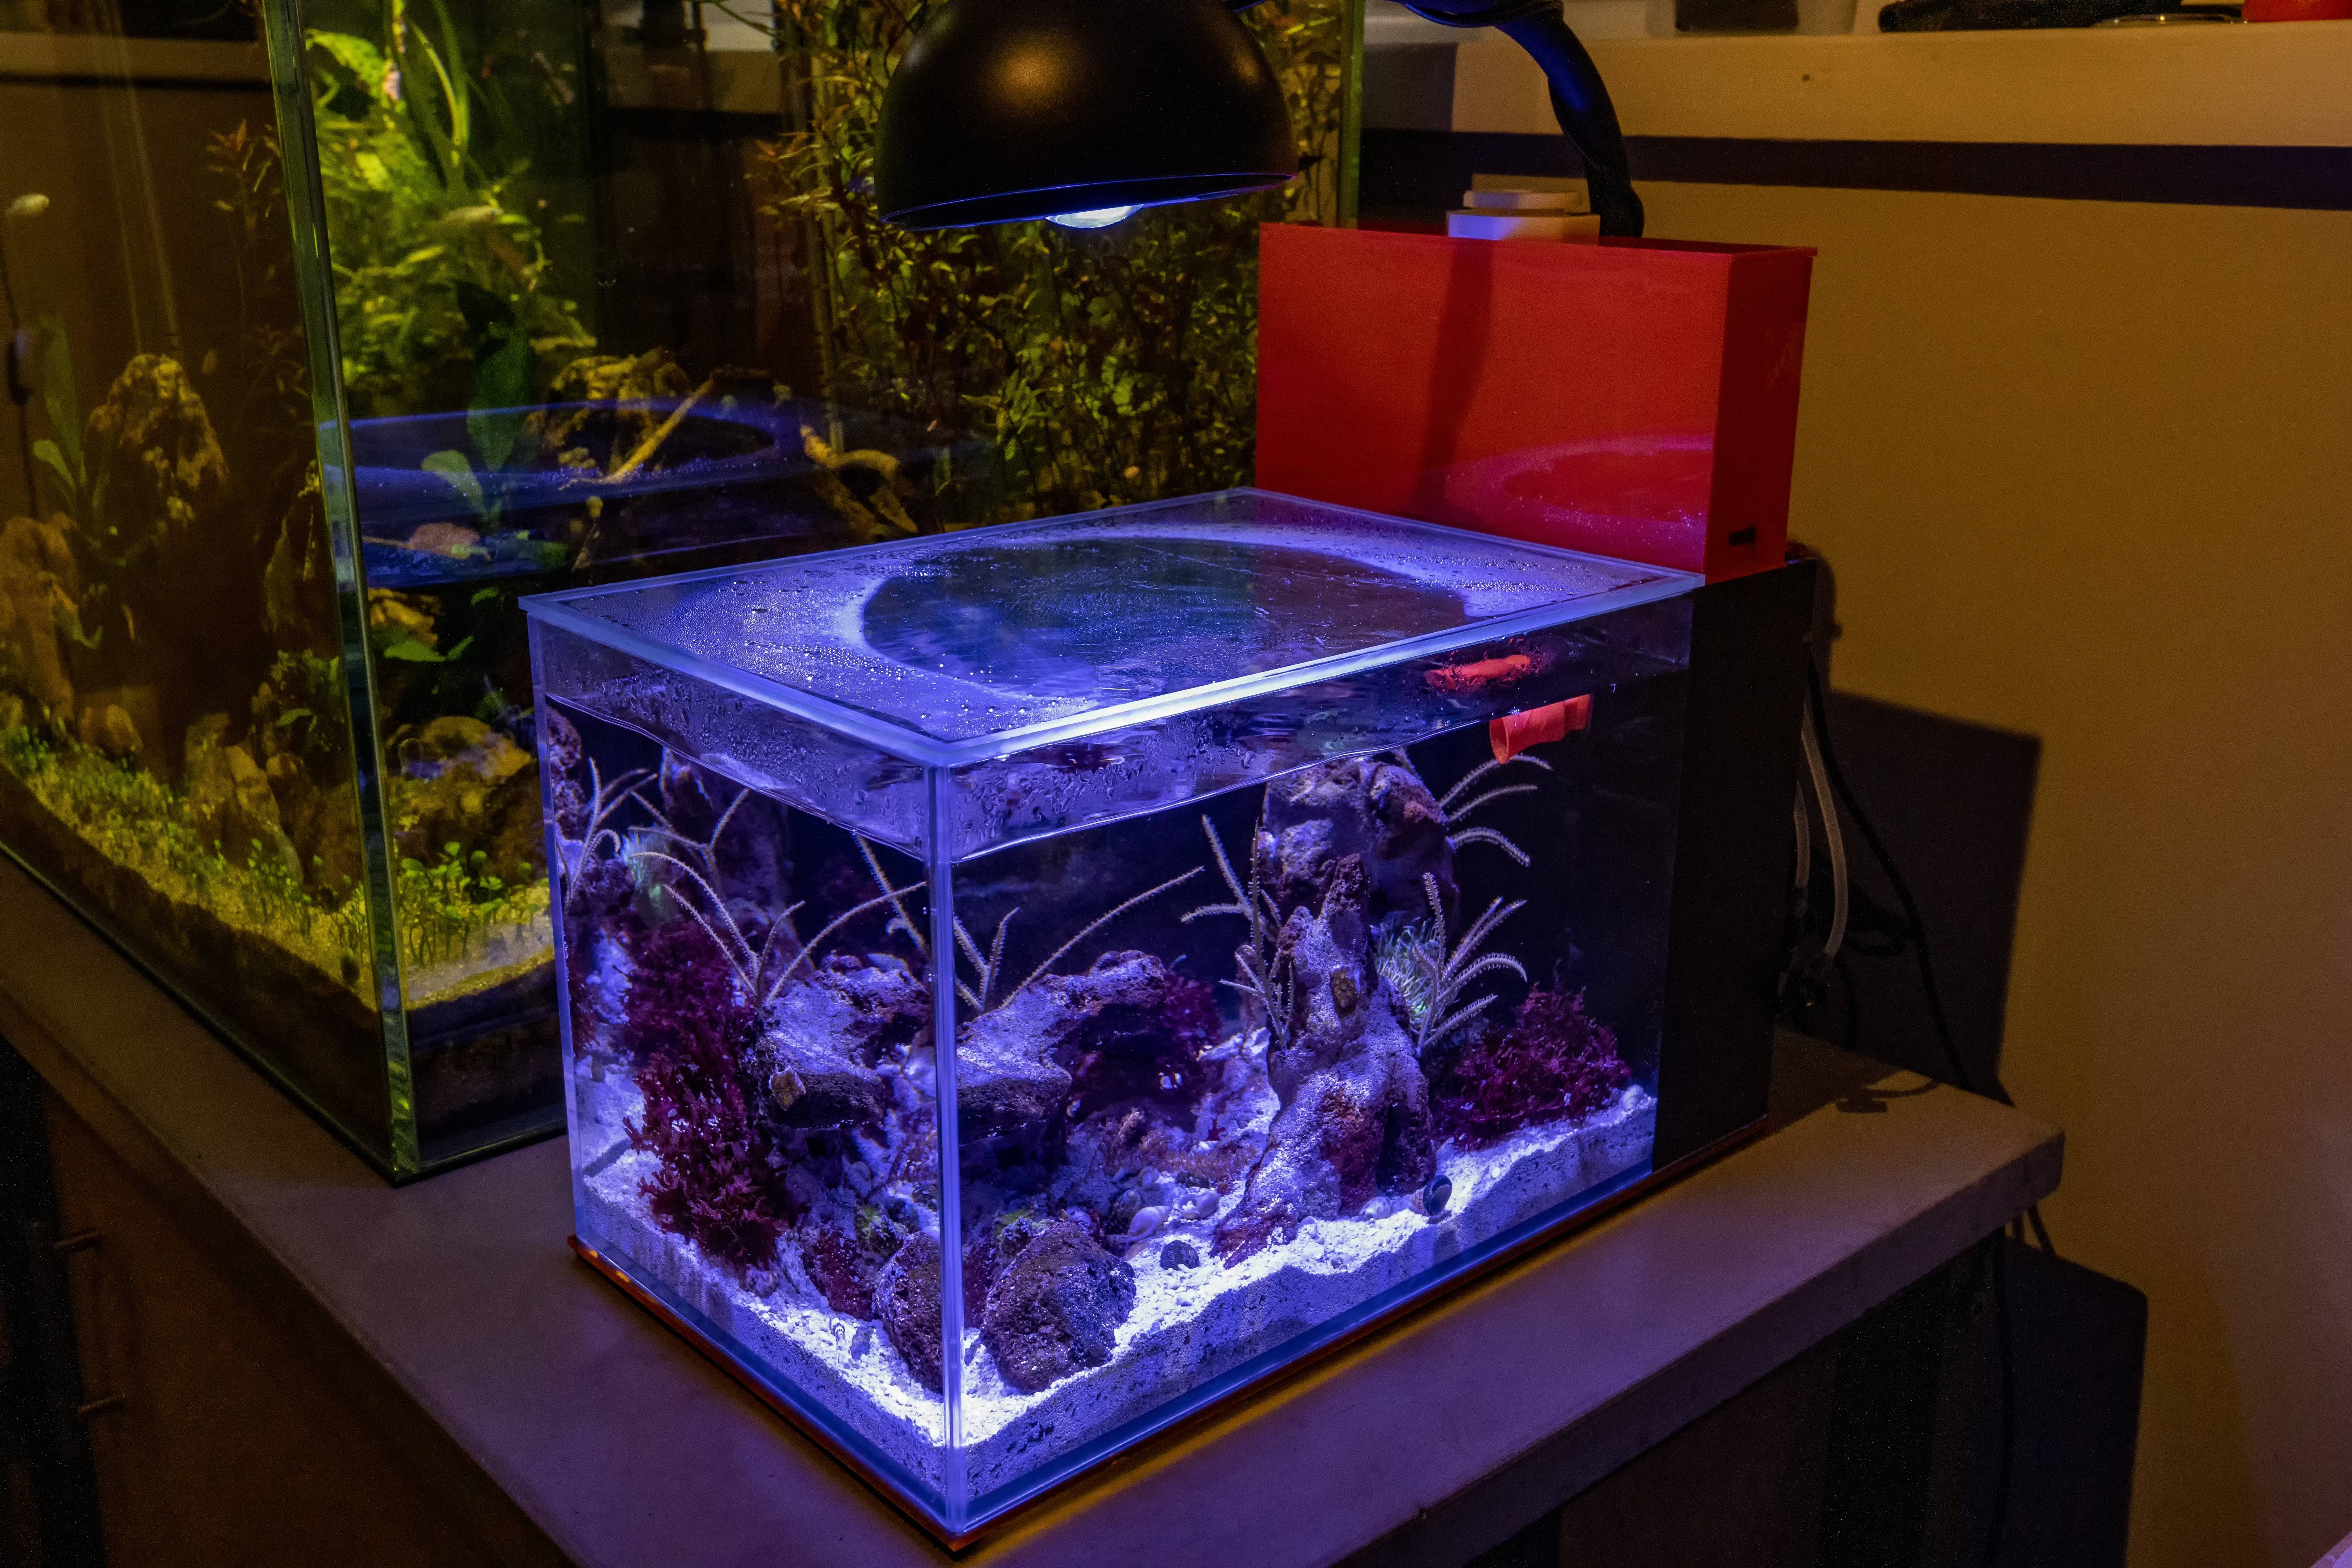
Meanwhile the macro algae I bought is not looking too hot. The ends of the plant were turning a brighter color, which I thought was new growth, until I noticed some parts were turning completely pale. Soooo I guess I was killing/am killing it/it was damaged in transport. Not really sure which or even if its still happening (vs stalling out) but I decided I would get some more and get it from someone local so I could know whether or not it was an issue with shipping.

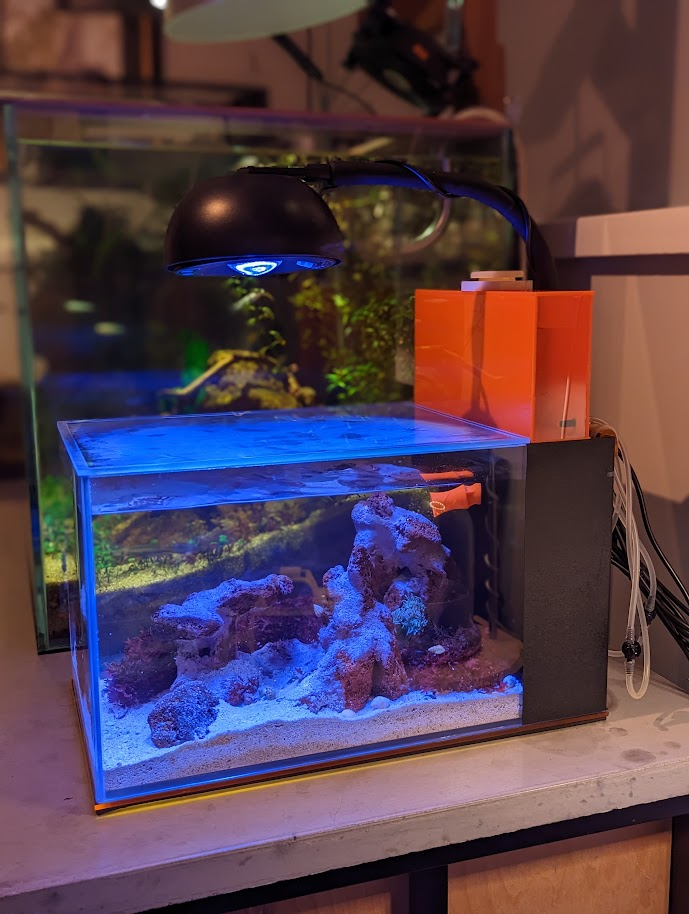
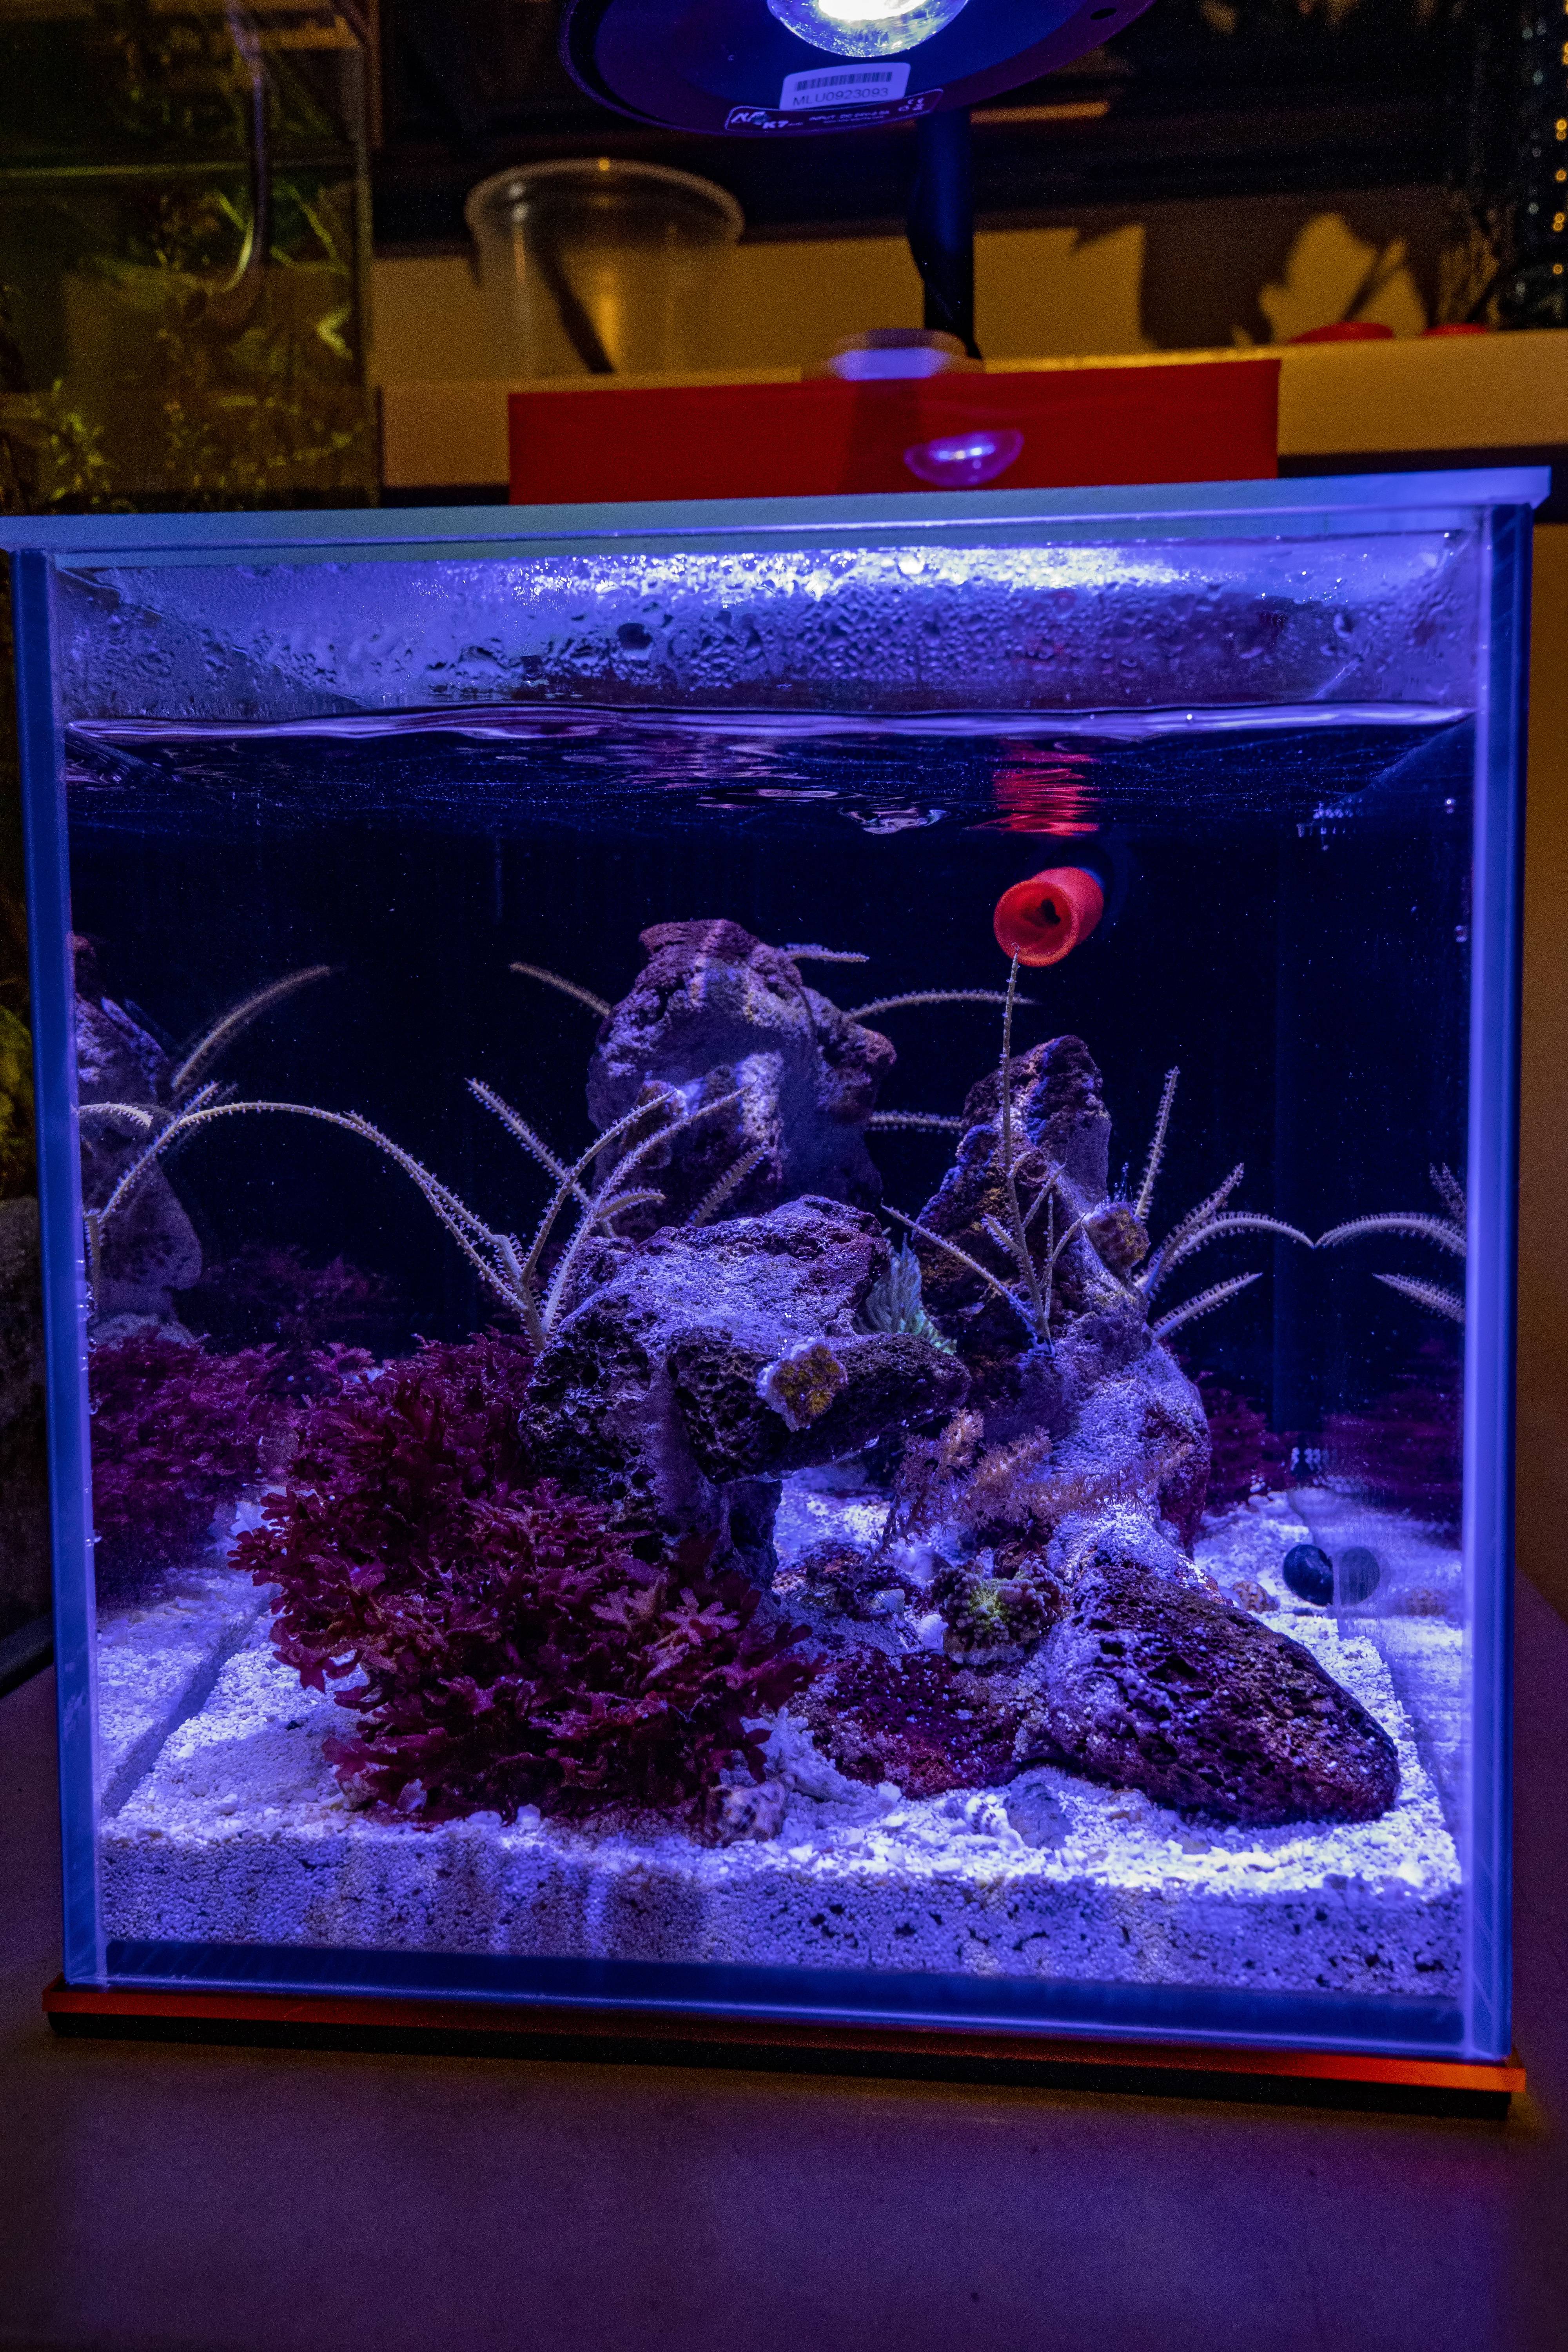
That proved to be VERY easy and earlier today I added a gigantic (for this tank) softball sized group of flat leaf gracilaria to the tank.

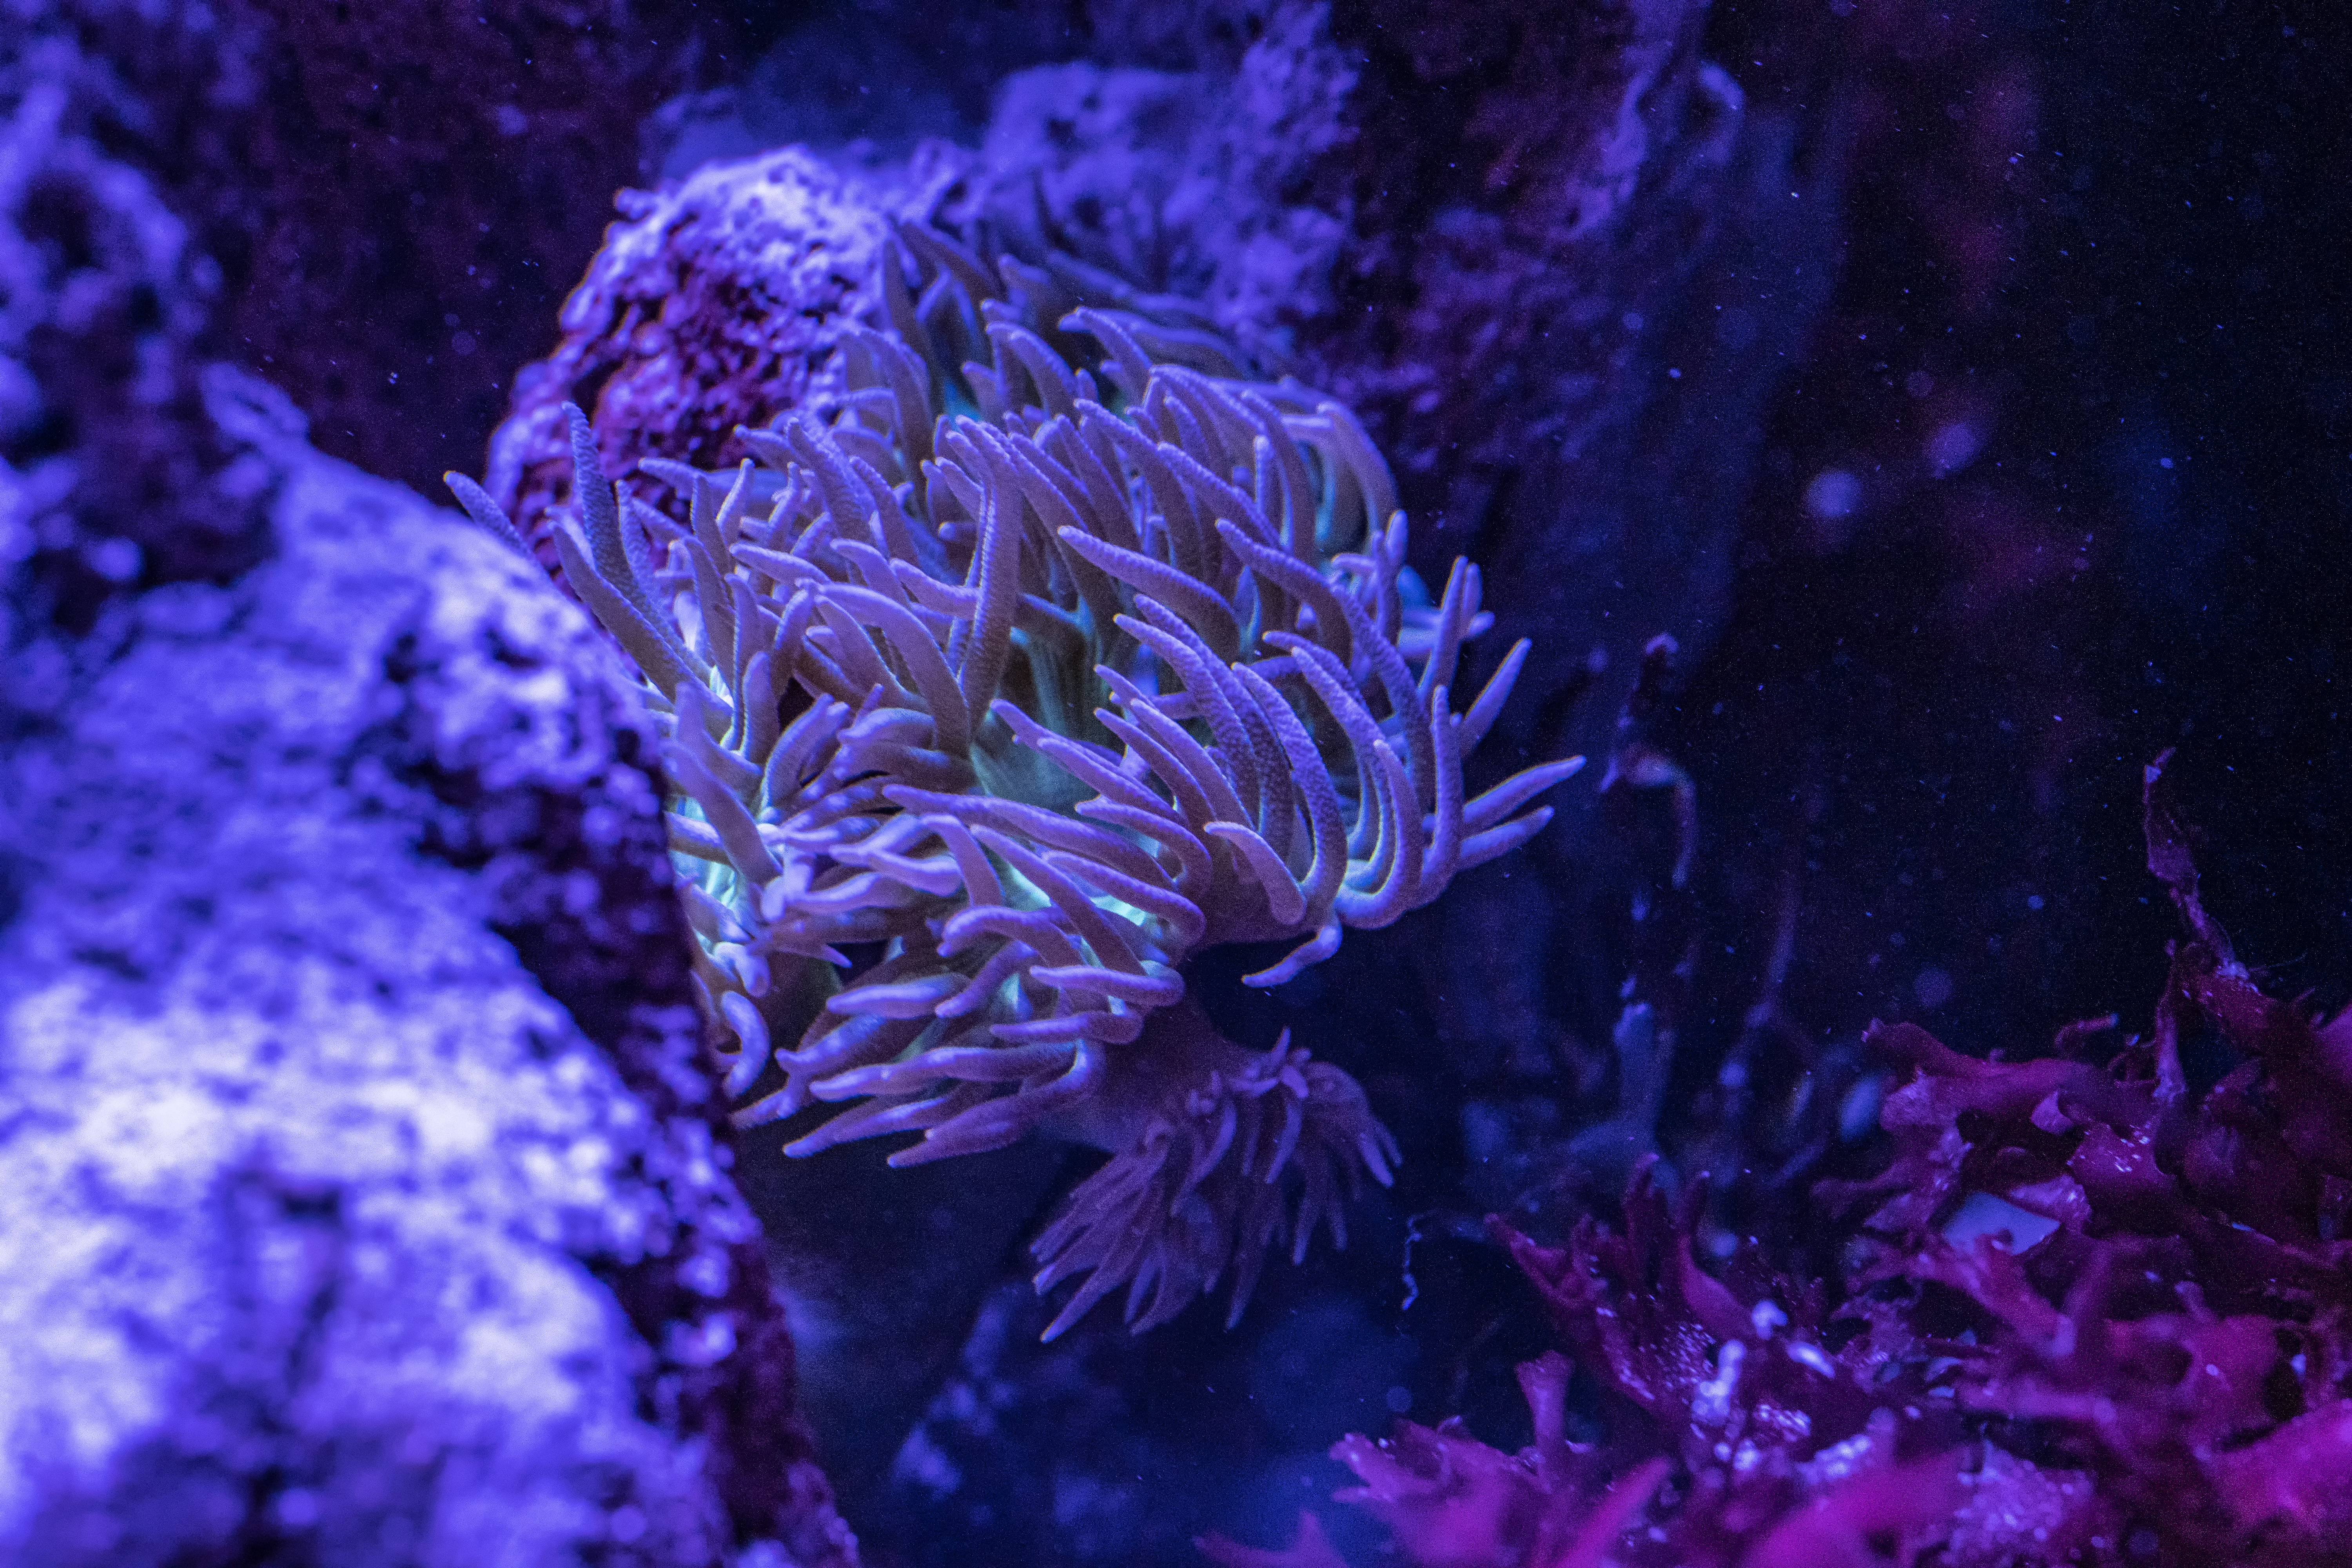
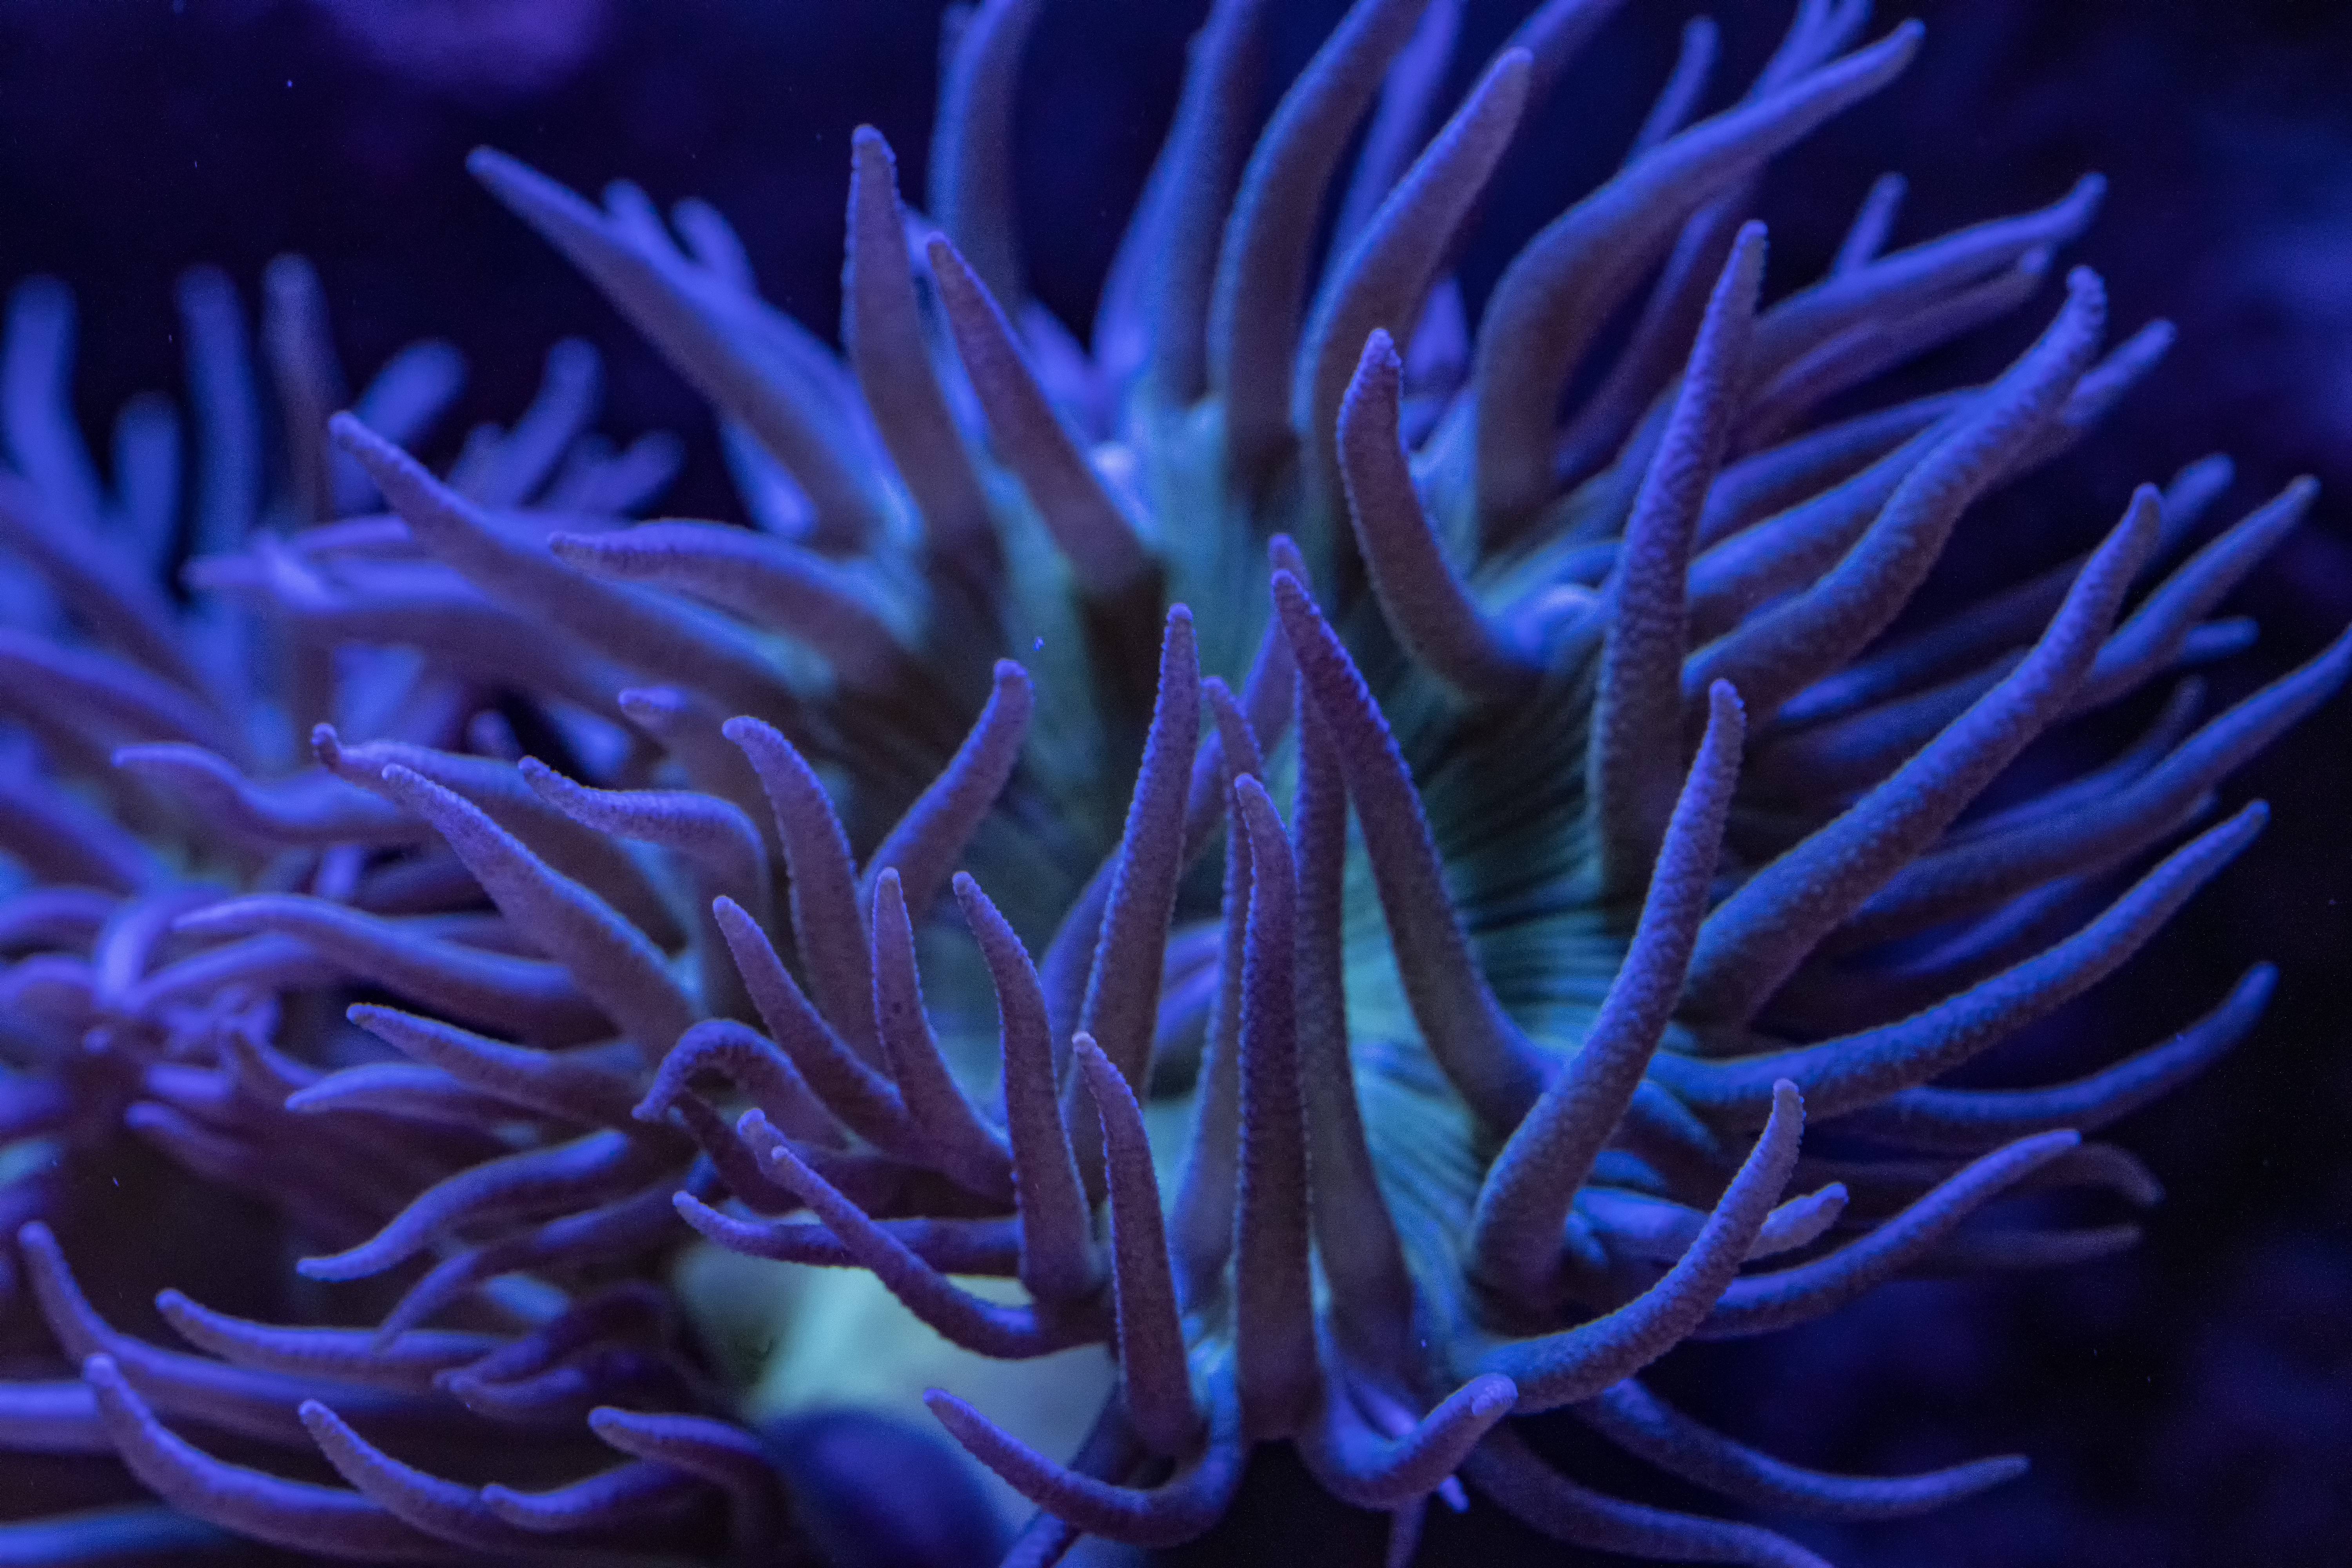
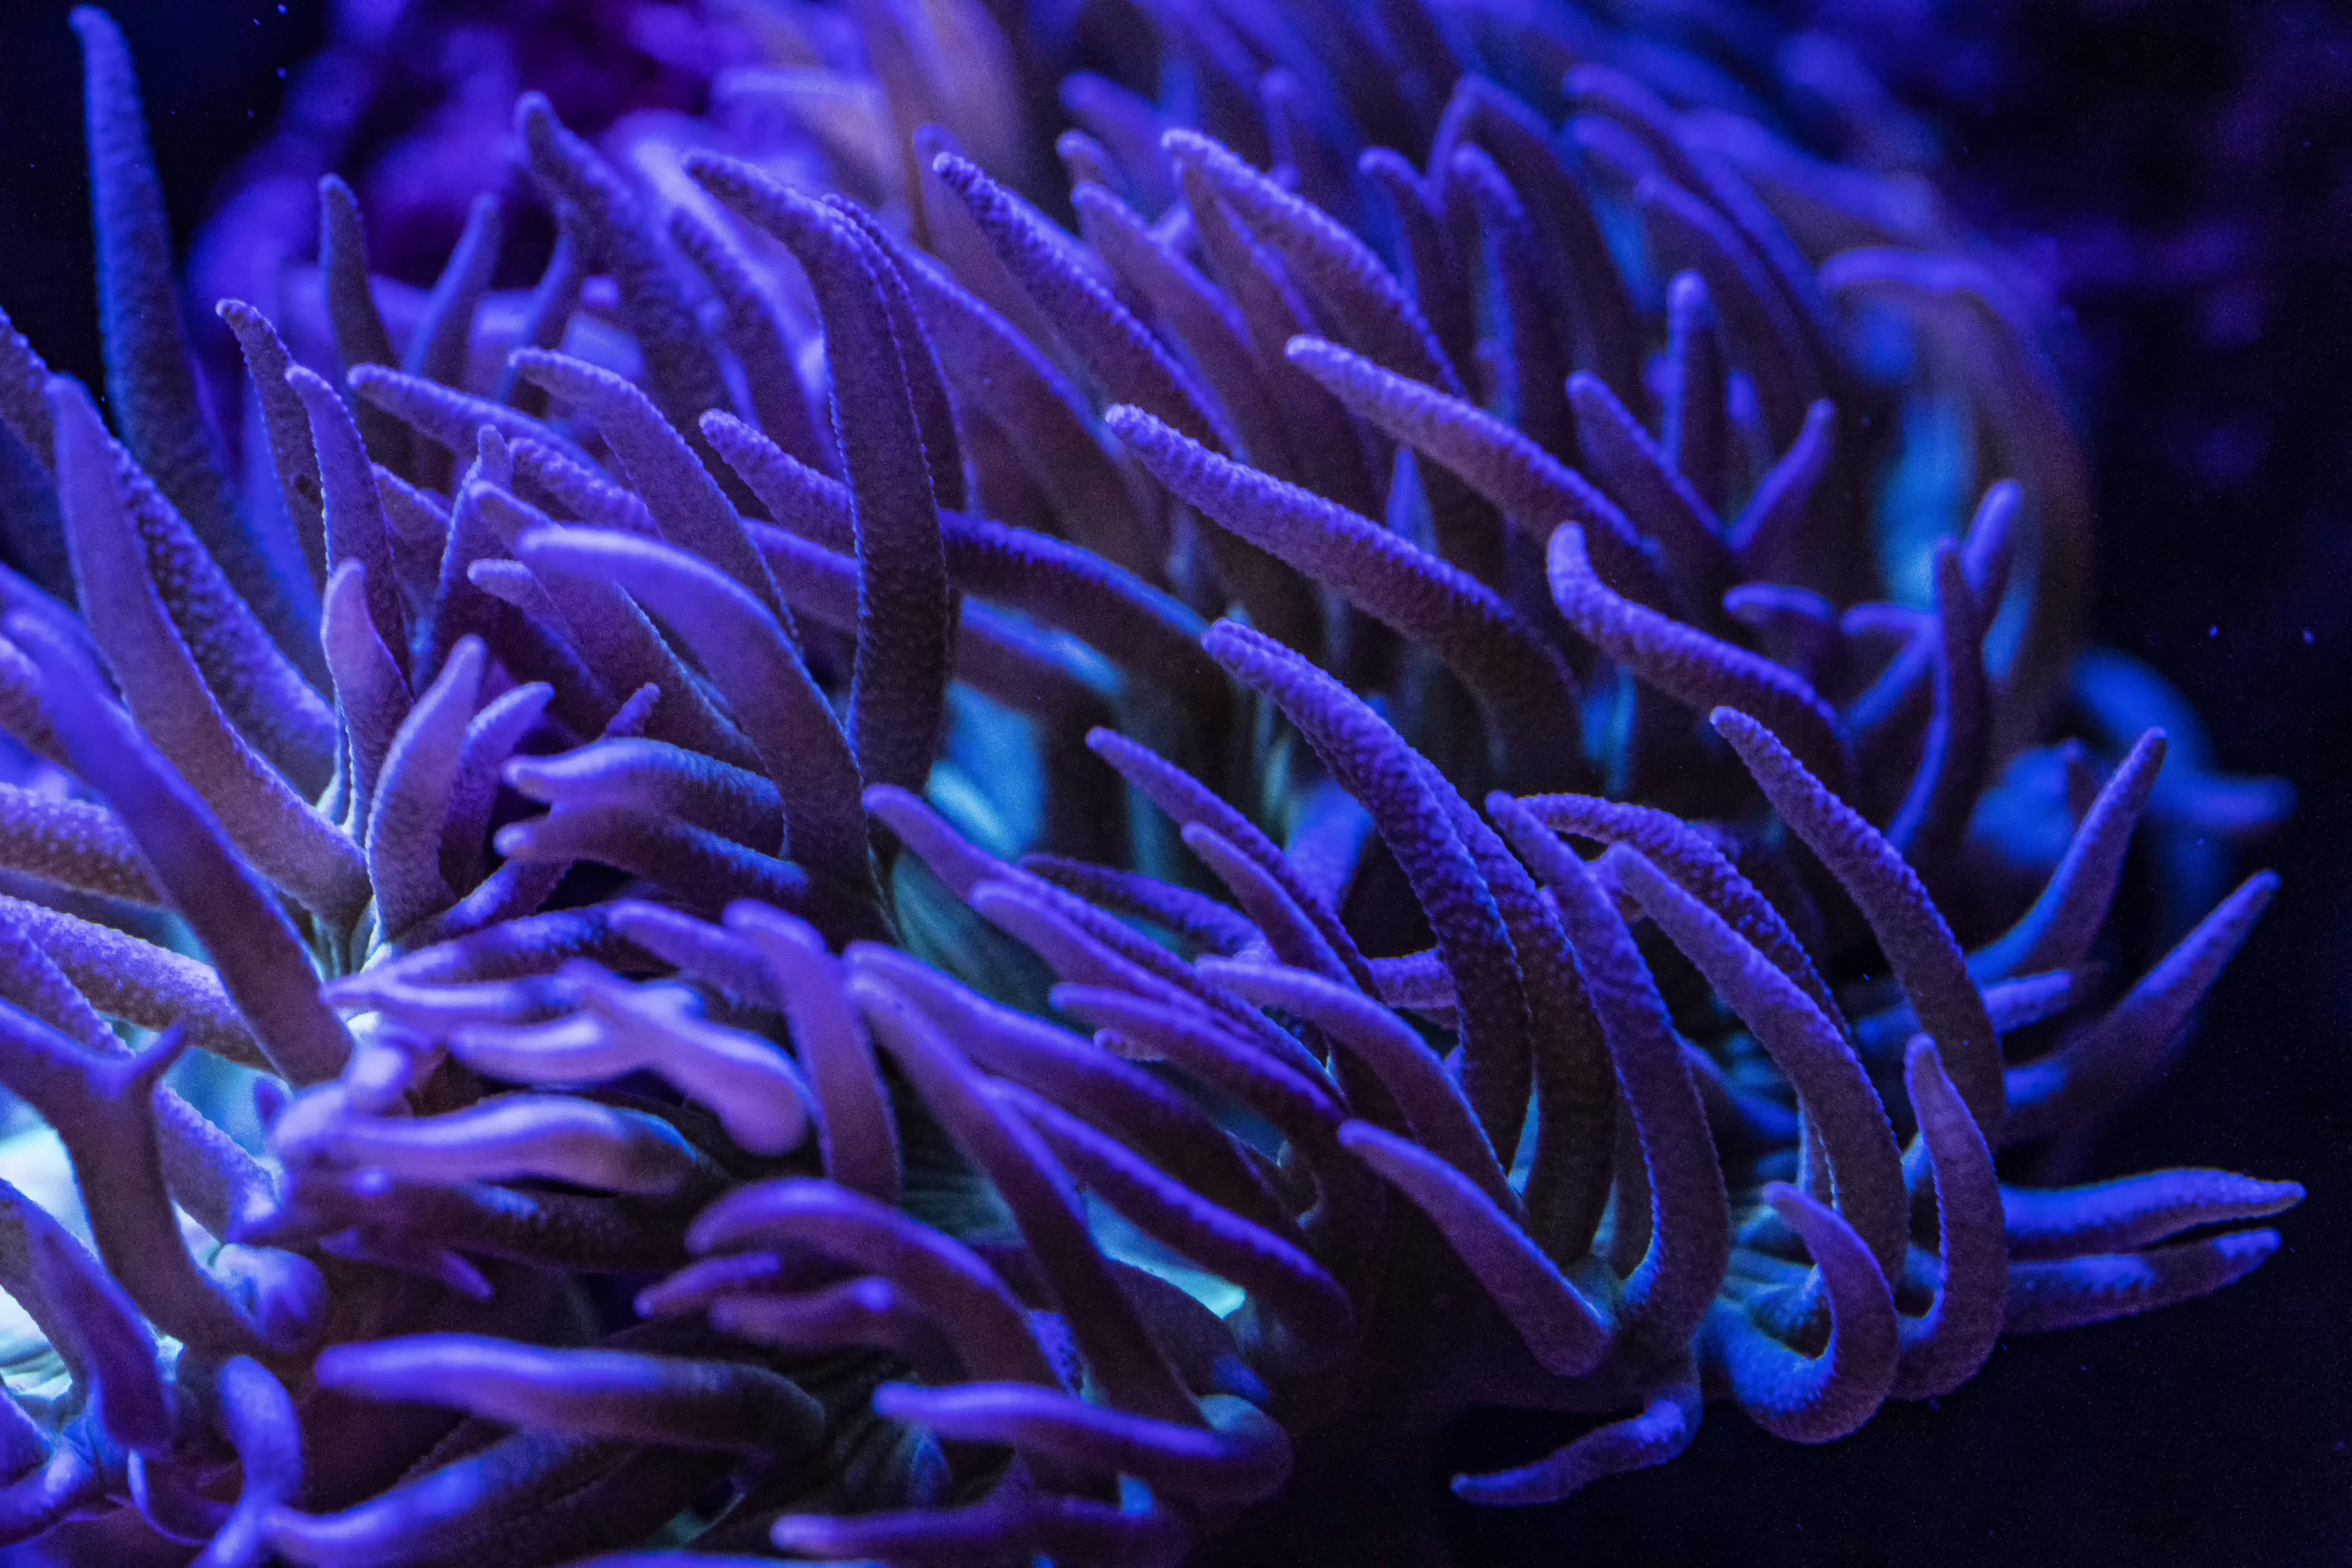
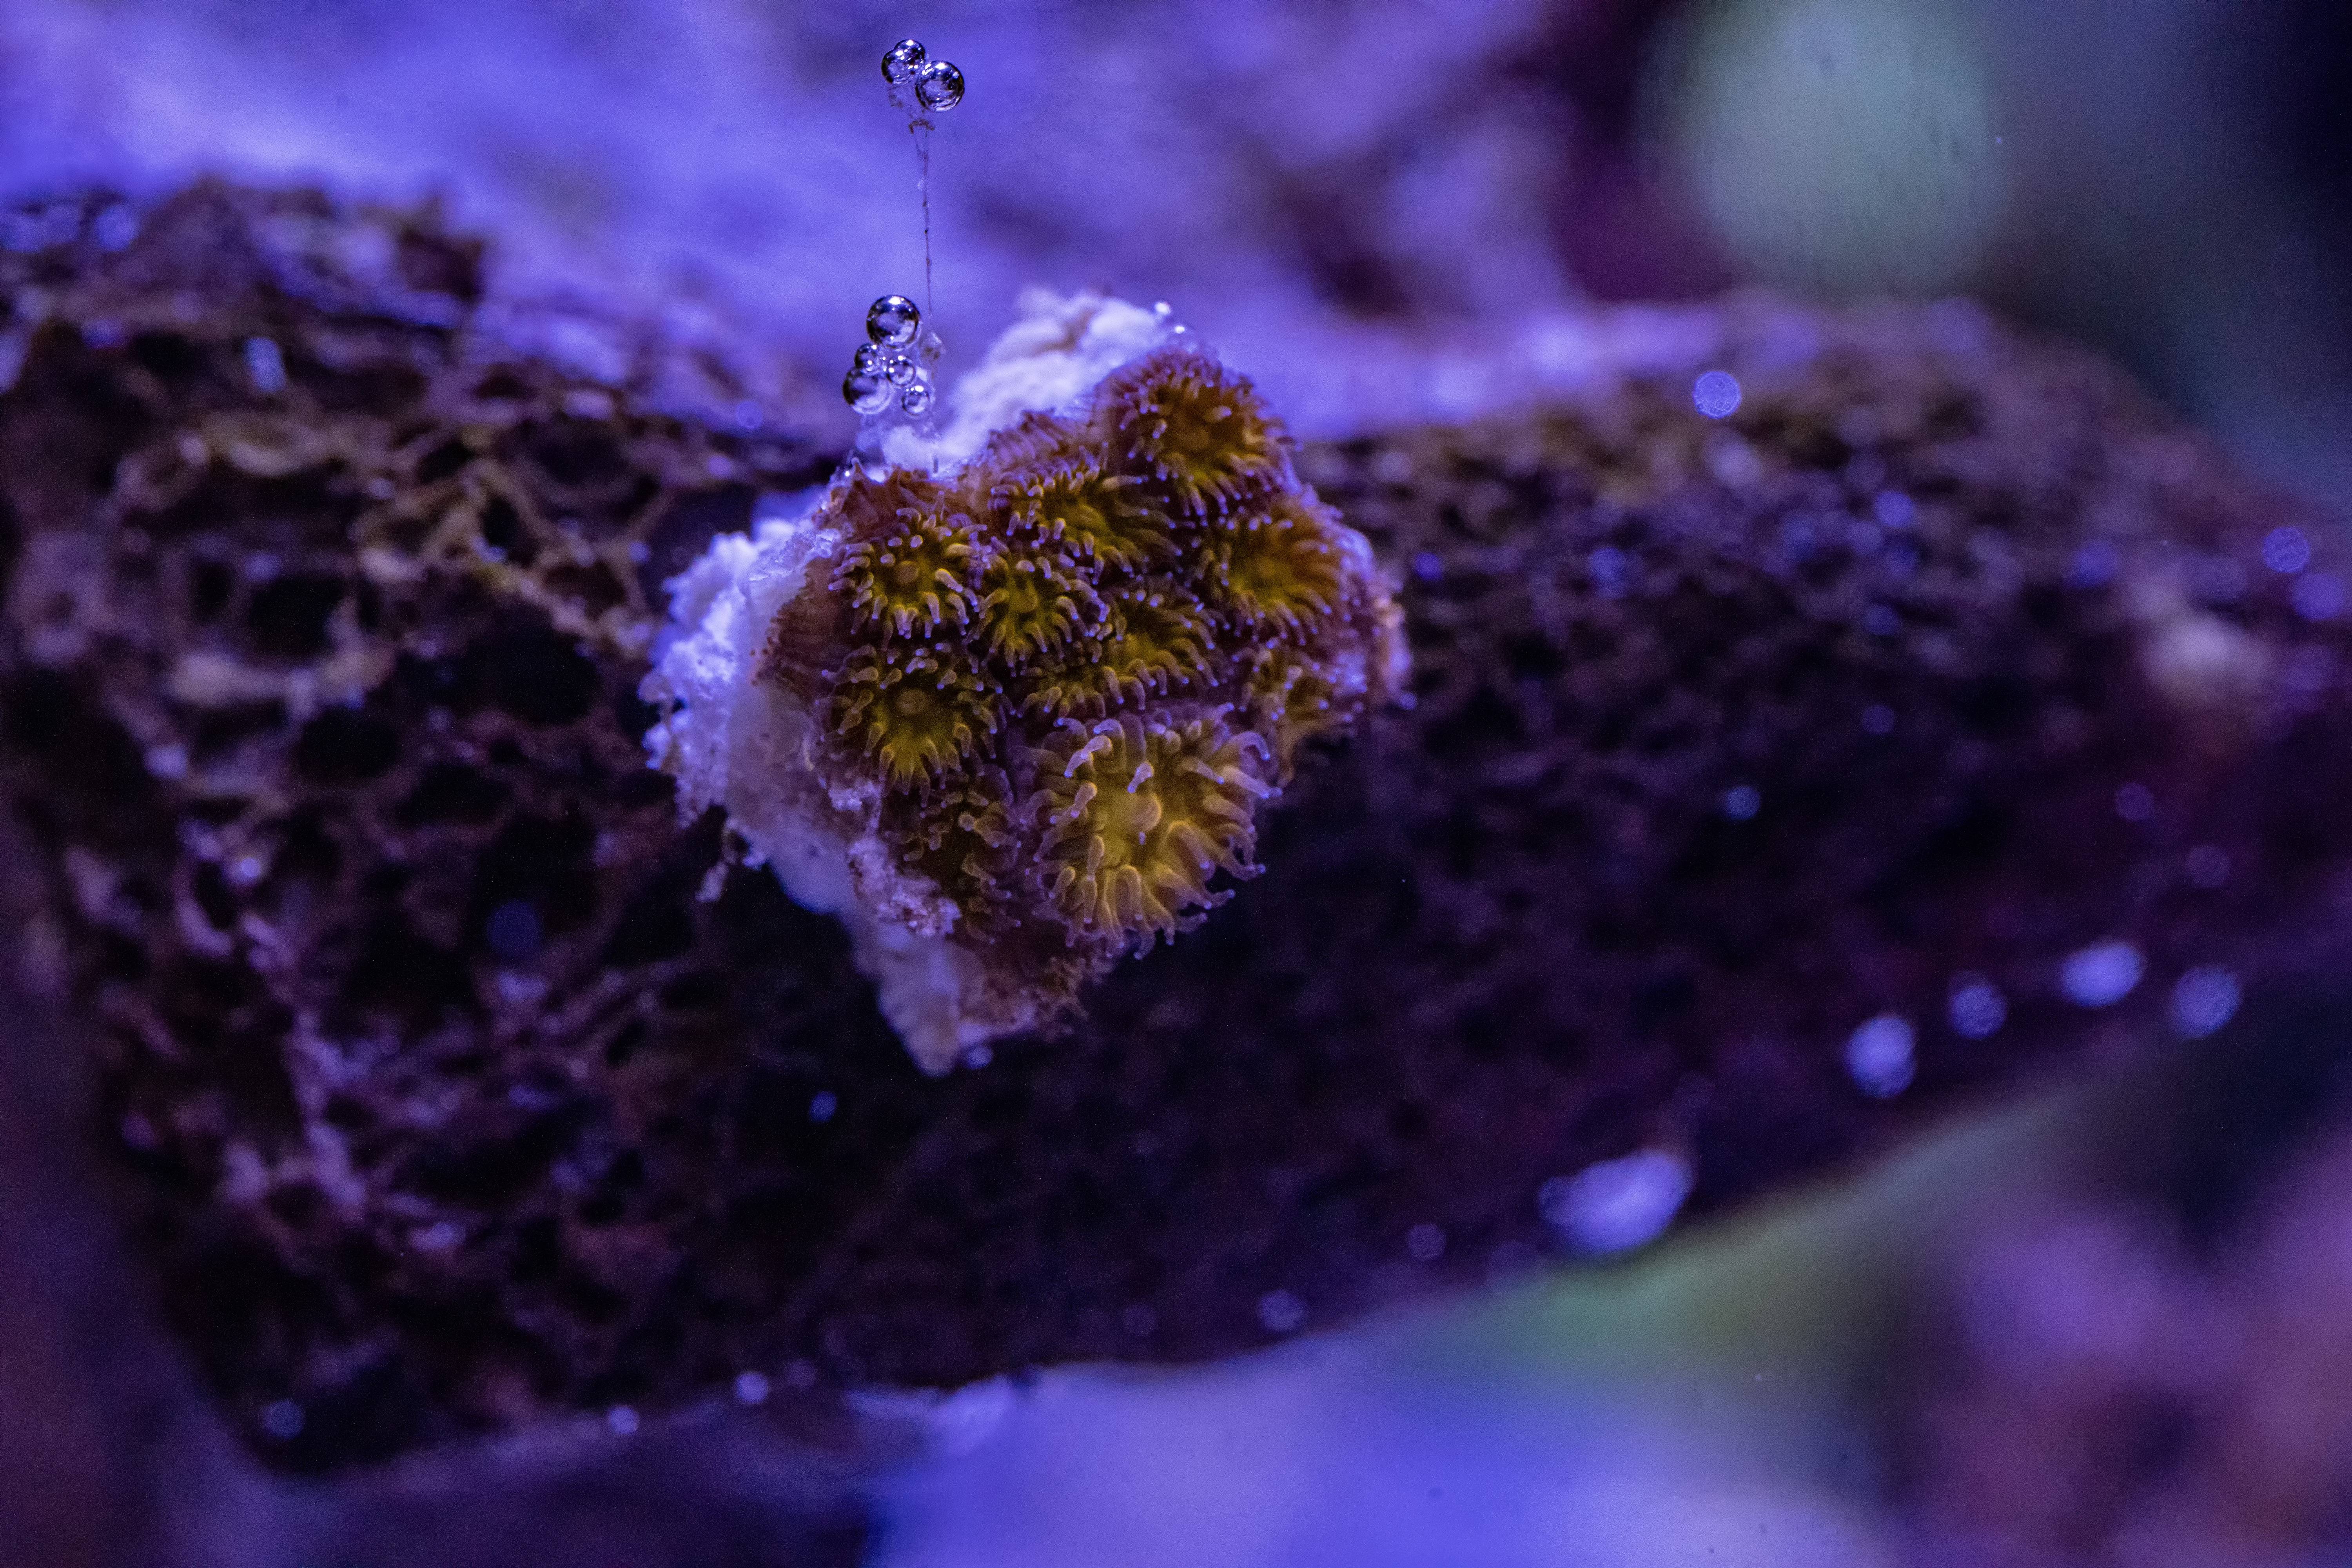
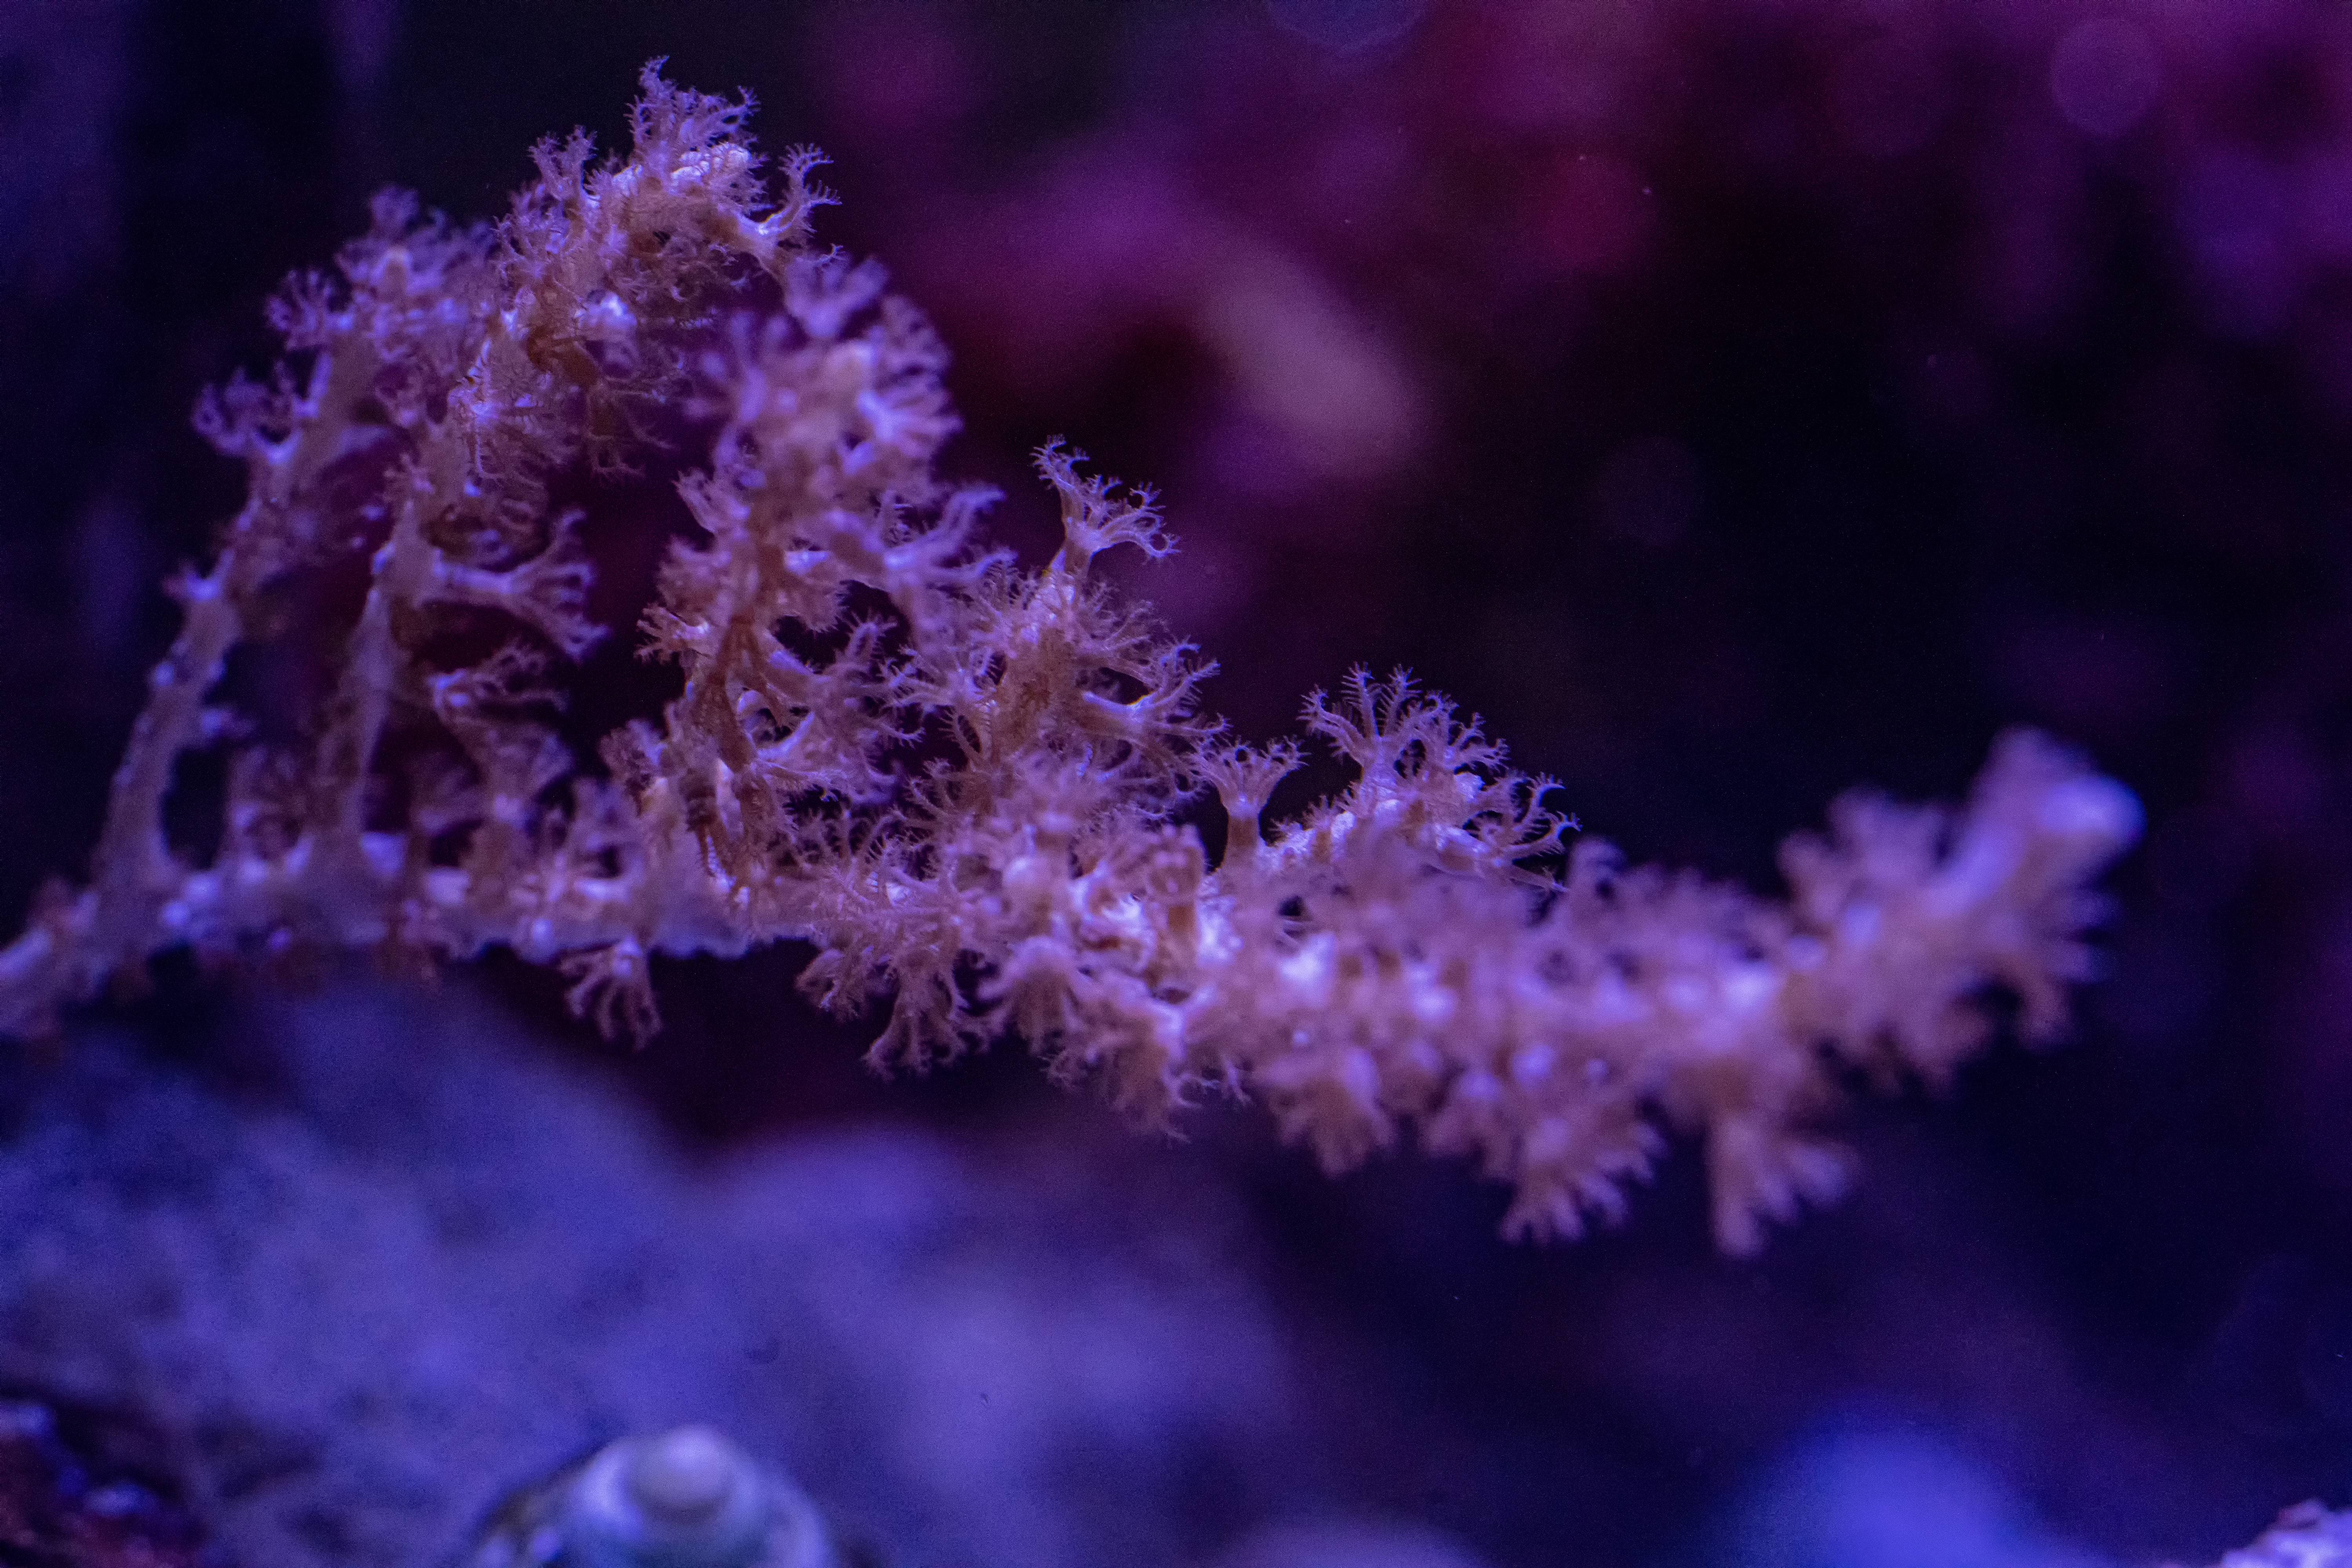
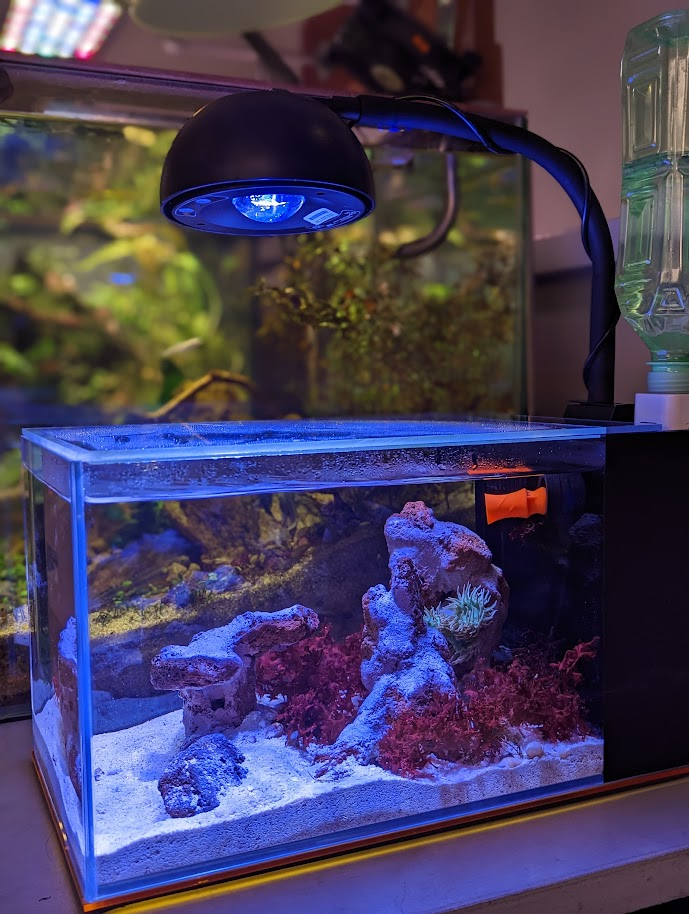
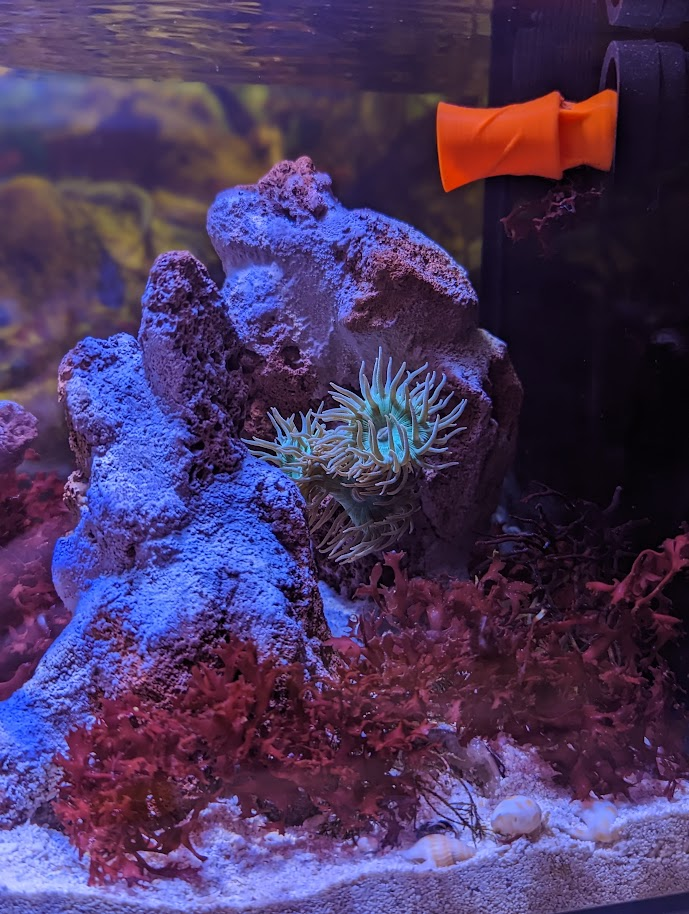
Meanwhile I picked up a duncan from the same seller. This is my very first coral, so I am a bit excited. I dipped it when I got home following the sellers instructions and then it was time to install.

I hate the look of frag plugs in a tank, so I used my spiffy new bone cutters to remove it from the plug, then I super glued it to a piece of rock. The super gluing process ended up being more difficult then I thought it would (I thought it would grab quicker underwater) but next time I will do better. Either way, a few hours later the coral was open and looking quite nice!

Fl7F5yL.png


9x0ZiqB.png


I now have an absurd amount of macro algae in the tank. I will let it go for a week or so and see if it appears to be doing well. If it does, I will remove the unwanted bits and just keep what I like.
 

Poliwag

New Member
View Badges
Joined
Nov 7, 2021
Messages
19
Reaction score
13
Location
Canada
Rating - 0%
0   0   0
Is the lid starting to bend or still fine? Looking to make on just like it
 
OP
OP
minorhero

minorhero

Active Member
View Badges
Joined
Dec 12, 2021
Messages
191
Reaction score
297
Location
Maryland
Rating - 0%
0   0   0
Is the lid starting to bend or still fine? Looking to make on just like it
It's still fine. It's made from 1/4 inch polycarbonate as opposed to acrylic/plexiglass so it 'should' be fine for the life of the tank, though I do plan to make a new one with orange trim eventually.
 
OP
OP
minorhero

minorhero

Active Member
View Badges
Joined
Dec 12, 2021
Messages
191
Reaction score
297
Location
Maryland
Rating - 0%
0   0   0
While only a couple of things actually happened, the real reason for this update is the addition of better pictures :p 
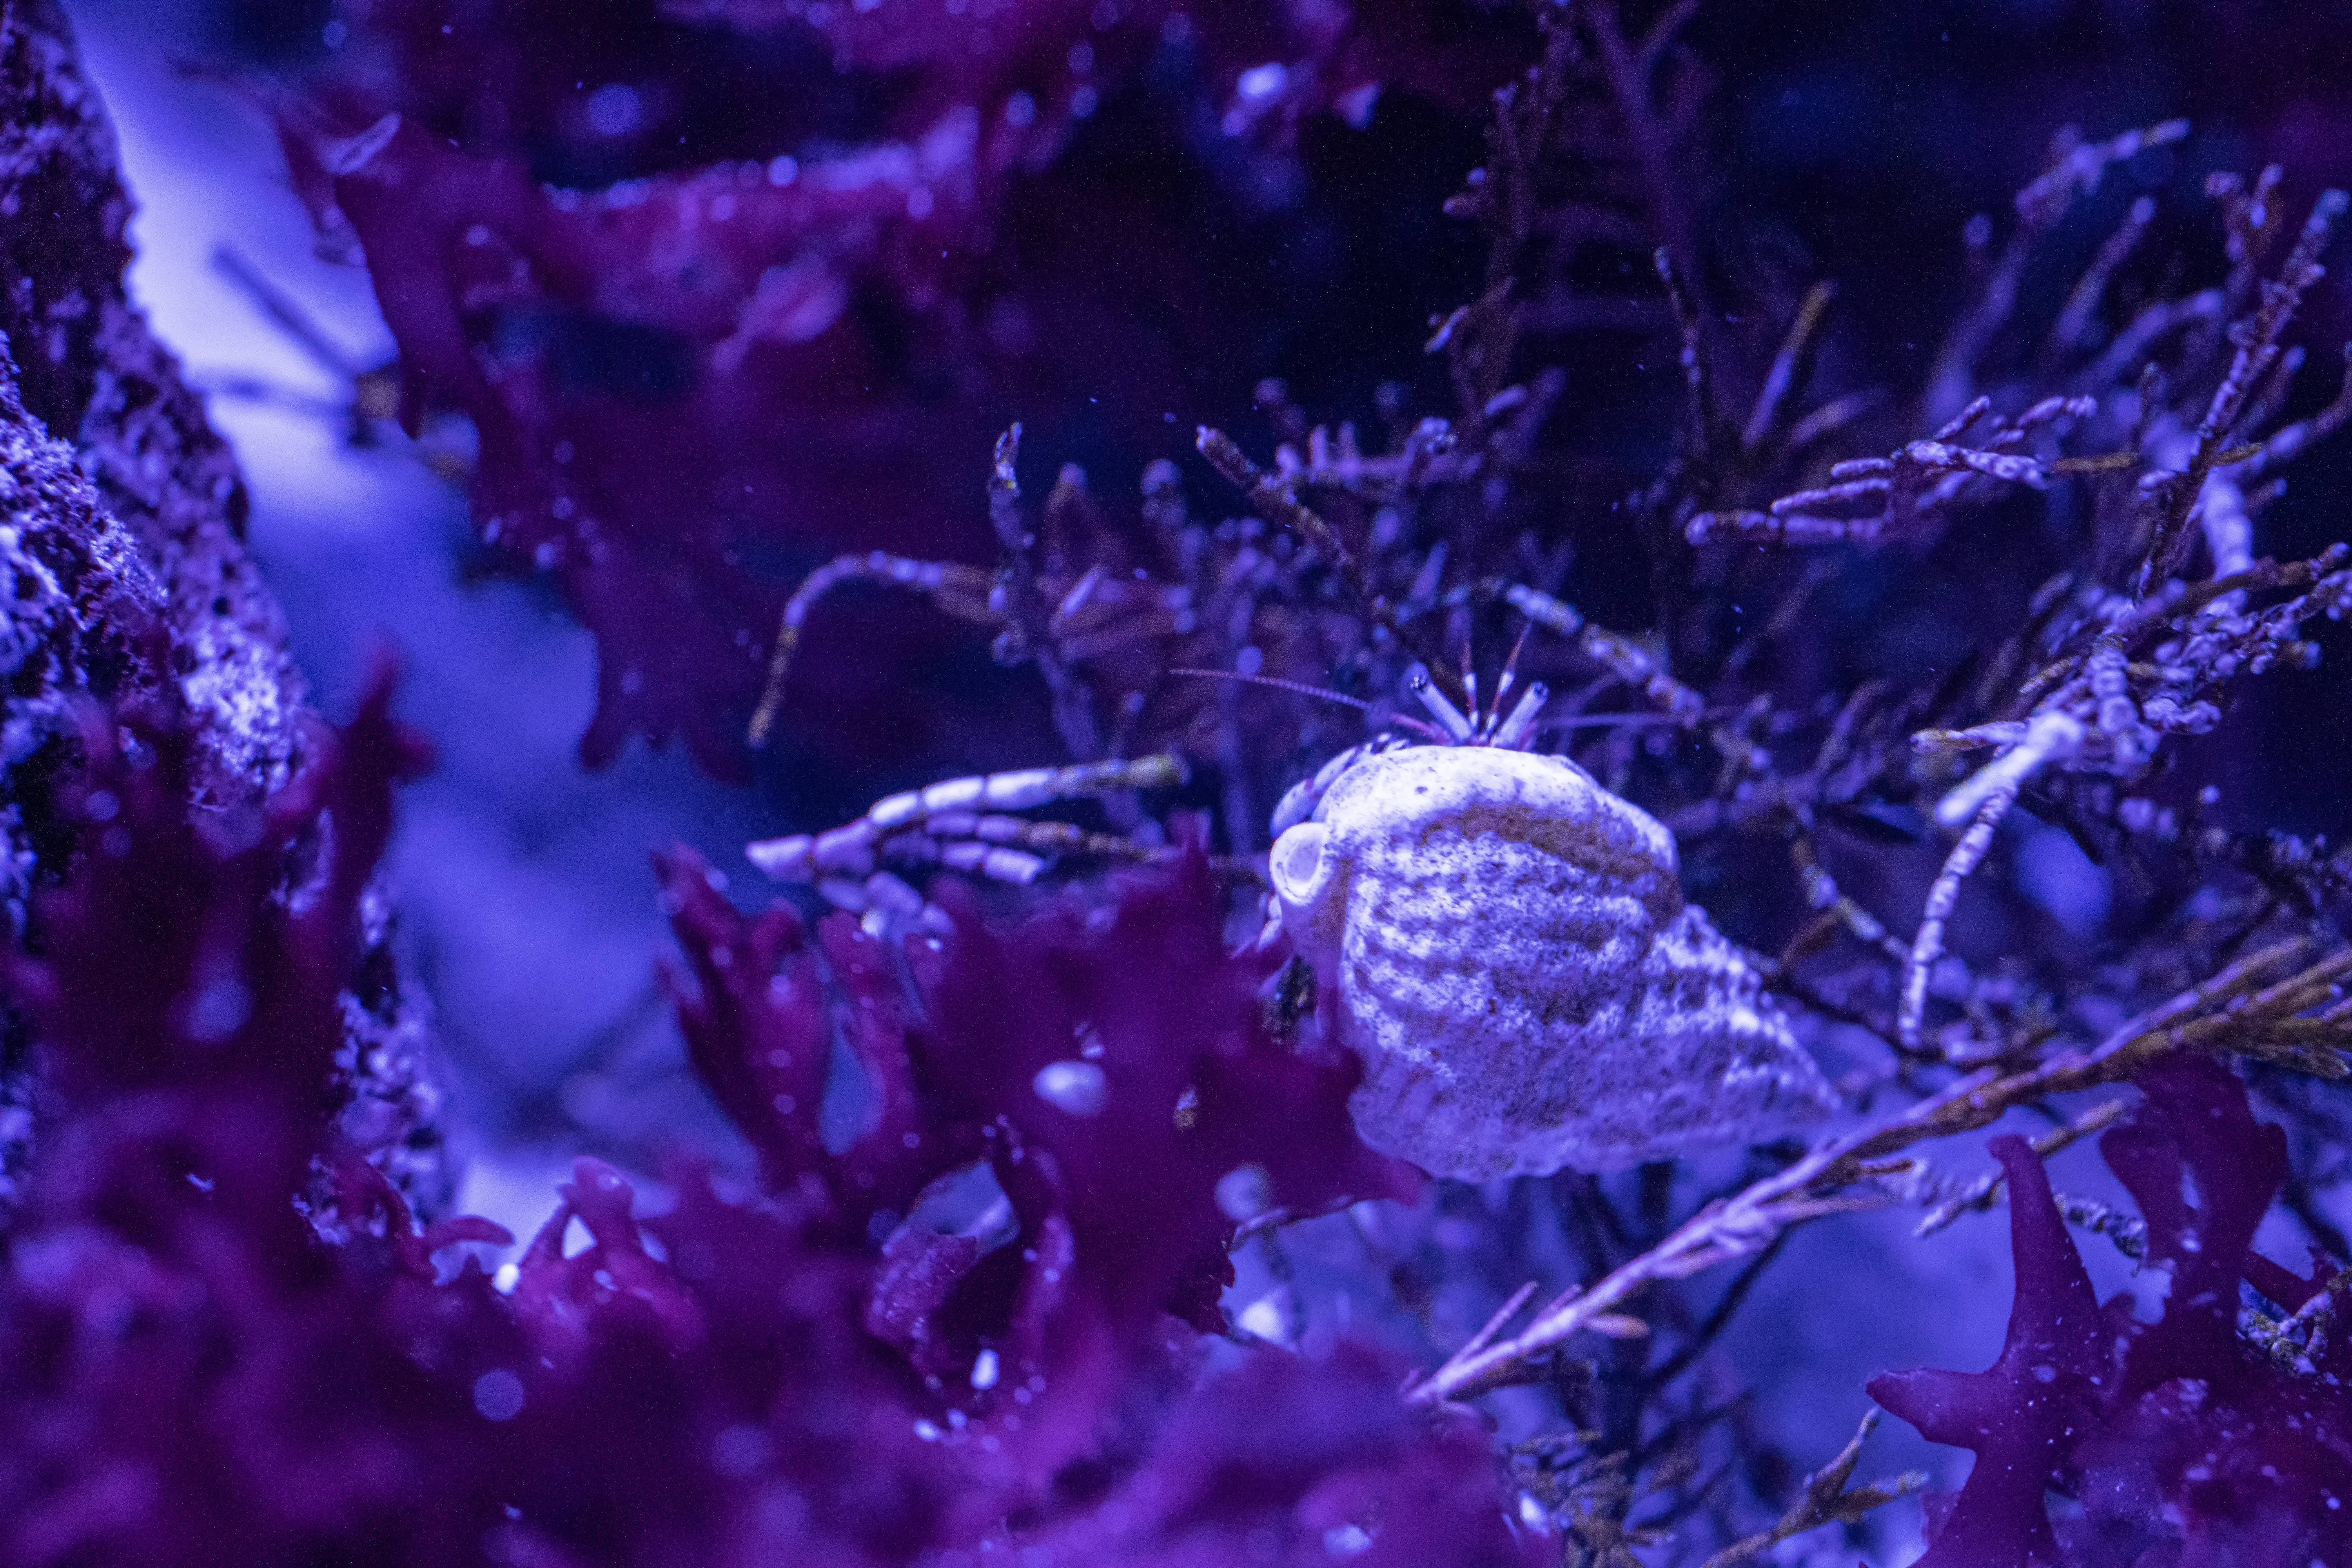
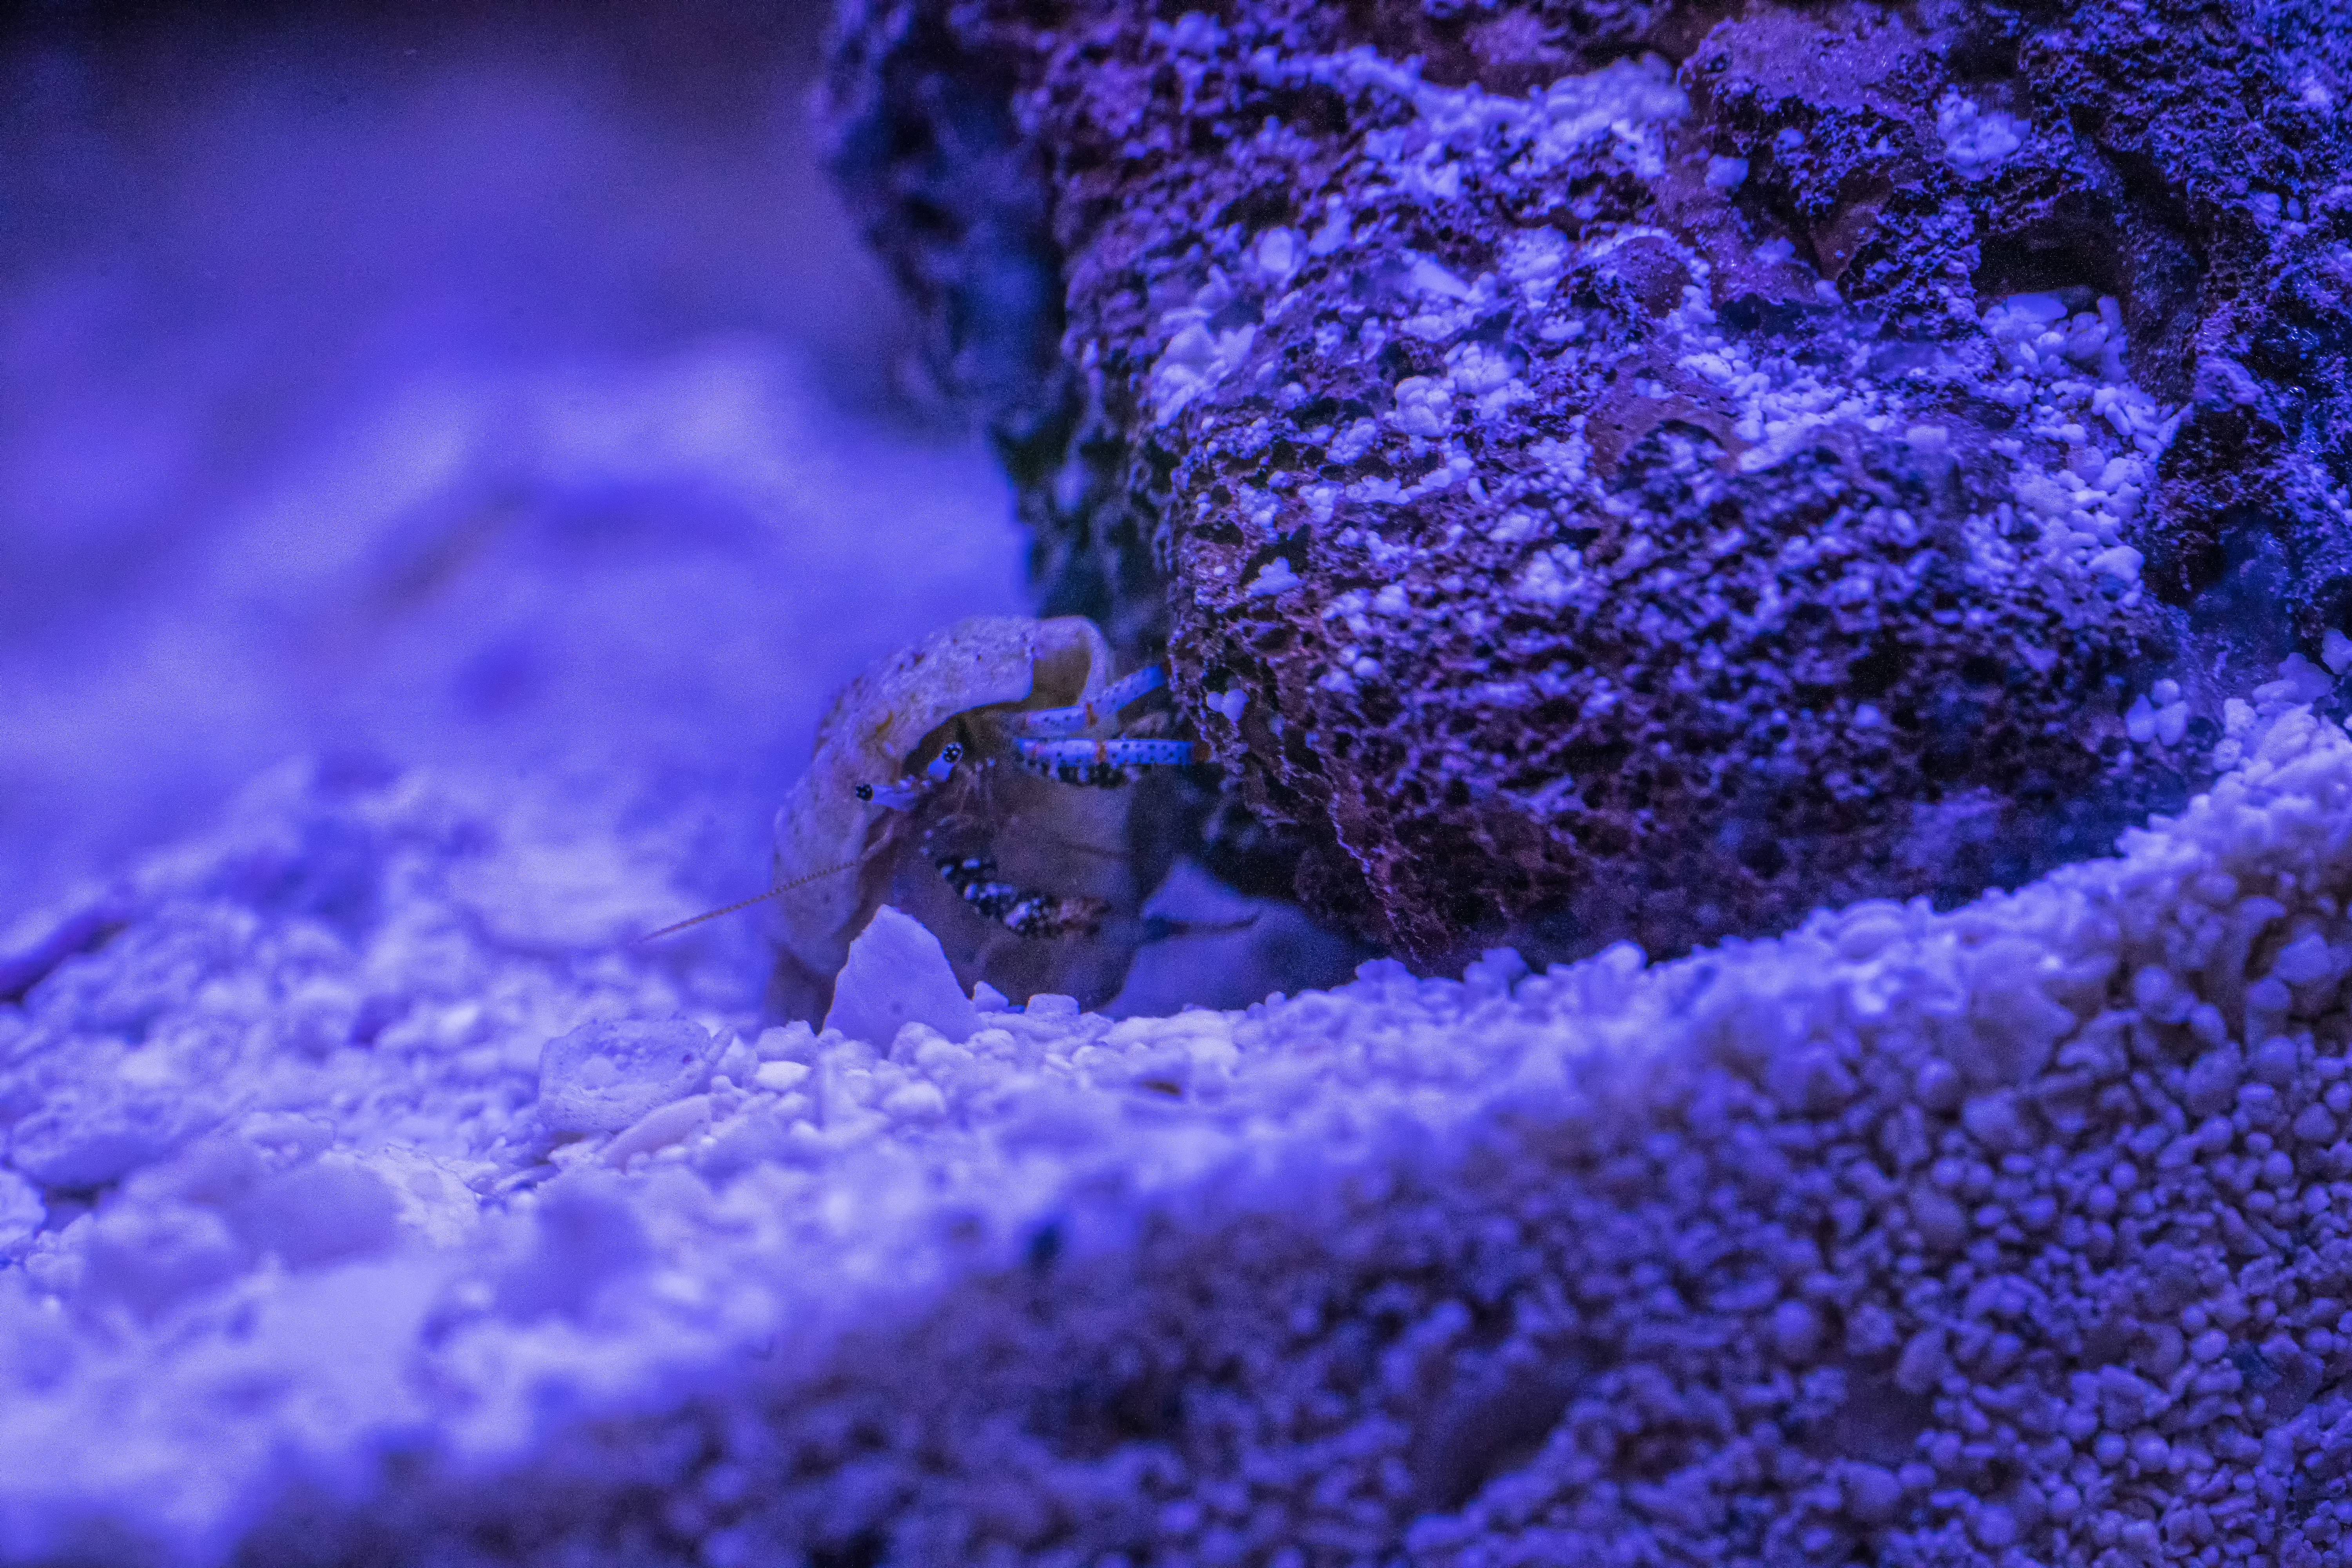
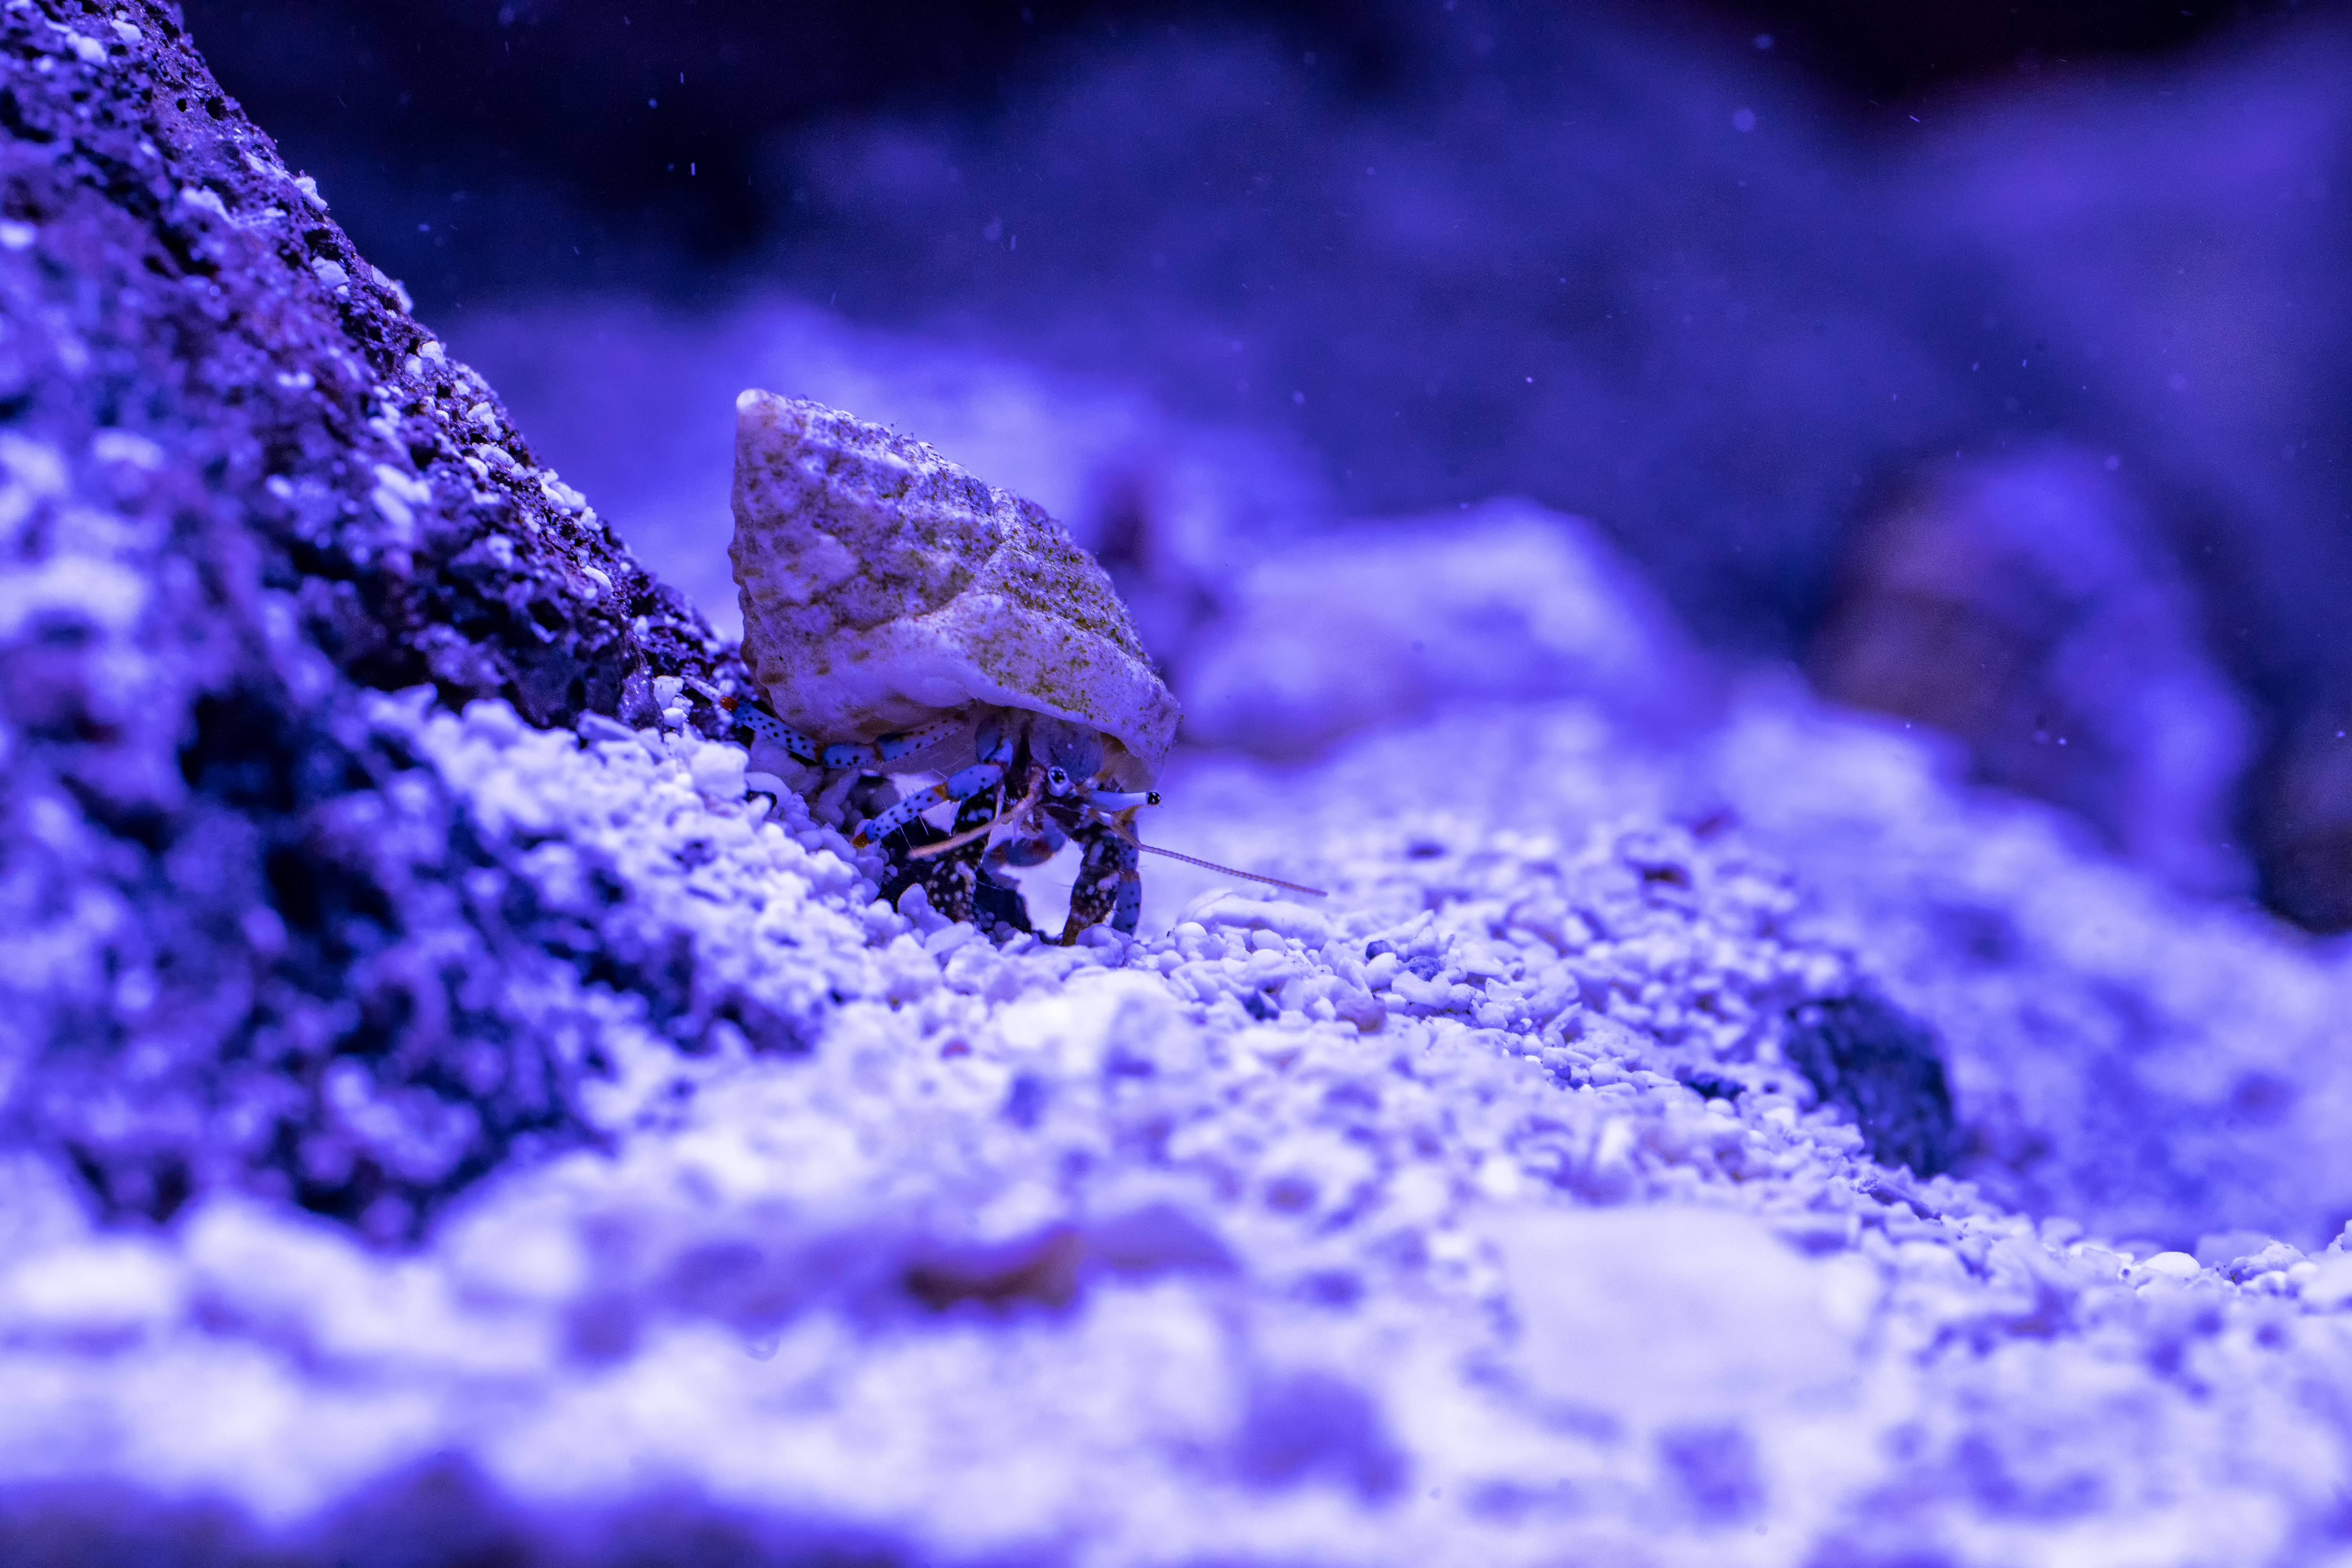
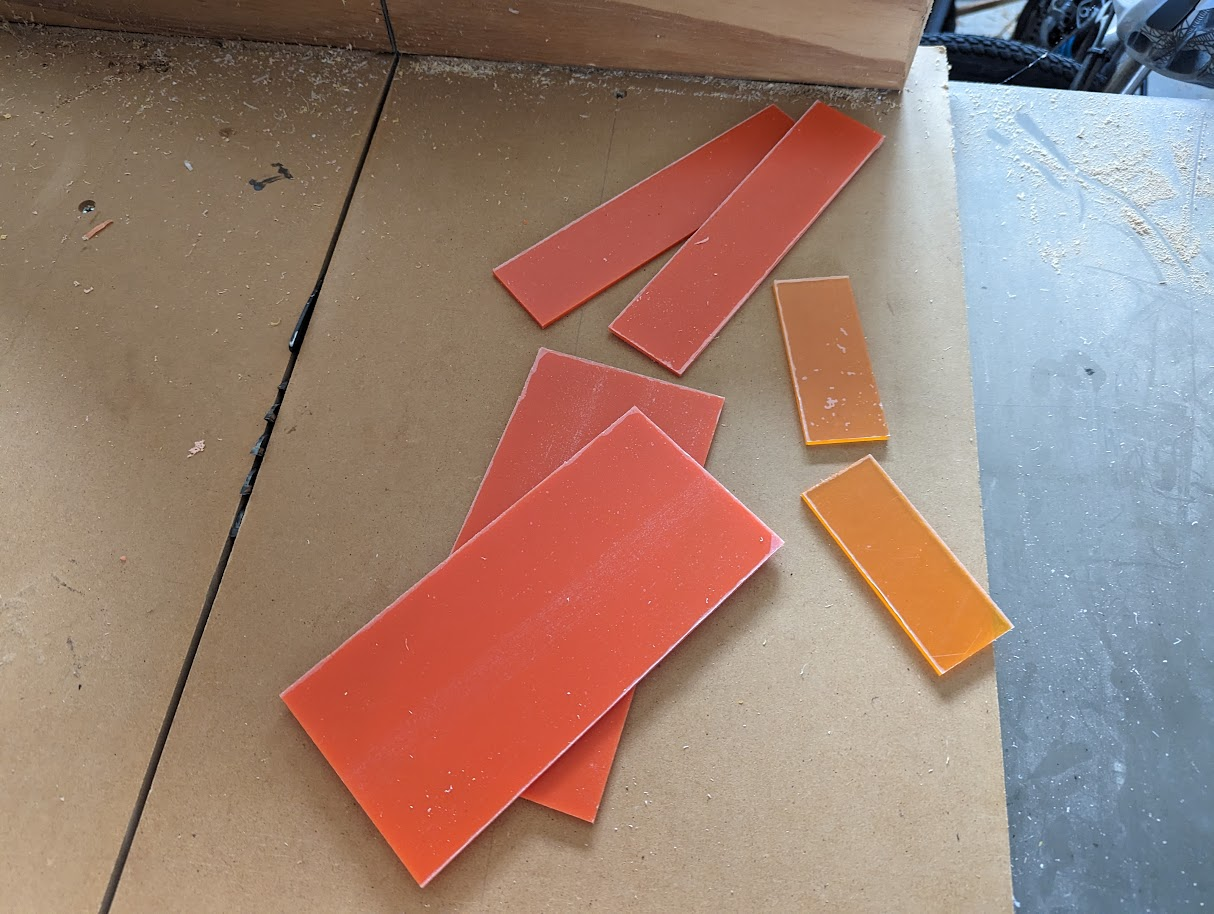
Everything up till this point has been shot with my phone. I have a much better camera (the 'real' camera), but haven't used it because I needed an orange filter for it. Or so I thought. The orange filter came and I immediately found out it's a waste of money. My camera has a white balance setting for "undersea fish" which does a MUCH better job then anything else I could do.

So what is different with the tank? Well I consolidated the piles of macro algae onto 4 lava rocks using some superglue. This really helped to better organize the tank and since this is new (and otherwise unattached) lava rock, I can move them around or remove them entirely from the tank as needed.

I also added 2 blue legged hermit crabs to the tank. Given the size of the tank, I probably won't add anymore of those fellows. I do plan to add some small snails to assist as clean-up crew. Otherwise, I think I'm ready to add some more coral. Before that though, here are the pictures:

Full tank shot:

QuSWohE.jpg


Pictures of my ducan (that I managed to knock off it's perch and needed to reglue):

TOBaf4P.jpg


zqHKTcA.jpg


hpoXuAf.jpg


And pictures of my hermits:

SqfTtG9.jpg


b6OOSFu.jpg


jsPwYs0.jpg
 
OP
OP
minorhero

minorhero

Active Member
View Badges
Joined
Dec 12, 2021
Messages
191
Reaction score
297
Location
Maryland
Rating - 0%
0   0   0
The ATO!

I hated the bottle from the moment I set it up on the tank, but did want to use a gravity fed ato for it's simplicity. After thinking about it, I came up with the idea of basically making a Flipper ATO but improve the design:

RxNHgIl.png


The problem with the flipper ato (other then it's too big for this tank) is that the fill port is on the top while the tube ports are on the bottom. This means for a saltwater tank that you have to let it go completely dry before you can refill it or you need to do a weird dance of turning it upside down quickly, taking it away, filling it while spilling water everywhere before bringing it back.

I wanted a method of turning off the water while the ato was being filled. I also wanted it to actually fit the tank.

So I bought some acylic in both opaque and translucent varieties. I cut the to size on the tablesaw:

fmCdBgC.png


Then took what would be the top piece and cut a hole for a bulkhead:

iZ9Jmla.png


1JoLuwm.png


I also took the bottom piece to my router table and made some rabbits on the edges so the ato would sit nicely between the glass walls of the tank:

NAduFHm.png


Then I began to assemble what is essentially a box using Weld-On 4.

FUBjTsU.png


A little while later, I had this critter:

8wFUX8q.png


57akLUt.png


EwgaIVW.png


You will notice that my ports for tubing in the back are different colors. That's because I ran out of ones that would bond with weld-on halfway through and didn't know it until it was too late :p

Next I needed a method of holding the tubes in place, so I drilled 4 holes a small piece of acrylic and bent it over using a heat gun.

8kjOCSZ.png


This makes sure the tubing won't move up or down when it's in use.

The reason the ports are in the back of the ato is so I can use shutoff valves between the reservoir and the tank. The sides are translucent so I can see the water level at a glance. Here is how it all looks:

VKWsg3F.png


hoeUN69.png


pG9m8OF.png
 

steveschuerger

I love Gonis and Euphyllia. Maybe too much
View Badges
Joined
Dec 11, 2021
Messages
15,890
Reaction score
37,223
Location
Newton
Rating - 0%
0   0   0
Very nice little tank. Would love to have something about that size for a clown/nem tank. But I can’t negotiate using cats as a negotiating tool as our one cat would be crazy jealous.
 
OP
OP
minorhero

minorhero

Active Member
View Badges
Joined
Dec 12, 2021
Messages
191
Reaction score
297
Location
Maryland
Rating - 0%
0   0   0
Very nice little tank. Would love to have something about that size for a clown/nem tank. But I can’t negotiate using cats as a negotiating tool as our one cat would be crazy jealous.

Cat's being catty is a real and terrible thing. It took several years before our first cat accepted our second cat. The third cat has still not be accepted by the first cat but it's only been a little over a year since he came along. I can't recommend my method of tank authorization to anyone :p
 
OP
OP
minorhero

minorhero

Active Member
View Badges
Joined
Dec 12, 2021
Messages
191
Reaction score
297
Location
Maryland
Rating - 0%
0   0   0
Love watching the progress of your build, from using egg crates, to making a ato. This has been a very neat build to follow!!!

Thank you! It's been a fun build for me, especially since the whole saltwater aspect is so different from my freshwater tanks.
 

steveschuerger

I love Gonis and Euphyllia. Maybe too much
View Badges
Joined
Dec 11, 2021
Messages
15,890
Reaction score
37,223
Location
Newton
Rating - 0%
0   0   0
Thank you! It's been a fun build for me, especially since the whole saltwater aspect is so different from my freshwater tanks.
I can definitely agree with that. Even my Discus tank isn’t really difficult comparatively.
 
OP
OP
minorhero

minorhero

Active Member
View Badges
Joined
Dec 12, 2021
Messages
191
Reaction score
297
Location
Maryland
Rating - 0%
0   0   0
Let us begin with the beginning.

Once upon a time there was a light. It was a good light. The spectrum and featureset was nice, the power was fantastic, and the price point was superb. But all was not well with the light. There was evil in it's heart. That evil had a name. The name was Fan.

Fan was there to spoil everything it touched, because though Fan was necessary, even essential for the light, Fan was also a big jerk. Fan was noisy.

And so forth....

Almost as soon as I got my NooPsyche K7 Mini setup, I knew I was going to need to do something about the fan.

My first plan was to replace the fan with a fan from a company known for making quiet fans (Noctua). Unfortionately when I first tried to do that it became immediately apparent that the fan in this light is a the 'slim' version. Specifically its an 80x80x15mm fan. Normal sized fans are 25mm thick, not 15.

That limited my options a LOT when it came to finding quiet fans. I eventually settled on a coolermaster fan. The first challenge was getting it to fit. Computer fans come in square cases that hold the fan, but my light has a round casing, so literally needed to make a square peg fit a round hole. How do you do that? With power tools!

D5aQttg.png


Using (some might say abusing) my grinder I was able to shave off the square corners:

o7IYWZh.png


Then I just needed to open up the light. The light itself is held together with 3 screws, 2 are visible and the third is hidden under a sticker:

ty6Ogdk.png


Once open I could see the current fan which has a spiffy mount held on with 3 screws that allows it to easily fit on the light.

YmvjruH.png


When removed I could see the sticker on the back which with a google search for the model number confirmed what I already knew, that this is a 80x80x15mm fan:

xHmJuk6.png


I test fit the new fan inside the casing and once happy, cut the wires connecting the old fan and soldered the connections with the new fan.

hyBNw7a.png


Tada:

Xuymimg.png


Or so I thought.... it turns out this fan was every bit as loud as the previous fan, just at a slightly different pitch...............

total fail.

Sooooo ummmmmm don't do that if you are looking to improve your fan noise on this light.

While my first foray was a failure, I was determined to make this work.

I simply couldn't find an 80mmx15mm fan that was quiet enough (I wanted something in the less then 16 decibel range). There WERE fans in the 60mm x 25mm size range that were quiet. Specifically this noiseblocker 1600 rpm 11 decibel fan. So I decided to go that route instead.

I had hoped I wouldn't need to shave the corners, but that hope was in vain.

qUaHuVf.png


I did not however need to shave as much off as the previous one. It was still very much a tight fit vertically with the 25mm of thickness, so much so that I was ultimately only able to engage 2 of the 3 scews that holds on the cover.

2mYUdcZ.png


But I doubt anyone but me will ever notice.

ftjpRYT.png


AND, this time it worked! The light is wonderfully quiet. It's not completely inaudible but it is orders of magnitude better, to the point that I usually don't notice the fan turning on or off when I am sitting right next to the tank in my office. Sooooo tada!
 

BadCrab

Community Member
View Badges
Joined
Apr 18, 2018
Messages
32
Reaction score
22
Rating - 0%
0   0   0
You're coming at this project with a unique perspective, having significant experience with freshwater tanks and the ability to modify and DIY. It's not often that someone will discuss mistakes they made or things that didn't work on the Internet - it's usually so carefully curated. This is refreshing.

It's been a very enjoyable journey so far (you're a fantastic writer,) and I hope you'll continue to let us follow this project.
 
OP
OP
minorhero

minorhero

Active Member
View Badges
Joined
Dec 12, 2021
Messages
191
Reaction score
297
Location
Maryland
Rating - 0%
0   0   0
You're coming at this project with a unique perspective, having significant experience with freshwater tanks and the ability to modify and DIY. It's not often that someone will discuss mistakes they made or things that didn't work on the Internet - it's usually so carefully curated. This is refreshing.

It's been a very enjoyable journey so far (you're a fantastic writer,) and I hope you'll continue to let us follow this project.

Thank you! I always find it weird when watching youtubers who don't report mistakes. They might present a tank build that I know is wrong as the 'only' way to do a thing and then quietly never mention it again in future updates. :p
 
OP
OP
minorhero

minorhero

Active Member
View Badges
Joined
Dec 12, 2021
Messages
191
Reaction score
297
Location
Maryland
Rating - 0%
0   0   0
Let's add more coral!

Up till now I just had a duncan in this tank. As my first ever coral, I wanted to see how it would do and decide if it was appropriate to add more. Well it's been pretty effortless thus far, so I figured it was definitely time to add some more.

I've thought for a while now that having a lot of Gorgonian corals would be pretty cool. I am less into the idea of having 1 of every type of coral under the sun, and more into having some consistency in coral for purposes of a better aesthetic. with that in mind, I've thought having a few different frags of Gorgonian growing on different rocks would be nifty.

I bought a large sized "Golden Plume" Gorgonian and then proceeded to cut it up into 5 different pieces. Definitely way more economical then buying 5 different small sized gorgonians. These all got super glued to my rock spires.

NbQ5fBz.jpg


I also bought an orange encrusting Leptastrea which came as a square. I really wanted to spread this around to multiple locations, so I used a center punch and a hammer and broke it into 3 pieces, and those too were super glued to my different rock spires. I noticed that this coral looks best when seen from straight on as opposed to from the side, so I glued them to mostly vertical surfaces. Note... it's apparently unhappy with being violently shattered and is leaking goo. I assume that's pretty normal under the circumstances and I am proceeding with doing nothing in particular for it.

KaQnZvs.jpg


Meanwhile, from someone local, I got Grube's Gorgonian for free, and a ricordea (not pictured). The grube's fragged itself when I pulled it from the bag so I glued the two pieces to opposite sides of the tank.

5m55jLO.jpg


I started to see some algae on the rocks and a little on the sand, so I added 2 mexican nerite snails and 2 cerith snails. I also added some more shells for my hermits that are closer to the existing sized shells. Here is how the hermits are looking now:

myjv7HY.jpg


rZtlSi1.jpg


And finally some full tank shots:

5E28emy.jpg


2D4cSyE.jpg


iP698ov.jpg
 

Rock solid aquascape: Does the weight of the rocks in your aquascape matter?

  • The weight of the rocks is a key factor.

    Votes: 10 8.7%
  • The weight of the rocks is one of many factors.

    Votes: 42 36.5%
  • The weight of the rocks is a minor factor.

    Votes: 35 30.4%
  • The weight of the rocks is not a factor.

    Votes: 27 23.5%
  • Other.

    Votes: 1 0.9%
Back
Top