Red Sea 750 XXL Rebuild

eeeeek

Community Member
View Badges
Joined
Jan 15, 2021
Messages
60
Reaction score
70
Location
Granite Bay
Rating - 0%
0   0   0
The front seam of my Red Sea Reefer 750 XXL was starting to fail, so Red Sea is sending me a replacement tank and stand. I have my fish, rocks and coral in a temporary RubberMaid 100 gallon stock tank and my 13 gallon QT tank. I expect there will be losses (my sub-adult Emperor Angel was the first casualty), but I'm going to try to tackle this as an opportunity to improve what I had.

My original tank was just about bone stock. I'm going through threads right now looking into what I can do to make the tank better as I can use the existing tank for dry fittings and as a real life 3D model.

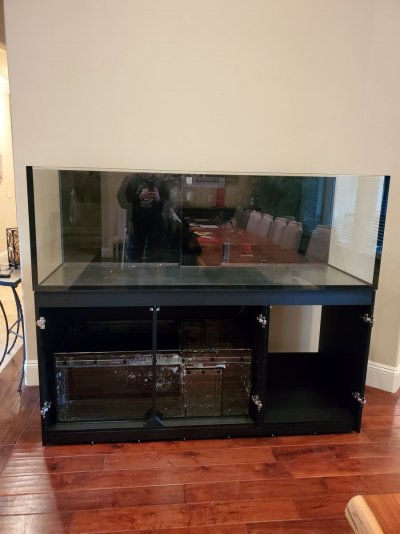
For reference, this was the tank pre-failure.
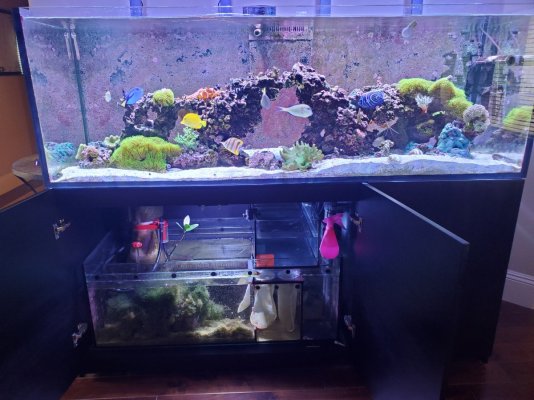
20200825_172020.jpg
 
OP
OP
E

eeeeek

Community Member
View Badges
Joined
Jan 15, 2021
Messages
60
Reaction score
70
Location
Granite Bay
Rating - 0%
0   0   0
Small update. There was a problem with the temporary holding tank. Within one day, I lost:

Sub-adult Emeror Angel
Blue Tang
Naso Tang
Yellow Tang
Copperband Butterfly
Niger Trigger
Ebli Angel
Starry Blenny
Lawnmower Benny
Cleaner shrimp

My QT tank is only 13 gallons, so I was trying to keep some prize corals in there, but as it became obvious the fish were in bad shape, I transferred what I could to the quarantine. I saved:

Sohal Tang
4 clowns (hardy little fish)
1 cleaner shrimp
Pepermint shrimp
The world's best sand sifter goby
6 year old hammer spawn
Leather coral
1 torch

Pretty much all the rest of the coral is dead. Many different SPS and LPS, including some Indos. I assume the GSP will live because it's GSP.

This much loss is devastating. I'm considering rebuilding as a FOWLR.
 

galaxy_man_66

Community Member
View Badges
Joined
Oct 30, 2020
Messages
31
Reaction score
0
Location
Phoenix
Rating - 0%
0   0   0
Where are you located do you have friends in the hobby that will help you out for the time being?
 
OP
OP
E

eeeeek

Community Member
View Badges
Joined
Jan 15, 2021
Messages
60
Reaction score
70
Location
Granite Bay
Rating - 0%
0   0   0
People came out of the woodwork to help, but time was not on my side. I'm down to 3 clowns, the sandsifter and one coral that's half dead. I'm running two QT tanks and cycling the rock in the garage.

The replacement tank is set to arrive today and I have people lined up to help put it in place on Sunday.
 
OP
OP
E

eeeeek

Community Member
View Badges
Joined
Jan 15, 2021
Messages
60
Reaction score
70
Location
Granite Bay
Rating - 0%
0   0   0
So the tank is the V2 and the stand is V3. I was thinking they were going to send me a V3 tank, but I guess they still have V2 inventory to unload.

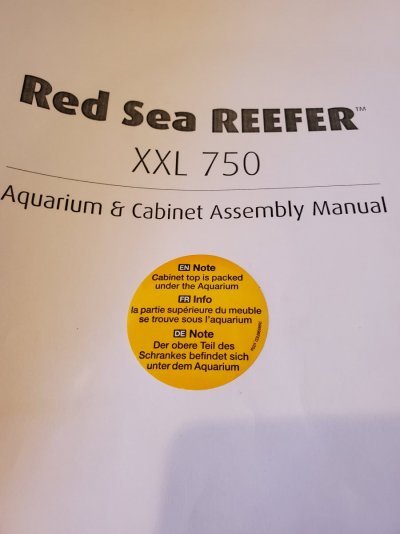
Fun Fact: The top of the stand is underneath the aquarium. I hadn't counted on that. I'm trying to engineer a way to get the stand top out without getting a team of people here.
 
Last edited:
OP
OP
E

eeeeek

Community Member
View Badges
Joined
Jan 15, 2021
Messages
60
Reaction score
70
Location
Granite Bay
Rating - 0%
0   0   0
Jumping back into it. It was an action packed weekend. I'm overdocumenting this because I have been referencing multiple different build threads and there were steps I missed for various reasons.

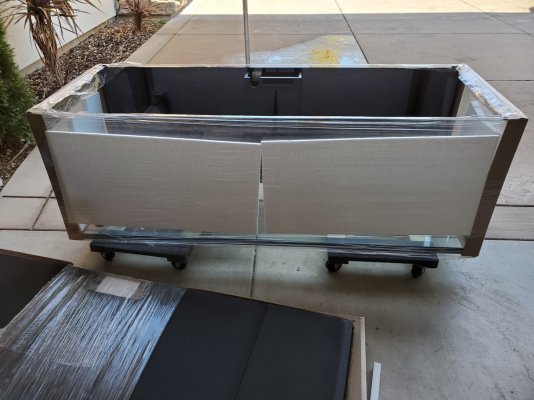
As I mentioned, several parts of the stand are underneath the tank, so you have to get it off the pallet. Fortunately, they highlight this on the instructions. While helpful, this proved to be the first of many times that the instructions were frustrating.

20210123_130219.jpg

I picked up two furniture dollies at home depot and slid the tank onto them. It was fairly anti climatic and I highly recommend having someone help to keep the dollies in place and be a general 'Johnny-on-the-spot".

20210123_125146.jpg

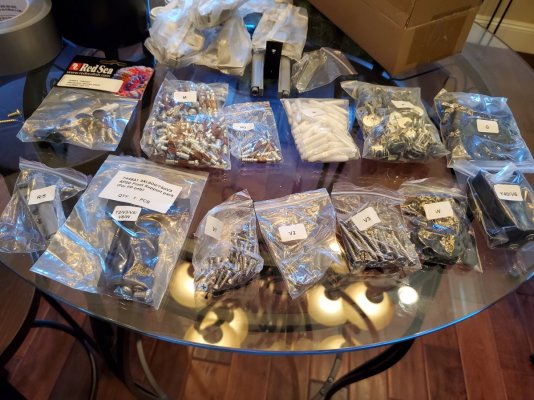
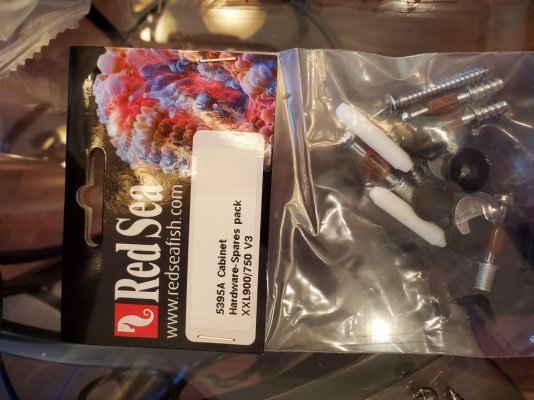
Once out of the way, I started building the stand (v3). At first, I was very impressed with the organization of the supplies from Red Sea. They even had a little bag of spare parts, so you wouldn't question why you had leftover parts.
20210123_131752.jpg 20210123_131801.jpg

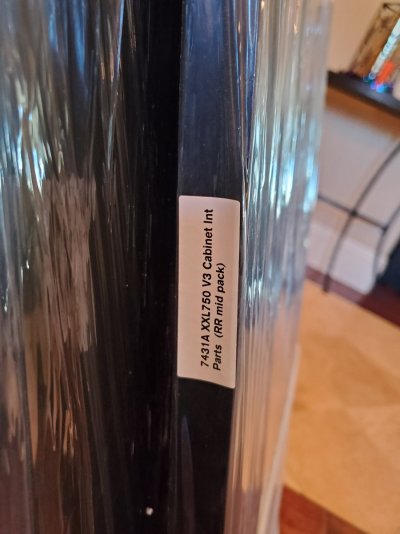
It's the labeling of the big pieces where things fell a little flat. They were mostly mislabeled to sub IKEA standards.
20210123_131849.jpg
 
OP
OP
E

eeeeek

Community Member
View Badges
Joined
Jan 15, 2021
Messages
60
Reaction score
70
Location
Granite Bay
Rating - 0%
0   0   0
Fast forward about six hours and the stand is built. There was time in there to double check things online and to eat. All in all, It was about the amount of time I expected. I ended up needed my cordless drill driver, two 10mm open end wrenches (one slim), a rubber mallet, a level, box cutter and a manual phillips head. You can use the 10mm wrench it comes with, but it's a joke.

I took my time to level it out and raise it a little higher than the old stand so I could get a swiffer more easily underneath it. I was able to slide the old stand and tank out of the way without damaging the wood floors and I am happy to report that there was only one indentation mark from the feet of the old tank. The V3 stand has more feet, so I feel confident it will be fine on the wood floor.

I spent a good 15 minutes debating how far I would set it away from the wall. The old one was 3", which was a bit tight. I ended up going with 5".

A few people showed up to help move out the old tank (sold for a song to someone who is going to try to repair it) and the new tank in. Honestly, it was less dramatic than I remembered the first time. Four people moving it was simple and in fact, when we picked the new one up off the dollies, the group determined it would be easier for two people to basically deal lift it up. You can't really slide the tank on the stand as three threaded nubs stick down a little, so we dropped it down right about where it needed to be.
20210124_135657.jpg
 
Last edited:
OP
OP
E

eeeeek

Community Member
View Badges
Joined
Jan 15, 2021
Messages
60
Reaction score
70
Location
Granite Bay
Rating - 0%
0   0   0
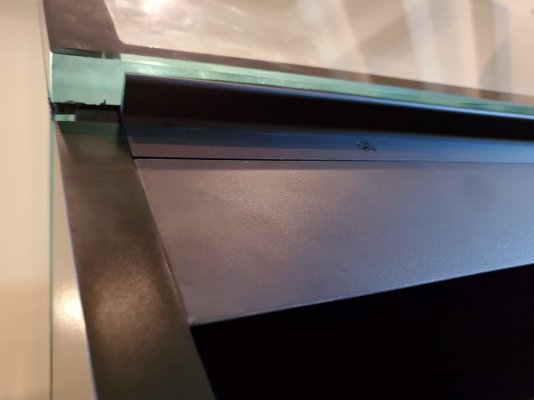
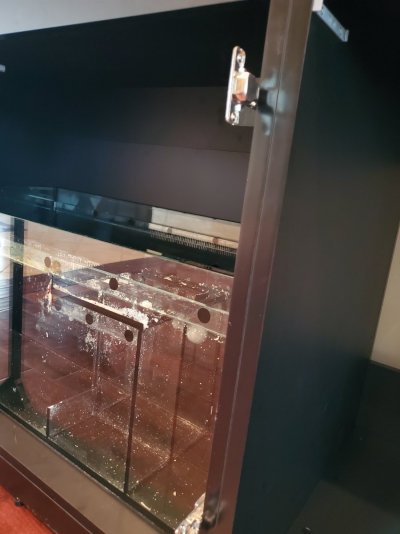
V2 vs V3 stand: Frankly, I'm very happy to have a whole new stand and not just the brace that they add to the old stand. The top on the new stand is large enough to extend out and support the front pane of glass, which was not supported on the old one. In retrospect, this seems like a huge miss.


20210125_110427.jpg

Most of us are now familiar with the brace.

20210125_110543.jpg

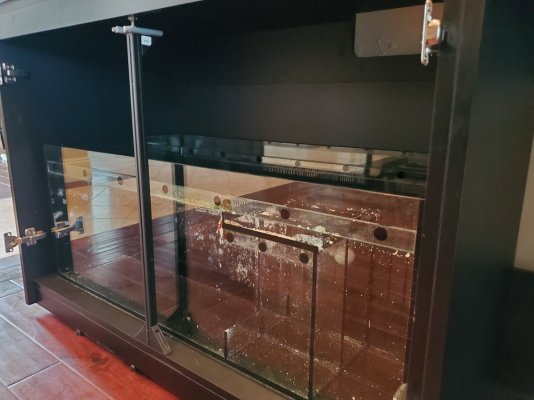
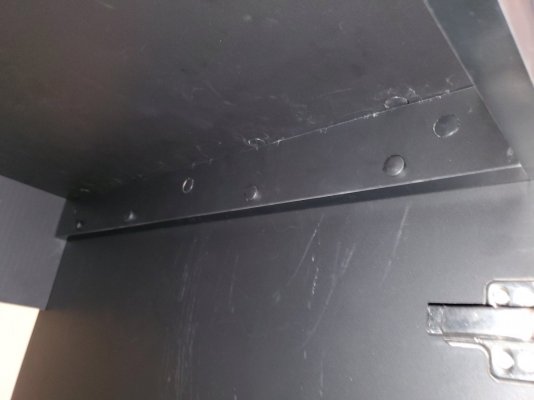
Look more closely and see that the wall between the sump and chiller compartments is now doubled up.

20210125_110538.jpg

Finally, these guys are now on the inside of the outside walls.

20210125_110554.jpg

All in all, I now have a lot more confidence in the V3 stand. Today, I'll start adding water. I built my own mixing station and make about 45 gallons at a time (that's the mix ratio that works for Reef Crystals). I plan on doing my own plumbing this time and have most of the parts on hand. I'm still debating colors, and even painting standard 1" PVC, so I may just go stock for some of the cycling. Since almost all of my fish and corals died, I'm not feeling the time crunch like before. In fact, my fiancé picked up a new Copperband and he's in QT right now, along with the surviving clowns and Diamond Goby.
 
Last edited:
OP
OP
E

eeeeek

Community Member
View Badges
Joined
Jan 15, 2021
Messages
60
Reaction score
70
Location
Granite Bay
Rating - 0%
0   0   0
You must have some big friends if two people could dead lift it!
I was a little put off, but the two biggest guys made the argument that it was easier to coordinate a two person lift than a four person lift. They took positions and then another guy and I 'spotted' from either side of the middle. Neither of the guys looked like powerlifters, but they both were stockier than me. 355lbs for the tank works out to about 175lbs per person, which isn't that bad.
 

Rubberfrog

Well-Known Member
View Badges
Joined
Jan 14, 2021
Messages
918
Reaction score
2,016
Location
Phoenix metro
Rating - 0%
0   0   0
I was a little put off, but the two biggest guys made the argument that it was easier to coordinate a two person lift than a four person lift. They took positions and then another guy and I 'spotted' from either side of the middle. Neither of the guys looked like powerlifters, but they both were stockier than me. 355lbs for the tank works out to about 175lbs per person, which isn't that bad.
That's not as heavy as I imagined it would be. Still, my old back hurts just thinking about it!
 
OP
OP
E

eeeeek

Community Member
View Badges
Joined
Jan 15, 2021
Messages
60
Reaction score
70
Location
Granite Bay
Rating - 0%
0   0   0
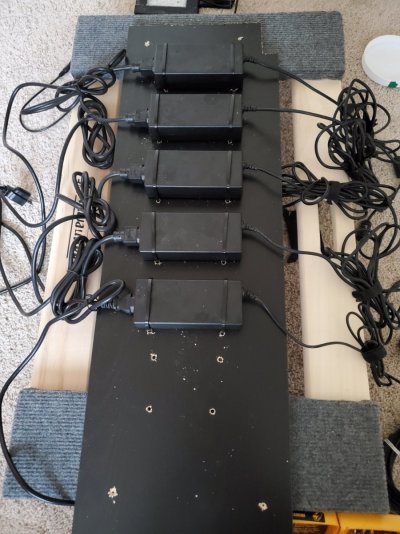
Starting on project dry side organization, version 1.1 (I've already had to change it up a little once). I plan on getting all the AC adapters mounted on the right side. I picked up two Rubbermaid black shelves (appear to be particleboard), 10x36 and cut them down to just under 30" long. I mounted them side by side and they look pretty solid. At first, I mounted the powerbars side by side, one on each board. Then, I noticed the little cooling fan on the right side, so I changed it up. I also mounted the powerbar brackets too close to each other the first time on the single board due to a comical measuring stick. One side has about 3.5 " lopped off and I've been too cheap to throw it away. I measured from the wrong side and shorted myself. I have since thrown the yardstick in the trash, where I should have thrown it years ago.

20210126_081229.jpg

90 gallons of water are in the tank now. The live rock is starting to smell only mildly putrid, so I may be able to do something with that soon.
 
Last edited:
OP
OP
E

eeeeek

Community Member
View Badges
Joined
Jan 15, 2021
Messages
60
Reaction score
70
Location
Granite Bay
Rating - 0%
0   0   0
Tangent: I want a nice, easy display for the Apex, but after the crash and buying the actual Apex, I'm wiped. I searched through boxes looking for an old phone to turn into a command center when I came across my son's old iPad mini. Ideal!

I'm not an Apple guy. I've had androids and PCs and barely know how to navigate the basics on Apple products. The passcode is also long forgotten, to the point where it says I can try again in about 25 million minutes. Crud.

After about the 6th set of instructions on how to put the iPad into recovery mode, I finally found the set that works for this old iPad Mini, and now I have a touchscreen command center for the Apex!
 
OP
OP
E

eeeeek

Community Member
View Badges
Joined
Jan 15, 2021
Messages
60
Reaction score
70
Location
Granite Bay
Rating - 0%
0   0   0
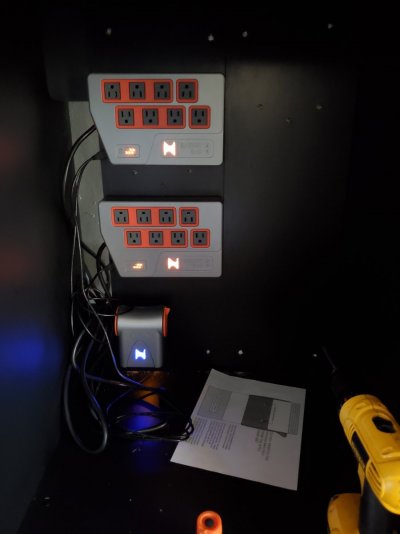
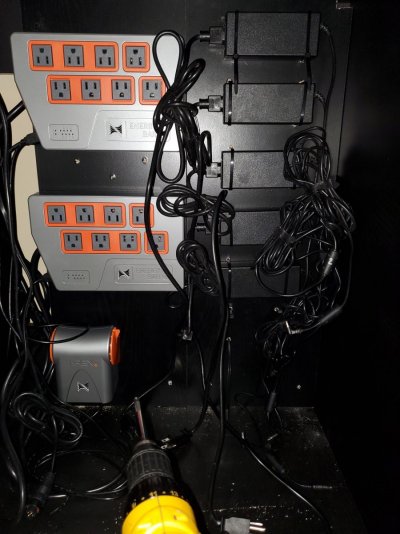
Crazy day here. High winds and a storm hit last night, knocking our the power around 8:00 PM. This morning was spent warming the water in the QT tank to keep what I have alive. After getting that under control, it was back to the dry area of the main stand. I'm operating on batteries only, so no cuts today. I did get the AC adapter wall organized and in place.

20210127_130037.jpg

I changed the zip ties up top so they wouldn't press against the back support of the stand and pre-threaded the bottom one.

20210127_132244.jpg

I use velcro rather than zip ties on the cables as I've learned that now and then you need to adjust cables or add more. Velcro gives more flexibility.

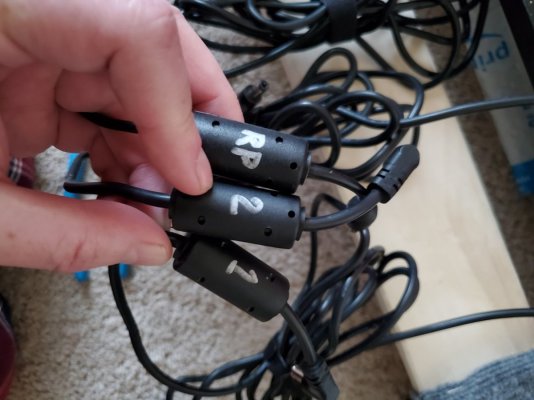
Finally, I labeled the power connectors so I'll clearly know which is which.

20210127_130142.jpg
 
Last edited:
OP
OP
E

eeeeek

Community Member
View Badges
Joined
Jan 15, 2021
Messages
60
Reaction score
70
Location
Granite Bay
Rating - 0%
0   0   0
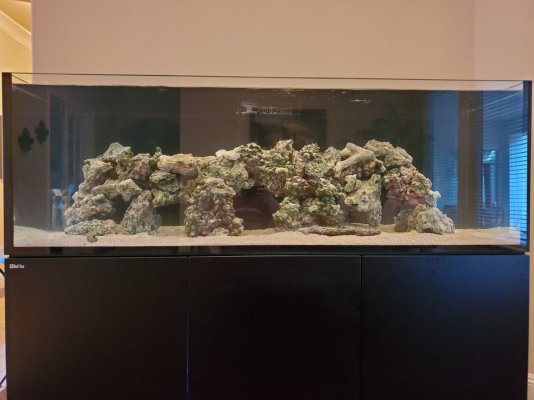
My day job has kept me busy. Rock is mostly cured, cycling the rest of the way in the tank and I build new aquascape. I went with crushed coral for substrate which is like saying I put a tang in a 10 gallon tank.

20210206_163230.jpg
 
Last edited:
OP
OP
E

eeeeek

Community Member
View Badges
Joined
Jan 15, 2021
Messages
60
Reaction score
70
Location
Granite Bay
Rating - 0%
0   0   0
Continuing work on the dry side. The tank is still cycling, so no livestock yet.

20210209_165550.jpg


The middle panel is a 12" tall door. I haven't organized behind it yet.
 
Last edited:
OP
OP
E

eeeeek

Community Member
View Badges
Joined
Jan 15, 2021
Messages
60
Reaction score
70
Location
Granite Bay
Rating - 0%
0   0   0
And control center ready. It's a gen1 iPad mini that I had lying around, so it can't run the current apex fusion app. The website works well enough, though. I also have it setup for AI Lights and other little things.

Up next: Cable management.

20210210_181419.jpg
20210210_181448.jpg
 

Being sticky and staying connected: Have you used any reef-safe glue?

  • I have used reef safe glue.

    Votes: 118 88.1%
  • I haven’t used reef safe glue, but plan to in the future.

    Votes: 8 6.0%
  • I have no interest in using reef safe glue.

    Votes: 5 3.7%
  • Other.

    Votes: 3 2.2%
Back
Top