Due to my stand failing (end panel was bowing) Red Sea sent me a replacement stand. Swapping stands on a tank this size was a metric farkton of work but at least they did what they could.
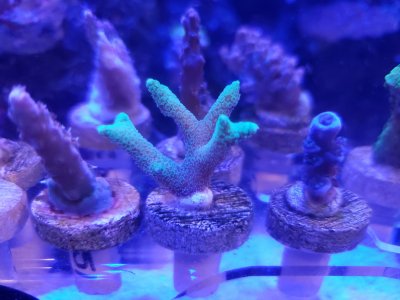
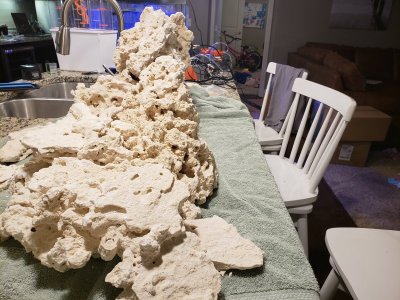
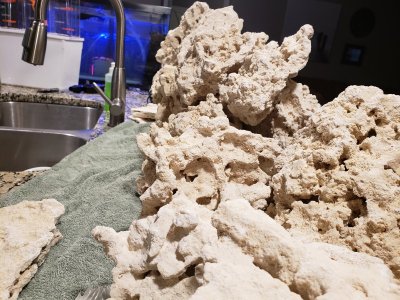
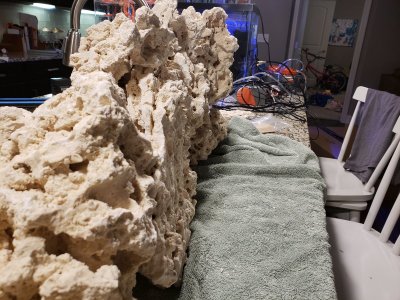
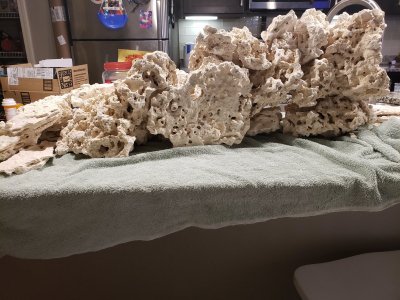
The new stand is in place. I was able to retain my larger rock structure without much change and only minor damage to the smaller one. Lost one of my Acro frags in the process but all in all my livestock are doing well. After a recent outbreak of velvet I had to leave my tank fallow anyway so that's a small silver lining. The tank is currently about 2/3rds full with just some water movement and heaters going right now. I'll finish plumbing the sump back in tonight I think.
Things were going really well until I knocked over the large vase I use for my ATO reservoir. Fortunately it didn't break but it did dump several gallons of water on my floor. I also managed to drop my Apex base unit into a bucket of vinegar. I think it's fairly dry at this point so I will try to plug it in tonight and hope for the best.
Fish are all in my 40G hospital tank that is being treated with copper. The whitetail bristletooth (the jerk who caused all this velvet I believe) is such a wimp and hides most of the time but everyone else is doing well. The watchman is NOT happy to be separated from his pistol shrimp buddy.
One more silver lining. Having the tank in a fallow period will let me really cut down on nutrient import and hopefully finish off the rest of the bubble algae problem. Now that this is dealt with I can get back to finishing my T5/AP700 hybrid fixture and trying to get my stupid Maxspect gyres to actually work for more than a few weeks.

I will be going slow and starting with a complete dry rock scape. I want to avoid some of the pest issues I had in my first reef. I've had my cube for 6 years now and I'm overdue for an upgrade. The new house is a great time to do this. Plus thanks to a recent online sale my tank will look like a frag tank for the foreseeable future.
Tank -
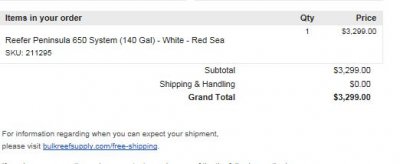
Reefer 650 in white
I'm going to cover the bottom in either starboard or ABS. This will accomplish a few things. Part of the tank I'd like to be truly bare bottom and grow zoas and/or encrusting montis etc. and they will grow better on the plastic than glass. I also hate the look of partially coralline covered glass.
The scape I have in mind will be more or less a curving ridgeline. The idea is to have a sand area on the lower flow side with the scape acting as a dam. This will keep my watchman/pistol combo happy and let me keep narrius and other sand dwellers. If sand get's kicked to the BB side I'll just vacuum it up. If I wind up hating the sand I can always suck it all out. Using some powerheads I want the top of the ridge to see very high flow, along with the steeper cliff "face". The far end of the peninsula will have some sort of small but powerful powerhead to keep water moving back towards the return. (inspiration pics)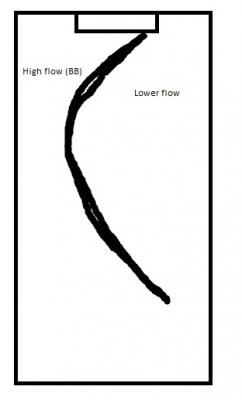
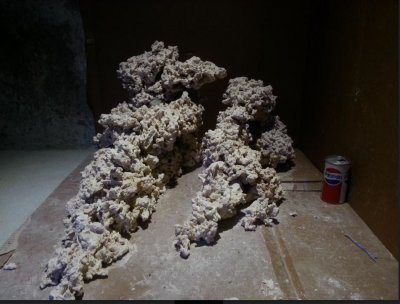

If I'm planning this correctly the scape will give me very distinct views for each side of the tank. Many peninsulas seem to more or less look like the same tank on either side. The low flow side will allow me to keep Euphillia and the like happy, with high light SPS on the ridge top (probably acros) and lower light SPS on the cliff.
Pumps -
Neptune Core 20. Gives me extra GPH if I want to run a manifold off it at some point and unlike the 15 can be run standalone if my Apex blows up etc. I wanted the quietest pump possible and the reviews say they are nearly silent. Controllability is also desirable so I can future proof my GPH needs.
I will test out flow in the empty tank and then with my scape before I start cycling. I believe I will pick up a large Maxspect Gyre to be mounted back top middle on the overflow. To either side of the overflows I'll either add another Gyre or something like a WAV/Tunze/Vortech. Opposite the return I'm considering the Tunze nanostream AC pump because of the small form factor and because I won't need controllability. It will be there just to keep water moving to the return.
General approach -
Rely on fuge as much as possible. Add skimmer according to nutrient need and as space allows. The tank will be in my living room and viewable from the kitchen. I want to run a very basic PVC drain from the wall into the sump compartment for WCs and for misc water dumping. If I go auto WC route using a dose I'll run the clean water line through the same pipe with a reservoir in the basement. (TBD, the price tag is already climbing)
Dry rock scape will be cycled, (curse a bunch) then the fuge will be fired up (curse more), then will slowly start adding fish and corals (look at credit card bills and curse then cry a little).
Lighting -
LED/T5 hybrid. This will be a DIY version similar to the aquatic life fixture. Personally, I hate the look of hanging lights so I'm going to do something a little different.
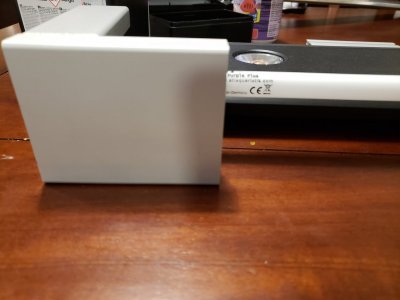
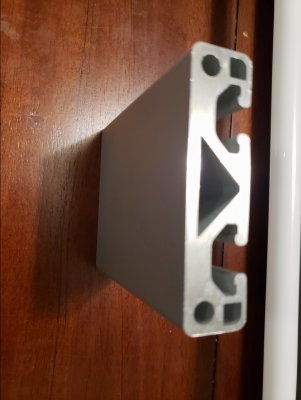
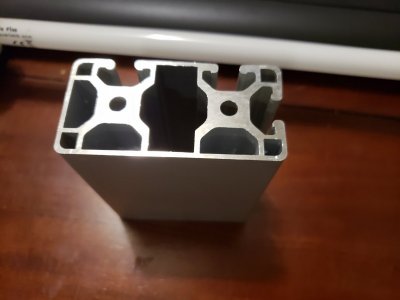
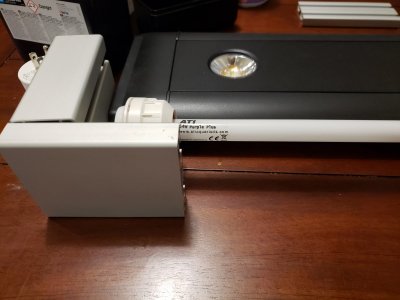
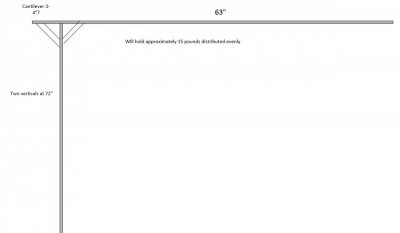
I was already thinking about using some type of tank mount when I found this thread. He used 80/20 aluminum to build an arm. https://www.reef2reef.com/threads/davids-red-sea-reefer-peninsula-500-build.348465/
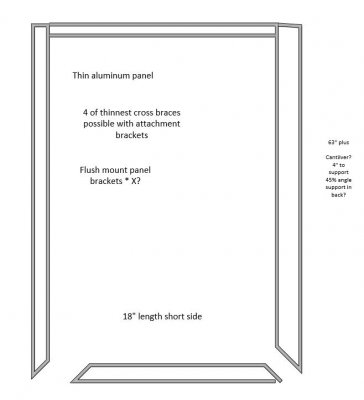
The difference is that I will be basically building a floating hood out of this stuff as well. It will have 2 supports on the overflow side of the stand, then connecting to a rectangle that will house 2-4 T5s and a Kessil AP700 with my A360NE (possibly swapped out for a 2nd Ap700 depending on how the can looks.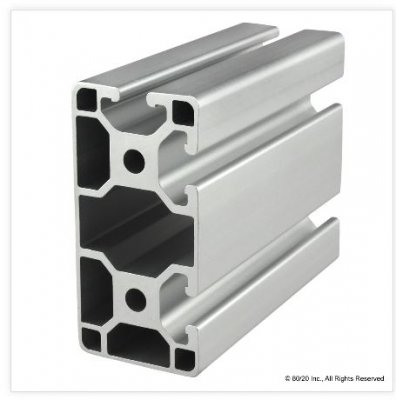
The corners will be mitered and I will bondo them if there is any gap. They make some nice flush mounts for aluminum sheeting and that will be the top of the hood with ports drilled for venting. The whole thing will get painted a nice glossy white to match the stand as close as possible. There will be nothing hanging from the ceiling and no visible cords hanging down as the cords will route through the tracks. The track is just tall enough to mount a slim T5 retrofit solution and the AP700s so they won't be visible. Ideally I'd like to be able to easily adjust the height but I haven't found a bracket from 80/20 that will work for that. I suppose the height won't change often and it's rare that I would need to remove the whole thing for access. This stuff is quite strong (and not all that heavy) and I expect very little deflection. Any I get should be easy to adjust for.
Dosing/ATO -
I'm likely going straight to a 2 part as I anticipate plenty of demand for DkH so 2 Neptune doses will be used. 1 for dosing and one for water changes. The built in reefer RO reservoir may get converted into a secondary fuge. If not I'll still supplement with a decorative ATO container outside the stand running with my aquasmart ATO if it can keep up.
Extras -
My winning personality (I can't remember what I intended to add to this section)
Fuge -
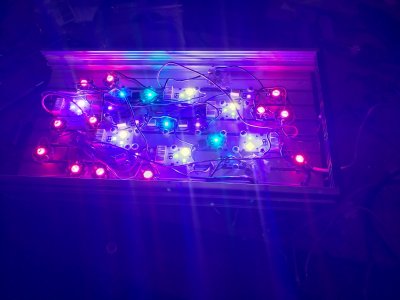
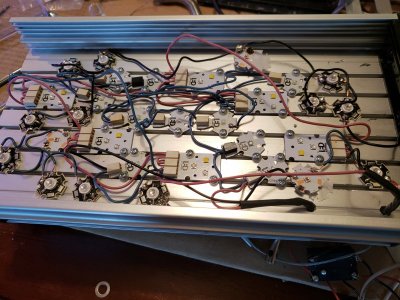
Will start with clean chaeto and maybe sea lettuce. Lighting will be handled by my old makers LED fixture. Right now it was 28 leds with a standard blue/white mix. I have plenty of room on the heat sync so I just ordered 16 assorted red LEDs that I'll mount to the sink as well. This will give me over 100watts of light with a good spectrum mix.
Skimmer - TBD
Controls -
Neptune apex, particularly as I plan on implementing the trident down the road.
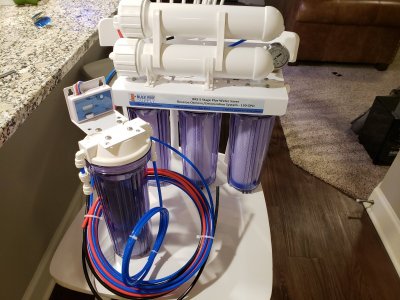
RODI - 5 stage 150gpd water saver from BRS is on it's way.
My next update will be of me adding the red LEDs and testing them and playing with the RO.
#reef2reef, #worldwidecorals,[URL='http://www.reef2reef.com/hashtags/mywwccontest/'] #mywwccontest[/URL]
The new stand is in place. I was able to retain my larger rock structure without much change and only minor damage to the smaller one. Lost one of my Acro frags in the process but all in all my livestock are doing well. After a recent outbreak of velvet I had to leave my tank fallow anyway so that's a small silver lining. The tank is currently about 2/3rds full with just some water movement and heaters going right now. I'll finish plumbing the sump back in tonight I think.
Things were going really well until I knocked over the large vase I use for my ATO reservoir. Fortunately it didn't break but it did dump several gallons of water on my floor. I also managed to drop my Apex base unit into a bucket of vinegar. I think it's fairly dry at this point so I will try to plug it in tonight and hope for the best.
Fish are all in my 40G hospital tank that is being treated with copper. The whitetail bristletooth (the jerk who caused all this velvet I believe) is such a wimp and hides most of the time but everyone else is doing well. The watchman is NOT happy to be separated from his pistol shrimp buddy.
One more silver lining. Having the tank in a fallow period will let me really cut down on nutrient import and hopefully finish off the rest of the bubble algae problem. Now that this is dealt with I can get back to finishing my T5/AP700 hybrid fixture and trying to get my stupid Maxspect gyres to actually work for more than a few weeks.
I will be going slow and starting with a complete dry rock scape. I want to avoid some of the pest issues I had in my first reef. I've had my cube for 6 years now and I'm overdue for an upgrade. The new house is a great time to do this. Plus thanks to a recent online sale my tank will look like a frag tank for the foreseeable future.
Tank -
Reefer 650 in white
I'm going to cover the bottom in either starboard or ABS. This will accomplish a few things. Part of the tank I'd like to be truly bare bottom and grow zoas and/or encrusting montis etc. and they will grow better on the plastic than glass. I also hate the look of partially coralline covered glass.
The scape I have in mind will be more or less a curving ridgeline. The idea is to have a sand area on the lower flow side with the scape acting as a dam. This will keep my watchman/pistol combo happy and let me keep narrius and other sand dwellers. If sand get's kicked to the BB side I'll just vacuum it up. If I wind up hating the sand I can always suck it all out. Using some powerheads I want the top of the ridge to see very high flow, along with the steeper cliff "face". The far end of the peninsula will have some sort of small but powerful powerhead to keep water moving back towards the return. (inspiration pics)


If I'm planning this correctly the scape will give me very distinct views for each side of the tank. Many peninsulas seem to more or less look like the same tank on either side. The low flow side will allow me to keep Euphillia and the like happy, with high light SPS on the ridge top (probably acros) and lower light SPS on the cliff.
Pumps -
Neptune Core 20. Gives me extra GPH if I want to run a manifold off it at some point and unlike the 15 can be run standalone if my Apex blows up etc. I wanted the quietest pump possible and the reviews say they are nearly silent. Controllability is also desirable so I can future proof my GPH needs.
I will test out flow in the empty tank and then with my scape before I start cycling. I believe I will pick up a large Maxspect Gyre to be mounted back top middle on the overflow. To either side of the overflows I'll either add another Gyre or something like a WAV/Tunze/Vortech. Opposite the return I'm considering the Tunze nanostream AC pump because of the small form factor and because I won't need controllability. It will be there just to keep water moving to the return.
General approach -
Rely on fuge as much as possible. Add skimmer according to nutrient need and as space allows. The tank will be in my living room and viewable from the kitchen. I want to run a very basic PVC drain from the wall into the sump compartment for WCs and for misc water dumping. If I go auto WC route using a dose I'll run the clean water line through the same pipe with a reservoir in the basement. (TBD, the price tag is already climbing)
Dry rock scape will be cycled, (curse a bunch) then the fuge will be fired up (curse more), then will slowly start adding fish and corals (look at credit card bills and curse then cry a little).
Lighting -
LED/T5 hybrid. This will be a DIY version similar to the aquatic life fixture. Personally, I hate the look of hanging lights so I'm going to do something a little different.
I was already thinking about using some type of tank mount when I found this thread. He used 80/20 aluminum to build an arm. https://www.reef2reef.com/threads/davids-red-sea-reefer-peninsula-500-build.348465/
The difference is that I will be basically building a floating hood out of this stuff as well. It will have 2 supports on the overflow side of the stand, then connecting to a rectangle that will house 2-4 T5s and a Kessil AP700 with my A360NE (possibly swapped out for a 2nd Ap700 depending on how the can looks.

The corners will be mitered and I will bondo them if there is any gap. They make some nice flush mounts for aluminum sheeting and that will be the top of the hood with ports drilled for venting. The whole thing will get painted a nice glossy white to match the stand as close as possible. There will be nothing hanging from the ceiling and no visible cords hanging down as the cords will route through the tracks. The track is just tall enough to mount a slim T5 retrofit solution and the AP700s so they won't be visible. Ideally I'd like to be able to easily adjust the height but I haven't found a bracket from 80/20 that will work for that. I suppose the height won't change often and it's rare that I would need to remove the whole thing for access. This stuff is quite strong (and not all that heavy) and I expect very little deflection. Any I get should be easy to adjust for.
Dosing/ATO -
I'm likely going straight to a 2 part as I anticipate plenty of demand for DkH so 2 Neptune doses will be used. 1 for dosing and one for water changes. The built in reefer RO reservoir may get converted into a secondary fuge. If not I'll still supplement with a decorative ATO container outside the stand running with my aquasmart ATO if it can keep up.
Extras -
My winning personality (I can't remember what I intended to add to this section)
Fuge -
Will start with clean chaeto and maybe sea lettuce. Lighting will be handled by my old makers LED fixture. Right now it was 28 leds with a standard blue/white mix. I have plenty of room on the heat sync so I just ordered 16 assorted red LEDs that I'll mount to the sink as well. This will give me over 100watts of light with a good spectrum mix.
Skimmer - TBD
Controls -
Neptune apex, particularly as I plan on implementing the trident down the road.
RODI - 5 stage 150gpd water saver from BRS is on it's way.
My next update will be of me adding the red LEDs and testing them and playing with the RO.
#reef2reef, #worldwidecorals,[URL='http://www.reef2reef.com/hashtags/mywwccontest/'] #mywwccontest[/URL]
Last edited:


