Red Sea XXL 750

OP
OP
F

frank-lloyd-reefer

Community Member
View Badges
Joined
Mar 10, 2022
Messages
39
Reaction score
14
Location
ogden dunes
Rating - 0%
0   0   0
OK here we go. A few relevant pictures.

I coincided this install with a water change, so the 40 gallon sump was mostly empty. All the way empty would have been better if you have the means. By this point I'd removed the filter sock holder thing. Getting the glass out was pretty arduous. Proper blades are crucial.

IMG_8023.jpg


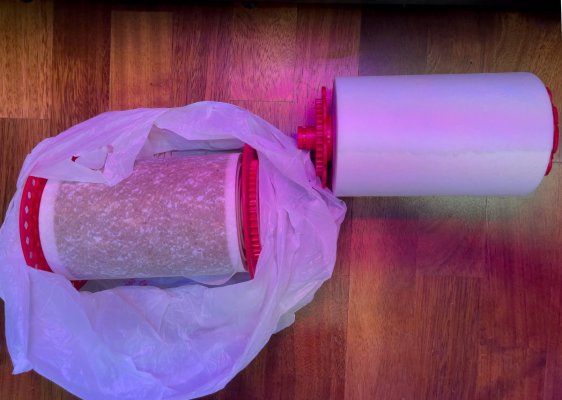
I'm so lucky I'd picked up this tool a couple months back for cutting thick poly pipe. Why? Because I couldn't get the pipe out:

IMG_8024.jpg

img_8024-jpg.2717494


And complete:
IMG_8069 2.jpg


IMG_8055.jpg


Quick chat about the install, and a video of it automatically running once. It also runs once during the longer video.

Install chat
Running once
 
OP
OP
F

frank-lloyd-reefer

Community Member
View Badges
Joined
Mar 10, 2022
Messages
39
Reaction score
14
Location
ogden dunes
Rating - 0%
0   0   0
So after one and a half rolls of ReefMat fleece here are my thoughts:
  • It's amazing how much detritus and random junk gets pulled from the water. On days when I blow off the rocks the output is double.
  • I remain incredibly pleased about my wacky install. The device is awesome, and I can still get back in the return area. Did an AWC yesterday and disconnected the ATO supply tube from the float valve easy peasy.
  • My skimmer output dramatically lessened. Whereas I was previously emptying the container every 2-3 days, I can now go for at least week if not longer. What does get collected in the cup with the ReefMat installed is black grossness.
  • Pretty sure the smell factor in my sump increased with addition of a roll of dirty filter fleece. Not really noticeable with the stand doors closed. But it can get pretty smelly in there.
  • The app is pretty great. Not janky, gives you full manual control.
  • Lastly, my water levels have stayed consistent for much longer. No longer is water rushing over filled filter socks when I am not here for days.
Because remote automation is a key requirement for my system, I couldn't be happier thus far.
 

Attachments

  • reefmat.jpg
    reefmat.jpg
    154.5 KB · Views: 42
OP
OP
F

frank-lloyd-reefer

Community Member
View Badges
Joined
Mar 10, 2022
Messages
39
Reaction score
14
Location
ogden dunes
Rating - 0%
0   0   0
Stuck in disconnected-from-Fusion land:

Does not appear to be network related.
 
OP
OP
F

frank-lloyd-reefer

Community Member
View Badges
Joined
Mar 10, 2022
Messages
39
Reaction score
14
Location
ogden dunes
Rating - 0%
0   0   0
Stuck in disconnected-from-Fusion land:

Does not appear to be network related.

Follow-up: It took all of a few minutes for tech support to declare the base unit broken. The process for replacing it is you give them a $300 deposit, you send in the broken one and they send you a replacement. If the original unit wasn't broken by water damage or anything I caused they will refund the $300. Pretty cool how there's an online process for this that includes the ability to have a unit overnighted for some additional cash.
 
OP
OP
F

frank-lloyd-reefer

Community Member
View Badges
Joined
Mar 10, 2022
Messages
39
Reaction score
14
Location
ogden dunes
Rating - 0%
0   0   0
A couple pictures from last night. I think I'm going to have to break out the DSLR. My iPhone is not cutting it with 71".

Additionally, I have a UV sterilizer on the way. The 40 watt from Aqua UV. I already have a Sicce Syncra 9.0 for the pump. The Siccee was supposed to be my main return pump but it took months to arrive so I went with a Cor-20 for the primary return. I'm going to install the sterilizer in the neighboring dose pump closet, which means adding a couple more holes for the 3/4" supply and return tubing. Really not looking forward to that part of the endeavor.
But definitely looking forward to less frequent (daily) glass scraping and dino management.

IMG_8878.jpg


IMG_8884.jpg
 
OP
OP
F

frank-lloyd-reefer

Community Member
View Badges
Joined
Mar 10, 2022
Messages
39
Reaction score
14
Location
ogden dunes
Rating - 0%
0   0   0
It was a bit of a journey getting to this point. It involved things I don’t think I’ll ever forget.


First up, the UV sterilizer. It’s a 40 watt unit from Aqua UV. It’s being supplied by a Sicce Syncra 9.0 (that is very, very loud — need to figure that out). I also put a flow control module on the the supply (that is reporting a lower than expected flow rate). I had a lot of issues with the FMM unit that it was plugged into. The FMM was “disconnected” a lot until I pulled out the flow control cable. Looks like this is a common problem, I need read up on it some more.

To get the UV plumbed in the closet I needed some additional holes in the wall. Which left me with two extra holes due to discovering some incompatible whatnot within the walls. This really bummed me out. I may put a plate of some kind over it that covers both the good and useless holes. Then again, the holes are behind the tank so it’s a task that is low on the low on the list of priorities.

Aside from the drilling, the install went really well. When plumbing is involved my first attempt at installing things usually involves leaking and some screw up’s that lead to re-installations. So I was very surprised that when I turned on the UV power there weren’t any leaks. Feeling proud of myself, I went to the kitchen to grab a drink. And that’s when I heard the waterfall.

Terrified, I ran to the tank to discover that the supply tube had popped off the UV pump. If you can imagine installing a firehose in your sump that points upward, then turning it on full blast, it looked like that. And it was so loud. Upon seeing this horror, it took me a beat to get past the omg factor and into crisis mode, which is something I’m really good at.

After killing the power I mopped it all up pretty quickly. The only place I couldn’t get to was the small gap between the sump and the back interior wall of the stand. This irked me, but aside from draining the sump the and pulling it out there wasn’t much I could do.

What happened? The culprit was a plastic clamp installed at the point of failure. It had popped off. When everything had dried, when I regained a shred of self confidence, I hooked it back up again but super glued the living hell out of out of the nozzle on the pump. Which seems to be OK now. But man that sight and sound — something you should never witness nor hear inside your home. I’m still shaken.

If you’re like, “yeah, but what’s the story with the fire extinguisher?” I’ll get to that in a bit.

A36EF31E-C3ED-43B2-B748-E4031957E13A.jpeg
66DE51B1-7C0C-427A-A36E-624C21F8C3A4.jpeg
 
OP
OP
F

frank-lloyd-reefer

Community Member
View Badges
Joined
Mar 10, 2022
Messages
39
Reaction score
14
Location
ogden dunes
Rating - 0%
0   0   0
Less than 24 hours before I was leaving to spend eight days in Disney World with my girls, the Trident began to fail. The "no water sample" error. This guy's post was extremely helpful:
How to fix no water sample

Here is my take.
Fixing the no water sample issue

I'm not sure what I would have done if it didn't work while I was on vacation (FYI my mom was house sitting to feed the fish). Then again, because I got it working I ended up being the source of a crucial issue.
 
OP
OP
F

frank-lloyd-reefer

Community Member
View Badges
Joined
Mar 10, 2022
Messages
39
Reaction score
14
Location
ogden dunes
Rating - 0%
0   0   0
Because the Apex unit had recently fried (see previous posts) , I had to go through the arduous process of re-setting up every single connection. There were a few things I did not get completed before the Disney trip. One of them being the Dos units. They were connected but renamed, and they were no longer set to dose the tank automatically. Dumb, but it was really the calk/alk pumps that I cared about, and they were the first pumps in the chain so I knew which ones to enable remotely if the levels start to get wonky. But when starting and stopping an alk dose, network latency showed the pump as off when it was really still on. It had been dosing for some 1-2 hours. I discovered this while waiting in line for a ride. Don't panic, I thought. My mom was there, so if there was something catastrophic going on she would notice.

Many hours later, my mom called. Something was wrong.

Screen Shot 2022-08-26 at 6.56.56 PM.png


The internet was pretty clear about what to do. Don't panic and get some water changes in there asap, which I obviously couldn't do. The Trident was reporting a level north of 15dKH. Calcium levels were toasted, but folks said levels were probably not going to be accurate until this event had clearly passed. My mom said the only fish she could see were the two clowns.

When I arrived back in the dunes the glass basically looked the same as my mom's weird pictures. So I began to scrape and was immediately taken aback. My coral looked amazing. All of the SPS had beautifully extended polyps. Growth definitely continued, at a seemingly quicker pace while I was away. And all of the fish? They were just fine.

I don't know how to explain it. I shut off the skimmer halfway through the trip. Had I been over skimming? I'd also decreased the amount of time the lights were on. The three Sky lights are wicked powerful and have the ability to enact harm if I'm not careful. No idea, but really interesting nonetheless.
 
OP
OP
F

frank-lloyd-reefer

Community Member
View Badges
Joined
Mar 10, 2022
Messages
39
Reaction score
14
Location
ogden dunes
Rating - 0%
0   0   0
The alk event was one week ago today. Pics from today:
IMG_9715.jpg


IMG_9717.jpg


IMG_9711.jpg


I did one water change that crucially included vacuuming the substrate. In addition to healthy coral I also had an algae bloom.
 
Last edited:

Reefacist

Active Member
View Badges
Joined
Jun 26, 2020
Messages
435
Reaction score
332
Rating - 0%
0   0   0
i follow this thread (posts) with great interest. I “ordered” a REEFER XXL 625 last weekend, with the order being confirmed on Tuesday and with delivery early next week. Stocks of the XxL 625 didn’t quite materialise because Red Sea is switching over to the 625 G2. The confirmed Tank is the 625 G2.

Between ordering and getting a Tank delivery “in motion”, I had plenty of time to consider if I had made the right choice. I have access to all the Red Sea manuals, drawings and other RS info. There is also a great many threads discussing Red Sea Tanks, the cabinets and any potential issues with gaps appearing between the Tank and the top of the cabinet e.g. observed with the “paper test”.

I observed that the range of Tanks that would fit in my Sitting Room have changed over time. RS have made changes which improve the product and seek to minimise the amount of issues (reducing their costs) until what we now have. My selection considered the overall size: 425, 525 or 750 Tank widths and the available space (long wall, divided in half with a fireplace and with existing furniture on the non Tank side). Whilst I could fit any of the widths, I settled on the 525 Tank length but ordered the 625 for the additional width and height. But, not before having downloaded all the manuals, drawings and figuring out what has changed and the differences.

Although I convinced myself that the XXL 625 was the right Tank, I have ended up with buying the 625 G2. In the UK the prices for the G2 increased by a small amount and the XXL (R3, G1) reduced. The G1 to G2 changes didn’t justify the price difference (for me) and RS listed differences which apply across the board but which were (mostly) already in place on larger versions.

525, 625 and 750 Tanks and cabinets are mostly more similar than different between G1 (aka R3) and G2. Like all companies, RS change their products based upon issues but only make changes where the additional costs are justified. These changes show up as obviouse things Tanks (dual outlets, 2 return pipes, diaphragm valves) etc. but also subtle (but sometimes important) changes.

The most significant change on 525 was the addition of a brace in the middle of the 525 cabinet on the G2 version. Any issues found with early 750 and bigger Tanks required RS to add a metal brace in the middle of the sump compartment so that the Tank cabinet has support spanning the front over middle of the Sump and the dividing wall between Sump and the Chiller cabinet. The 525 has same capacity but width heights were altered (slightly).

The drawings for the 525 R3 show a revised Sump layout but without a brace or a “brace kit”. The 525 G2 has a brace over the middle of the Sump. For all the parts of the cabinet all the P/N are unchanged except for the brace and the front kick board being black/white rather than a black and white separate version. This surprised me because if it is deemed necessary to add the brace on G2 then what about existing customers of R3, G1 Tanks. It may be that the change in width/height cause the change to be implemented and not because of Tank sagging (returns etc.).

The 750 Tank and Cabinet are similar except a brace lit was offered to 750 owners and became standard with the 750 R3 version. The G2 version continues with the metal brace. Looking back, you do wonder how a Cabinet could be designed with only the Sump/Chiller divider providing support at the front?

Similarly, the XXL 625 had a brace kit that became standard on the 625 R3 and this is carried over to the G2. Only the kick board being black and white vs a separate black and white versions changed. I think RS packages the doors/sides with the Tank and the cabinet is boxed separately so that the same Cabinet can be provided for both black and white versions?

The R3 changes is mostly about improvements in the Sump layouts. The XXL Sump (I was most interested in) has the “same layout” and siize as the newer G2. What changed, was not having a fixed section for the Socks and the removal of the front slot so that the dividing wall no longer has two positions. On the RHS there is no glass wall for the RHS slot. I look at these changes as being for the benefit of RS e.g. as a cost reduction. Similarly for the 525 and 750 R3 Sumps.

Red Sea make a “big thing“ out of the change to a removable Sock area so that a ReefMat can easily be installed. It is certainly true that (for me) the idea of having to cut way the silicone and remove glass on the. XXL 625 R3 so that the ReefMat can be fitted. Especially as I have seen (and like) the ReefMat in my LFS.

I didn’t like the idea of cutting a new Tank, especially as this becomes a “one way street”. Cut the Sump and you cannot revert to using Socks again. Sell the Tank and the ReefMat is no longer an option. Even so I still preferred the cost saving of the older XXL 625 R3. Because…

Regardless of choosing the RS ReefMat or Clarisea (or similar) the cut away of the R3 Sumps isn’t required and the benefit (to me) don’t justify making the change. With the 625 G2 that I have ordered, I do have the “benefit” of the plug n play Socks removal and so the older XXL 625 R3 has (for me) no real disadvantage. Because…

Red Sea provide a Product FAQ for the ReefMat that show how it can be added to existing R3 Sumps (or earlier versions). The same layouts should also apply to G2 Tanks (same size and layouts).This also applies to most of the bigger Tanks including 525 and 750. Why ignore the benefits of the G2? Because…

Without a Protein Skimmer and ReefMat, the R3 Sumps have the RS Reservoir initially over the Sock are and close to the pipework/valve. Adding a ReefMat means either cutting out the existing Sock Dividers (or removing it if it is G2). Another option is simply to position it to the left of the sock area. If it replaces the Sock location, then it also sticks up above the Socks area and the RS Reservoir has to be moved (or removed).

If you are using the ReefMat (or similar), then you had to move the RS Reservoir. More than likely, you will use a Protein Skimmer. Adding the Protein Skimmer requires that the RS Reservoir is removed if it was already moved to the LHS. Removal of the RS Reservoir means that you also have to find a new location and Red Sea didn’t provide a shelf/supports in the Chiller compartment. If it is placed on the base of the Chiller Cabinet then an pumped OTA is needed (and worst case case a barrel outside the Cabinet is required).

The Red Sea Hardware ReefMat FAQ provides two options for most Red Sea Tanks including 625 but also 525 and 750. Option 1 requires removal of the Socks Compartment and giving up the RS Reservoir that sits above it after installing the ReefMat and where a Skimmer is also in the Sump.

Option 2 is the most interesting (and for me beneficial) choice. It doesn’t require cutting the Socks area (on pre G2 Tank) and it accommodates the ReefMat, Skimmer and Reservoir. There is a small area that s a “dead space on pre G2 Tanks, but the advantage overwhelmingly trumps the disadvantage of either cutting the Socks area or going without the RS Reservoir, IMHO. The common layout of R3 Sumps should mean that the same Option 2 can be used for my own 625 G2 Tank.

FWIW, the Red Sea configuration wizard suggests an RSK-900 and ReefMat 1200. The layout shows the RS Reservoir removed. Only when you look at the FAQ, do you see the option of keeping all three components. I opted for the 600 skimmer for the size of tank and the ReefMat 500 because these are big units and Sump space is at a premium. The combined “working” width of 600 skimmer and ReefMat 500 is 12cm (5”) narrower than the RS suggestions. Overall the revised layout in the G2 versions doesn’t (to me) justify the extra cost. That said, I’m trying to justify the additional expense incurred and the best thing (so far) appears to be better circulation with dual return outlets.
Just read this. Good detailed post with good info. I actually bought the v3 xxl750 a year ago and just opened it now. I was kinda bummed to find out the g2 came out. It was hard finding info on the difference but this post did a good job pretty much what I found out searching the web for 30min. At the end the difference made my spray paint my pluming black/red lol but no REAL big improvement. I guess hard to improve on a rectangle glass tank with ultra clear glass. “Look at our new 2024 version. It is still rectangular and has ultra ultra clear glass”
 

Caring for your picky eaters: What do you feed your finicky fish?

  • Live foods

    Votes: 13 27.7%
  • Frozen meaty foods

    Votes: 39 83.0%
  • Soft pellets

    Votes: 7 14.9%
  • Masstick (or comparable)

    Votes: 3 6.4%
  • Other

    Votes: 2 4.3%
Back
Top