ReefBase10 - 300 gallon inwall system 15 years in the making

lactose

Active Member
View Badges
Joined
Mar 11, 2009
Messages
428
Reaction score
494
Location
Chicagoland
Rating - 0%
0   0   0
I have been meaning to start a build thread since I started this system 11 months ago but I have been scraping time just to work on the tank. I am finally here and this is my build thread. I will both update on what I have built and completed and what I am doing going forward. This system is primarily built on three key ingredients:

1) 15 years of learning from my very first saltwater tank around 2002 to all the other systems I have in the house today. This is the culmination of every lesson learned, every wet floor, every carried bucket of water and negative outcome of a short term or impulse decision

2) Patience & research. I have learned in life and in reefs that only bad things happen quickly, good things take time and things work best if you know what you are doing. I have not rushed any part of this and won't going forward. I want this system running awesome 15 years from now. I have read a high percentage of R2R, watched just about every fish video on YouTube and even read books - you know the internet on paper! - in the last decade as I built other systems and learned the latest from others.

3) Black Friday, double points, open box and DIY creativity that maximized the return on my budget. I have spent plenty of money on this build and my others - we all do or at least wind up doing so ;) - but I tried my best to make that money go farther buy circling the open box items on BRS, watching for sales, doubling points when possible and doing/making a lot of the items myself and/or reusing items from the non reefing world.

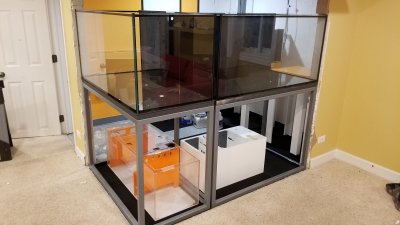
Next Post will be the tanks and sizes/specs along with what I love/don't love about them. There are two display tanks, a frag tank and a 'back tank' wherein I can do whatever I want without worrying what it looks like :), they are interconnected with sumps and an external skimmer all in a fish room in our basement. The display tanks are visible outside the room and the wrap on the stands completes the outside 'walls' of the room.
 

NY_Caveman

likes words, fish and arbitrary statistics
View Badges
Joined
Sep 8, 2017
Messages
17,008
Reaction score
108,390
Location
New York
Rating - 0%
0   0   0
Great write up! Love the details and the philosophy. Cannot wait for the pictures to come.
 

SPR1968

No, it wasn’t expensive dear....
View Badges
Joined
Feb 21, 2017
Messages
20,039
Reaction score
124,688
Location
Nottinghamshire England
Rating - 0%
0   0   0
Great write up so far and we NEED pictures! Lol
 
OP
OP
lactose

lactose

Active Member
View Badges
Joined
Mar 11, 2009
Messages
428
Reaction score
494
Location
Chicagoland
Rating - 0%
0   0   0
You start a thread with best intentions of regularly posting and then three weeks of business travel ensue... Oh well, got the week off so going to get to the next post on the tanks.
 
OP
OP
lactose

lactose

Active Member
View Badges
Joined
Mar 11, 2009
Messages
428
Reaction score
494
Location
Chicagoland
Rating - 0%
0   0   0
Display Tanks
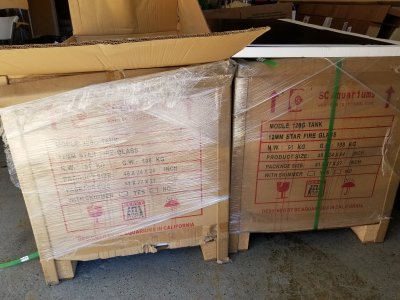
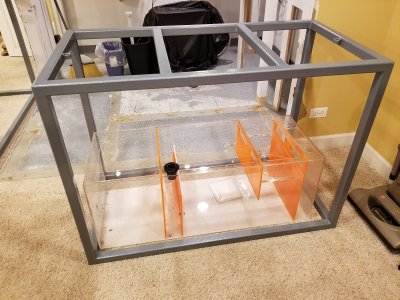
Each tank is a 120 Gallon 48"x24"x24" SCA Aquariums tank. They were both ordered almost exactly 1 year ago during last year's Black Friday sale.

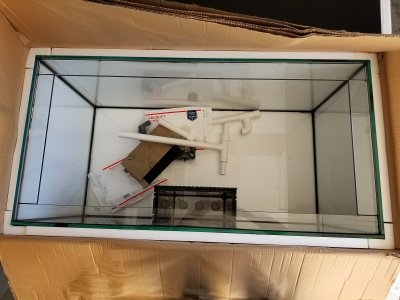
IMHO they are great tanks for the $800ish I paid for them. The glass is very clear "starfire" and regardless of branding details it is much clearer than regular glass to my eyes. I love the bevel on the glass ends and the silicon is very clean in all the display seams. I will say it isn't great clean in a lot of areas you don't see or can't see easily. I am fine with that tho as I am sure that is part of how the tanks get their price.

It is also exactly the dimensions in their diagram - which is great that they both supply a diagram in the first place let alone it is accurate. This was very key for me as I was having the stands made prior to receiving the tanks and everything worked out.

The packaging was impressive and they arrived with no damage at all.

RB10 DTs in Boxes.jpg

RB10 DT Open Box.jpg

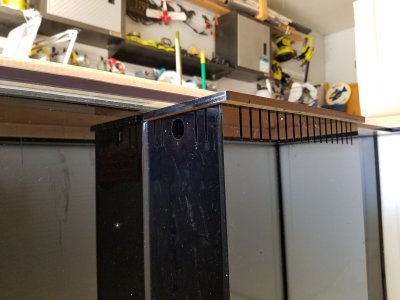
RB10 Overflow.jpg

I had become used to acrylic tanks recently and forgot just heavy these would be. I found a local moving company a neighbor suggested that had a service of moving things in/out of a house assuming someone else had done the moving truck part. They had a 4 hour minimum so I had them move the two tanks down, onto the stands, keep moving them just a bit as I got everything aligned and then they carried out some of the heavy parts of the old tanks/systems that were in the basement and some other random stuff to use up the whole 4 hours.
 
Last edited:
OP
OP
lactose

lactose

Active Member
View Badges
Joined
Mar 11, 2009
Messages
428
Reaction score
494
Location
Chicagoland
Rating - 0%
0   0   0
Display Tank Stands
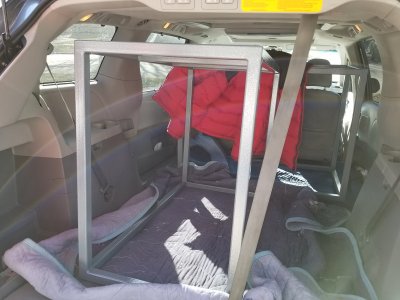
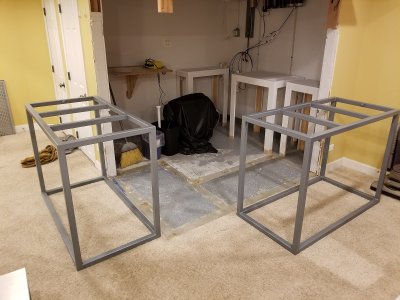
The twin 120G tanks were fitted with twin powder coated steel stands.

I was aligning this all to fit in an existing wall 'cutout' I had used for past tanks so there was lots of measuring and confirming details with the stand builder. The stands were made by Reef Plus in North Aurora, IL under their IronFish brand.

I regularly shop at that store and the owner is awesome and super helpful. The owner who was making the stand was probably even more OCD than I was about the dimensions and verifying everything which is both impressive and something I valued greatly.

They are 48 1/4" wide by 24 1/4" deep and 36" tall. This allowed me to get the tanks up at the right height as well as have an amazing amount of open space for access and installation. Keep in mind my previous system (which I will dig up a picture) was made 15 years ago with a wood stand WAY overbuilt with a vertical 2x4 at least every 16" which made access impossible. I am pretty sure you could have put the rest of my house on that stand ;)

ReefPlus made them quick and kept me up to date on the build and powder coating progress. I would highly recommend them.

First step was bringing them home back on Dec 16th, 2017 - having a minivan drives us nuts but it is SO handy
RB10 Stands in Transit.jpg

Then the moment came to start verifying all our measuring had paid off:

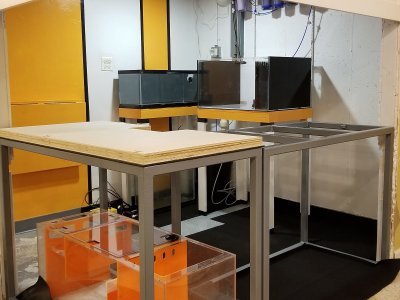
First to verify they would fit together
RB10 Stands in Basement.jpg

Does the sump fit? Yes I am literally checking if 42" is less than 45" :)
RB10 Stand Test Fit Sump.jpg

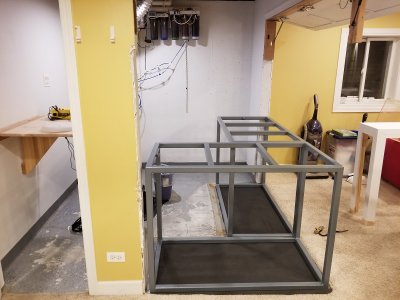
Then they get positioned into their final spot (with neoprene foam sheet under them to smooth out any texture on concrete bits)
RB10 Stands in Position.jpg

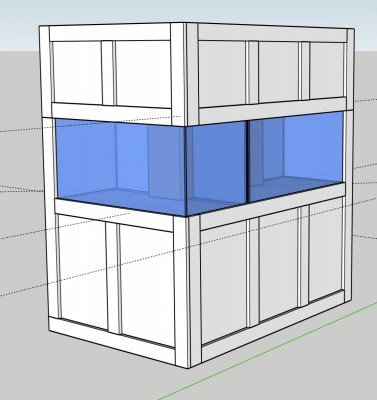
Thankfully everything worked out, we'll get to it, but when I had the tanks on the plywood on the stands every final measure was within a 1/4" of my original SketchUp design (precision for the win!)
RB10 Sketchup.jpg
 
Last edited:
OP
OP
lactose

lactose

Active Member
View Badges
Joined
Mar 11, 2009
Messages
428
Reaction score
494
Location
Chicagoland
Rating - 0%
0   0   0
Display Tank Stand Tops

Having two tanks means two of everything. Two stands, two tops etc.

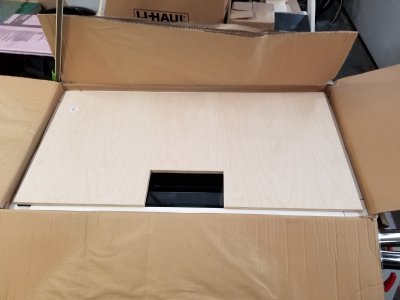
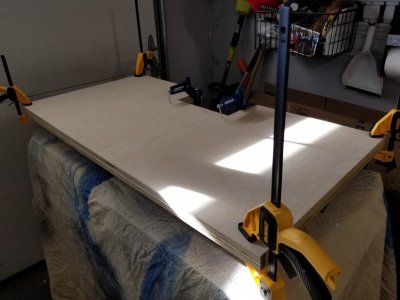
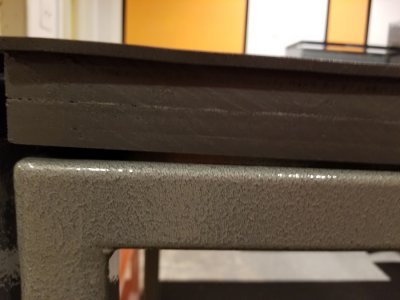
To achieve the height I wanted as well as to allow for a couple of items to be screwed/mounted to the bottom of the stand tops I made the tops out of two 3/4" Marine Grade plywood sheets cut to size and then glued to each other.

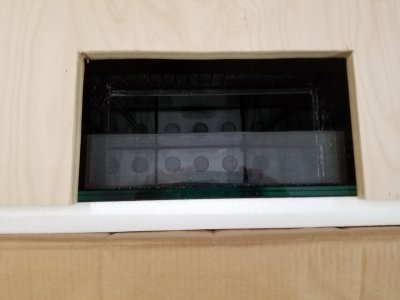
First a test fit of the first stand top (done while tanks were still in box)
RB10 Stand Tops Test Fit.jpg
RB10 Stand Tops Test Overflow.jpg

Then I went ahead and made two tops (4 pieces total)
RB10 Stand Tops Build.jpg

After they were built and glue dried I painted them with Kilz and then spray coated them in Plasti Dip dark gray to be similar to stands and water would just run off. One of them was perfect:
RB10 Stand Top in place.jpg

Unfortunately the other was way warped and was curved 'up' on both ends
RB10 Stand Top Warped.jpg

Unfortunately I didn't discover this until two days before the tank movers were coming so I had to do an accelerated rebuild of two more pieces, gluing and painting which got done just in time.

Here is the stands, tanks and stand tops all in place and once again everything lined up within 1/4" of plan.

RB10 Stand Tops All Done.jpg
 
Last edited:
OP
OP
lactose

lactose

Active Member
View Badges
Joined
Mar 11, 2009
Messages
428
Reaction score
494
Location
Chicagoland
Rating - 0%
0   0   0
Under tank foam pads
You can see in a couple of those pics in the last post a black pad that was on the plywood stand tops. They are the Aqua Gadget DIY Mat and I have a love/hate relationship with them. One of them was perfect and the backing came off pretty easy and stuck right on no issues. The other one I got (along with a couple of smaller ones for the other tanks) had backing that wouldn't come off more than a couple inch piece at a time. It took me an hour to get off about a 1'x2' area of backing and I gave up and called @Bulk Reef Supply and they immediately sent out a replacement that was better but still not as good as that first piece. I think I would say they are hit or miss when it comes to backing but do a good job when installed.

If/when I do need pads for future tanks I think I am just going to do the Neoprene foam mat from BRS that I used under the stands. There is no backing to remove and they worked really well for me in the past.
 
OP
OP
lactose

lactose

Active Member
View Badges
Joined
Mar 11, 2009
Messages
428
Reaction score
494
Location
Chicagoland
Rating - 0%
0   0   0
Btw, I would love your feedback on if including links to the products is helpful or not. I know personally I usually wind up searching for the products mentioned in build threads so this saves the steps of selecting, copy/pasting, searching and finding a link to them in a sponsor store like BRS.
 

JasonK84

I want more!!!
View Badges
Joined
Sep 14, 2018
Messages
2,975
Reaction score
8,188
Location
Amarillo
Rating - 0%
0   0   0
Those tanks are coming together very nicely!! As far as posting links to products used, I don't see why there would be an issue as long as the providers were sponsors of R2R.
 

dugthefish

Well-Known Member
View Badges
Joined
Oct 2, 2018
Messages
788
Reaction score
718
Location
Iowa
Rating - 0%
0   0   0
Love your concept, looking forward to watching the execution! +1 for liking links.
 
Back
Top