ReefSentinel’s 200g Mini Barrier Reef build.

OP
OP
ReefSentinel

ReefSentinel

Active Member
View Badges
Joined
Jan 11, 2020
Messages
207
Reaction score
357
Location
Sydney
Rating - 0%
0   0   0
This is going to look fantastic when finished! Good job sir!
My build is on hold until end of year, so I live vicariously through everyone else here. Thank you for all the details of your build.
Thanks for the reply, Nothing wrong with living through other builds, I am still doing it, I found it is a great way to find what works and what doesn’t.
My build is slowly coming together, happy to take my time try to get thing right.
Good luck on your build.
 
OP
OP
ReefSentinel

ReefSentinel

Active Member
View Badges
Joined
Jan 11, 2020
Messages
207
Reaction score
357
Location
Sydney
Rating - 0%
0   0   0
Hi all
Received Frame/stand back from powder coating just it time for weekend.
still have a bit of work to do on it.
- Tap holes for adjustable feet
- Drill /tap holes to Mount alum slotted extrusion, this to mount things to.
- Paint front of cabinet where doors close as doors are black and you will see the white frame between door gaps.
- fit Timber top, plan to run led strip in Slot on underside.

9F45DAC2-C744-413E-AC61-5B2FAE6819BF.jpeg
 
OP
OP
ReefSentinel

ReefSentinel

Active Member
View Badges
Joined
Jan 11, 2020
Messages
207
Reaction score
357
Location
Sydney
Rating - 0%
0   0   0
Been working on the Radion G5 hanging setup, seen a few good ideas on reef2reef & you tube.

My wish list was the following for the setup
1. Ideally on the cheap side of things as everything is starting to add up
2. Hold 3 x Radion G5's, possible a 4th if needed down the track
3. Be able to move the Radion's side ways if needed
4. Be able to adjust the lights up and down, planning to setup at 10" above water line and see from there.
5. Ideally be able to move the all lights up and back for better access to tank.
6. Remove lights if needed.

On you tube I found someone who inserted M5x20mm screws into the top of the Radions G5 and have the head of the screws slide in a Aluminum extrusion profile, from this my design started.

Plan to use standard Alum extrusion 20/40, standard shoulder bolts, standard M5x20mm SS304 button head screws and a pair of custom mounting brackets for inside the canopy.
The mounting brackets I can have laser cut at work so been the laser cutting & the $100 for the Alum extrusion I think I tick the wish list with my design.

I have drawn the design up, seems like it will work.
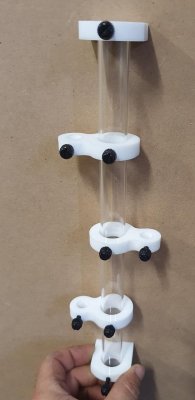
Basically 2 rails with a spacer rails holding them apart, I will tap the end of the Alum extrusion and screw in a Shoulder bolt at end (4), the head of the shoulder bolt will fit into a hole on the mounting bracket, once insert at each end I can move the rails system in the track to different heights and also move it back.
If I wish to remove a light I drop the rail to the lowest position and slide the lights out sideways.
only thing I cannot do the rotate the light, if I find i need to rotate down the track I will open the rails apart.

Here are a few pic's of the design.

If anything has any suggestions or see's any problems please let me know.
I thought weight may have been a issue for the 2040 (20mm wide x 40mm high) Alum however each light is only 2kg this is total of 6kg over a 2 x 1.8m rail, 2 rails = 3kgs/rail spread fairly evenly across so I think (hope) the rails will support it.

Radion Light assembly -2.jpg
Radion Light assembly -4.jpg
Radion Light assembly -7.jpg
Radion Light assembly.jpg
Radion Light assembly -5.jpg
Radion Light assembly -6.jpg
 
OP
OP
ReefSentinel

ReefSentinel

Active Member
View Badges
Joined
Jan 11, 2020
Messages
207
Reaction score
357
Location
Sydney
Rating - 0%
0   0   0
Hi All,
Happy fathers day to all the dad's out there.
Busy weekend with fathers day but was able to find a little time to work on the tank build.
I got the steel frame powder coated white to help reflect light around in the under tank area however I am having back cabinet door so this leave a white line between the doors so I paint the front of the stand matt Black.
A little time consuming but worth it in the end.
IMG_9684.JPG
IMG_9686.JPG
IMG_9687.JPG
IMG_9688.JPG


Done some work on the timber top, 16mm marine plywood, have routed out some slots for LED light to sit in.
IMG_9685.JPG
IMG_9689.JPG
 
OP
OP
ReefSentinel

ReefSentinel

Active Member
View Badges
Joined
Jan 11, 2020
Messages
207
Reaction score
357
Location
Sydney
Rating - 0%
0   0   0
Hi All,
Been busy with work and family life last 2 weeks, not much time to work on built however got a few hours in a throw this weekend.
Good and bad news
Update
- Tank is finished, will be viewing next week before delivery.
- Bad news, more work carried out of the framing, worst thing is I was doing a try run and found a issue with the steel frame :mad: (not happy) the two vertical supports have been welded in the wrong position.
Result: This error effects the way the center door hinges, it is meant to swing from the middle left support as this was being cladded with timber for the hinge to mount to.
After carrying out check I found the two center supports have been welded in upside/ back to front. Basically the measurement from the left right now from the right and vice versa.
Fix: either take the frame back to work, cut the supports outs, re-weld, re-powder coat, mask and repaint front face or have the middle door modified to swing the opposite way.

???? now i need to think why i had the Right & middle doors open opposite???

IMG_9705a.png

IMG_9706.JPG


Had some progress, added the LED strips to the underside of the top of the stand (under tank base) also ran some conduct that will run wires for the door switch for the Apex BOB.

IMG_E9701.JPG


IMG_E9702.JPG


Also done a dry run of the stand in it's finished position.

IMG_9704.JPG


Equipment wise, still waiting for Neptune & Nyos equipment to land in Australia, dam you COVID
 
OP
OP
ReefSentinel

ReefSentinel

Active Member
View Badges
Joined
Jan 11, 2020
Messages
207
Reaction score
357
Location
Sydney
Rating - 0%
0   0   0
Hi All,

Update, equipment wise, the LFS advised they are receiving outstanding items of equipment at the start of Oct :).

Planning to add a drainage pipe through the wall to so when I do a clean/water change I can drain the water straight of tank to drain on other side of wall.
I also have plan to make a tray that sits under the sump, i am add a drain hole to this and drain outside as well.
Skimmer Air supply, while adding holes to the wall 1 more can't hurt for the skimmer air intake, can only help i guess.

Fish list, being working on my wish list of fish and inverts.
Theory of the list, fish qty's are based on 1" of fish / 5 gallons (19ltrs)
CUC is a big part of the list along with a mix of colour and where the different fish live in the water column/rockscape.

The list will largely depend on availability but something to work with i guess.

I would like a few more wrasse however I really like the shrimps in a tank, so may have to wait until shrimp are of a large size so they don't become wrasse food.

Mini Reef Fish List.jpg


Invert Fish.jpg
 
OP
OP
ReefSentinel

ReefSentinel

Active Member
View Badges
Joined
Jan 11, 2020
Messages
207
Reaction score
357
Location
Sydney
Rating - 0%
0   0   0
Update following the weekend,
Hole added to the wall for waste water, as always seem to be a elbow short to finish job, will pick up supplies to finish this week.
Still need to add 2 small holes for air intake and tray drain.
A19016A3-BFAD-4604-8CE8-8C97D654AB30.jpeg

44ADBB48-EA12-4010-BED8-0FBF1B21802F.jpeg
 

Reverend Turtle

Active Member
View Badges
Joined
Jun 26, 2017
Messages
388
Reaction score
504
Location
The Crab Nebula
Rating - 0%
0   0   0
Looks good. I would personally skip the purple psuedo, they can become holy terrors. Orchid dottybacks have a similar color with less attitude.
I would also skip the sand sifting star. They rarely live long in aquariums.
 
OP
OP
ReefSentinel

ReefSentinel

Active Member
View Badges
Joined
Jan 11, 2020
Messages
207
Reaction score
357
Location
Sydney
Rating - 0%
0   0   0
Looks good. I would personally skip the purple psuedo, they can become holy terrors. Orchid dottybacks have a similar color with less attitude.
I would also skip the sand sifting star. They rarely live long in aquariums.
Thank for the advise Reverend Turtle, much appreciated.
I had reservations on the purple dotty back, now confirmed will give this one a miss, need to find a replacement.
Regarding the starfish any recommendations for something to help turn the sand over?
Thanks again.
 
OP
OP
ReefSentinel

ReefSentinel

Active Member
View Badges
Joined
Jan 11, 2020
Messages
207
Reaction score
357
Location
Sydney
Rating - 0%
0   0   0
Quick update
Been working on the stand/cabinet doors, still have re-hinge one door but it’s all moving along.
Tank is finished, will viewing finished tank over coming days.
Electrican is due out tomorrow or Friday to add new circuit to the house for the tank requirements.
A few pics
E66244E2-1640-4D92-8FF1-1EF2AB48E353.jpeg
979656F0-ADCD-46A1-9069-6E22ADF1947E.jpeg
3EF9CBE9-2CA7-499C-8BAA-862BF98C7D7C.jpeg
 

revhtree

Owner Administrator
View Badges
Joined
May 8, 2006
Messages
47,739
Reaction score
86,873
Rating - 100%
1   0   0
Excellent work so far! Going to be stellar!
 
OP
OP
ReefSentinel

ReefSentinel

Active Member
View Badges
Joined
Jan 11, 2020
Messages
207
Reaction score
357
Location
Sydney
Rating - 0%
0   0   0
Hi All,
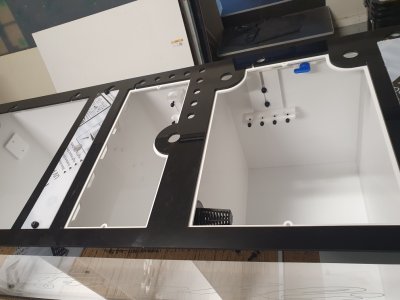
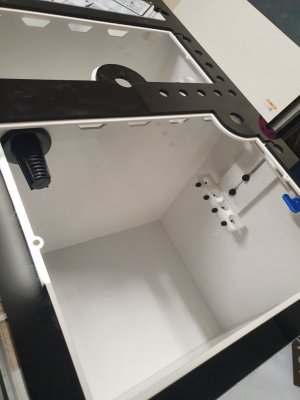
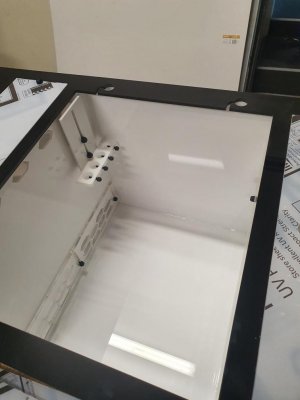
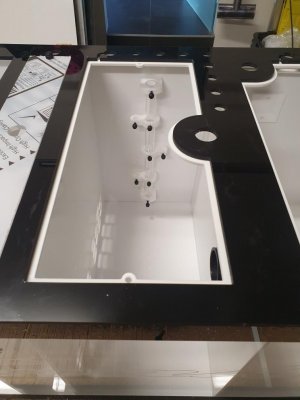
The Sump build has started.;Shamefullyembarrased
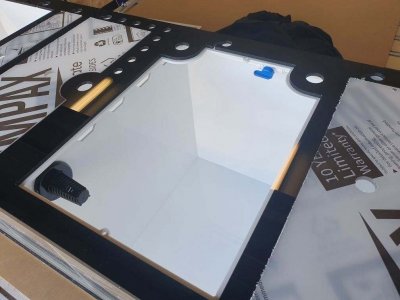
Large movement forward this week, I think I have been waiting 6-7 weeks for my sump be started, it's a long time however I was advised at the beginning that there was a long lead time which I was happy to wait.

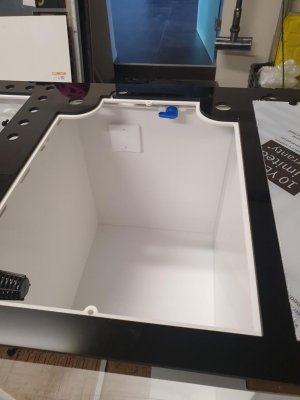
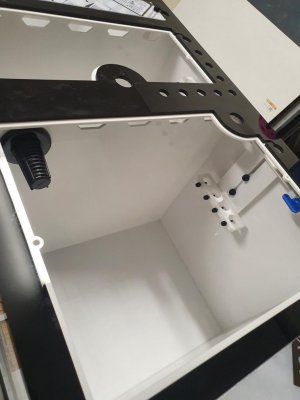
Due to the error in the stand and the result of moving the 2 door that open together outwards to the left I have flipped the sump design 180 degree's, which I think will work would better in the end.

A few pic's in thew sump build
3a.jpg


120804568_2410058745969681_5323556440422196104_o.jpg
120811843_2410058719303017_854734898895524504_n.jpg
Resized_20201007_181757.jpg
Resized_20201007_181808.jpg

Originally it was all going to be white and clear however the front of the sump has built-in LED strip that can be seen if done in white so we changed the front panel and top to black which I think stills looks ok.
I am not a real fan of black and white however the build is turning out to be very much a Black and white build for some reason, definitely wasn't planned other than the black cabinetry and white frame to help with the light under the tank.

Pic of stand below so you can see the black and white build.

IMG_E9723.JPG


Now for plumbing, i can see this as a bit of a nightmare as need to order the "Sanking Plumbing" i will require for the build compared to just gong down to local hardware store and buying / returning what I need and don't need.
I don't mind planning ahead but plumbing is a different story.
Colour wise, I am not sure to go safe with the grey plumbing or mix it up with the colour tubing.
Colour options are
- General fittings: Grey
- Piping: Orange, Blue Grey & Red (picture below of options.)

I was 95% on the Grey but I may go the Orange to mix it up, I know its the one that everyone seems to go with but the blue and red I think is something I will get sick of.

Sanking Plumbing 1.jpg
Sanking Plumbing 2.jpg
Sanking Plumbing 3.jpg
 
OP
OP
ReefSentinel

ReefSentinel

Active Member
View Badges
Joined
Jan 11, 2020
Messages
207
Reaction score
357
Location
Sydney
Rating - 0%
0   0   0
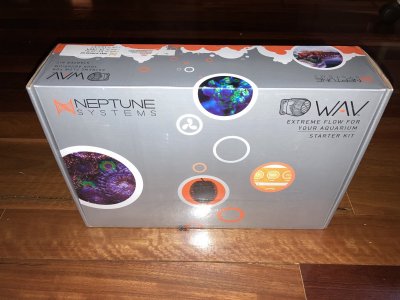
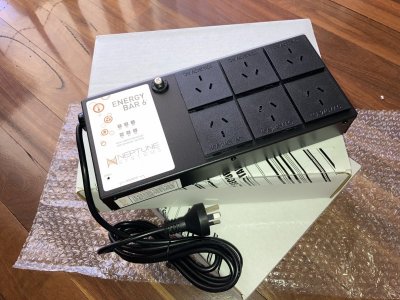
Weekend is here and today for shopping day to pickup most of the outstanding items.

Today's items included the following
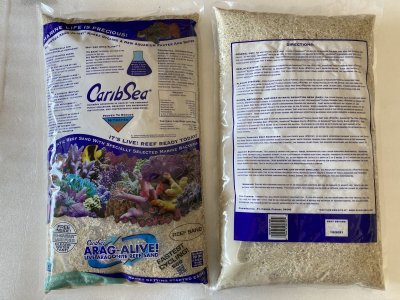
2 x Bags of CaribSea Arag-Alive Special Grade Reef Sand 20lb 9.1kg, I though I ordered enough based on a website site calculator but are looking at it I think I will need another 2 bags.

I used the following website to calculate.

1602320098717.png


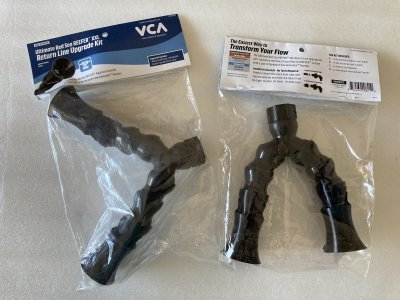
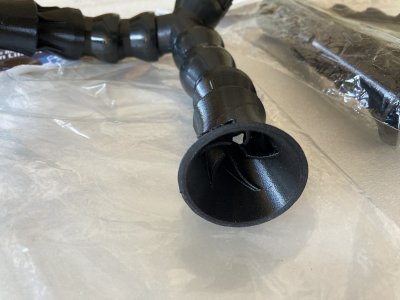
2 x VCA - Red Sea Reefer Ultimate Return Line Upgrade Kit, these are made for Red sea tank but I need to modify to suit my return.
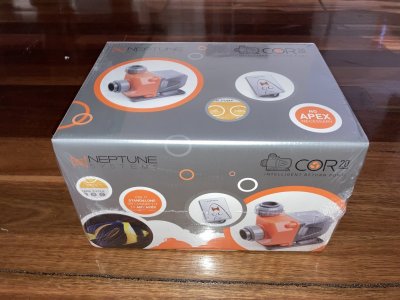
1 x Neptune Core 20 return pump
1 x Neptune Wave Starter Kit
2 x Neptune Energy Bar 6 (Aus)
"STOP" before to ask I am i buying this old piece of equipment, the answer is I live in Australia and Neptune don't see us as being large enough market for us to have the Energy Bar 8 made to Australia standards. :mad: ;Rage :mad: ;Rage :mad: ;Rage :mad: ;Rage
IMG_9762.JPG


IMG_9763.JPG

IMG_9764.JPG

IMG_9767.JPG

IMG_9768.JPG

IMG_9773.JPG

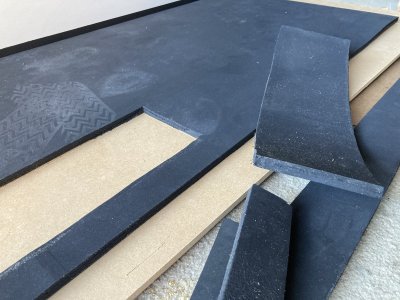
Also had time to purchase some 12mm (1/2") Anti-Slip Foam Matting to go under the tank.

IMG_9775.JPG

IMG_9774.JPG

Also a had little time to add another hole to the wall (wife not happy) for a drain which will come from the tray which I plan to put under the sump (just in case, I will sleep a little better)
Still to connect drain pipe to main drain PVC.
Drip Tray - Sump.jpg

Drip Tray - Sump 2.jpg

IMG_9761.JPG
IMG_9777.JPG


Still awaiting on Neptune Apex to come available and Nyos 160 skimmer which I have have been hold are still on the boat (COVID delays).
Overall the project has ragged a little however things are starting to come together, as I tell the wife I (we) are spending a lot of cash here and once the tank goes in I can't do thinks on the wall or make big changes, plus I tend to over think things.

IMG_9762.JPG IMG_9763.JPG IMG_9764.JPG IMG_9767.JPG IMG_9768.JPG IMG_9773.JPG IMG_9775.JPG
 

Being sticky and staying connected: Have you used any reef-safe glue?

  • I have used reef safe glue.

    Votes: 95 88.0%
  • I haven’t used reef safe glue, but plan to in the future.

    Votes: 6 5.6%
  • I have no interest in using reef safe glue.

    Votes: 4 3.7%
  • Other.

    Votes: 3 2.8%
Back
Top