

After 20 years without a tank, I was able to start again. I picked up a cracked Red Sea Reefer 525XL on Craigslist.
The original owner received the tank cracked and Red Sea replaced it, so he sold just the glass on CragsList.
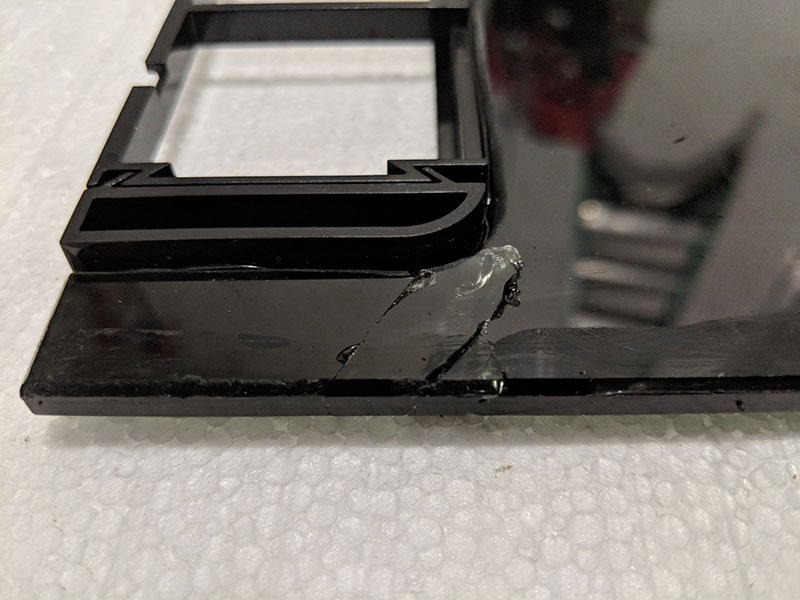
The crack was on the overflow box above the waterline and non-structural. While fixing it (superglue), I took the opportunity to remove the metric Red Sea plumbing fittings.
The cracks. This is the inside of the front panel of the overflow.
I used braided fishing line, a carpet knife blade, Stanley blade and dental floss to remove the silicone between the glass panels. Once you have something through the seam, just run it backwards and forwards and let friction eat the silicone. This will take you several hours of careful work.
The bottom plastic fitting is siliconed to the glass. In order to remove it, I had to cut the silicone and then break it into pieces. The tool I used left small scratches on the surface of the glass. I have not yet tested if the bulkheads will seal over those small scratches.
Note that this basically MELTED the plastic. As such, it got hot, and I had to stop every minute and give it several minute to cool down, since I did not want to stress the glass with localized heating.
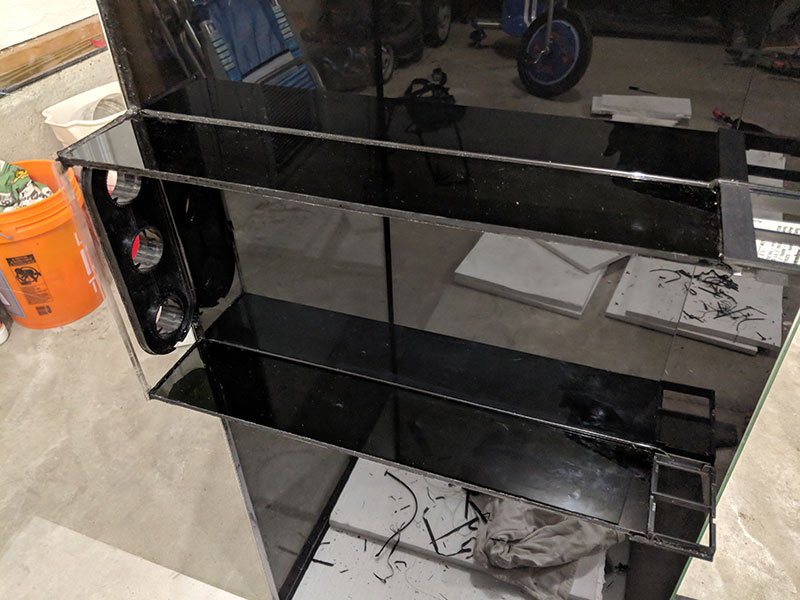
You can also see how the plastic fitting lines the top surface as well as the glass holes. When cutting through, I left the part inside the glass holes, and removed it later.

Here is the view from the bottom of the tank with just the plastic rings still in place. I gently cut the silicone from both sides with a Stanley blade.

The glass was scraped with a new Stanley blade, and then polished to remove silicone residue with #000 grade steel wool. This was done on all edges. They were then taped off, and black aquarium silicone was used to re-attach the original panel.
After a week of cure time, I started filling.

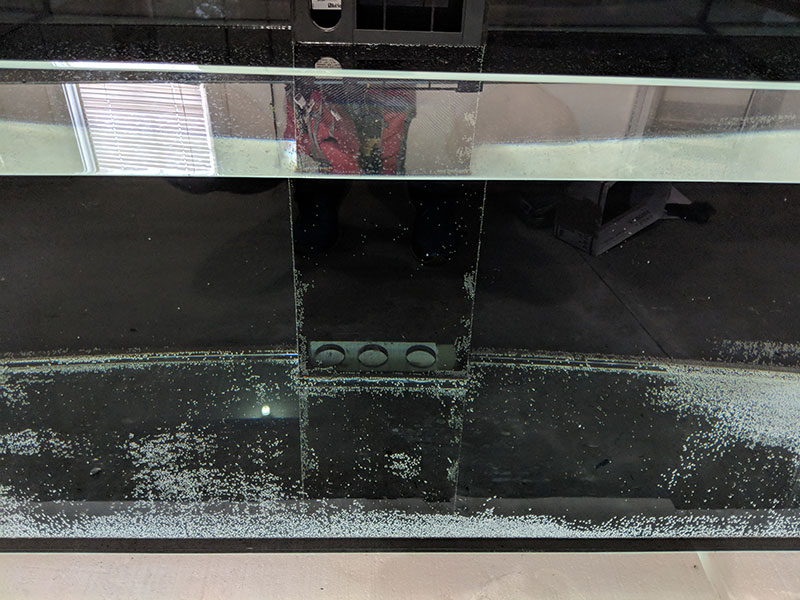
She lives! Here you can see the reflection of the holes (actually, you are seeing the reflection in the bottom panel of the glass).
When I get some time, I will be doing an 8020 stand for the tank in CAD, and then building it.
The original owner received the tank cracked and Red Sea replaced it, so he sold just the glass on CragsList.
The crack was on the overflow box above the waterline and non-structural. While fixing it (superglue), I took the opportunity to remove the metric Red Sea plumbing fittings.
The cracks. This is the inside of the front panel of the overflow.
I used braided fishing line, a carpet knife blade, Stanley blade and dental floss to remove the silicone between the glass panels. Once you have something through the seam, just run it backwards and forwards and let friction eat the silicone. This will take you several hours of careful work.
The bottom plastic fitting is siliconed to the glass. In order to remove it, I had to cut the silicone and then break it into pieces. The tool I used left small scratches on the surface of the glass. I have not yet tested if the bulkheads will seal over those small scratches.
Note that this basically MELTED the plastic. As such, it got hot, and I had to stop every minute and give it several minute to cool down, since I did not want to stress the glass with localized heating.
You can also see how the plastic fitting lines the top surface as well as the glass holes. When cutting through, I left the part inside the glass holes, and removed it later.
Here is the view from the bottom of the tank with just the plastic rings still in place. I gently cut the silicone from both sides with a Stanley blade.
The glass was scraped with a new Stanley blade, and then polished to remove silicone residue with #000 grade steel wool. This was done on all edges. They were then taped off, and black aquarium silicone was used to re-attach the original panel.
After a week of cure time, I started filling.
She lives! Here you can see the reflection of the holes (actually, you are seeing the reflection in the bottom panel of the glass).
When I get some time, I will be doing an 8020 stand for the tank in CAD, and then building it.

")


