Howdy! I've been itching to dive back into reef mania for the last 7 years only to be held back by pesky professional commitments.. Come hell or high water I will have a reef tank.
Enter hardware:
.jpg")
The plumbing came out very clean. The distribution manifold from the return line will likely supply a carbon reactor and and UV filter.

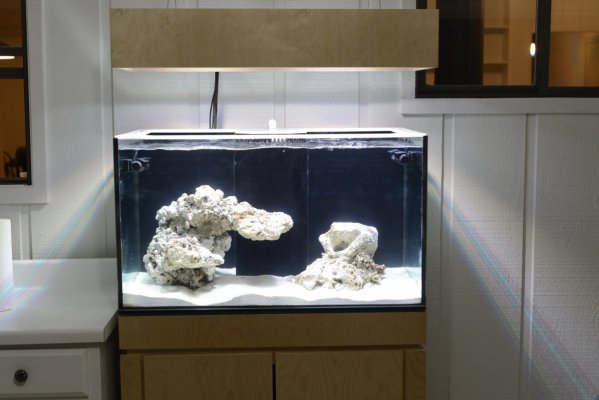
I designed the tank stand to hold factors of safety of ~4 against failure. The inside of the stand is coated with 3 layers of west system epoxy and painted with a high gloss white exterior paint.


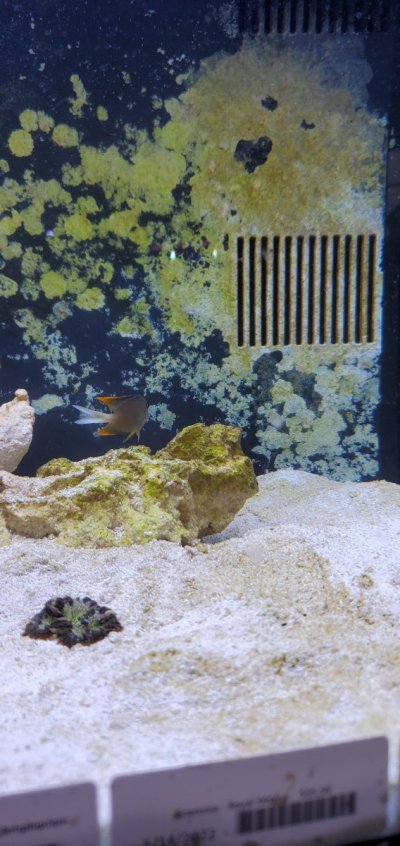
I struggled deciding whether or not to repair or scrap this tank due to its chipped corner. The previous owner told me the tank was in good condition which to him apparently meant 'it holds water'..? Anyway, I cleaned/prepped and filled the chipped glass with GEII silicone and all appears well. The tank has been holding water for the last month.
.jpg")
.jpg")
My wife and I are moving back to San Antonio in July 2021, so I plan to have this tank reef ready before loading up the moving truck this summer. Stay tuned for more build updates!
-Ryan
Enter hardware:
- 1x 65 gallon AGA from craigslist for $250 with a chipped bottom corner (nothing a little silicone cant fix).
- 2x XR15 G4 lights ($450) + 2x 36" OR3 Blue Plus ($340)
- The goal here is to have some high angle of incidence beams coming from the OR3 strips to reduce shadowing)
- 1x Lifereef SVS2-24 skimmer with Jebao DC-9000 pump ($75)
- 1x Sicce SDC6.0 return ($200)
- 2x Maxspect xf330 gyres ($360)
- 1x Sheet of 4x8" birch ply for the stand ($50)
- Profliux 3 with Jebao dosers and other accessories that are in questionable condition ($75)
- 18" Trigger Systems Crystal sump ($75)
The plumbing came out very clean. The distribution manifold from the return line will likely supply a carbon reactor and and UV filter.
I designed the tank stand to hold factors of safety of ~4 against failure. The inside of the stand is coated with 3 layers of west system epoxy and painted with a high gloss white exterior paint.
I struggled deciding whether or not to repair or scrap this tank due to its chipped corner. The previous owner told me the tank was in good condition which to him apparently meant 'it holds water'..? Anyway, I cleaned/prepped and filled the chipped glass with GEII silicone and all appears well. The tank has been holding water for the last month.
My wife and I are moving back to San Antonio in July 2021, so I plan to have this tank reef ready before loading up the moving truck this summer. Stay tuned for more build updates!
-Ryan
Last edited:


")


.jpg")
.jpg")