Check post #248 for ATO deets...
Navigation
Install the app
How to install the app on iOS
Follow along with the video below to see how to install our site as a web app on your home screen.
Note: This feature may not be available in some browsers.
More options
You are using an out of date browser. It may not display this or other websites correctly.
You should upgrade or use an alternative browser.
You should upgrade or use an alternative browser.
samnaz’s Long and Shallow Rimless [upgrade in progress]
- Build Thread
- Thread starter samnaz
- Start date
- Tagged users None
So sessyCheck post #248 for ATO deets...


- Joined
- Jan 12, 2020
- Messages
- 175
- Reaction score
- 466
Hey I didn't know you were on r2r. Got a build thread?just dropping in to say hi. sorry about kitty, but look forward to some updates on your reef.
Edit found it ;-)
awesome effort!I did it. I finally drilled the tank. After putting it off for months, I'm so glad to have it over and done with. Everyone says it ends up being way easier than they thought it would be, but I have to disagree. That may have something to do with the fact that this was my first time ever using a drill. I should have practiced on a different tank first to get the hang of it. After drilling two holes I've got it down. Only one more hole to go... as soon as I figure out where the return should go.
The first hole was stressful, nerve wracking, and scary. I used a drill guide instead of the template. The drill guide wouldn't stay in place, it was jumping/spinning around the entire time, causing the putty dam to leak. I kept having to put the putty back in place and refill the dam with water. It took forever to finish. Much longer than expected (about 15-20 mins per hole). I was so careful not to give it too much pressure, maybe I wasn't giving enough? Who knows... Perhaps it took forever because of the diamond coated hole saw I got on amazon for $4, the lowest possible quality drill bit you can get.
Before hole #1
Hole #1 complete:
For the second hole, I ditched the awful drill guide and used the included template instead. It was 10x easier. Piece of cake.
Before hole #2:
And here's the finished product with overflow box installed:
It looks *so* good in person. These pics are crap.
Now that I have that out of the way, I can actually start putting this tank together instead of just thinking about it.
how did that ever end up working? Lol i just bought some of these, and dang, they are huge lol. I can see where they might look out of place in a smaller tank... Just seeing your build for the first time. Really nice!Well shoot, I just got one today. How’s that for timing? I appreciate the generous offer though. I got the 3/4” and it’s definitely larger than I hoped it would be. My tank is only 12”H x 14”W, and the nozzle is about 5” That’s taking up some serious real estate, less room for coral and I’m not down with that. Tanks small enough as is.
Maybe I can build a scape around it somehow to make it less noticable and obtrusive. We shall see...
I picked up some flexible PVC pipe and 45 degree elbows. Below is a very ROUGH idea of the final plumbing setup. One concern/problem I see with this rough setup in general is that the pipe isn't mounted or supported to the stand anywhere. I need to figure out where/how to support the pipe.


Thoughts??
Reason #436 I regret choosing a MDF stand from PetCoSmart, instead of building one myself...
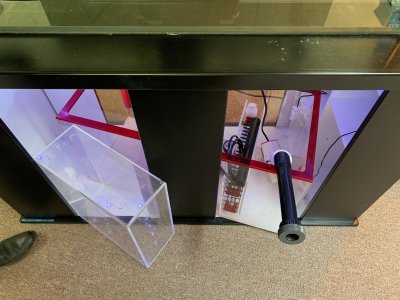
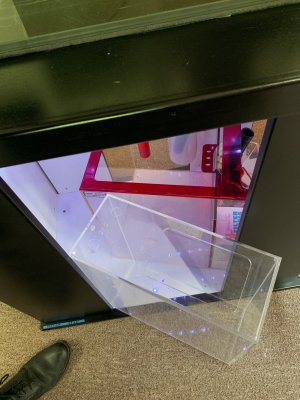
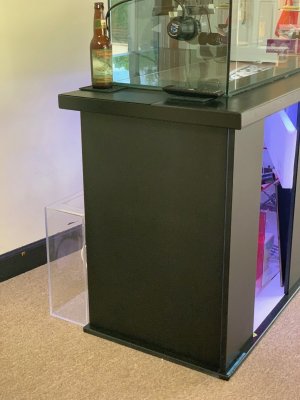
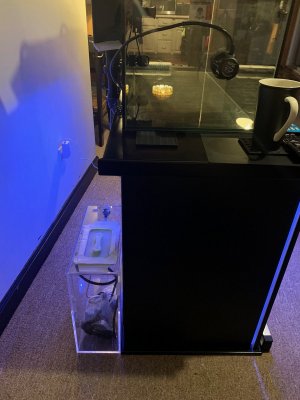
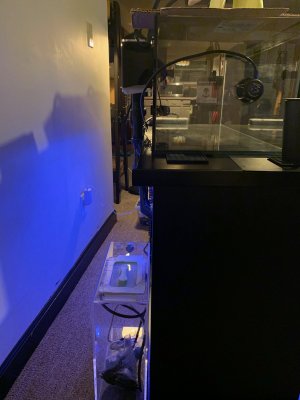
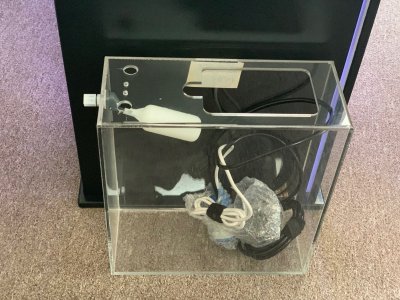
Turns out I can't fit the ATO reservoir into the stand without moving the sump over. This isn't an issue now, since the sump is empty, but once the tank is running and the sump is full, the ATO would be a huge massive pain in the bum to remove (for cleaning, or for whatever else I may want to remove it).
Options are:
1-Inside the stand (and never be able to remove it).
2-Next to the stand (and find a cabinet/chest to hide it in, OR paint the ATO container black to match the stand).
3-Behind the stand (this would require having the tank a couple more inches away from the wall, which isn't a big deal because it's already 4-5" from the wall bc of overflow/plumbing, but having it behind the stand would make it hard for me to access plumbing and everything back there).
4-Get a new ATO reservoir that fits under the stand without having to move the sump.
5-Other...?
I have no experience with ATOs so for those of you who do, what is most ideal?
Help me decide please ;-)
How on earth have I missed all these updates????? I just figured you were slacking like me ;Bored
Things are looking really good! GREAT job on drilling the tank! And I'm so sorry about your loss

Things are looking really good! GREAT job on drilling the tank! And I'm so sorry about your loss
really coming along!
I do love my two hearted.
Josh, I drilled the tank like 3 years ago. Make no mistake, I AM slacking here. ;-)
Josh, I drilled the tank like 3 years ago. Make no mistake, I AM slacking here. ;-)
Yes, I know you’re still out there...!Any update?!
+1Any update?!
- Joined
- Jun 12, 2020
- Messages
- 236
- Reaction score
- 165
+1
Where are things at now? What are you working on next?
kinda glad you are slacking ,give me time to start ,be back soon 

- Joined
- Jun 26, 2020
- Messages
- 2,072
- Reaction score
- 2,056
So you commented on my build thread so I know you're still on R2R, but...everything going okay, regardless of tank?
Similar threads
- Replies
- 17
- Views
- 331


