Starting over - IM 20 NUVO Fusion Pro Build

The_Panda_Chef

New Member
View Badges
Joined
May 27, 2019
Messages
3
Reaction score
2
Rating - 0%
0   0   0
Quick update and DIY REFUGIUM project.

I wanted to add a refugium to the IM 20 Nuvo Fusion so that I could grow macro algae and reduce some nutrients and generally stabilize things.

At the same time, I wanted to have a sleek, low profile setup.


I bought the inTank Aquatics fuge basket sized for this aquarium.
Screenshot 2023-07-15 at 6.41.25 PM.png

It is designed to go in one of the two '2nd chambers" of the AIO setup. Thanks to inTank Aquatics. I have a few of their items and I find them to work well.

filled with some chaeto.
IMG_0652.JPG

and going into the 2nd chamber.
IMG_0661.JPG


Next was to sort out a light source.

I found the typically available ones to be rather clunky and expensive. Just not what I wanted.
I thought I would create my own as I could be a lot more flexible with the design and placement.


So, I found these LED pucks on Amazon.
Screenshot 2023-07-15 at 5.02.10 PM.png
Very cost effective and I like how low profile they are. Also, they can switch from white light to red spectrum if that is desireable. And I figured I might also use them for lighting my cabinet of my stand in the future.
Each puck is rated at 3W of power and as a LED, wont add hardly any heat energy.

These will be fix to the back of the tank and shine into the 2nd chamber of the AIO setup.


I made this simple bracket out of cheap plexiglass from Home Depot.
IMG_0641.JPG

I took the face off the puck as it just unscrews like a jelly jar.
I used the mounting holes in the puck and some simple nylon screws and nuts.

IMG_0643.JPG

IMG_0645.JPG


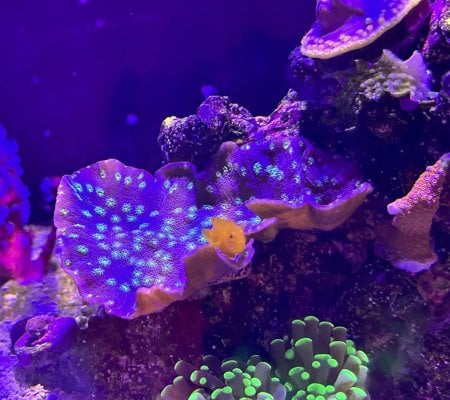
I then made a window on the black adhesive sheet that is on the back glass panel of the tank over the 2nd chamber to allow the light to come through. You can obviously see the macro algae on the other side of the glass in the 2nd chamber.
IMG_0647.JPG


To 'fix it' to the tank's back panel, I used strong neodymium magnets that already have adhesive on one side to stick to the glass back panel. Once in place, the other magnets on the outside of the plexiglass are strong enough that it holds this light-wieght set up just fine. More than strong enough. And it is totally adjustable if I want to change it around.

IMG_0654.JPG

You can see the light shining through into the chamber without the fuse basket in place.

IMG_0658.JPG

video link of the light filling the 2nd chamber.
CLICK HERE


and then with the fuge basket in place.
IMG_0657.JPG

And its easy enough to change to red LEDs with the remote control.
IMG_0655.JPG


I also checked the PAR level of the white light at about 1.5 inches (the working distance in this set up) and it was about 150 with white lights. Red lights closer to 100. The light brightness is adjustable with the supplied remote control so I can adjust as needed.

It has been installed for about 30 min and I am already thinking of some ways to modify it for lower profile and less light 'leakage'. But this will be a good start and the modifications will be a variation on this theme. Should help export some nutrients.
Dang your’s looks like it fits so much better! Have the same tank and I can’t fit that insert plus my light plus my ATO:(. There is just no good place to put the sensor for my ATO with it installed…Had to drop back and punt.
 
OP
OP
J

Jason Scalise

Active Member
View Badges
Joined
Apr 13, 2019
Messages
264
Reaction score
221
Location
Phoenix, AZ
Rating - 0%
0   0   0
Dang your’s looks like it fits so much better! Have the same tank and I can’t fit that insert plus my light plus my ATO:(. There is just no good place to put the sensor for my ATO with it installed…Had to drop back and punt.

I am not sure what the space constraint is in your setup per se....but I wonder if you could skinny-down the fuge cage/insert to allow it to fit? hacksaw an inch on one side to make it narrower? just guessing.

I will say that I had to reduce my fuge photo period by several hours recently as I was seeing too much consumption of nitrates causing them to get too low (< 4) for my liking. In other words, this fuge setup with the chaeto was too effecient for my balance of feeding and everything else. I had to dose some nitrate to get it back up to the 9-10 range which now it is hovering around.

I was pulling out a baseball size piece of cheato every 2 weeks or so...which means it was/is doing its job....but just too much for me. So, less photons means less growth means more nitrates.

SPS have responded well to that change.
 
OP
OP
J

Jason Scalise

Active Member
View Badges
Joined
Apr 13, 2019
Messages
264
Reaction score
221
Location
Phoenix, AZ
Rating - 0%
0   0   0
Here is an update on corals and growth.

A short video of how the tank is looking.

IMG_1313.jpg

The gorgonians continue to do well.
The echinopora seems to be doing well. Spreading out.
From then to now...
echinopora.jpg IMG_1315.JPG

IMG_1295.JPG

There has been good growth of the
and the cyaphestra has taken hold, encrusting and spreading out.


IMG_1314.JPG


I have started to dose daily ESV two part (Alk and Ca) small amounts as parameters were dropping with this growth. I expect to increase the dosage a bit over the next several weeks if growth keeps picking up.

And found my Yasha Gobby in the return chamber (again!) after a 2.5 months hiatus. Not too skinny but he seems to be doing well. Paired instantly (again) with his pistol shrimp buddy. Fishguard screens in place over each wier now. real pain in the butt.

IMG_1298.jpg

IMG_1308.jpg

so far, so good.
 

Attachments

  • IMG_1303.jpg
    IMG_1303.jpg
    234 KB · Views: 29

FitCoral09

New Member
View Badges
Joined
Aug 31, 2019
Messages
21
Reaction score
27
Rating - 0%
0   0   0
Ordered this tank today. Super pumped. Going from my 10g Lifeguard aquatics AIO to this. Excited to join in this with you!
 

Strawberry

Well-Known Member
View Badges
Joined
Oct 3, 2019
Messages
768
Reaction score
1,049
Rating - 0%
0   0   0
Cool. It is a good 20gal tank. Pretty versatile. Just need to go slow (which is hard).
I’m having the same problem. I want to buy everything right away but I can’t afford to do that & have my safety net budget lol
Speaking of safety nets, have you planned any sort of automatic WiFi or power outage response? :thinking-face:
Back when I had my biocube, I only ever had 1 power outage of less than 12 hours. I just used a few air stone pumps with D batteries, but obviously this is not an automatic response that would be sufficient if my home temperature had swung for long enough to affect the tank. Right out the gate, I know I’m going into the hobby with more experience and likely more expensive taste :downcast-face-with-sweat: also equipment and livestock prices have gone up a good deal since I broke my tank down in 2019. Just wanted to ask if you’d considered any contingency plans yet!
 

Gumbies R Us

Another Fish in the Sea
View Badges
Joined
Nov 10, 2022
Messages
9,859
Reaction score
18,954
Location
North Georgia
Rating - 0%
0   0   0
Here is an update on corals and growth.

A short video of how the tank is looking.

IMG_1313.jpg

The gorgonians continue to do well.
The echinopora seems to be doing well. Spreading out.
From then to now...
echinopora.jpg IMG_1315.JPG

IMG_1295.JPG

There has been good growth of the
and the cyaphestra has taken hold, encrusting and spreading out.


IMG_1314.JPG


I have started to dose daily ESV two part (Alk and Ca) small amounts as parameters were dropping with this growth. I expect to increase the dosage a bit over the next several weeks if growth keeps picking up.

And found my Yasha Gobby in the return chamber (again!) after a 2.5 months hiatus. Not too skinny but he seems to be doing well. Paired instantly (again) with his pistol shrimp buddy. Fishguard screens in place over each wier now. real pain in the butt.

IMG_1298.jpg

IMG_1308.jpg

so far, so good.
Coral looks like it is doing great!
 
OP
OP
J

Jason Scalise

Active Member
View Badges
Joined
Apr 13, 2019
Messages
264
Reaction score
221
Location
Phoenix, AZ
Rating - 0%
0   0   0
I’m having the same problem. I want to buy everything right away but I can’t afford to do that & have my safety net budget lol
Speaking of safety nets, have you planned any sort of automatic WiFi or power outage response? :thinking-face:
Back when I had my biocube, I only ever had 1 power outage of less than 12 hours. I just used a few air stone pumps with D batteries, but obviously this is not an automatic response that would be sufficient if my home temperature had swung for long enough to affect the tank. Right out the gate, I know I’m going into the hobby with more experience and likely more expensive taste :downcast-face-with-sweat: also equipment and livestock prices have gone up a good deal since I broke my tank down in 2019. Just wanted to ask if you’d considered any contingency plans yet!
I do not have a ready-to-go power back up solution in place. Power outages are uncommon where we live as we don’t have winter storms like other parts of the country. That said, a back-hoe could always sever a buried power cable in the neighborhood or a transformer could blow any time I suppose.

WiFi outages have happened (router acting up, etc). But with the logic within Apex, it will keep on its program settings (indefinitely) until connection is restored.
 
OP
OP
J

Jason Scalise

Active Member
View Badges
Joined
Apr 13, 2019
Messages
264
Reaction score
221
Location
Phoenix, AZ
Rating - 0%
0   0   0
Coral looks like it is doing great!
Thanks.
Over the last 6 weeks or so, I have increased my lights (RedSea 90) settings to max out at 45% (blue) and 15% (white).
That gives a PAR in the neighborhood of 150 or a bit more for where the SPS are currently (mid water column). The distance from light to coral (not top of water) is about 12-15"
I agree that the PAR could be much higher but things are responding with growth, good PE, etc.
 
OP
OP
J

Jason Scalise

Active Member
View Badges
Joined
Apr 13, 2019
Messages
264
Reaction score
221
Location
Phoenix, AZ
Rating - 0%
0   0   0
How do you like the RS Light?
The RS 90 light works well. It is PLENTY powerful for this 20g tank.
It has impressive shimmer effect.
The app interface is easy enough to use.

One thing that is slightly annoying is that when you make any changes to the light setting on the app, the transmission and uploading the new instructions to the light takes a lot longer that other lights. It's only 15seconds but during that time, the lights go dark, fish run to the hills, etc. It's not a huge issue and you can eliminate that 'issue' by making changes after dark. It seems like that is something they could fix with a software/firmware fix. But that is just me guessing.

Prior to this, I had a AI Hydra 26 which I also liked...but sold as part of a previous tank sale. Although the AI Hydra had multiple color channels (red, green, royal blue, etc...) that does lend itself to lots of adjusting and fiddling. Maybe that is good.... maybe it is unnecessary. But with the RS90, there are only two channels (blue and white). Less fiddling.
 
OP
OP
J

Jason Scalise

Active Member
View Badges
Joined
Apr 13, 2019
Messages
264
Reaction score
221
Location
Phoenix, AZ
Rating - 0%
0   0   0
I aded a UV sterilization light modification for a mild but growing dino outbreak.

There were some mats of dinos on the sand in 2-3 areas. a few strings of dinos on the glass but not a dino pandemic. It was not exploding but was increasing a bit.
First, I identified these under the microscope as being mostly Ostreopsis.

Screenshot 2024-01-28 at 8.39.53 AM.png

Video link here

My parameters at the time were fine.
dKh steady at 8.7
PO4 0.10 ppm
Nitrate 5.3ppm
some of the corals not terribly happy looking, others looking fine.

Rather than the traditional UV sterilizer equipment for this 20g AIO, I found this economical UV light on amazon. Link here.
Only $14.
I purchased the 3W version as it was the shortest bulb length (3") and I could easily place it in the left initial return chamber of the AIO below the floss filter cup. I just dangled it in there and set the timer (Apex) to have it come on at night.


Screenshot 2024-01-28 at 8.30.51 AM.png

After the first night, there was a noticeable reduction of the dino patches.
And after about 3 nights, they were essentially gone.
I have turned the UV off althogher for the last couple of weeks without any return of the dino patches.

The corals that were not so happy before (e.g. gorgonian polyps retracted 100% of the time) are now fully happy it would seem.

I think the UV was effective given how quickly things improved and not just a coincidence.

Perhaps this can be helpful to others as an easy and cost effective solution. I dont know if it would have worked on a much worse infestation and certainly already have parameters in a good range is helpful too. But I liked not having to consider any plumbing, easy 10 second "installation", nothing in the visible display area....and cheap.
 

PocketGoose

Active Member
View Badges
Joined
Nov 6, 2022
Messages
289
Reaction score
277
Location
Florida
Rating - 0%
0   0   0
FWIW I have the IM version - had dinos, they resolved and then removed the UV. Each time I’ve removed the UV they came back in time (three separate occasions) not Immediately but they came back - not in the numbers from the first invasion, much smaller. I run it 24/7 now and haven’t dealt with them since. The microbial community of the tank has also matured immensely, but I’m just going to leave it and change the bulb annually. Just a thought :)
 
OP
OP
J

Jason Scalise

Active Member
View Badges
Joined
Apr 13, 2019
Messages
264
Reaction score
221
Location
Phoenix, AZ
Rating - 0%
0   0   0
FWIW I have the IM version - had dinos, they resolved and then removed the UV. Each time I’ve removed the UV they came back in time (three separate occasions) not Immediately but they came back - not in the numbers from the first invasion, much smaller. I run it 24/7 now and haven’t dealt with them since. The microbial community of the tank has also matured immensely, but I’m just going to leave it and change the bulb annually. Just a thought :)
yeah, thanks.
I was going to get the IM version originally, but it was out of stock....hence the alternate solution.
 

jphilip813

Well-Known Member
View Badges
Joined
Sep 8, 2019
Messages
887
Reaction score
571
Location
In The 915
Rating - 0%
0   0   0
First modifications

The way IM has the return pump tubing situated in the return chamber, consumes a fair amount of space in my opinion.

There is not much room in the front-to-back dimension in the return chamber given how far out the elbows in the return chamber stick out. It is not much but for tiny spaces, every bit helps. I want to install a float valve here for my ATO and desire the space. I decided to modify it a bit.

Screenshot 2022-12-30 at 8.45.22 AM.png


This is the stock configurate with the Y split going to each elbow.


IMG_0034.JPG

IMG_0038.JPG

I cut down the elbow a bit (the part that connects to the flange that goes into the DT. (pre-cut on top, modified on the bottom).

And I replaced the Y with a T to move that ‘bulk’ of the connection higher up in the chamber. That said, I probably would have done the job with just the modification of the elbows.

IMG_0035.JPG


IMG_0037.JPG


And now it looks closer to this.
return tubing mod.jpg
This created an extra 1 inch of clear clearance in a 3 inch space...33% pick up.
I think i am going to redo mine and follow what you did...I like it
 

ajjw0828

Active Member
View Badges
Joined
Dec 12, 2019
Messages
485
Reaction score
449
Rating - 0%
0   0   0
Nice build, following along! Gave me some good ideas for a couple changes to my tank. How is the mp-10 treating you? Going between that and a slow-10 or 20. Can’t decide.
 
OP
OP
J

Jason Scalise

Active Member
View Badges
Joined
Apr 13, 2019
Messages
264
Reaction score
221
Location
Phoenix, AZ
Rating - 0%
0   0   0
Nice build, following along! Gave me some good ideas for a couple changes to my tank. How is the mp-10 treating you? Going between that and a slow-10 or 20. Can’t decide.
The pump its not a MP-10 (for clarity) but instead a Nero 3. The Nero 3 is working fine. Not issues. super quiet and responsive.
I suspect the MP-10 is just fine however. No personal experience.
 

Clear reef vision: How do you clean the inside of the glass on your aquarium?

  • Razor blade

    Votes: 133 59.9%
  • Plastic scraper

    Votes: 64 28.8%
  • Clean-up crew

    Votes: 79 35.6%
  • Magic eraser

    Votes: 39 17.6%
  • Other

    Votes: 63 28.4%

New Posts

Back
Top