Elder1945

Valuable Member
View Badges
Joined
Aug 29, 2014
Messages
1,499
Reaction score
4,202
Location
Barrie Ontario
Rating - 0%
0   0   0
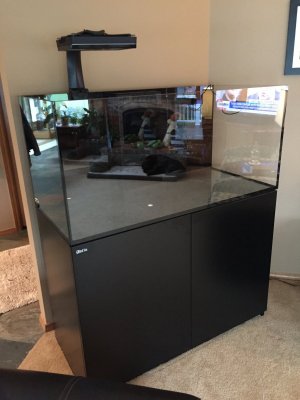
For now, this is the view of my tank:
IMG_2372.JPG

Cool build!

A few questions on the plumbing layout.. Why do you have a valve going in and out of the UV? One valve going in would regulate the flow? Would a union work on the other side?

As for adding a valve i would put one going into the refugium as this is something you might need to control flow too.

build is looking good though.
 
OP
OP
SuncrestReef

SuncrestReef

That Apex guy
View Badges
Joined
Jan 18, 2018
Messages
4,214
Reaction score
9,217
Location
Oregon
Rating - 0%
0   0   0
Cool build!

A few questions on the plumbing layout.. Why do you have a valve going in and out of the UV? One valve going in would regulate the flow? Would a union work on the other side?

As for adding a valve i would put one going into the refugium as this is something you might need to control flow too.

build is looking good though.

The UV unit will need periodic cleaning and bulb replacement. During normal operation, the two valves for UV input and output will be open, and the bypass valve will be closed. During maintenance, I will close the two valves attached to the UV input and output, then open the bypass valve on the return line so the tank will continue to have flow. If I only had one valve connected to the UV, then water would spew out once I open the bypass valve.
 
OP
OP
SuncrestReef

SuncrestReef

That Apex guy
View Badges
Joined
Jan 18, 2018
Messages
4,214
Reaction score
9,217
Location
Oregon
Rating - 0%
0   0   0
I just spoke with R&L Carriers and my Reefer XL 425 is scheduled for delivery tomorrow! I have already received most of the equipment, just waiting on a back-ordered COR-20 pump, one XR30 Pro G4, and a few PVC fittings. Should be able to start my build this weekend.
After waiting around all day for the delivery truck that didn't show up, I called the shipping company back and they said "I'm not sure who you spoke with, but it hasn't even reached our warehouse yet". Now they're saying it will be delivered on Monday, so my plans to start the build this weekend just went out the window.

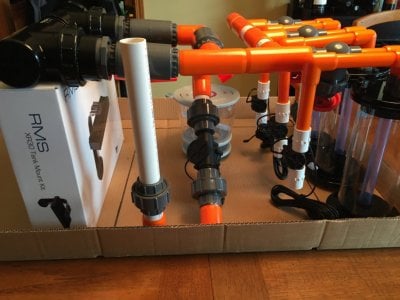
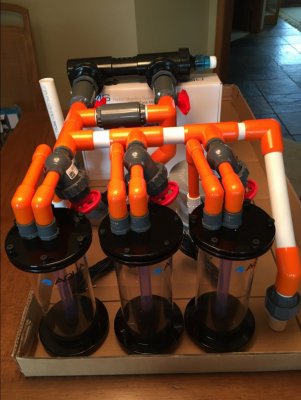
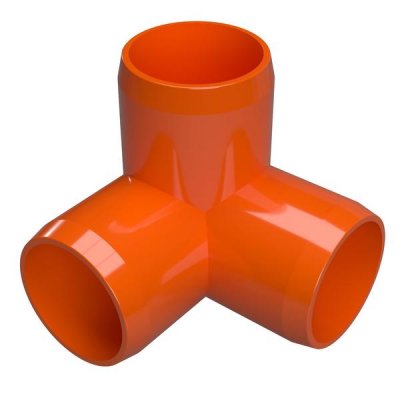
In the meantime a few more of the PVC fittings have arrived so I'm mocking up some design ideas for my manifold. I think I have a couple ways I can easily fit the 3 AquaMaxx reactors and the UV sterilizer without interfering with the skimmer inside the cabinet. 3-way wye fittings save a lot of space over traditional T-fittings and elbows.
formufit-side-outlet-elbow-orange-1-3-way-pvc-elbow-fitting-furniture-grade-1805232734236_grande.jpg
 

mjlash22

Well-Known Member
View Badges
Joined
Jan 13, 2016
Messages
643
Reaction score
432
Location
Michigan
Rating - 0%
0   0   0
Looking good so far! Interested to see what you do with all that equipment!
 
OP
OP
SuncrestReef

SuncrestReef

That Apex guy
View Badges
Joined
Jan 18, 2018
Messages
4,214
Reaction score
9,217
Location
Oregon
Rating - 0%
0   0   0
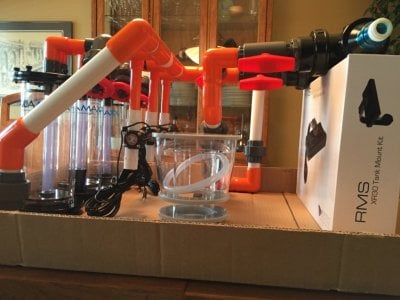
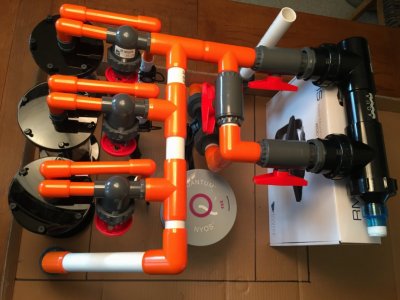
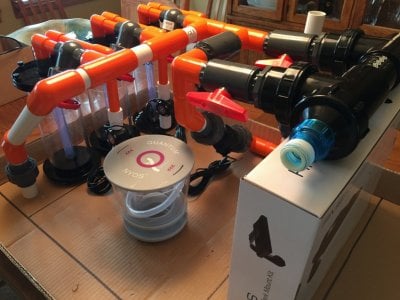
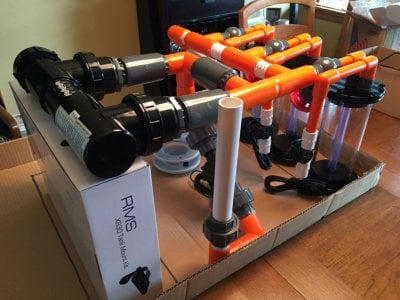
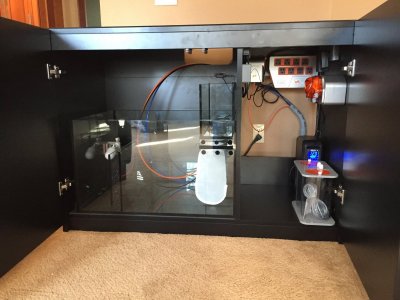
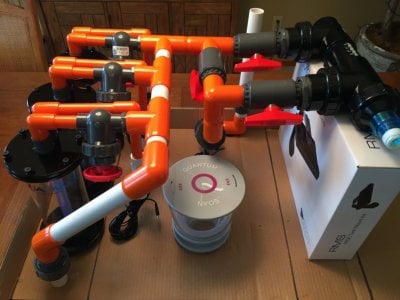
The rest of my PVC fittings finally arrived so I was able to mock up a design for my manifold. The primary challenge was to place the UV sterilizer in a position where I can easily remove the bulb and quartz sleeve for maintenance, and to fit my Apex flow sensors. I ended up locating it at the ceiling of the cabinet directly above the ATO reservoir. This will allow me to pull the bulb straight out the front of the cabinet, and it's high enough above the reservoir that I'm planning to use as a refugium to still have room for a slim LED grow light. The 3-way PVC fitting made all the difference in fitting things nicely. This design also allows me to securely support all the PVC from the ceiling of the cabinet.

The final version will have all orange PVC pipe. I just used scrap white PVC since I didn't want to start cutting up the expensive stuff until I'm ready to glue things up. Everything is 1" except for the reactors which use 1/2".

Just waiting patiently for the Reefer to show up...

IMG_2524.JPG IMG_2525.JPG IMG_2527.JPG IMG_2528.JPG IMG_2529.JPG IMG_2530.JPG IMG_2531.JPG
 
Last edited:
OP
OP
SuncrestReef

SuncrestReef

That Apex guy
View Badges
Joined
Jan 18, 2018
Messages
4,214
Reaction score
9,217
Location
Oregon
Rating - 0%
0   0   0
My Reefer XL 425 finally arrived! The pallet lost a couple of the support blocks on the bottom, but there was no damage.

IMG_2534.JPG

IMG_2535.JPG

IMG_2536.JPG
 
OP
OP
SuncrestReef

SuncrestReef

That Apex guy
View Badges
Joined
Jan 18, 2018
Messages
4,214
Reaction score
9,217
Location
Oregon
Rating - 0%
0   0   0
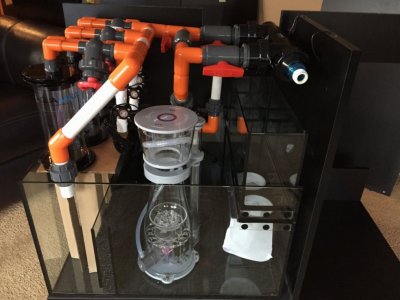
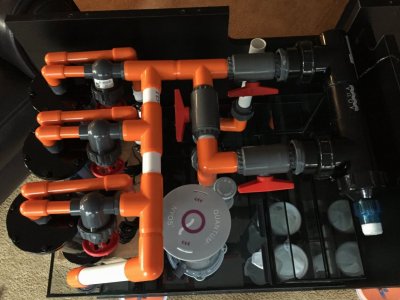
I took a break during cabinet assembly and temporarily put the sump in place and mocked up my PVC, reactors, skimmer, and UV sterilizer to validate my design would actually fit. Everything fit perfectly, with a little extra room to spare!

Now I can get back to cabinet assembly knowing that I won't need to completely redesign everything at the last minute.
IMG_2541.JPG IMG_2542.JPG IMG_2543.JPG
 
Last edited:

mjlash22

Well-Known Member
View Badges
Joined
Jan 13, 2016
Messages
643
Reaction score
432
Location
Michigan
Rating - 0%
0   0   0
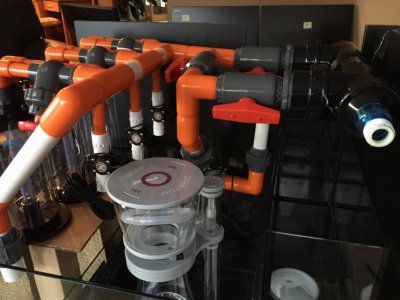
I took a break during cabinet assembly and temporarily put the sump in place and mocked up my PVC, reactors, skimmer, and UV sterilizer to validate my design would actually fit. Everything fit perfectly, with a little extra room to spare!

Now I can get back to cabinet assembly knowing that I won't need to completely redesign everything at the last minute.
IMG_2541.JPG IMG_2542.JPG IMG_2543.JPG
Looking good!
 
OP
OP
SuncrestReef

SuncrestReef

That Apex guy
View Badges
Joined
Jan 18, 2018
Messages
4,214
Reaction score
9,217
Location
Oregon
Rating - 0%
0   0   0
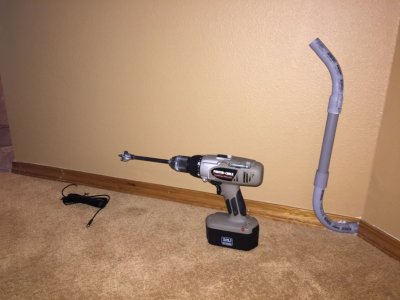
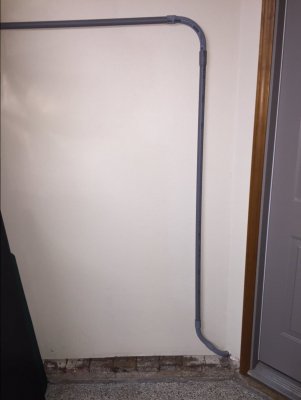
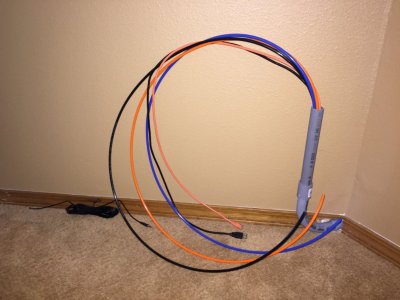
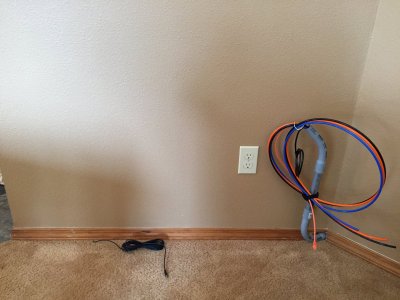
At this point I'm waiting on the electrician who will be installing a dedicated 20 amp circuit for the aquarium before I can put the cabinet in place and set the display tank on top. In the meantime I successfully drilled the hole through the baseboard and ran 3/4" conduit that will contain poly tubing for ATO, AWC, an AquaBus bus cable to link to the remote DOS and FMM module, and an Ethernet cable to link my Apex into my home network switch. Even though Apex has wireless capability, I still prefer to rely on a good CAT-5 cable for things I really depend on. The conduit will be completely hidden behind the Reefer stand, and then goes into the garage directly to my mixing station area. That's where I will also mount a Neptune DOS for AWC and a Neptune FMM for ATO.

You'll also notice in the photo a cable coming from a low-profile leak detection probe I placed under the carpet ready to plug into another one of my FMM modules inside the cabinet. Making progress, perhaps slowly, but progress none the less.

IMG_2552.JPG

IMG_2554.JPG
 
OP
OP
SuncrestReef

SuncrestReef

That Apex guy
View Badges
Joined
Jan 18, 2018
Messages
4,214
Reaction score
9,217
Location
Oregon
Rating - 0%
0   0   0
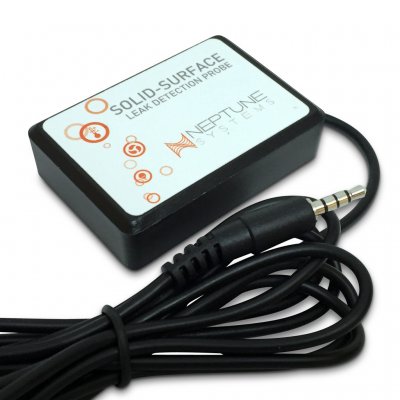
For anyone thinking about placing a Neptune Apex Leak Detection Probe in the sump area on a Reefer XL 425, I want to warn you it won't fit without modification to both the probe and the Reefer cabinet due to the width of the sump tank. The sump cabinet area is 29-1/8" wide and it's lined on 3 sides (left, right, and rear) by a strip of dense foam rubber that's 3/16" thick and about 1" tall to keep the sump from touching the actual cabinet walls. Since the sump tank itself is 27.5" wide, that leaves only 1.25" of available space. Unfortunately the Leak Detection Probe is 1.75" wide, so there's just no way it can sit flat at the bottom of the cabinet, and the sensor needs to sit flat in order to accurately sense the smallest of leaks as water makes contact with the metal detection strips.

LD-2-1024x1024.jpg

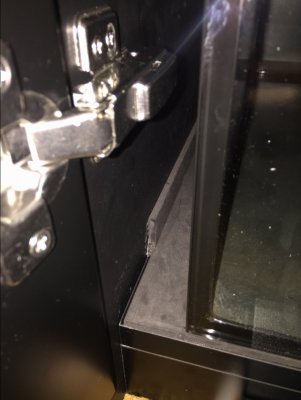
I don't like my solution for this, but it worked. I completely removed the foam rubber strip from the right side of the sump cabinet area, slid the sump tank to the right so it's now flush with the cabinet wall, and then trimmed a small piece of the foam rubber strip from the left side of the cabinet long enough to accommodate the probe.

IMG_2561.JPG

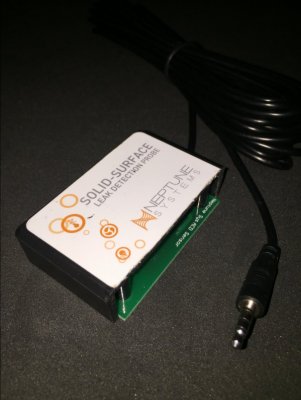
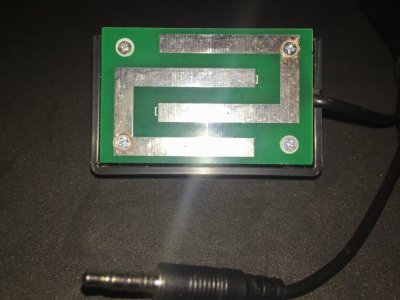
Then I removed the plastic housing of the probe (it's just held on by 4 small screws) and used a grinding disk to trim the housing. This reduced the overall width by 3/16", so now it fits snugly between the cabinet wall and the sump. I'm not concerned about the internal circuitry getting wet because the plastic housing was not a water-tight seal to begin with, and the internal circuits don't contain any chips or resistors. It's just a couple metal strips connected to the sensor cable.

IMG_2563.JPG

IMG_2564.JPG

IMG_2559.JPG

My biggest worry is if the sump glass up against the wall of the cabinet will resonate from any vibrations from the return pump or skimmer. I'll have to wait until I have the system up and running before I'll know. If that does become a problem, then I'll trim the other side of the probe enough to allow the sump to be pulled away from the cabinet wall.

Anyway, I just hope this helps someone if they run into the same situation.
 
Last edited:
OP
OP
SuncrestReef

SuncrestReef

That Apex guy
View Badges
Joined
Jan 18, 2018
Messages
4,214
Reaction score
9,217
Location
Oregon
Rating - 0%
0   0   0
The electrician won't be able to install the new dedicated 20 amp circuit until next Monday, so I've been killing time getting other things ready before I can finally mount the display tank on top of the stand. Here's a brief update on my recent progress:

1. I finally received my 30' lengths of poly tubing for ATO and AWC plumbing, in addition to the 30' Aquabus cable and Ethernet cable so I can route all of these through the conduit from my garage into the living room where the display tank will be. Last week I drilled through the wall and installed 3/4" PVC pipes to contain these tubes and cables. After taping them together with electrical tape, I managed to pull all of them through the PVC and it worked out perfectly.

IMG_2593.JPG IMG_2592.JPG

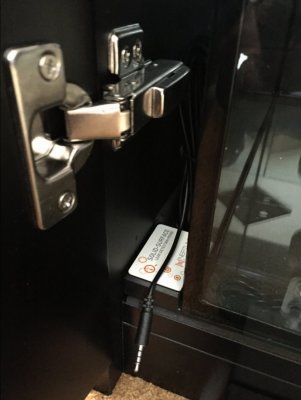
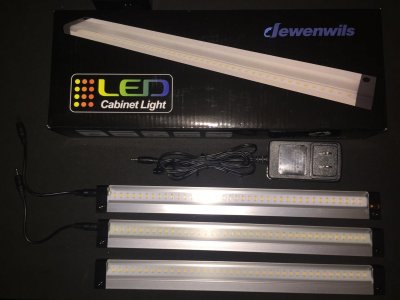
2. I also picked up some nice simple LED lights for inside the Red Sea cabinet. There are 3 lighting units, each about 12" long, with short 4" power cables that connect them together. This allows one LED to be in the control cabinet side and 2 LED's in the sump cabinet area. I drilled a small 1/4" hole through the cabinet wall to connect them. The lights have a motion detector so I can just wave my hand under the control cabinet space to turn the lights on/off, or hold my hand under the sensor to dim them. Pretty convenient.

IMG_2578.JPG

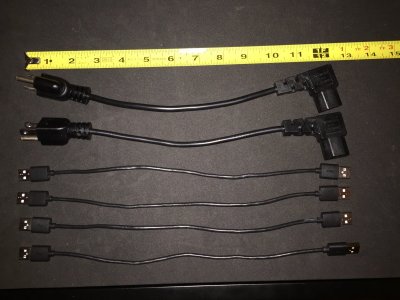
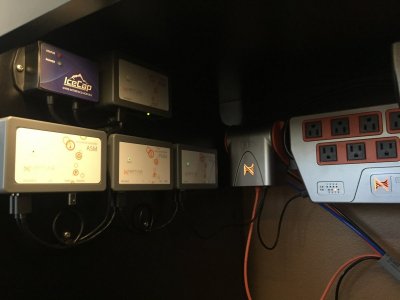
3. As I'm planning how to mount all my Apex modules and other electrical components, I wanted to minimize the cable clutter. I found these 1' USB cables to connect AquaBus components and 1' power cords for the Radion LED power bricks.

IMG_2584.JPG

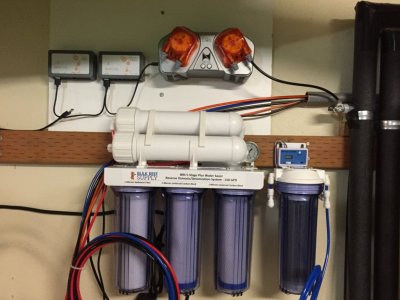
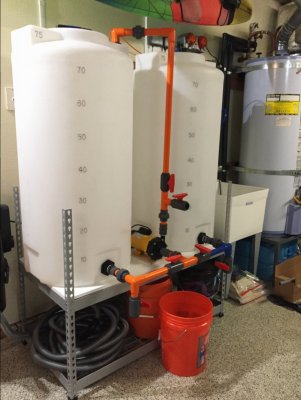
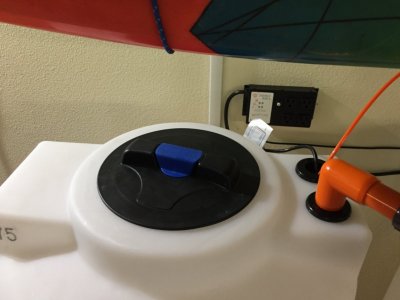
4. I also finalized my saltwater mixing station design and put all the plumbing together. Keeping with my color-coded pipes, blue is RO/DI water and orange is salt water:

IMG_2596.JPG

IMG_2597.JPG

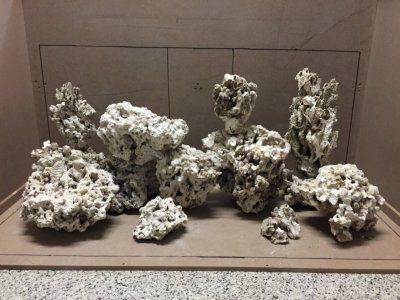
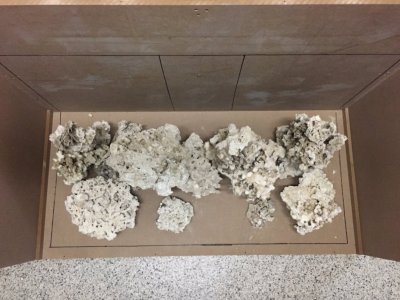
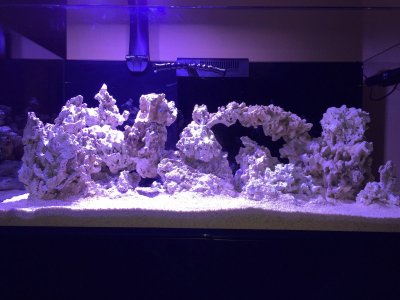
5. Lastly, I started playing with my dry Pukani rock to figure out what I want to do for aquascaping. Here's my first attempt:

IMG_2585.JPG IMG_2586.JPG

I'm not convinced this will be my final aquascape design, but it's not bad for simply working with the rocks I received without taking a chisel to anything yet.

The electrician will be here on Monday to install the dedicated circuit for the aquarium, then I can finally put the tank on the cabinet and fill it with salt water. After that I will be able to make a lot more progress!
 
OP
OP
SuncrestReef

SuncrestReef

That Apex guy
View Badges
Joined
Jan 18, 2018
Messages
4,214
Reaction score
9,217
Location
Oregon
Rating - 0%
0   0   0
It's been a while, but I finally have some progress to report. The electrician installed the dedicated 20 amp circuit behind the Reefer cabinet so I was able to put the cabinet in its permanent position and mount the display tank.
IMG_2609.jpg
I installed a UPS for emergency power, and mounted all my Apex hardware.
IMG_2610.jpg
IMG_2605.jpg
It was actually easier than I thought it would be for two people to lift the display tank onto the cabinet. I had seen others using suction cups, but for the 425 XL tank it was totally manageable for two people without any suction cups.
I'm still waiting on one of my Radion LED units that's on back order, so for now I only mounted the one I have.
IMG_2621.jpg
I also finalized my aquascape.
IMG_2642.jpg
Here's a quick video of the aquascape. A single photo doesn't really reveal the 3-D aspect of all the caves and gaps between rocks.

I'm still waiting on my Neptune COR-20 return pump that's also on back order, so I can't really do much with the plumbing or start cycling my tank until I have a way to circulate the water. Hope it arrives soon.
 
Last edited:

Creating a strong bulwark: Did you consider floor support for your reef tank?

  • I put a major focus on floor support.

    Votes: 25 39.7%
  • I put minimal focus on floor support.

    Votes: 15 23.8%
  • I put no focus on floor support.

    Votes: 21 33.3%
  • Other.

    Votes: 2 3.2%
Back
Top