OP
OP
SuncrestReef

SuncrestReef

That Apex guy
View Badges
Joined
Jan 18, 2018
Messages
4,214
Reaction score
9,214
Location
Oregon
Rating - 0%
0   0   0
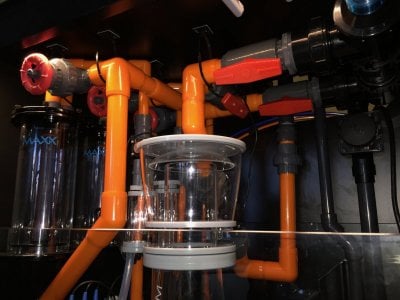
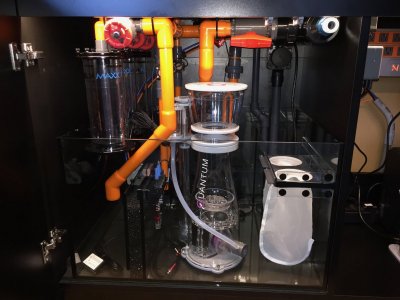
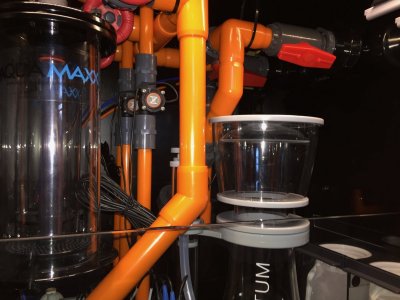
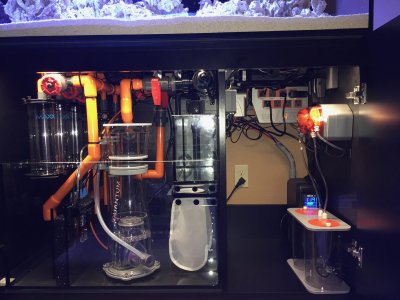
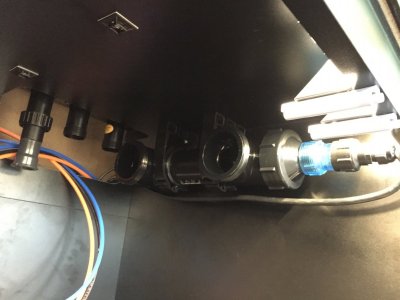
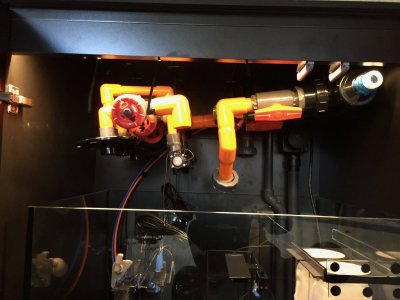
More good progress today. I glued up all the PVC and installed the sump plumbing. I purchased a set of mounting brackets for the Aqua UV sterilizer since it's a pretty heavy unit and will require periodic maintenance to replace the bulb and clean the glass tube. I wanted to make sure it was mounted firmly to make this easier when unscrewing the large PVC fittings.
IMG_2654.jpg

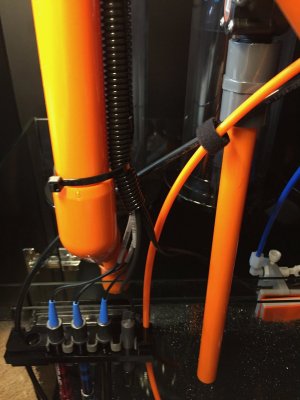
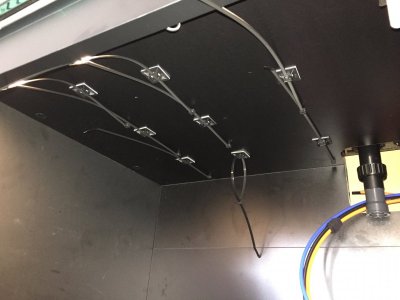
To support the rest of the plumbing, I used 1" x 1" zip-tie mounting plates screwed into the sump cabinet ceiling, then suspended the PVC pipe from the mounts with zip ties. This worked great because it allowed me to loosely suspend the pipes while I got everything lined up and connected, then just tightened the zip ties until everything was pulled up to the ceiling and level with the UV sterilizer that is mounted solidly.
IMG_2658.jpg

IMG_2659.jpg

IMG_2662.jpg

IMG_2661.jpg

IMG_2663.jpg

Now I just need to wait patiently for Neptune to get their manufacturing caught up and start shipping the next batch of COR-20 pumps so I can get water flowing.

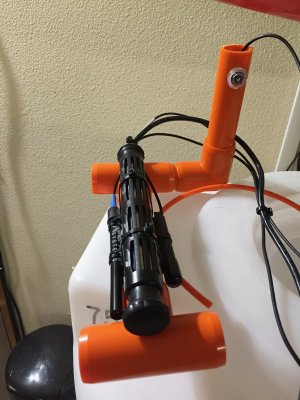
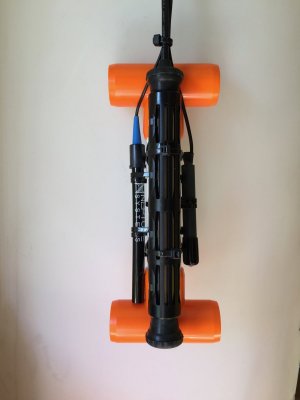
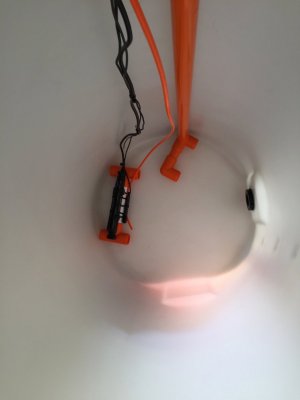
I also added a few final touches to my saltwater mixing station. I glued up a small PVC structure to mount a heater, temperature probe, and salinity probe to sit in the bottom of the saltwater tank and connect into my Apex.
IMG_2646.jpg

IMG_2647.jpg

Tomorrow I plan to organize all the Apex cabling and power cords, and start the Apex configuration & programming.
 
OP
OP
SuncrestReef

SuncrestReef

That Apex guy
View Badges
Joined
Jan 18, 2018
Messages
4,214
Reaction score
9,214
Location
Oregon
Rating - 0%
0   0   0
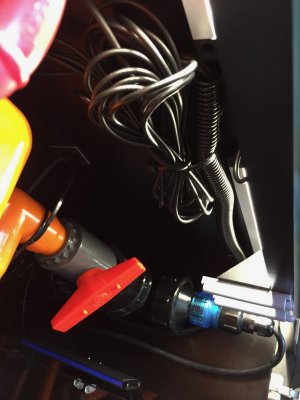
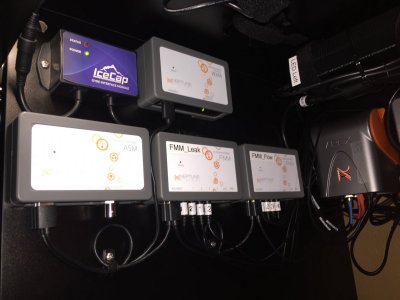
Today I connected all the Apex cables for the probes and flow monitors & leak sensors. I used the same zip-tie mounts but this time with just the adhesive backing since the cables are light weight and likely don't need screws to support them. We'll see how long the adhesive works in a saltwater evaporation environment.

I also used some plastic cable management tubing to keep things organized. Since I have the four basic Apex probes plus 4 flow sensors, two optical sensors for the ATK, and two leak sensors, there are a lot of cables to run from the sump area to the control cabinet. The corrugated plastic tubing allowed me to tuck all 12 cables into a single bundle to tie off and route neatly to the control cabinet.

IMG_2666.jpg

IMG_2667.jpg

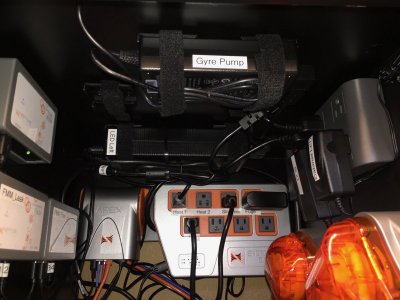
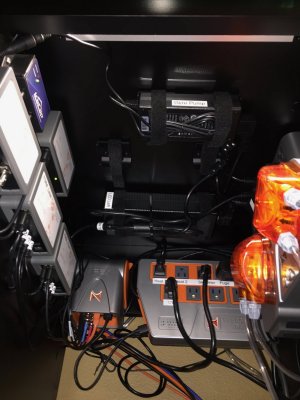
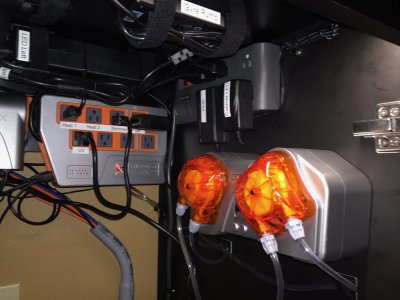
On the control cabinet side, I mounted the various power bricks to the cabinet ceiling and used 1 foot power cords to eliminate as much cabling clutter as possible.

IMG_2668.jpg

(there's one empty mounting bracket for a Radion power brick. The LED is on back order.)
IMG_2670.jpg

I labeled all the cables and tried to keep them from tangling.

IMG_2671.jpg

I also ran the tubing for the DOS and DDR. I wish Neptune wouldn't crimp their plastic tubing and wrap it with rubber bands that make it really difficult to straighten out the tubing. I did my best to make it look neat, but may end up replacing their tubing with something that hasn't been folded up.

IMG_2672.jpg

I made sure to leave room in the control cabinet area for the upcoming Neptune Trident and plan to order one as soon as it's available.

IMG_2669.jpg


IMG_2673.jpg

At this point I just need to wait for my COR-20 pump and one more Radion LED, both on back order.
 
Last edited:
OP
OP
SuncrestReef

SuncrestReef

That Apex guy
View Badges
Joined
Jan 18, 2018
Messages
4,214
Reaction score
9,214
Location
Oregon
Rating - 0%
0   0   0
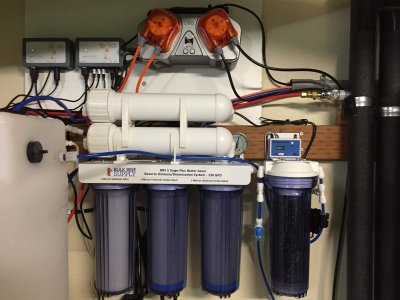
Today I completed all the connections on my RO/DI system and made a few additions to my mixing station. I decided to purchase an auto-flush system to help preserve the life of the RO/DI filters and to help me save time. Since I have 75 gallon tanks, using the BRS 5-stage RO/DI 150 gallon per day setup will take at least 12 hours to fill a single tank. The auto-flush system will automatically flush the filters every hour.

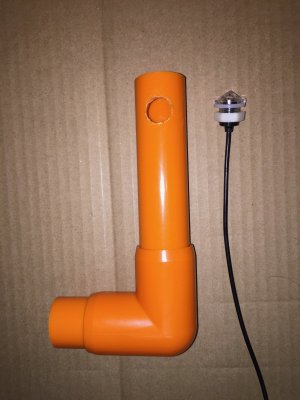
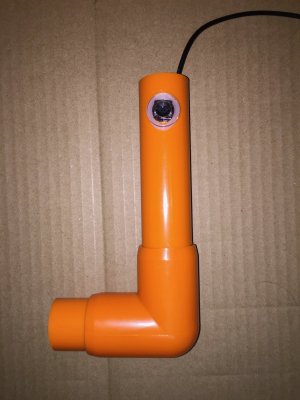
I also added optical sensors in both tanks. For the RO/DI tank, I just used magnetic mount sensors. On the saltwater tank, I was concerned if the mixing pump might cause enough flow to dislodge a magnet mounted sensor, so instead I built a PVC mount to attach to the PVC structure already holding the heater and temp/salinity probes at the bottom of the tank:

IMG_2681.jpg

IMG_2682.jpg

IMG_2683.jpg

IMG_2687.jpg

IMG_2686.jpg

RO/DI is finally filling the tank for the first time, so tomorrow I should be able to transfer that water to the mixing tank and start the heater before mixing up my first batch of saltwater.

I'm STILL waiting for my COR-20 pump to ship (it was ordered in early February), but at least I'm now starting to see the COR-20 in stock at some vendors so I hope mine will arrive soon.
 
Last edited:
OP
OP
SuncrestReef

SuncrestReef

That Apex guy
View Badges
Joined
Jan 18, 2018
Messages
4,214
Reaction score
9,214
Location
Oregon
Rating - 0%
0   0   0
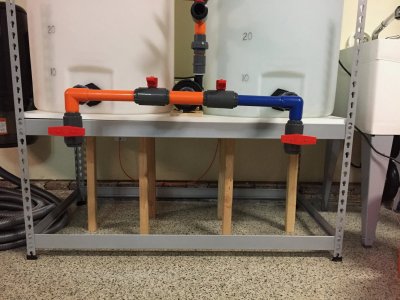
I let the RO/DI run overnight to fill the first tank. This morning I went out to check on it and it was at 65 gallons full, but I noticed the tank was leaning about 5 degrees towards the other tank. The "heavy duty" metal shelf rails were bowed and I was worried it might collapse. For now I put some temporary wood supports under the tanks to better distribute the load.
IMG_2690.jpg

Once I'm done mixing up this first batch of saltwater I'll take the mixing station apart and replace the shelving with something more sturdy.
 
OP
OP
SuncrestReef

SuncrestReef

That Apex guy
View Badges
Joined
Jan 18, 2018
Messages
4,214
Reaction score
9,214
Location
Oregon
Rating - 0%
0   0   0
Nice and super clean install! Great job!

Thanks! The one advantage of waiting on back ordered equipment is that I had plenty of time to kill so I spent way more time organizing everything than usual.
 
Last edited:
OP
OP
SuncrestReef

SuncrestReef

That Apex guy
View Badges
Joined
Jan 18, 2018
Messages
4,214
Reaction score
9,214
Location
Oregon
Rating - 0%
0   0   0
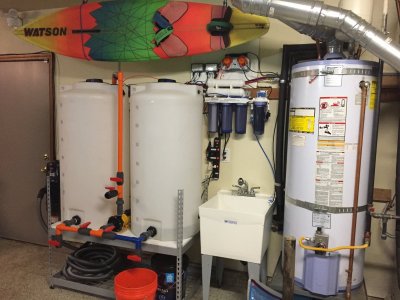
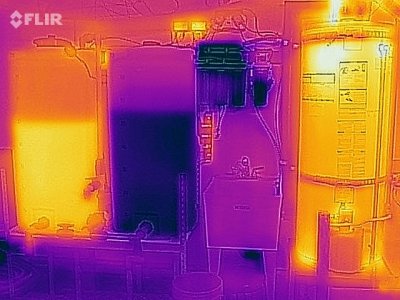
This is a total nerdy thing to do, but I was curious how well the heater in my saltwater mixing tank was working, so I got out my Flir thermal camera and snapped a heat signature photo of my mixing station. On the left is the saltwater tank with 50 gallons of water heating up (currently at about 76 degrees). Next to the right is the RO/DI tank with about 55 gallons of fresh unheated water. Next to the right is the RO/DI filter on the wall above the sink, and on the far right is the hot water heater for the house. Just above the RO/DI tank you can see the heat signature of my Apex PM2 and ATK modules, and you can also see the power strip on the wall below the RO/DI filter.

20180322T205206.jpg

If you scroll up to post# 43 in this thread you can see the normal lighting photo of this same scene.

Again, sorry for the nerd shot, but I thought it would be fun to see.
 
OP
OP
SuncrestReef

SuncrestReef

That Apex guy
View Badges
Joined
Jan 18, 2018
Messages
4,214
Reaction score
9,214
Location
Oregon
Rating - 0%
0   0   0
Cool! Why do you have a thermal camera?

Just for fun. It was a Xmas present from my wife a few years ago. She knows I like gadgets and photography, so this Flir One camera that attaches to my iPhone was a clever gift idea.

https://www.amazon.com/gp/aw/d/B071Z63RSL

I’ve used it around the house to find where cold air is coming from, where insulation is lacking, checked my circuit panel for any overheating breakers, and even busted my dog for sleeping on the loveseat while we were out for dinner! :) (we were curious where he sleeps so I walked around the house with the Flir cam until I found a dog-shaped heat pattern on the loveseat)
 
OP
OP
SuncrestReef

SuncrestReef

That Apex guy
View Badges
Joined
Jan 18, 2018
Messages
4,214
Reaction score
9,214
Location
Oregon
Rating - 0%
0   0   0

kswan

Active Member
View Badges
Joined
Mar 24, 2017
Messages
430
Reaction score
339
Location
Minneapolis
Rating - 0%
0   0   0
Just for fun. It was a Xmas present from my wife a few years ago. She knows I like gadgets and photography, so this Flir One camera that attaches to my iPhone was a clever gift idea.

https://www.amazon.com/gp/aw/d/B071Z63RSL

I’ve used it around the house to find where cold air is coming from, where insulation is lacking, checked my circuit panel for any overheating breakers, and even busted my dog for sleeping on the loveseat while we were out for dinner! :) (we were curious where he sleeps so I walked around the house with the Flir cam until I found a dog-shaped heat pattern on the loveseat)

Can’t argue with that.

I have a 425 as well. Nice build! Mine has been running since July.
 
OP
OP
SuncrestReef

SuncrestReef

That Apex guy
View Badges
Joined
Jan 18, 2018
Messages
4,214
Reaction score
9,214
Location
Oregon
Rating - 0%
0   0   0
My COR-20 pump and my 2nd Radion finally shipped today, scheduled for delivery next Wednesday. I'll post my next update once they arrive.
 
OP
OP
SuncrestReef

SuncrestReef

That Apex guy
View Badges
Joined
Jan 18, 2018
Messages
4,214
Reaction score
9,214
Location
Oregon
Rating - 0%
0   0   0
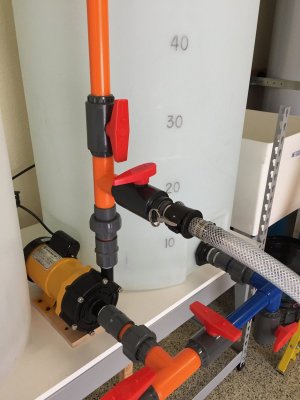
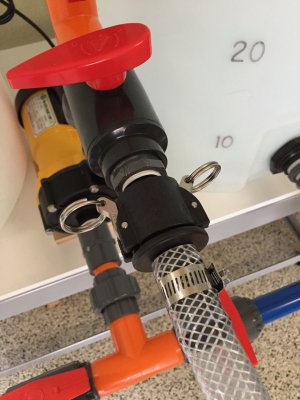
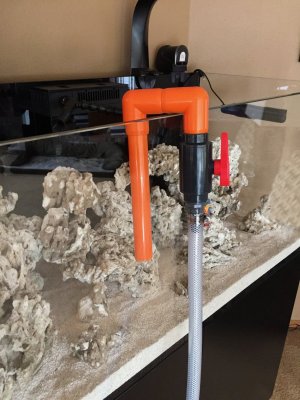
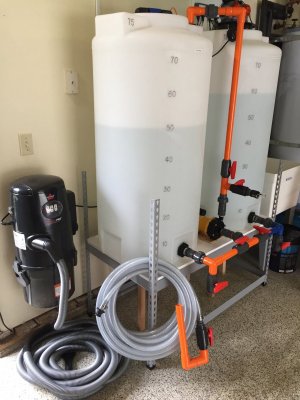
One last thing I needed to prepare for filling the tank next week was a hose to connect to my mixing station. I purchased a cam-connect fitting, 30 feet of braided hose, and one more ball valve.

My pump is connected to a Neptune EB4, so I can remotely turn it on and off from my iPhone while standing at the display tank, and I can regulate the flow using the ball valve hanging from the nozzle end of the hose.

IMG_2714.jpg

IMG_2715.jpg

IMG_2716.jpg

IMG_2717.jpg

Nice and simple setup, and stores easily out of the way when not needed.
 
OP
OP
SuncrestReef

SuncrestReef

That Apex guy
View Badges
Joined
Jan 18, 2018
Messages
4,214
Reaction score
9,214
Location
Oregon
Rating - 0%
0   0   0
love the wire layout. how did you attach those straps?

I'm not sure which straps you're asking about as I have a couple different ones in use. For the power bricks strapped to the ceiling of the cabinet, I used the Ecotech mounting brackets. See https://www.bulkreefsupply.com/power-supply-bracket-ecotech-marine.html

For the zip ties just holding bundles of wires, I used 1" square zip tie mounting plates with adhesive backing. I use the same zip tie mounts for the PVC pipes but secured them with 1/2" screws due to the weight of the plumbing. See https://ziptie.com/1-in-black-cable-tie-mounts-100-pack.html
 

offtropic

Active Member
View Badges
Joined
Nov 1, 2017
Messages
147
Reaction score
80
Location
Bay Area, California
Rating - 0%
0   0   0
Hey I'm really enjoying your build and attention to detail here. I currently only have a 20g nano tank but planning on going bigger soon and your schematics are giving me some great ideas as I am trying to figure out if a Reefer 350 or 425 is going to be the way I go. One of the things I'm looking at is sump configuration and I see you are converting the stock ATO into a refugium - maybe I haven't see the right picture but are you going to modify the overflow to put the water back into the sump?

Also, I'm looking to set up something like what you have with regards to water management - I'm wondering about the purpose of the heater in the salt water holding tank. Is it there for large % water changes, does your garage hit freezing temps or is there some salinity/chemistry issue that it helps with?
 
OP
OP
SuncrestReef

SuncrestReef

That Apex guy
View Badges
Joined
Jan 18, 2018
Messages
4,214
Reaction score
9,214
Location
Oregon
Rating - 0%
0   0   0
Hey I'm really enjoying your build and attention to detail here. I currently only have a 20g nano tank but planning on going bigger soon and your schematics are giving me some great ideas as I am trying to figure out if a Reefer 350 or 425 is going to be the way I go. One of the things I'm looking at is sump configuration and I see you are converting the stock ATO into a refugium - maybe I haven't see the right picture but are you going to modify the overflow to put the water back into the sump?

Also, I'm looking to set up something like what you have with regards to water management - I'm wondering about the purpose of the heater in the salt water holding tank. Is it there for large % water changes, does your garage hit freezing temps or is there some salinity/chemistry issue that it helps with?

I haven't started working on converting the ATO box into a refugium yet, but will work on it in the next week or so and I'll post photos at that time. Basically I am going to drill two holes in the side of the ATO tank, one near the bottom to pump water in from the sump using a Neptune PMUP, and one near the top for an overflow drain back into the sump.

The reason I'm heating the mixing station tank is so the water will be approximately the same temperature as my aquarium and I can be more accurate with the salinity level when mixing in the salt. Since salinity measurements can vary based on water temperature, and the water from my plumbing system comes out at about 50 degrees, I plan to heat it up before mixing each new batch of saltwater.

I'm glad you're enjoying the build, and I hope my design is helpful for your planning! Regarding the decision between a Reefer 350 or 425, I'm glad I went with the 425 because the extra couple of inches in depth allowed me to fit all the plumbing in with little room to spare. I'm not sure I could have squeezed everything in with a 350.
 

Being sticky and staying connected: Have you used any reef-safe glue?

  • I have used reef safe glue.

    Votes: 42 85.7%
  • I haven’t used reef safe glue, but plan to in the future.

    Votes: 2 4.1%
  • I have no interest in using reef safe glue.

    Votes: 2 4.1%
  • Other.

    Votes: 3 6.1%
Back
Top