offtropic

Active Member
View Badges
Joined
Nov 1, 2017
Messages
147
Reaction score
80
Location
Bay Area, California
Rating - 0%
0   0   0
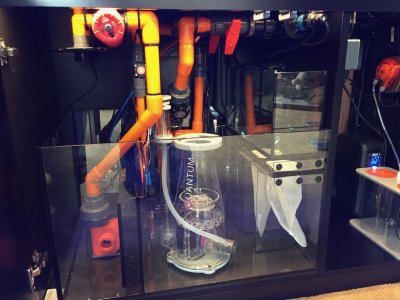
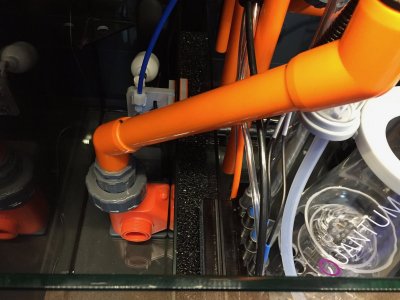
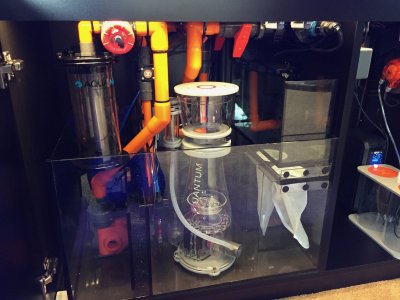
I haven't started working on converting the ATO box into a refugium yet, but will work on it in the next week or so and I'll post photos at that time. Basically I am going to drill two holes in the side of the ATO tank, one near the bottom to pump water in from the sump using a Neptune PMUP, and one near the top for an overflow drain back into the sump.

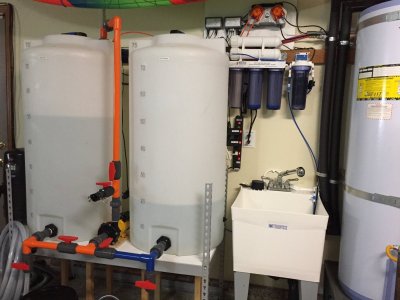
The reason I'm heating the mixing station tank is so the water will be approximately the same temperature as my aquarium and I can be more accurate with the salinity level when mixing in the salt. Since salinity measurements can vary based on water temperature, and the water from my plumbing system comes out at about 50 degrees, I plan to heat it up before mixing each new batch of saltwater.

I'm glad you're enjoying the build, and I hope my design is helpful for your planning! Regarding the decision between a Reefer 350 or 425, I'm glad I went with the 425 because the extra couple of inches in depth allowed me to fit all the plumbing in with little room to spare. I'm not sure I could have squeezed everything in with a 350.

It is funny that a year ago I would only have based my decision on the size of the DT but now that is almost secondary to what sort of space/configuration options there is in the sump area (which is, as you pointed out, why the 425 is very appealing). I'll check out the chemistry of salinity at different temperatures but your answer does make sense. In my case I'm not sure exactly how I'm going to handle the creation and storage of my salt water so still coming up to speed on what needs to be done there. I do think I'll be looking for small daily water changes (using DOS) from a large salt water container regardless of how I end up sourcing it.

I'll definitely be checking back in with regard to where you go with the refugium (sounds like another cor20 for the refugium pump?) and how your design is working in general. I have almost no experience with plumbing but I also have some garage/storage space about 15' from where we think we will put the tank so your schematics, ideas and implementation are definitely of interest.
 
OP
OP
SuncrestReef

SuncrestReef

That Apex guy
View Badges
Joined
Jan 18, 2018
Messages
4,214
Reaction score
9,217
Location
Oregon
Rating - 0%
0   0   0
I'll definitely be checking back in with regard to where you go with the refugium (sounds like another cor20 for the refugium pump?) and how your design is working in general.

A full size return pump like the COR-20 would be way too much flow for the refugium. The ATO tank is only a few gallons, so I’m using a small PMUP pump that only produces up to 100 GPH and using 3/8” tubing.
 
Last edited:

FernandesReef

Community Member
View Badges
Joined
May 12, 2017
Messages
48
Reaction score
108
Rating - 0%
0   0   0
Great build thread.
Just want to thank you for documenting your build the way you do, I know it takes time and not always easy, but really helps users of this platform.
Thanks, and great start of your reef.
 
OP
OP
SuncrestReef

SuncrestReef

That Apex guy
View Badges
Joined
Jan 18, 2018
Messages
4,214
Reaction score
9,217
Location
Oregon
Rating - 0%
0   0   0
Great build thread.
Just want to thank you for documenting your build the way you do, I know it takes time and not always easy, but really helps users of this platform.
Thanks, and great start of your reef.

Thanks for the kind words. This was the goal for creating this build thread; to hopefully share useful information (both successes and failures) so others may benefit. I learned so much from other build threads before I even began planning mine, so it was the least I could do to return the favor.
Stay tuned for future updates. My pump will arrive in 2 days, so then the real fun begins when I add water!
 

pelphrey

2500 Club Member
View Badges
Joined
Apr 22, 2015
Messages
4,109
Reaction score
6,100
Location
Kentucky
Rating - 0%
0   0   0
Great build thread! The mixing station, cabling down to it, and the tank itself are incredible!
 
OP
OP
SuncrestReef

SuncrestReef

That Apex guy
View Badges
Joined
Jan 18, 2018
Messages
4,214
Reaction score
9,217
Location
Oregon
Rating - 0%
0   0   0
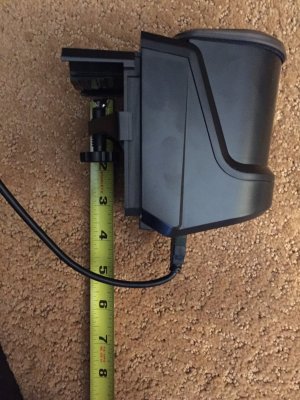
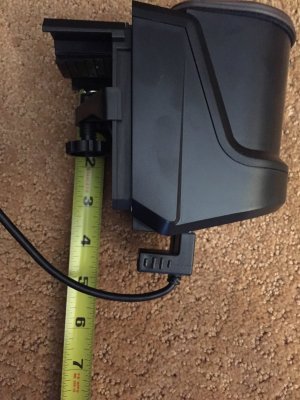
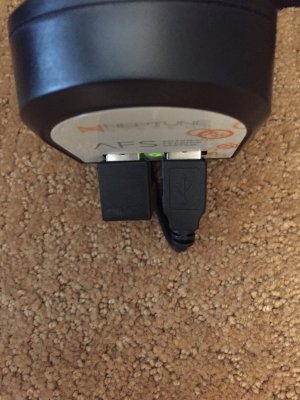
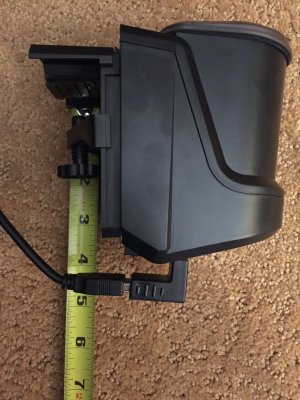
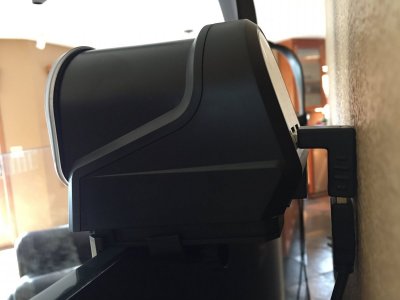
I ordered a Neptune AFS, but once it arrived I realized the 4 inches between my tank and the wall is not enough to allow the AFS to hang off the back and still connect the Aquabus cable to power/control it. Since AquaBus cables are standard USB cables (regardless of all the warning to NOT plug them into a PC or other USB device due to the higher voltage sent through AquaBus) I did some research and found a handy little 90 degree USB adapter on Amazon that allows me to connect the AquaBus cable from the bottom rather than straight out the back of the AFS unit and it shaves almost an inch off the standard straight USB cable.

For anyone running into this same issue, just order this from Amazon for $4.99:
https://www.amazon.com/gp/product/B01IZYPJAS

Since USB connectors are uni-directional, this product comes with two adapters, one that angles up and one that angles down, so I also have one more that angles up if I find another use for it.

IMG_2724.jpg

IMG_2725.jpg

IMG_2727.jpg

IMG_2726.jpg

IMG_2730.jpg
 
OP
OP
SuncrestReef

SuncrestReef

That Apex guy
View Badges
Joined
Jan 18, 2018
Messages
4,214
Reaction score
9,217
Location
Oregon
Rating - 0%
0   0   0
For any of you following along on my build, please take a look at the question I posted about curing Pukani rock in this separate thread:
https://www.reef2reef.com/threads/dry-pukani-rock.376919/

Thanks.

After a lively discussion about curing Pukani rock in a brand new display tank on the separate thread linked above, here's what I have decided to do starting tomorrow once my COR-20 pump arrives and I complete my plumbing setup:

1. I have removed all the sand from my display tank to avoid infesting it with any material coming off the rocks. Since it was still dry, this was relatively easy.
2. I removed 3 larger free-standing pieces of Pukani that were not glued to the rest of the aquascape and placed them in a tub with heated RO/DI water and a powerhead. They have been soaking now for over 24 hours and there is no smell whatsoever, and very little detritus or coloration in the water. Several people warned the rock will stink link crazy as soon as it gets wet. Either they were exaggerating, or perhaps my Pukani is much cleaner than theirs was, but so far that has not been the case. I basically wanted to get a sense of how dirty the initial water will be.
3. I am going to leave the rest of the aquascape in place in the DT, return the 3 pieces that have been soaking back into the tank, and fill it with salt water tomorrow after I finally get my return pump installed.
4. I am going to leave the return pump and powerheads running.
5. If it starts to smell, I will turn on my carbon reactor.
6. I'll be monitoring for phosphates and if they start getting high, I'll turn on my GFO reactor.
7. I'll set my automatic water changes to flush about 5 gallons per day.
8. Every couple of days I will blast the rocks with a turkey baster and/or go over each rock with the powerhead to hopefully release any dead material. Then I will vacuum out what I can from the bottom of the tank. This should be much easier without the sand.
9. I'll check and clean out the filter socks every couple days or more if needed.
10. I might run the skimmer to see if it collects anything.
11. Once the phosphates are under control, I'll turn off the reactors, add the sand back in, turn off the auto water change, and begin a normal cycling process starting with Dr. Tim's.

Tomorrow's going to be a big day!!! Stay tuned...
 
Last edited:
OP
OP
SuncrestReef

SuncrestReef

That Apex guy
View Badges
Joined
Jan 18, 2018
Messages
4,214
Reaction score
9,217
Location
Oregon
Rating - 0%
0   0   0
OK, time for a big update:

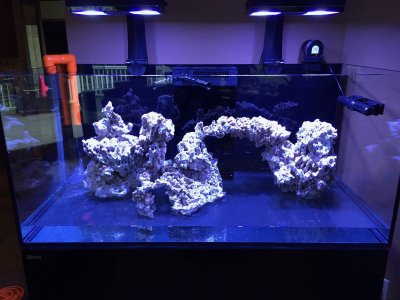
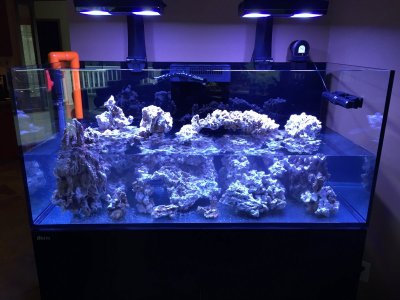
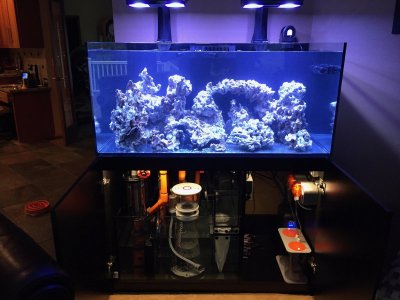
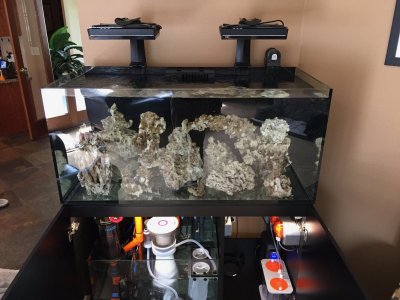
The Neptune COR-20 return pump and 2nd Radion XR30w Pro LED arrived this morning. I finished up the plumbing and wiring, then filled the tank with salt water. There were NO LEAKS!!!! I lost sleep last night worrying that I'd find all sorts of leaks, but luckily those were just bad dreams. What a relief!

IMG_2738.jpg

IMG_2739.jpg

IMG_2740.jpg

The mixing station pump and filling hose worked great! I initially mixed up 60 gallons of salt water, then started filling the tank. My Apex monitored the amount of water in the salt water storage tank and when it dropped to 10 gallons, it automatically shut off the pump based on the optical sensor. It only took about 5 minutes, so roughly 10 gallons per minute through a 30 foot 3/4" hose. Then I mixed up another batch of salt water and topped off the whole system.

IMG_2743.jpg

IMG_2744.jpg

IMG_2745.jpg

So, the rock is now curing in my display tank and I'll begin testing the water to track phosphates. In a few weeks I hope to begin cycling.
(don't worry, the LED lights are only on for these photos, but will remain off while curing and cycling)

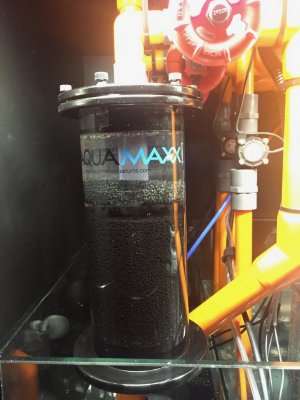
To hopefully keep the odor to a minimum, I started up my carbon reactor and have it tumbling nicely.
IMG_2749.jpg

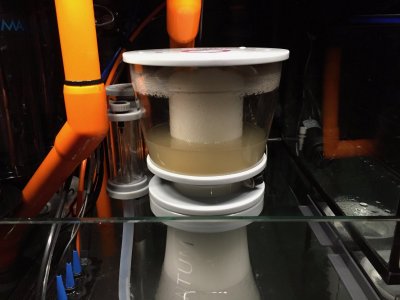
I also started up the skimmer and it's already collecting a good amount of ugly stuff.

IMG_2748.jpg

So far all my Apex programming seems to be working as expected. I've had it all programmed for weeks, but all the outlets were set to OFF while the system was dry. I've now set many of the outlets to AUTO but I'm still watching things closely to make sure I didn't overlook anything. To play it extra safe I'm going to turn many of them back Off (such as ATO and AWC) before going to bed so I don't wake up to any disasters.

Wow, I can't believe how long I've been waiting to get to this point. Now it's time to start waiting again for the next big steps...
 
Last edited:
OP
OP
SuncrestReef

SuncrestReef

That Apex guy
View Badges
Joined
Jan 18, 2018
Messages
4,214
Reaction score
9,217
Location
Oregon
Rating - 0%
0   0   0
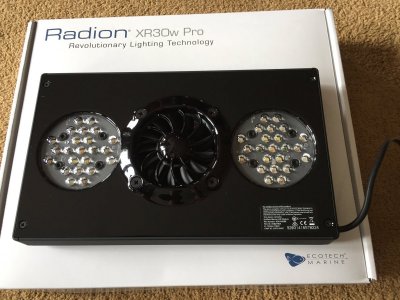
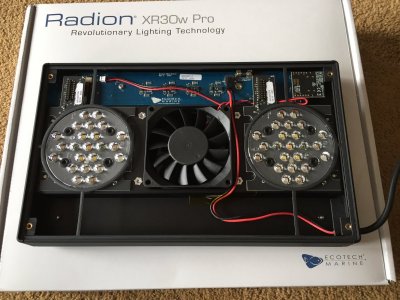
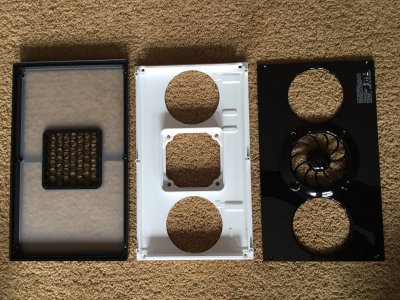
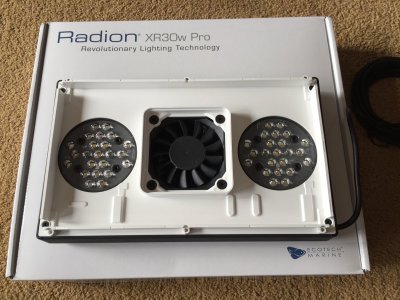
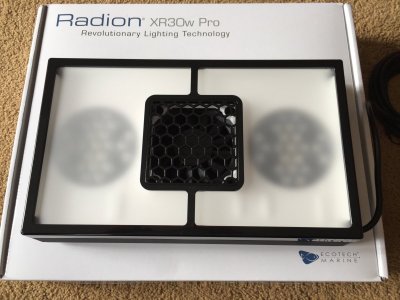
One more quick update: I also installed diffusers on my Radion XR30w Pro LED's. The assembly process was pretty simple, just remove 8 screws, take off the existing face plate, screw on the diffuser base plate, then place the diffuser on the base plate. It's held on by 6 small magnets.

IMG_2732.jpg
IMG_2733.jpg

IMG_2734.jpg

IMG_2735.jpg

IMG_2737.jpg

The diffusers really help smooth out the light and reduces the shimmer/disco effect. It also reduces the side glare when you are sitting looking at the tank and your eyes are below the level of the lights.
 
Last edited:
OP
OP
SuncrestReef

SuncrestReef

That Apex guy
View Badges
Joined
Jan 18, 2018
Messages
4,214
Reaction score
9,217
Location
Oregon
Rating - 0%
0   0   0
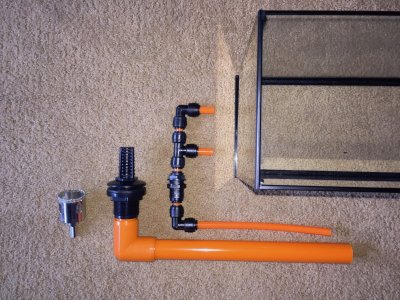
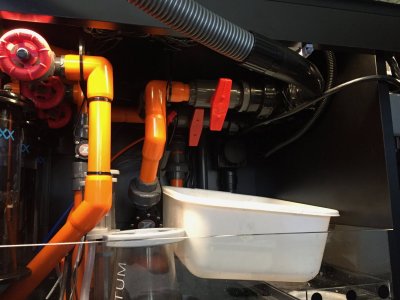
Here's a sneak peak at what I'm planning for converting the ATO into a refugium. I need to drill two holes through the side glass, one near the bottom for a 3/8" bulkhead that will feed water from a Neptune PMUP in the skimmer chamber through the bulkhead and a two-nozzle mini manifold. All these parts are 3/8" poly tubing and push-connect fittings. The second hole will be near the top for a 3/4" bulkhead with a strainer that will drain out through 3/4" PVC back into the skimmer chamber. I'm not sure if there will be enough flow to keep chaeto rotating, but we'll see. Since it's only a 3 gallon tank, there won't be a lot of room for much chaeto, but I think it will be better than nothing.

IMG_2755.jpg

I just need to find a 21mm glass hole cutter for the smaller bulkhead (already have the 35mm for the larger bulkhead), then I can get started on this project. I'll post photos of the construction process at that time.
 
Last edited:
OP
OP
SuncrestReef

SuncrestReef

That Apex guy
View Badges
Joined
Jan 18, 2018
Messages
4,214
Reaction score
9,217
Location
Oregon
Rating - 0%
0   0   0
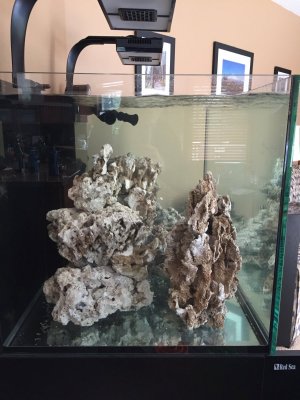
So far everything is going smoothly with the Pukani rock curing in my display tank. No smelly odors thanks to the carbon reactor running, and the skimmer has pulled out a bit of gunk. The water is very clear and has not clouded up at all. I've used a turkey baster a couple times to blow some material off the rocks, but they seem to be a lot cleaner than what others have described about their Pukani.

IMG_2765.jpg

IMG_2766.jpg

I've also been checking the phosphate levels each day to get a sense of what the rocks are releasing:

Day 1: 1.2 ppm
Day 2: 1.0 ppm
Day 3: 0.9 ppm (after this reading, I started my GFO reactor)
Day 4: 0.6 ppm (so I think the GFO is working)

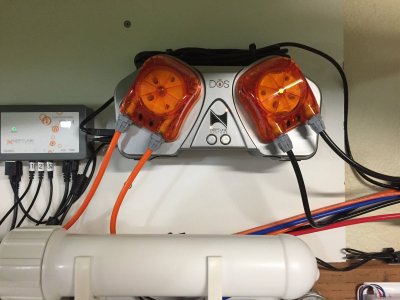
I also started doing automatic water changes with the DOS near my mixing station. It drains 2 gallons using 1/4" poly tubing through a conduit from the sump in my living room to the utility sink drain in the garage. Then it pumps 2 gallons from my saltwater tank in the garage back through the conduit to the sump. No buckets, no hoses. Very convenient!

(black tubes are waste water, orange tubes are new salt water)
IMG_2756.jpg

IMG_2764.jpg

Here's a quick video of the DOS in action during the drain cycle:


I programed my Apex to temporarily disable the ATO pump during the water change so it doesn't accidentally start filling the tank with fresh water due to the low water sensor. Everything is working as planned!
 
Last edited:
OP
OP
SuncrestReef

SuncrestReef

That Apex guy
View Badges
Joined
Jan 18, 2018
Messages
4,214
Reaction score
9,217
Location
Oregon
Rating - 0%
0   0   0
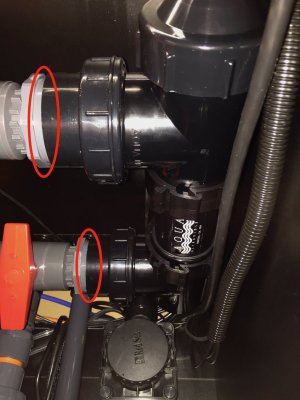
When I first tested my sump plumbing, I was relieved I didn't find any leaks. However, I did not test the UV sterilizer at that time because I really didn't have any reason to turn on the UV until I have livestock in the tank. Well, today I thought I should probably test it just in case and sure enough, I found leaks at both the input and output lines, highlighted in red below:

IMG_2769.jpg

I panicked because the leaks are where a 2" to 1" reducing bushing is glued to valves, so there's no easy way to just re-do those glue joints. After some research and watching YouTube videos, I found a technique that was worth a try. Luckily I have valves set up to bypass the UV sterilizer for routine maintenance so I can keep the return line flowing to the display tank. Here's what I did:

1. Turned off the valves to the UV unit and opened the bypass valve.
2. Removed the UV bulb from the front opening, then removed the glass tube and drained the water still left in the unit.
3. Attached my shopvac hose to the opening on the UV unit where I just removed the glass tube. I used black electrical tape to attach the hose for an air-tight seal rather than duct tape since the adhesive on the electrical tape is much easier to remove.
4. After turning on the vacuum to create suction, I applied PVC primer liberally around both of the leaky joints. I placed a plastic dish pan above my sump to catch any drips so I don't contaminate the water with any chemicals.
5. I let the vacuum suck the primer into any gaps in the PVC joint for about 10 seconds, then applied a liberal amount of PVC glue and again let the vacuum suck the glue into the gaps.
6. After about 10 seconds I turned off the vacuum and wiped off any excess glue.
7. I let the glue set for 1 hour, then reinstalled the glass tube and UV bulb.
8. I opened the valved to the UV, closed the bypass valve, and found the repair worked successfully! No more leaks.

(valves closed, vacuum attached, pan in place...ready to repair: )
IMG_2776.jpg

(electrical tape attaching the shopvac nozzle to the UV unit: )
IMG_2777.jpg

I'm so glad this worked. It would have been a huge pain to rip out all the plumbing to repair or replace it.
 
Last edited:
OP
OP
SuncrestReef

SuncrestReef

That Apex guy
View Badges
Joined
Jan 18, 2018
Messages
4,214
Reaction score
9,217
Location
Oregon
Rating - 0%
0   0   0
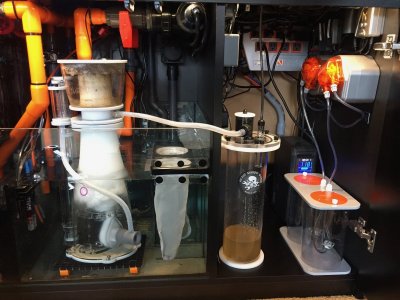
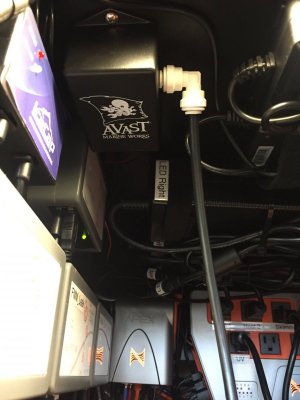
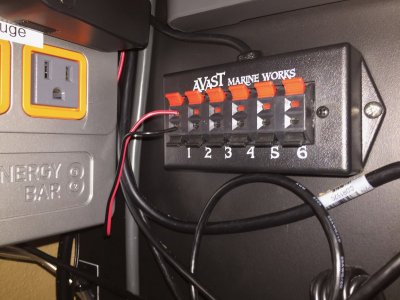
The Pukani rock is still curing in my display tank, and after 2 weeks there has still been no odor or cloudy water, I'm assuming due to my carbon reactor and skimmer. The skimmer has been pulling out a lot of ugly water, and after cleaning the cup every couple days I decided it will be worth it to get a skimmate storage container. I purchased Avast Marine's Davy Jones' Skimmate Locker and it's working great! They have 3 sizes (I chose the medium) and 3 different connection options. Since I have everything controlled by my Apex, I went with the digital output for a breakout box. Instead of buying the Apex breakout box, I also purchased the Avast Marine breakout box because it has stereo speaker-style wire terminals so it is much easier to connect wires with a simple push of the spring-loaded tabs. It's only $5 more than Neptune's breakout box, and considering how little space I have to work with in my control cabinet I can't imagine trying to get in there with a tiny screwdriver to connect wires. I'm really happy with both products.

The skimmate locker has a pressure switch monitoring when the canister is nearly full and that notifies the Apex to turn off the skimmer and sends me an alert. It works great!

Avast Marine skimmate locker connected to my Nyos Quantum 160 skimmer:
IMG_2789.jpg

Pressure switch:
IMG_2795.jpg

Avast Marine breakout box:
IMG_2794.jpg
 
OP
OP
SuncrestReef

SuncrestReef

That Apex guy
View Badges
Joined
Jan 18, 2018
Messages
4,214
Reaction score
9,217
Location
Oregon
Rating - 0%
0   0   0
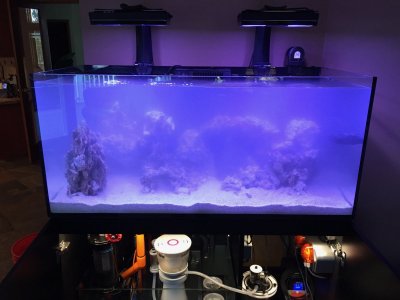
I've been monitoring the Pukani rock curing in my display tank for the past two weeks, and doing frequent water changes. The phosphate levels have dropped to 0.07 ppm, so I decided I will begin cycling the rock. I did a 100% water change, added the sand back into the tank, and will let it filter with the pumps, filter socks, carbon reactor, and skimmer running for the next 24 hours to let the water clear up before adding a bottle of Dr. Tim's One & Only bacteria tomorrow. I rinsed the sand in RO/DI water, but it still clouded the water quite a bit. If it doesn't clear up by tomorrow, I might do another water change before adding the bacteria.

IMG_2804.jpg
 
Last edited:

High pressure shells: Do you look for signs of stress in the invertebrates in your reef tank?

  • I regularly look for signs of invertebrate stress in my reef tank.

    Votes: 35 31.8%
  • I occasionally look for signs of invertebrate stress in my reef tank.

    Votes: 26 23.6%
  • I rarely look for signs of invertebrate stress in my reef tank.

    Votes: 21 19.1%
  • I never look for signs of invertebrate stress in my reef tank.

    Votes: 28 25.5%
  • Other.

    Votes: 0 0.0%
Back
Top