Tank has finally arrived and now the fun begins....Have questions

FreshSaltyGuy

Active Member
View Badges
Joined
Sep 28, 2022
Messages
414
Reaction score
223
Location
Central California
Rating - 0%
0   0   0
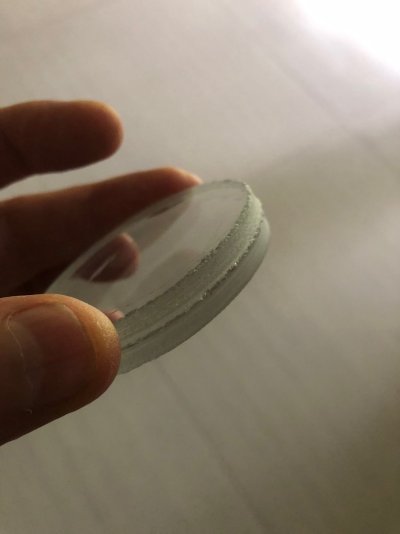
Here is my 40 gallon tall tank. I would have bought a breeder long tank but as some of you know from my first post I got a steal on this and couldn't pass it up. So attached are pics of the tank obviously still wrapped until I can determine where to move it. The instructions that came with the tank are real bad so I'm hoping you all can help answer some questions I have. BTW the glass on the tank is 0.47" thick.

Here are my questions:
1.) What is the small box above "Biological Filter Media" that has holes in the bottom of it and a little drawer to pull out? What goes in there?

2.) As you can see it came with bags of Crushed coral and Bio Ceramic media. First do I take these out of the bags they came in and dump it into where it says "biological Filter Media" or keep it in the bags? Second part to that is I wanted to put Live sand with some CUC in the Filter media area and then maybe some of the crushed coral but not all of it, can I put the rest on the right side of the sump where the pump goes along with the bio ceramics?

3.) Is there a wrong way and right way to place the white floss stuff on that section of the tank? Is it normal for it to stick above the tank like it is now?

4.) Any idea where the 2 rectangular pieces of glass with the white frame is for and why is 1 of them cut at an angle?

5.) The top of the tank has that black cover with the holes in it. Since I'm putting a hanging light on the tank I can just remove that correct and get a screen mesh to go over the top?

6.) Since my sump is so small, and I have that basket think above the filter media section, where in the heck do I place a light for the algae and any plants that I'll be keeping in there?

7.) The flow pipes go up through the bottom back right of the tank is this ok and safe to have this kind of setup?

Any other advice for this size tank/sump etc.. I'd really appreciate.

Thank you all again for all the help!

PXL_20221004_153134007.jpg PXL_20221004_153210699.jpg PXL_20221004_154235041.jpg PXL_20221004_154247344.jpg PXL_20221004_154324719.jpg PXL_20221004_154435873.jpg PXL_20221004_154923655.jpg
 

StatelineReefer

Reef Safe With Caution
View Badges
Joined
Jan 1, 2020
Messages
9,339
Reaction score
27,764
Location
Beloit, WI
Rating - 0%
0   0   0
Oh totally I'm going to give it at least 3-4 weeks if not longer. Any good place to point me to where to get live rock online besides my LFS? What should I do about a overflow box. I do have a 3d printer but not really good at modifying something lol
You don't need an overflow box, that standing pipe is your drain. Fit it with a critter catcher and a sponge to keep anything big from going down it.

For live rock I'm going to suggest either local reefers, or TB liverock, a sponsor on Reef2Reef and the most 'alive' you can get rock without committing a felony.

It's your return you want to think about, and I would suggest simple. A 3/4 pvc return using vinyl tubing to isolate the pump vibration. Top it off with a split locline return head to direct flow to each of the opposite corners.
 
Upvote 0
OP
OP
F

FreshSaltyGuy

Active Member
View Badges
Joined
Sep 28, 2022
Messages
414
Reaction score
223
Location
Central California
Rating - 0%
0   0   0
You don't need an overflow box, that standing pipe is your drain. Fit it with a critter catcher and a sponge to keep anything big from going down it.

For live rock I'm going to suggest either local reefers, or TB liverock, a sponsor on Reef2Reef and the most 'alive' you can get rock without committing a felony.

It's your return you want to think about, and I would suggest simple. A 3/4 pvc return using vinyl tubing to isolate the pump vibration. Top it off with a split locline return head to direct flow to each of the opposite corners.
So as far as plumbing goes here is everything it came with along with the pipe I already have in the tank and the 2 small pvc pipes with a shutoff that is in the sump cabinet. I guess the easier question to ask is what am I missing LOL. Here is a video I found of the 50 gallon model which seems to be the same as what I have.


PXL_20221004_220432903.jpg PXL_20221004_232507883.jpg PXL_20221004_232515489.jpg PXL_20221004_233036662.jpg PXL_20221004_233120897.jpg
 
Upvote 0

dcsorrell

Active Member
View Badges
Joined
Sep 22, 2022
Messages
170
Reaction score
531
Location
USA
Rating - 0%
0   0   0
Ok so in the pics you see the little black clips holding the tank, since I couldn't remove the back or side (didn't really see a way. I tried removing the clips but the tank still didn't budge it's in there really good however they secured it. So I took pics from the top looking down, as well as with the trickle drawer open and then from the from trying to look into the back. So in the entire large rectangle tank there is a piece of glass that basically splits it 50/50 with about a 1" inch gap or so on the bottom. I really want a spot for a refugium or somewhere where I can host the sea lettuce, macro algae, etc..
Someone else can advise you about the filter better than I can. I've never used a sump under the tank. You asked about refugium lighting: a daylight led from the hardware store will do it. Doesn't need to be expensive. Which chamber does the pump go in?
 
Upvote 0
OP
OP
F

FreshSaltyGuy

Active Member
View Badges
Joined
Sep 28, 2022
Messages
414
Reaction score
223
Location
Central California
Rating - 0%
0   0   0
Someone else can advise you about the filter better than I can. I've never used a sump under the tank. You asked about refugium lighting: a daylight led from the hardware store will do it. Doesn't need to be expensive. Which chamber does the pump go in?
The pump goes in the far right side of the sump it looks like where the floss is.
 
Upvote 0

dcsorrell

Active Member
View Badges
Joined
Sep 22, 2022
Messages
170
Reaction score
531
Location
USA
Rating - 0%
0   0   0
Oh totally I'm going to give it at least 3-4 weeks if not longer. Any good place to point me to where to get live rock online besides my LFS? What should I do about a overflow box. I do have a 3d printer but not really good at modifying something lol
That I can help with :)

I'm planning to purchase from Tampa Bay Saltwater, one of the R2R sponsors. There are two others I've also seen recommended around here: Gulf Live Rock and KP Aquatics. TBS and KP both ship their rock submerged, and GLR ships it wrapped in wet newspaper. If you want it shipped to your door, TBS only offers that option on their Treasure Chest packages. Have fun shopping!
 
Upvote 0

dcsorrell

Active Member
View Badges
Joined
Sep 22, 2022
Messages
170
Reaction score
531
Location
USA
Rating - 0%
0   0   0
The pump goes in the far right side of the sump it looks like where the floss is.
If you can diy something to keep little critters on the other side of the glass, I think the left lower chamber would work as a refugium. The 'fuge can be lit from the side; the light doesn't have to be overhead.
 
Upvote 0
OP
OP
F

FreshSaltyGuy

Active Member
View Badges
Joined
Sep 28, 2022
Messages
414
Reaction score
223
Location
Central California
Rating - 0%
0   0   0
If you can diy something to keep little critters on the other side of the glass, I think the left lower chamber would work as a refugium. The 'fuge can be lit from the side; the light doesn't have to be overhead.
Would it be smart to remove the trickle down chamber as it seems to only be attached with silicone? Then do I just split the chamber on the left and have a piece of plexiglass go from the very bottom up about 8" or 10" to allow water to flow over the top into the next chamber? Any kindergarten level diagrams you can draw out for me? :)
 
Upvote 0

dcsorrell

Active Member
View Badges
Joined
Sep 22, 2022
Messages
170
Reaction score
531
Location
USA
Rating - 0%
0   0   0
Would it be smart to remove the trickle down chamber as it seems to only be attached with silicone? Then do I just split the chamber on the left and have a piece of plexiglass go from the very bottom up about 8" or 10" to allow water to flow over the top into the next chamber? Any kindergarten level diagrams you can draw out for me? :)
I would probably use that chamber for mechanical/chemical filtration, and If you're planning to keep chaeto in your refugium, adding something such as Seachem Matrix wouldn't hurt. Your macro algaes need nitrates. Then, to divide the chambers, if the flow goes over the first into the second, anything that's in the first will also go with it. You want the flow to go through something fine enough to block access. (Can't help with a diagram - sorry)
 
Upvote 0
OP
OP
F

FreshSaltyGuy

Active Member
View Badges
Joined
Sep 28, 2022
Messages
414
Reaction score
223
Location
Central California
Rating - 0%
0   0   0
I would probably use that chamber for mechanical/chemical filtration, and If you're planning to keep chaeto in your refugium, adding something such as Seachem Matrix wouldn't hurt. Your macro algaes need nitrates. Then, to divide the chambers, if the flow goes over the first into the second, anything that's in the first will also go with it. You want the flow to go through something fine enough to block access. (Can't help with a diagram - sorry)
Something fine like a screen? or do they make something I can buy?
 
Upvote 0
OP
OP
F

FreshSaltyGuy

Active Member
View Badges
Joined
Sep 28, 2022
Messages
414
Reaction score
223
Location
Central California
Rating - 0%
0   0   0
If you can diy something to keep little critters on the other side of the glass, I think the left lower chamber would work as a refugium. The 'fuge can be lit from the side; the light doesn't have to be overhead.
Also, since this is a whole new setup and I'm trying to have the most natural environment possible is getting the "Premium" natural from from TBS a good idea or just basic base rock?
 
Upvote 0

BaliReefBox

Well-Known Member
View Badges
Joined
Jun 10, 2022
Messages
846
Reaction score
786
Location
Bali
Rating - 0%
0   0   0
if you are planning running the return line through the overflow as the diagram suggests I would be care about upgrading the pump to much. Also the square glas at the top is just bracing for the tank. I would drill a seperate hole in the rear wall and plumb a seperate return
 
Upvote 0

dcsorrell

Active Member
View Badges
Joined
Sep 22, 2022
Messages
170
Reaction score
531
Location
USA
Rating - 0%
0   0   0
Something fine like a screen? or do they make something I can buy?
These plastic food-grade screens might work, attched with some aquarium silicone:


Micro brittle stars and such can still climb over them, but I never had any end up in the pump. What you're trying to avoid is 'pod soup.
 
Upvote 0
OP
OP
F

FreshSaltyGuy

Active Member
View Badges
Joined
Sep 28, 2022
Messages
414
Reaction score
223
Location
Central California
Rating - 0%
0   0   0
These plastic food-grade screens might work, attched with some aquarium silicone:


Micro brittle stars and such can still climb over them, but I never had any end up in the pump. What you're trying to avoid is 'pod soup.

so place those (If the right size) to split the tank, what do I do about the glass that splits the whole thing now that is open all the way across the bottom?
 
Upvote 0

dcsorrell

Active Member
View Badges
Joined
Sep 22, 2022
Messages
170
Reaction score
531
Location
USA
Rating - 0%
0   0   0
so place those (If the right size) to split the tank, what do I do about the glass that splits the whole thing now that is open all the way across the bottom?
I would attach them in such a way that the water flows over the glass separator but through the screens. You might need to overlap the screens a bit to make them fit, or maybe one would do, depending on the dimensions of the glass divider. You don't need to remove the divider.
 
Upvote 0

RocketEngineer

Well-Known Member
View Badges
Joined
Sep 3, 2019
Messages
953
Reaction score
1,040
Rating - 0%
0   0   0
Ok, let me be blunt: whoever built that tank has no idea what they are doing. My 100G rimless uses that thickness glass with no braces. That overflow/return setup is an engineering disaster. And that sump is something out of the 90’s. My 100G rimless with external overflow, drilled returns, and 34” stand cost just slightly more than retail on that one. I’m glad you got this cheap, no way is it worth what they are charging.

Now, what can we do to fix things?
1) I would add a regular overflow box. https://melevsreef.com/reefshop/acrylic-products/overflow-boxes/left-corner-overflow-box or similar.

2) I would remove the funky plumbing and go with a regular bulkhead fitting, a Durso standpipe, and standard fittings. I’m not a fan of custom plumbing as it’s hard to get replacements.

3) I would route the return over the back wall of the tank.

4) I would remove the drip tray from the sump and look into a skimmer that will fit in your stand. There may not be many options given how short the stand is. I know Tunze makes one that sits inside the tank or sump that may fit.

Hope that helps.
 
Upvote 1
OP
OP
F

FreshSaltyGuy

Active Member
View Badges
Joined
Sep 28, 2022
Messages
414
Reaction score
223
Location
Central California
Rating - 0%
0   0   0
Ok, let me be blunt: whoever built that tank has no idea what they are doing. My 100G rimless uses that thickness glass with no braces. That overflow/return setup is an engineering disaster. And that sump is something out of the 90’s. My 100G rimless with external overflow, drilled returns, and 34” stand cost just slightly more than retail on that one. I’m glad you got this cheap, no way is it worth what they are charging.

Now, what can we do to fix things?
1) I would add a regular overflow box. https://melevsreef.com/reefshop/acrylic-products/overflow-boxes/left-corner-overflow-box or similar.

2) I would remove the funky plumbing and go with a regular bulkhead fitting, a Durso standpipe, and standard fittings. I’m not a fan of custom plumbing as it’s hard to get replacements.

3) I would route the return over the back wall of the tank.

4) I would remove the drip tray from the sump and look into a skimmer that will fit in your stand. There may not be many options given how short the stand is. I know Tunze makes one that sits inside the tank or sump that may fit.

Hope that helps.
Well thanks so much for being honest and giving recommendations. So what you just said is 100% a foreign language to me lol. Are you saying drill the top back of the tank to place the bulkhead fittings or at the bottom next to the existing hole? Do completely cover up the existing hole and if so what do I use? Any simple drawings you can provide?
Also, you mention the left overflow is that the right one since my hole in the tank is at the bottom back right of the tank.
Thank you again for great info!!
 
Upvote 0

StatelineReefer

Reef Safe With Caution
View Badges
Joined
Jan 1, 2020
Messages
9,339
Reaction score
27,764
Location
Beloit, WI
Rating - 0%
0   0   0
1664949106714.png


So apparently, according to this, the standpipe is both drain AND return.

That's a bold strategy, Cotton...

What are the interior dimensions of the stand, it might be more beneficial to drop a small acrylic sump purpose built for what you intend to do than to work with a trickle filter.
 
Upvote 0

BaliReefBox

Well-Known Member
View Badges
Joined
Jun 10, 2022
Messages
846
Reaction score
786
Location
Bali
Rating - 0%
0   0   0
my wife and I just drill a 63mm hole into the 10mm rear wall of our new 3' opti clear tank...I drilled she squirted the water. came out real good.. reason for telling you this is imo dont do over the top return just drill a hole and plumb thru there. get rid of the stock plumbing and get some black acrylic made with a weir/teeth at the top and run a standpipe with a durso or similar. I agree the original plumbing is over designed limiting. A tip I saw at the local glaziers was they drilled half way then flipped over and drilled the other half...nice clean hole
 

Attachments

  • IMG_5475.jpg
    IMG_5475.jpg
    65.6 KB · Views: 12
Upvote 0

RocketEngineer

Well-Known Member
View Badges
Joined
Sep 3, 2019
Messages
953
Reaction score
1,040
Rating - 0%
0   0   0
Well thanks so much for being honest and giving recommendations. So what you just said is 100% a foreign language to me lol. Are you saying drill the top back of the tank to place the bulkhead fittings or at the bottom next to the existing hole? Do completely cover up the existing hole and if so what do I use? Any simple drawings you can provide?
Also, you mention the left overflow is that the right one since my hole in the tank is at the bottom back right of the tank.
Thank you again for great info!!

Using the existing hole for the drain is fine. In my opinion, there’s no need to drill the glass, just replace the plumbing and add an overflow box. The one I linked was just an example, you will want to measure where the existing hole is to ensure the wier (that’s what the box is actually called) has enough size to go around the bulkhead fitting. Purchasing one is probably easiest but I’ve also seen them DIY. I’m not sure 3D printed would be water tight which is what you need.
 
Upvote 0
OP
OP
F

FreshSaltyGuy

Active Member
View Badges
Joined
Sep 28, 2022
Messages
414
Reaction score
223
Location
Central California
Rating - 0%
0   0   0
Using the existing hole for the drain is fine. In my opinion, there’s no need to drill the glass, just replace the plumbing and add an overflow box. The one I linked was just an example, you will want to measure where the existing hole is to ensure the wier (that’s what the box is actually called) has enough size to go around the bulkhead fitting. Purchasing one is probably easiest but I’ve also seen them DIY. I’m not sure 3D printed would be water tight which is what you need.
So I guess where I'm confused is the existing hole has basically 2 in 1 pipe going through it. There is a small 1/2" pvc Going up the middle of a 1.5" pipe. Then the open space around the 1.5" pipe is for drain back into the sump and the 1/2" pipe up the middle of it is the return. How do I change that out to be Return only?
 
Upvote 0
Back
Top