- Joined
- Jul 28, 2015
- Messages
- 4,668
- Reaction score
- 3,189
Little review and getting it setup!
http://www.buckeyehydro.com/the-gapper-light-commercial-ro-system/
PRODUCT DESCRIPTION
Residential-scale systems too slow, and commercial systems too expensive for your application? Meet The Gapper - an RO system that utilizes the best of both worlds to deliver up to 400 gpd at an incredibly affordable price! True to its name, the Gapper fills the gap between traditional residential scale RO's that produce up to 200 gpd, and commercial RO's that typically begin at 500 gpd.
The Gapper features three 20" x 2.5" standard-sized prefilters - one sediment filter and two carbon blocks; an extra low energy, made-in-the-USA commercial RO membrane; liquid-filled pressure gauge; high pressure pump; auto flush valve; feed water solenoid valve; housing wrench; and an incredible 1:1 waste water to purified water ratio! Includes 10 feet of 3/8" feedwater tube (blue) and permeate tube (white), and 10 feet of 1/4" concentrate tubing (yellow). With 98.5% rejection, The Gapper is an excellent choice to purify your water before its delivered to a deionization stage.
For chlorinated feedwater, the standard filter package can be selected. For addressing feedwater with chloramines, or for enhanced chlorine removal, choose the Chloramine Filter Package. This package features a 1 micron sediment filter, and two best-in-class 20" x 2.5" Chloraguard Carbon Blocks.
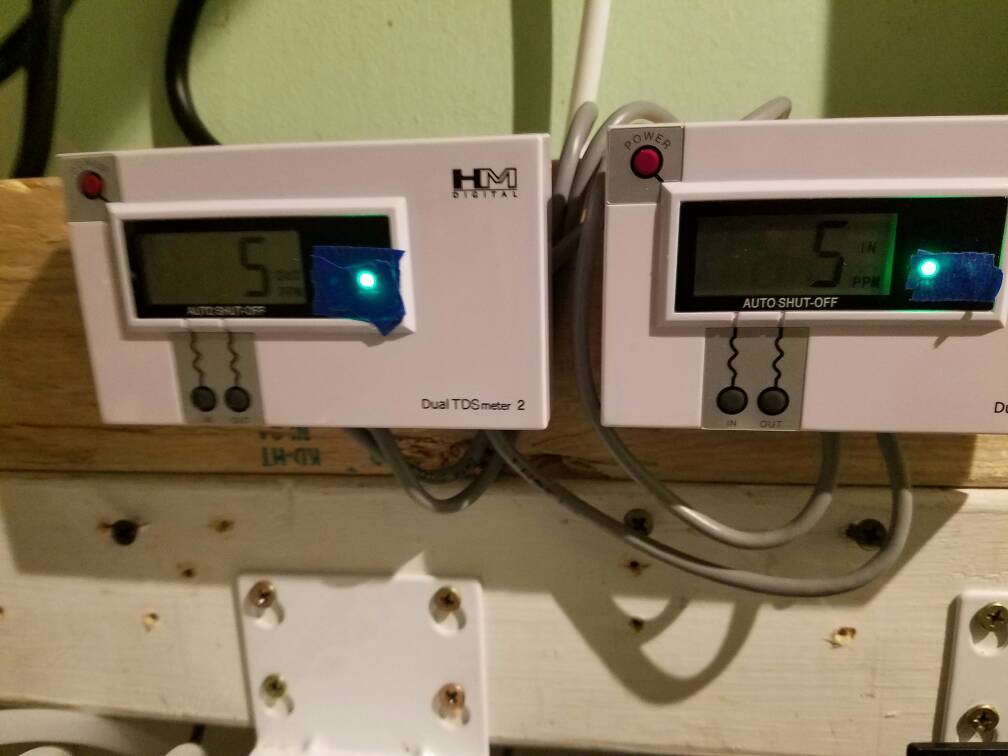
I thought this "light" RO unit should get a little thread of it's own. I just replaced a basic 5 stage RO/DI system I started with back in 2009 and have slowly over time upgraded various components of it. From adding more DI stages to rotate though, adding additional membrane to boost production rate, adding more TDS meters, etc.
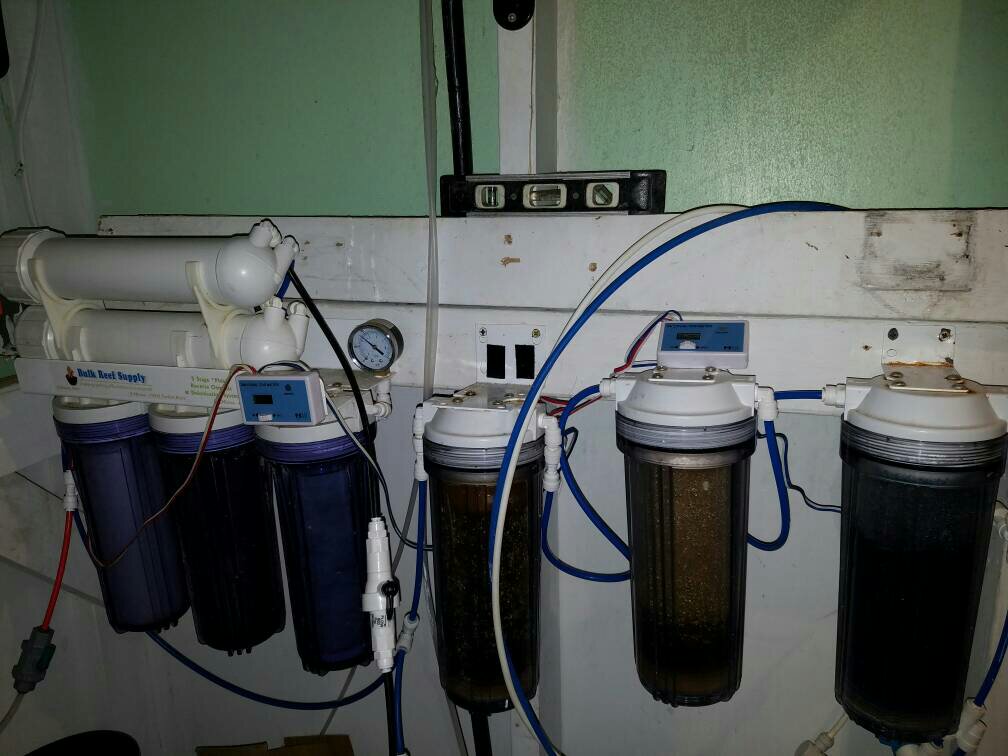
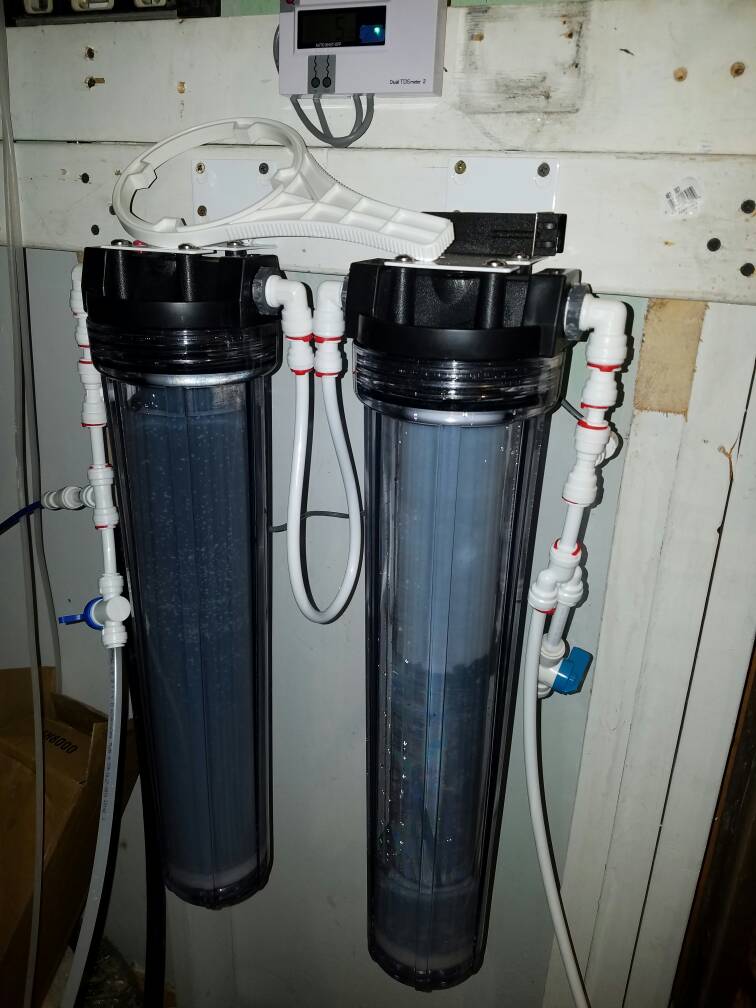
This was my current setup just before this last upgrade. 1 micron sediment, 1 micron carbon, .5 micron carbon, dual 150 GPD membranes, and 3 DI stages. I was getting between 200-300gpd and rotating DI stages helped increase it's life.
Normally I swap out the carbon filters every 6 months preventively. Mainly because I'm to lazy to test for total chlorine which would indicate when the carbon blocks actually need to be replaced. So, I was looking at upgrading the carbon blocks to 20" x 2.5" from the standard 10"x2.5" and only swap them out once a year. That's when I ran across the Gapper!
A lot of features I didn't have but wanted and the 20" housings I was wanting to get anyway. Went from upgrade to total replacement. I found a thread by buckeye hydro for The Gapper when they released it which was late last year.
So, I started asking questions and Buckeye Hydro was very helpful in answering questions and getting me going into the right direction.
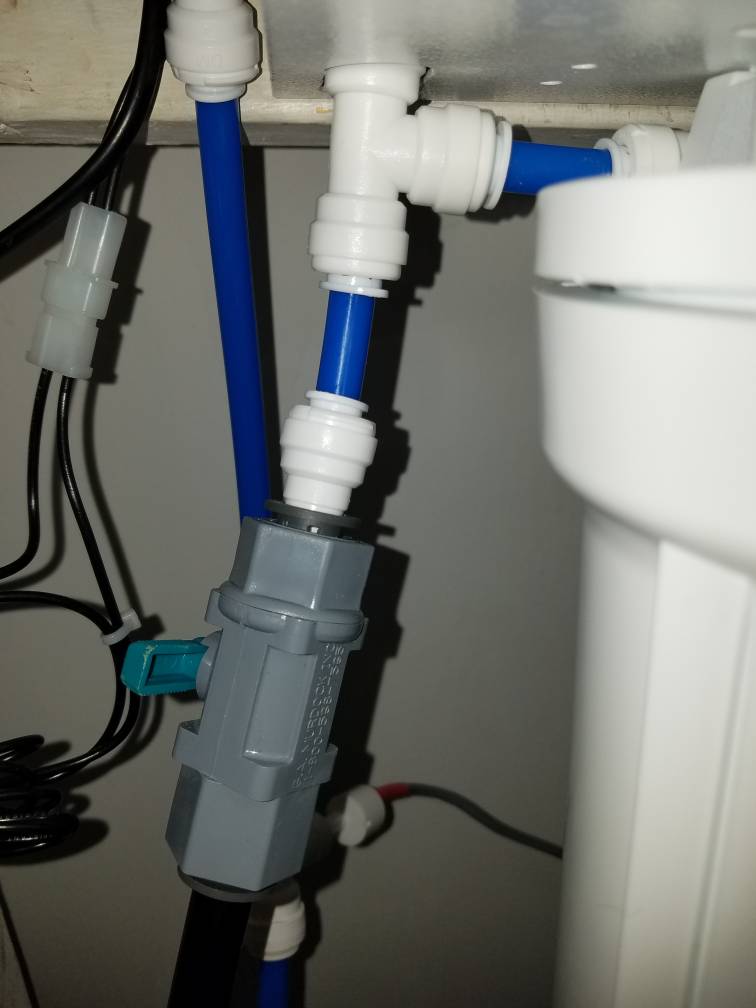
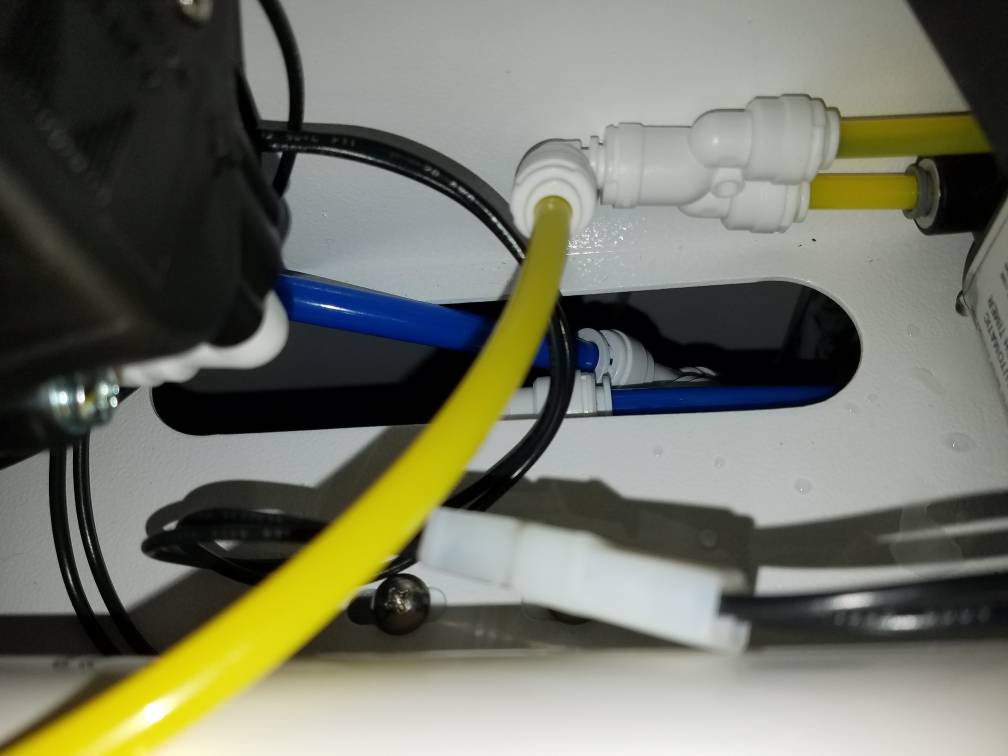
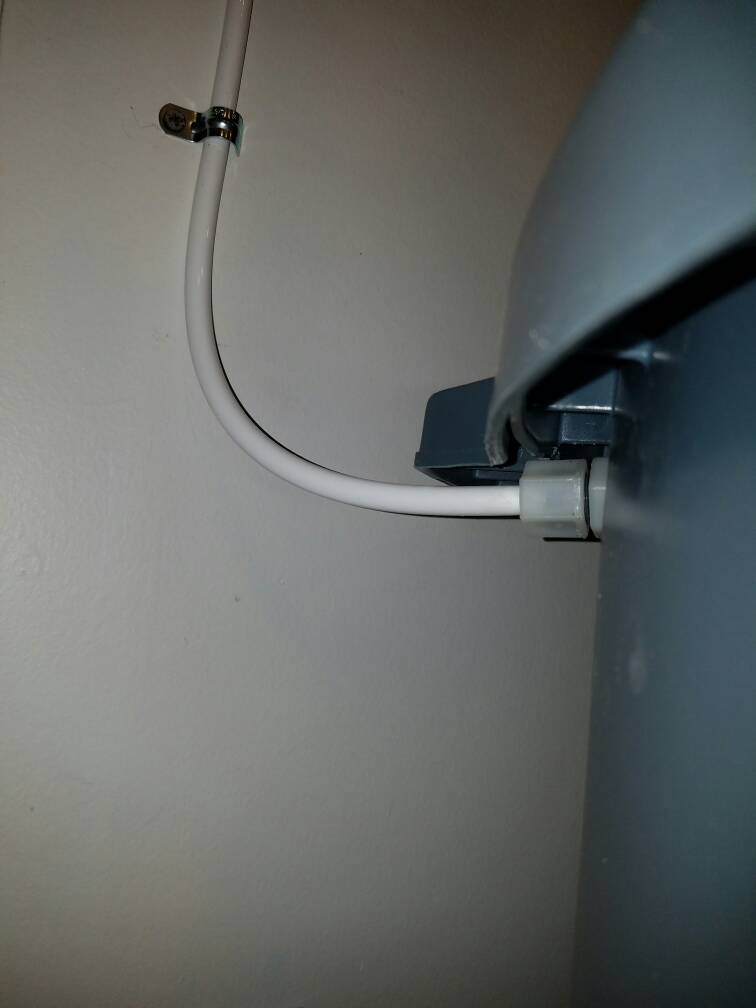
First thing I found out I had to do was change out how my water supply was feeding into my RO/DI system. The Gapper uses 3/8" tubing instead of the 1/4" most standard home ro/di systems use. Plus it uses a booster pump to make sure the PSI into the membrane is right which the membrane has a considerably higher PSI requirement.
Buckeye Hyder also does NOT recommend using a saddle valve especially for those using booster pumps and definitely NOT for the Gapper. I found out why very quickly after doing this change out. For my single and dual 75gpd to 150gpd membranes I've been using my pressure has been good enough but for some people a saddle valve may be hurting a lot more.
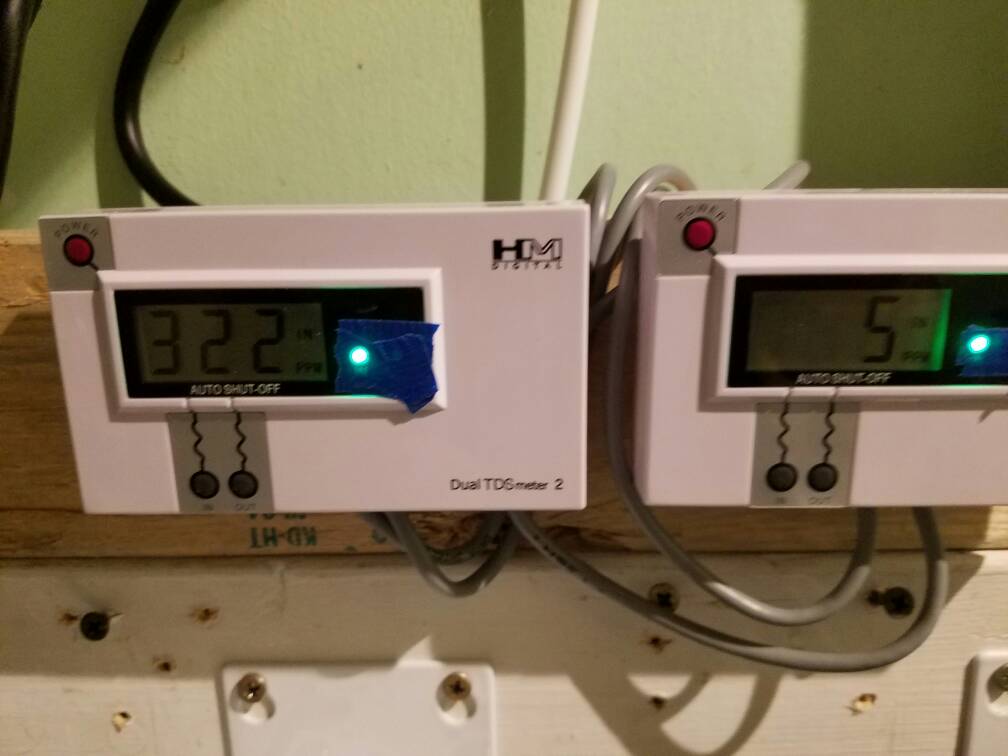
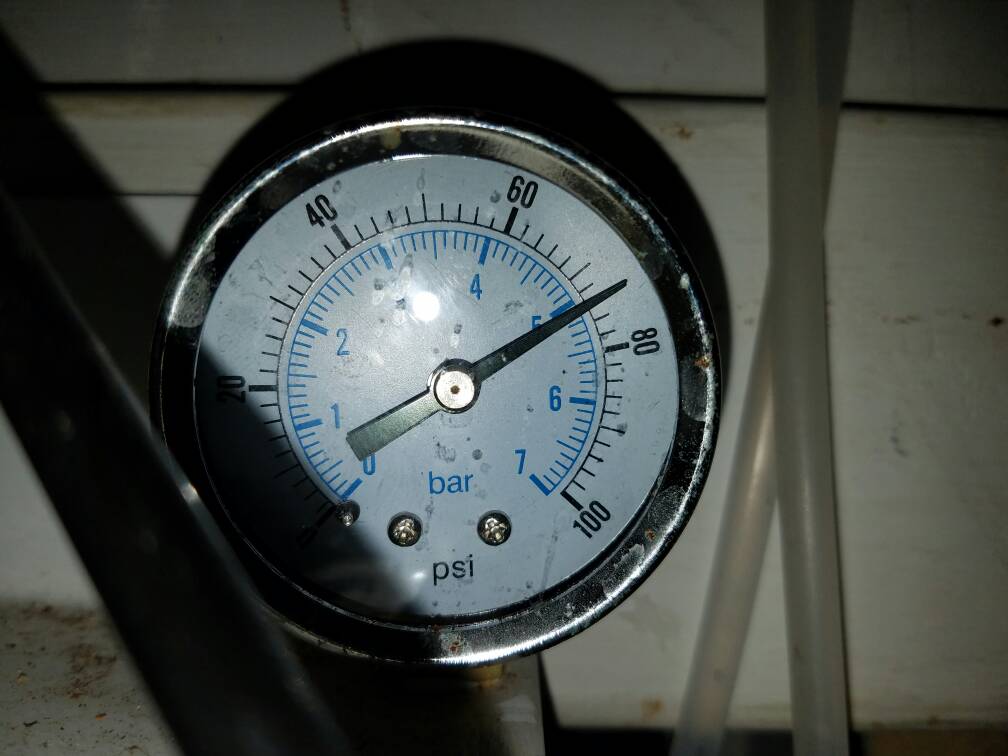
I went from this
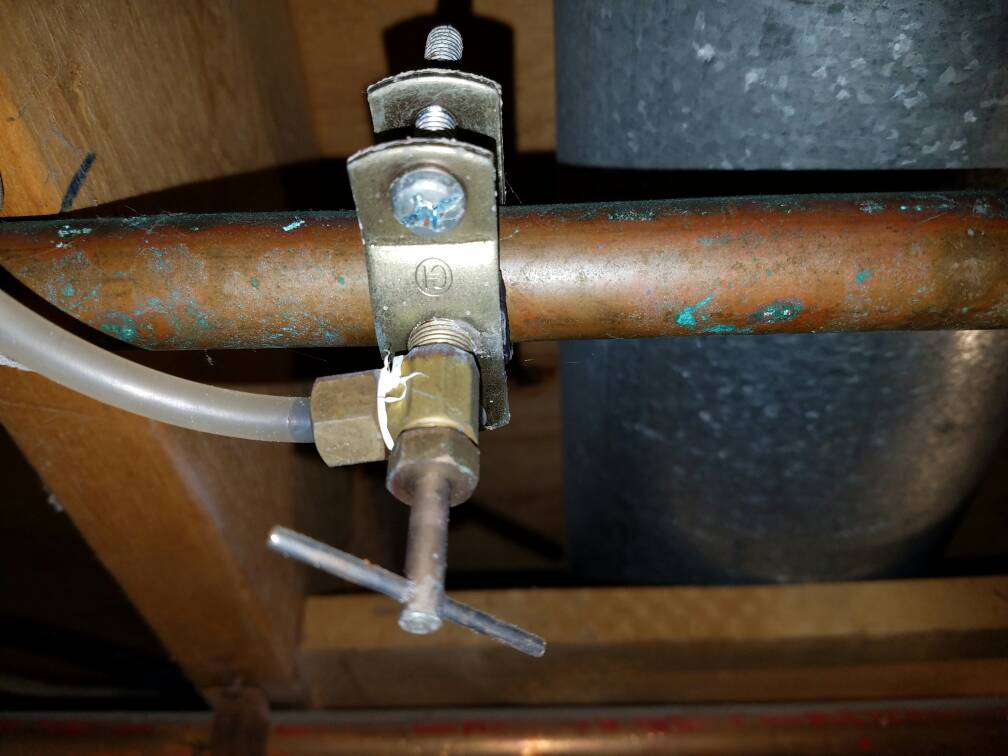
74psi
To this
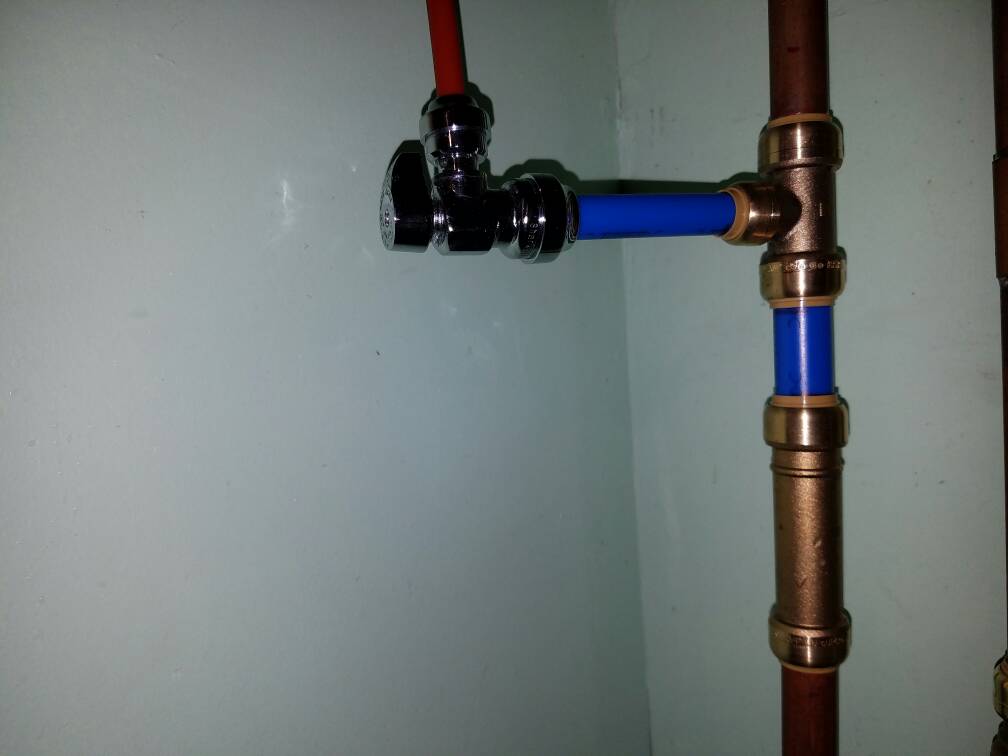
92psi
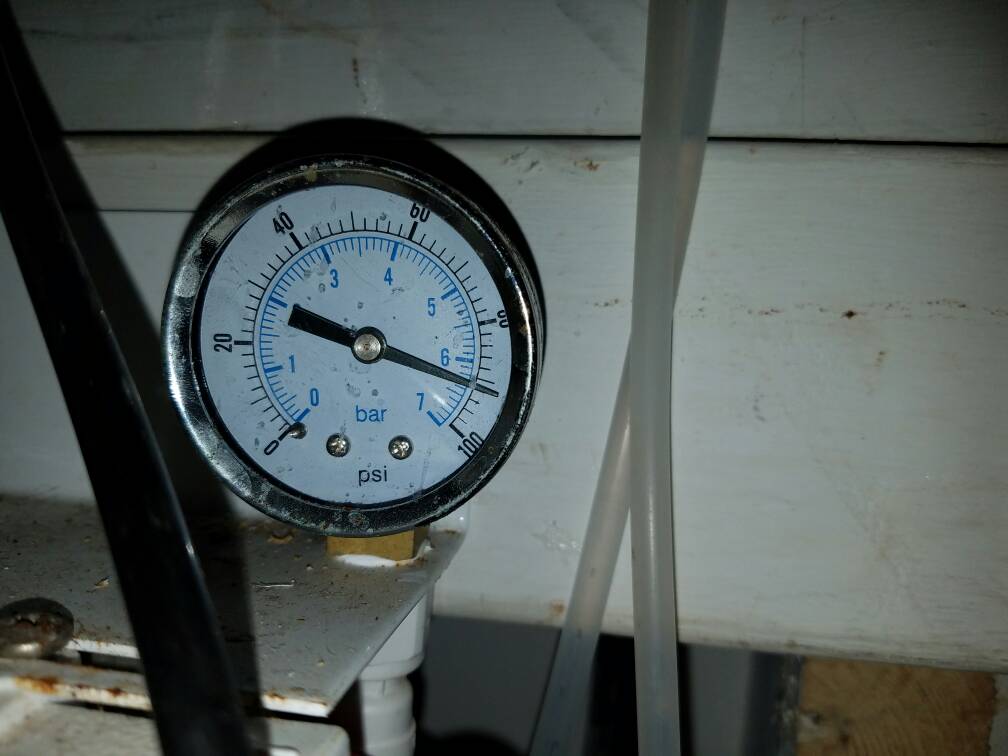
Almost 20PSI increase in pressure just from switching out from a saddle valve. Crazy. But still not high enough for the Gapper which is good it comes with a booster pump. So, While I was waiting for the Gapper to get in I decided to change everything out to 3/8" tubing which was recommended and decided to change out the DI stages I had to also use 20"x2.5" housings.
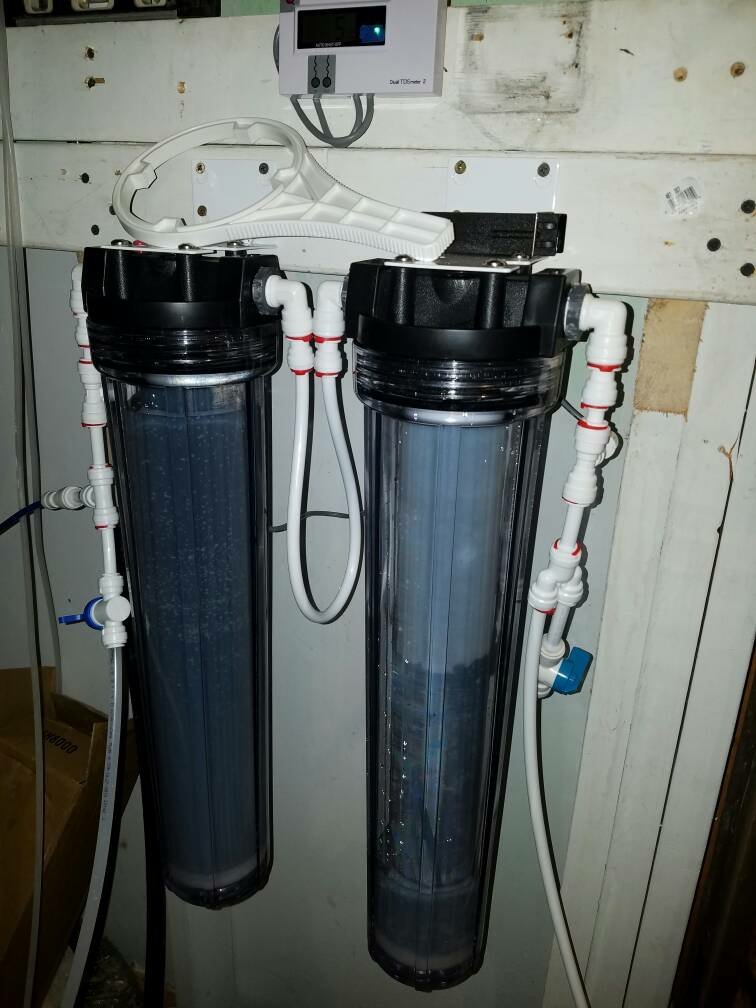
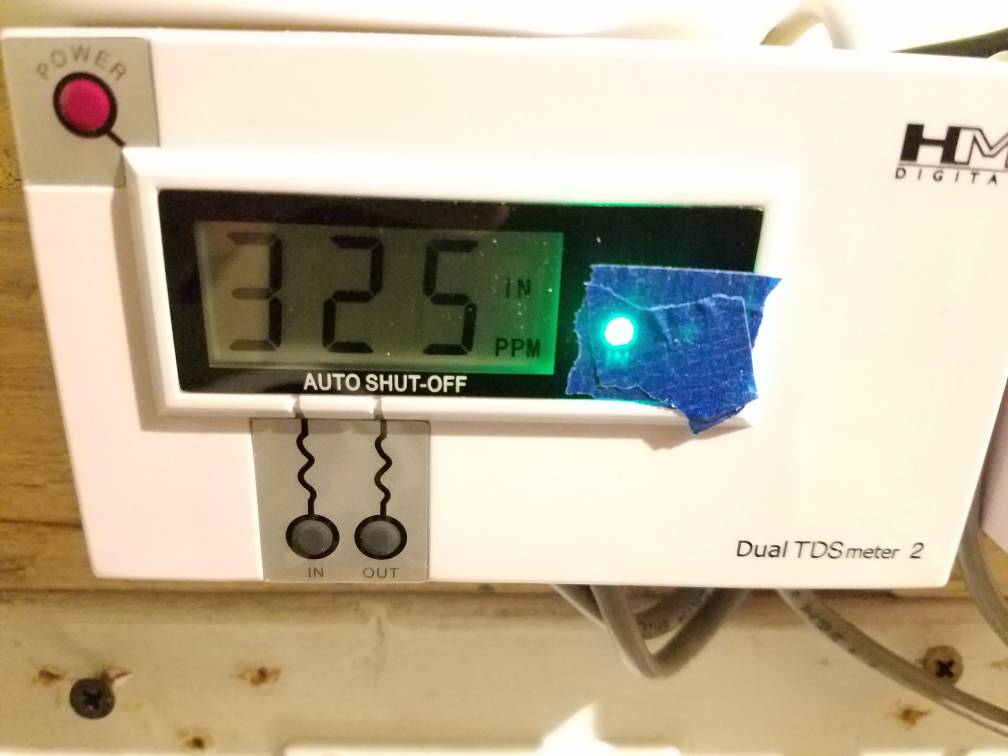
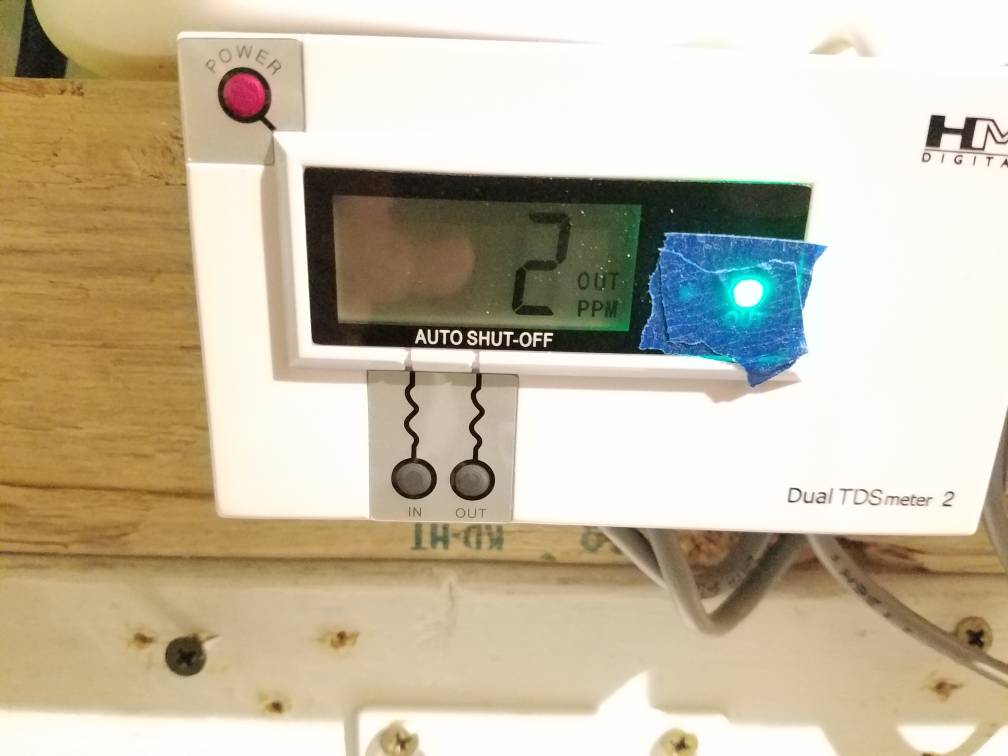
Replaced 3x 10" housings with 2x 20" housings. I found out a single 20" refillable cartridge holds more by about a quarter pound or so then 2x 10" refillable cartridges. This should last quite a long time time as I swap the 2nd cartridge to the first rotation like I was doing with the 3x 10" stages. Plus the Gapper has a pretty high rejection rate over 98.5% which I was getting around 96-98% before. Which will also help increase the life of the DI.
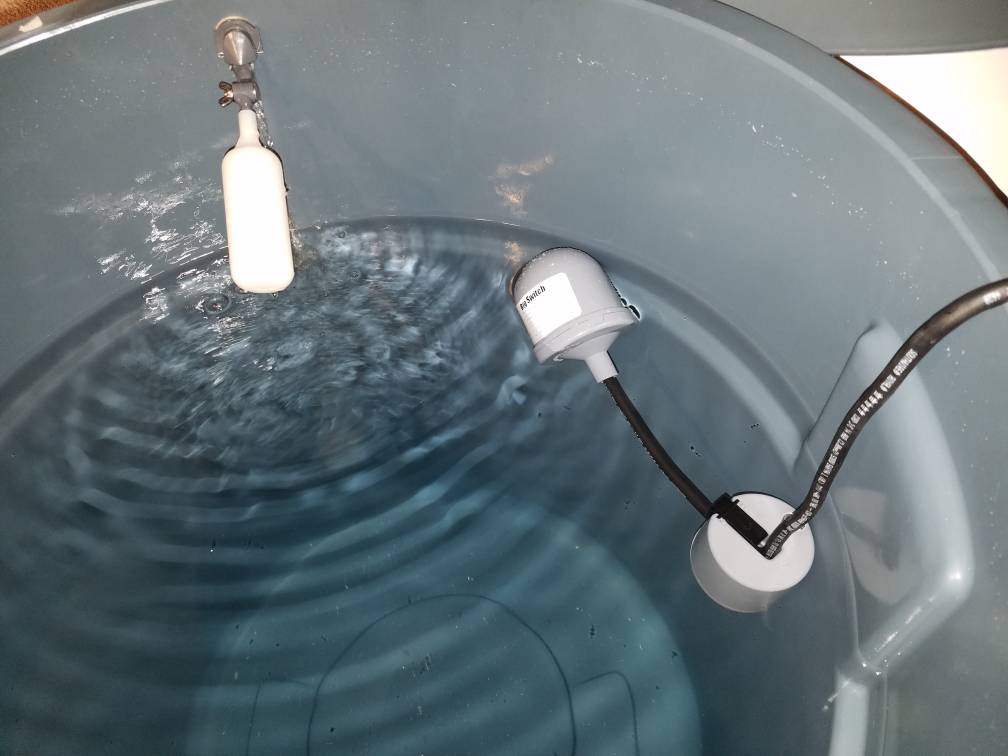
Last leg to my rodi reservoir upgraded to 3/8" tubing and float valve. Ready for the Gapper!
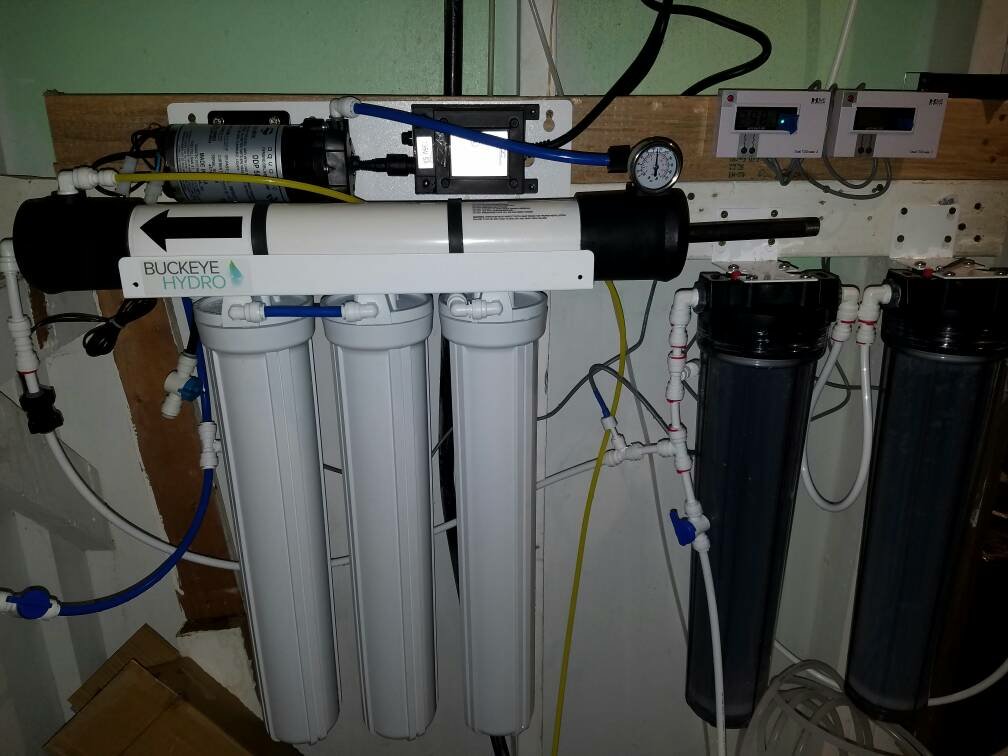
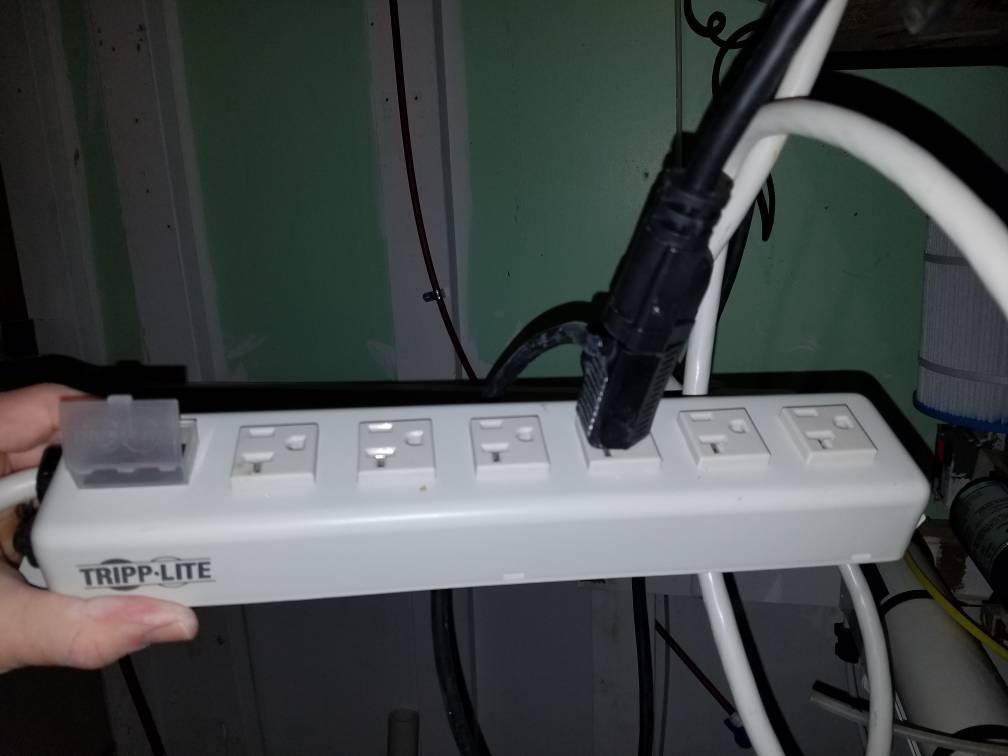
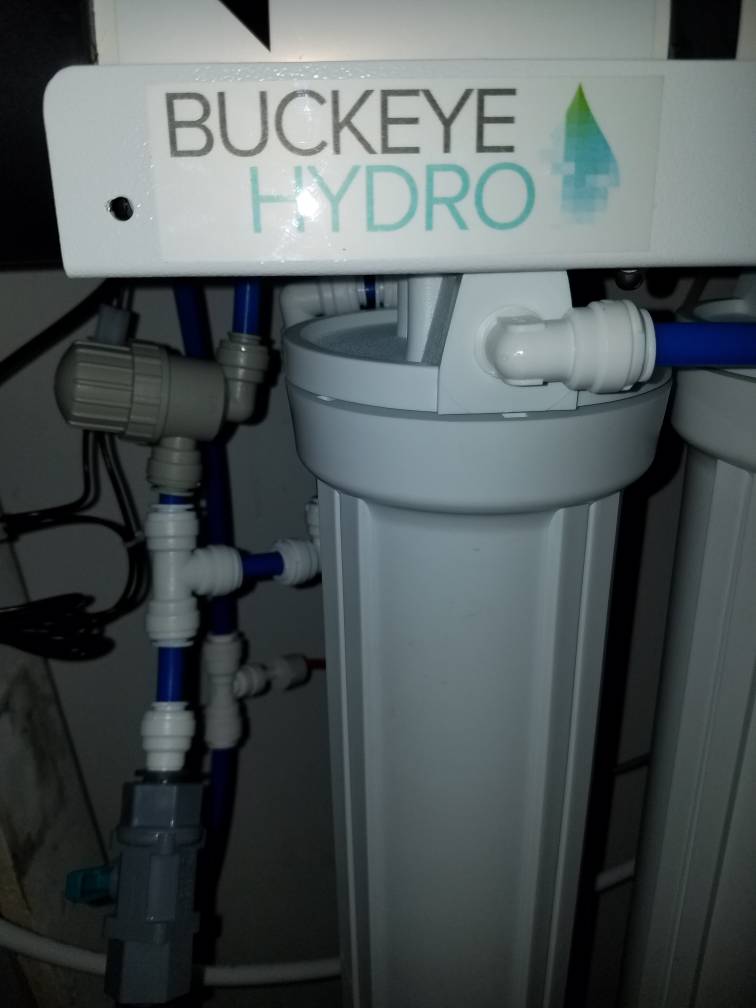
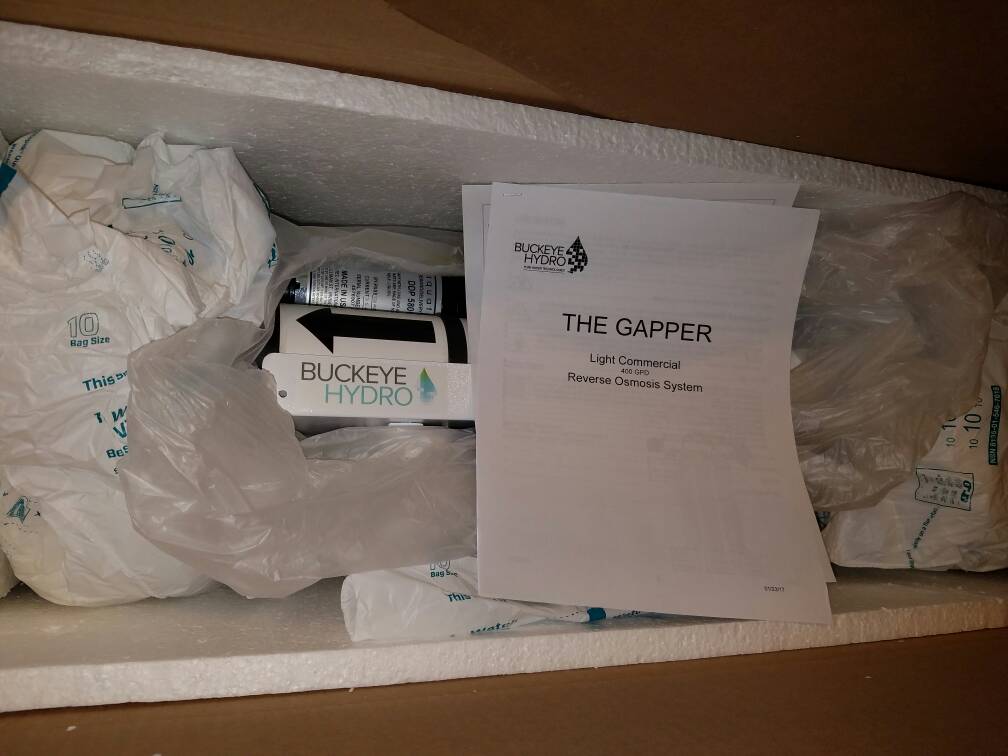
Which I got the Gapper in yesterday. It was packaged really well and comes with everything needed to get the RO unit up and running which is awesome. I started looking at other commercial type units and there was always something missing like the booster pump, solenoid valves, pressure switches, and even pre filter stages (housing not just the filters). The Gapper has everything and the manual was very helpful in getting it all together. Plus the price for it all was well under a grand which when looking at a complete commercial setup I was seeing $2,000 and up and way up like $10k and more.
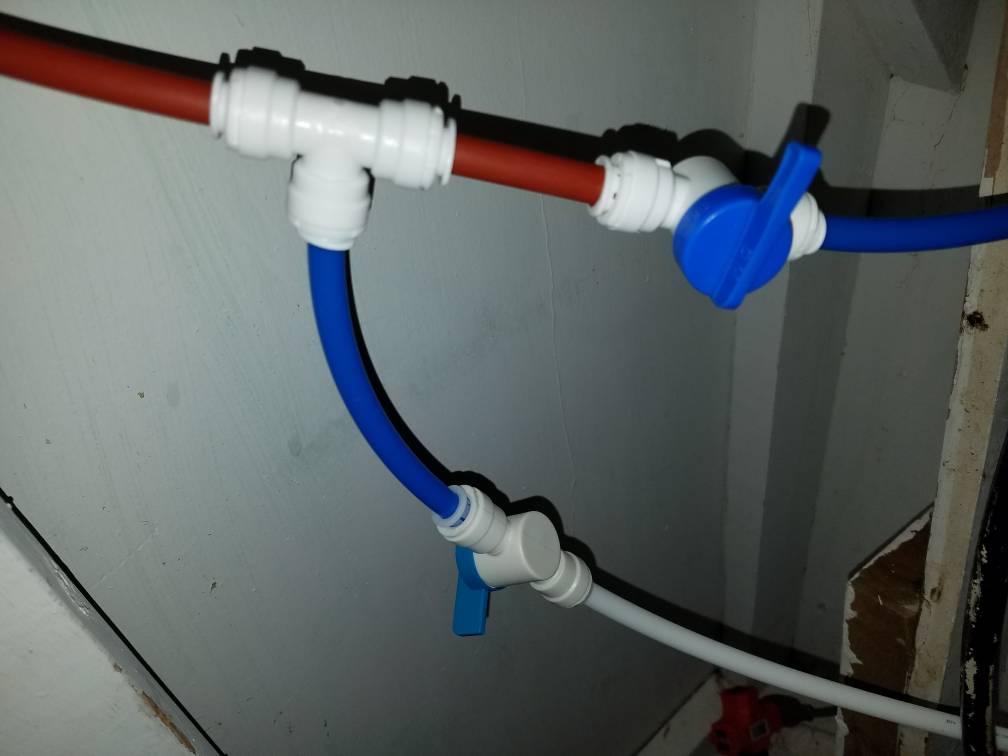
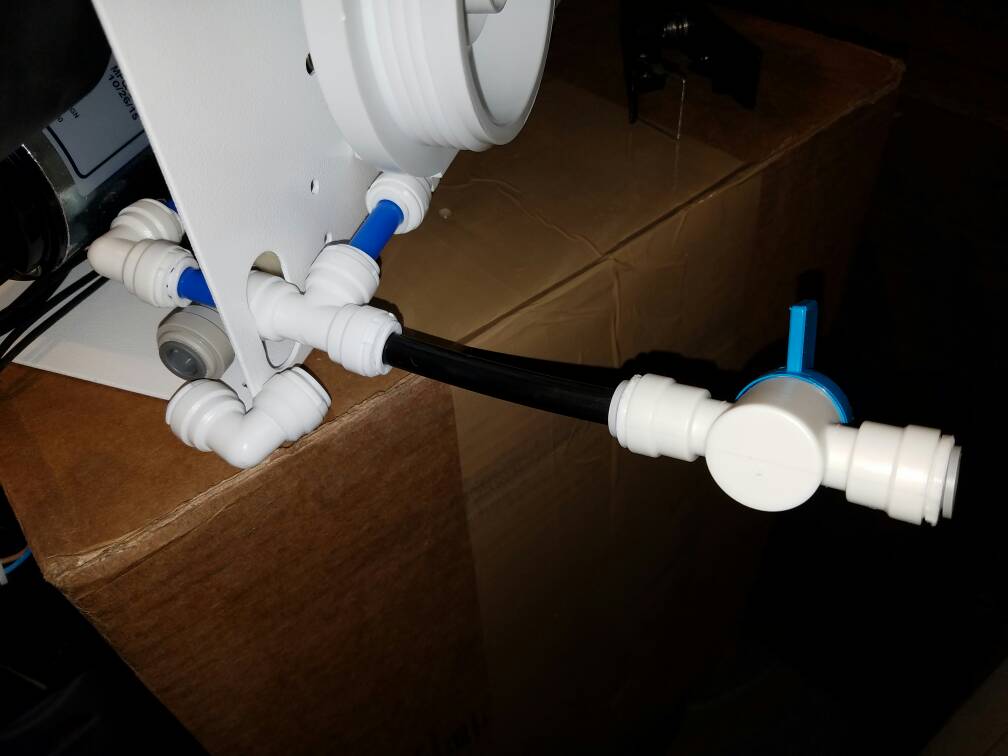
There is one modification I did do which is to replace an elbow and put in a T with a valve. Which will be fore whenever I replace the carbon prefilters I can run the water down to the drain to rinse them off with out fouling the membrane.
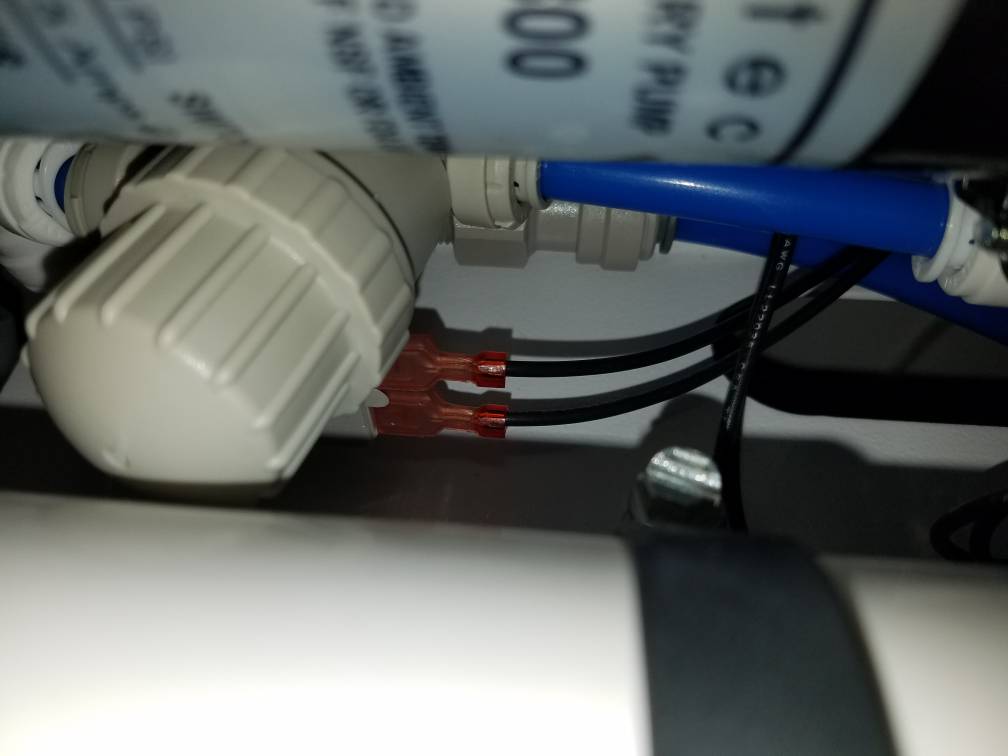
It took me about an hour to get it all setup which included moving my DI stages over a bit and putting in a new 2x4 so the Gapper could be mounted with the bracketing being fully supported and up higher then the DI stages so I could remove or add a membrane. Be warned when flushing the filters with out the RO membrane that membrane chamber has quite a bit of water in it which all came out when I opened up the end cap. Getting that cap back in took some pushing for sure. Then it's secured with a ring clip. Nice setup.
Here it is all setup which everything there besides the TDS meters, the micro ball valves I added, and the DI stages ALL came with the Gapper.

There's several reason's I went with this unit. Water volume used monthly is one which is around 230 gallons.
The big things I'm looking forward to is the auto flush, 1 to 1 waste ratio, and the very high rejection rate.
My old basic 5 stage is about 4:1 waste and about 96-98 rejection rate. That will be a big savings in water usage and DI usage. The DI being the bigger of the cost but the water reduction will be good environmentally.
The next big pluses to me will be that I will only need to swap out a single membrane and reduce the pre filter change out to once a year. The cost on the prefilters is a wash but the single membrane will be slightly cheaper and easier.
Also, I have a larger volume of water if there's ever another bad emergency where I need to make a lot of quick water changes the faster production speed is of great benefit. Like a couple years ago mildew remover got into my tank and wiped out all corals and other inverts and ammonia spikes were starting to kill off my fish. After a quick water change with what I had on hand in my saltmix reservoir I was waiting for it to fill and mix again which I did several times. 400GPD will help speed that up.
Plus, miscellaneous and smaller gallon stuff stuff I'm always wishing the RO output was faster.
http://www.buckeyehydro.com/the-gapper-light-commercial-ro-system/
PRODUCT DESCRIPTION
Residential-scale systems too slow, and commercial systems too expensive for your application? Meet The Gapper - an RO system that utilizes the best of both worlds to deliver up to 400 gpd at an incredibly affordable price! True to its name, the Gapper fills the gap between traditional residential scale RO's that produce up to 200 gpd, and commercial RO's that typically begin at 500 gpd.
The Gapper features three 20" x 2.5" standard-sized prefilters - one sediment filter and two carbon blocks; an extra low energy, made-in-the-USA commercial RO membrane; liquid-filled pressure gauge; high pressure pump; auto flush valve; feed water solenoid valve; housing wrench; and an incredible 1:1 waste water to purified water ratio! Includes 10 feet of 3/8" feedwater tube (blue) and permeate tube (white), and 10 feet of 1/4" concentrate tubing (yellow). With 98.5% rejection, The Gapper is an excellent choice to purify your water before its delivered to a deionization stage.
For chlorinated feedwater, the standard filter package can be selected. For addressing feedwater with chloramines, or for enhanced chlorine removal, choose the Chloramine Filter Package. This package features a 1 micron sediment filter, and two best-in-class 20" x 2.5" Chloraguard Carbon Blocks.
I thought this "light" RO unit should get a little thread of it's own. I just replaced a basic 5 stage RO/DI system I started with back in 2009 and have slowly over time upgraded various components of it. From adding more DI stages to rotate though, adding additional membrane to boost production rate, adding more TDS meters, etc.
This was my current setup just before this last upgrade. 1 micron sediment, 1 micron carbon, .5 micron carbon, dual 150 GPD membranes, and 3 DI stages. I was getting between 200-300gpd and rotating DI stages helped increase it's life.
Normally I swap out the carbon filters every 6 months preventively. Mainly because I'm to lazy to test for total chlorine which would indicate when the carbon blocks actually need to be replaced. So, I was looking at upgrading the carbon blocks to 20" x 2.5" from the standard 10"x2.5" and only swap them out once a year. That's when I ran across the Gapper!
A lot of features I didn't have but wanted and the 20" housings I was wanting to get anyway. Went from upgrade to total replacement. I found a thread by buckeye hydro for The Gapper when they released it which was late last year.
So, I started asking questions and Buckeye Hydro was very helpful in answering questions and getting me going into the right direction.
First thing I found out I had to do was change out how my water supply was feeding into my RO/DI system. The Gapper uses 3/8" tubing instead of the 1/4" most standard home ro/di systems use. Plus it uses a booster pump to make sure the PSI into the membrane is right which the membrane has a considerably higher PSI requirement.
Buckeye Hyder also does NOT recommend using a saddle valve especially for those using booster pumps and definitely NOT for the Gapper. I found out why very quickly after doing this change out. For my single and dual 75gpd to 150gpd membranes I've been using my pressure has been good enough but for some people a saddle valve may be hurting a lot more.
I went from this
74psi
To this
92psi
Almost 20PSI increase in pressure just from switching out from a saddle valve. Crazy. But still not high enough for the Gapper which is good it comes with a booster pump. So, While I was waiting for the Gapper to get in I decided to change everything out to 3/8" tubing which was recommended and decided to change out the DI stages I had to also use 20"x2.5" housings.
Replaced 3x 10" housings with 2x 20" housings. I found out a single 20" refillable cartridge holds more by about a quarter pound or so then 2x 10" refillable cartridges. This should last quite a long time time as I swap the 2nd cartridge to the first rotation like I was doing with the 3x 10" stages. Plus the Gapper has a pretty high rejection rate over 98.5% which I was getting around 96-98% before. Which will also help increase the life of the DI.
Last leg to my rodi reservoir upgraded to 3/8" tubing and float valve. Ready for the Gapper!
Which I got the Gapper in yesterday. It was packaged really well and comes with everything needed to get the RO unit up and running which is awesome. I started looking at other commercial type units and there was always something missing like the booster pump, solenoid valves, pressure switches, and even pre filter stages (housing not just the filters). The Gapper has everything and the manual was very helpful in getting it all together. Plus the price for it all was well under a grand which when looking at a complete commercial setup I was seeing $2,000 and up and way up like $10k and more.
There is one modification I did do which is to replace an elbow and put in a T with a valve. Which will be fore whenever I replace the carbon prefilters I can run the water down to the drain to rinse them off with out fouling the membrane.
It took me about an hour to get it all setup which included moving my DI stages over a bit and putting in a new 2x4 so the Gapper could be mounted with the bracketing being fully supported and up higher then the DI stages so I could remove or add a membrane. Be warned when flushing the filters with out the RO membrane that membrane chamber has quite a bit of water in it which all came out when I opened up the end cap. Getting that cap back in took some pushing for sure. Then it's secured with a ring clip. Nice setup.
Here it is all setup which everything there besides the TDS meters, the micro ball valves I added, and the DI stages ALL came with the Gapper.
There's several reason's I went with this unit. Water volume used monthly is one which is around 230 gallons.
The big things I'm looking forward to is the auto flush, 1 to 1 waste ratio, and the very high rejection rate.
My old basic 5 stage is about 4:1 waste and about 96-98 rejection rate. That will be a big savings in water usage and DI usage. The DI being the bigger of the cost but the water reduction will be good environmentally.
The next big pluses to me will be that I will only need to swap out a single membrane and reduce the pre filter change out to once a year. The cost on the prefilters is a wash but the single membrane will be slightly cheaper and easier.
Also, I have a larger volume of water if there's ever another bad emergency where I need to make a lot of quick water changes the faster production speed is of great benefit. Like a couple years ago mildew remover got into my tank and wiped out all corals and other inverts and ammonia spikes were starting to kill off my fish. After a quick water change with what I had on hand in my saltmix reservoir I was waiting for it to fill and mix again which I did several times. 400GPD will help speed that up.
Plus, miscellaneous and smaller gallon stuff stuff I'm always wishing the RO output was faster.
Last edited: