Time to Get Serious (Red Sea Reefer 250 Build)

OP
OP
AwildcatsZ

AwildcatsZ

Active Member
View Badges
Joined
Aug 4, 2016
Messages
409
Reaction score
570
Location
Orange County
Rating - 0%
0   0   0
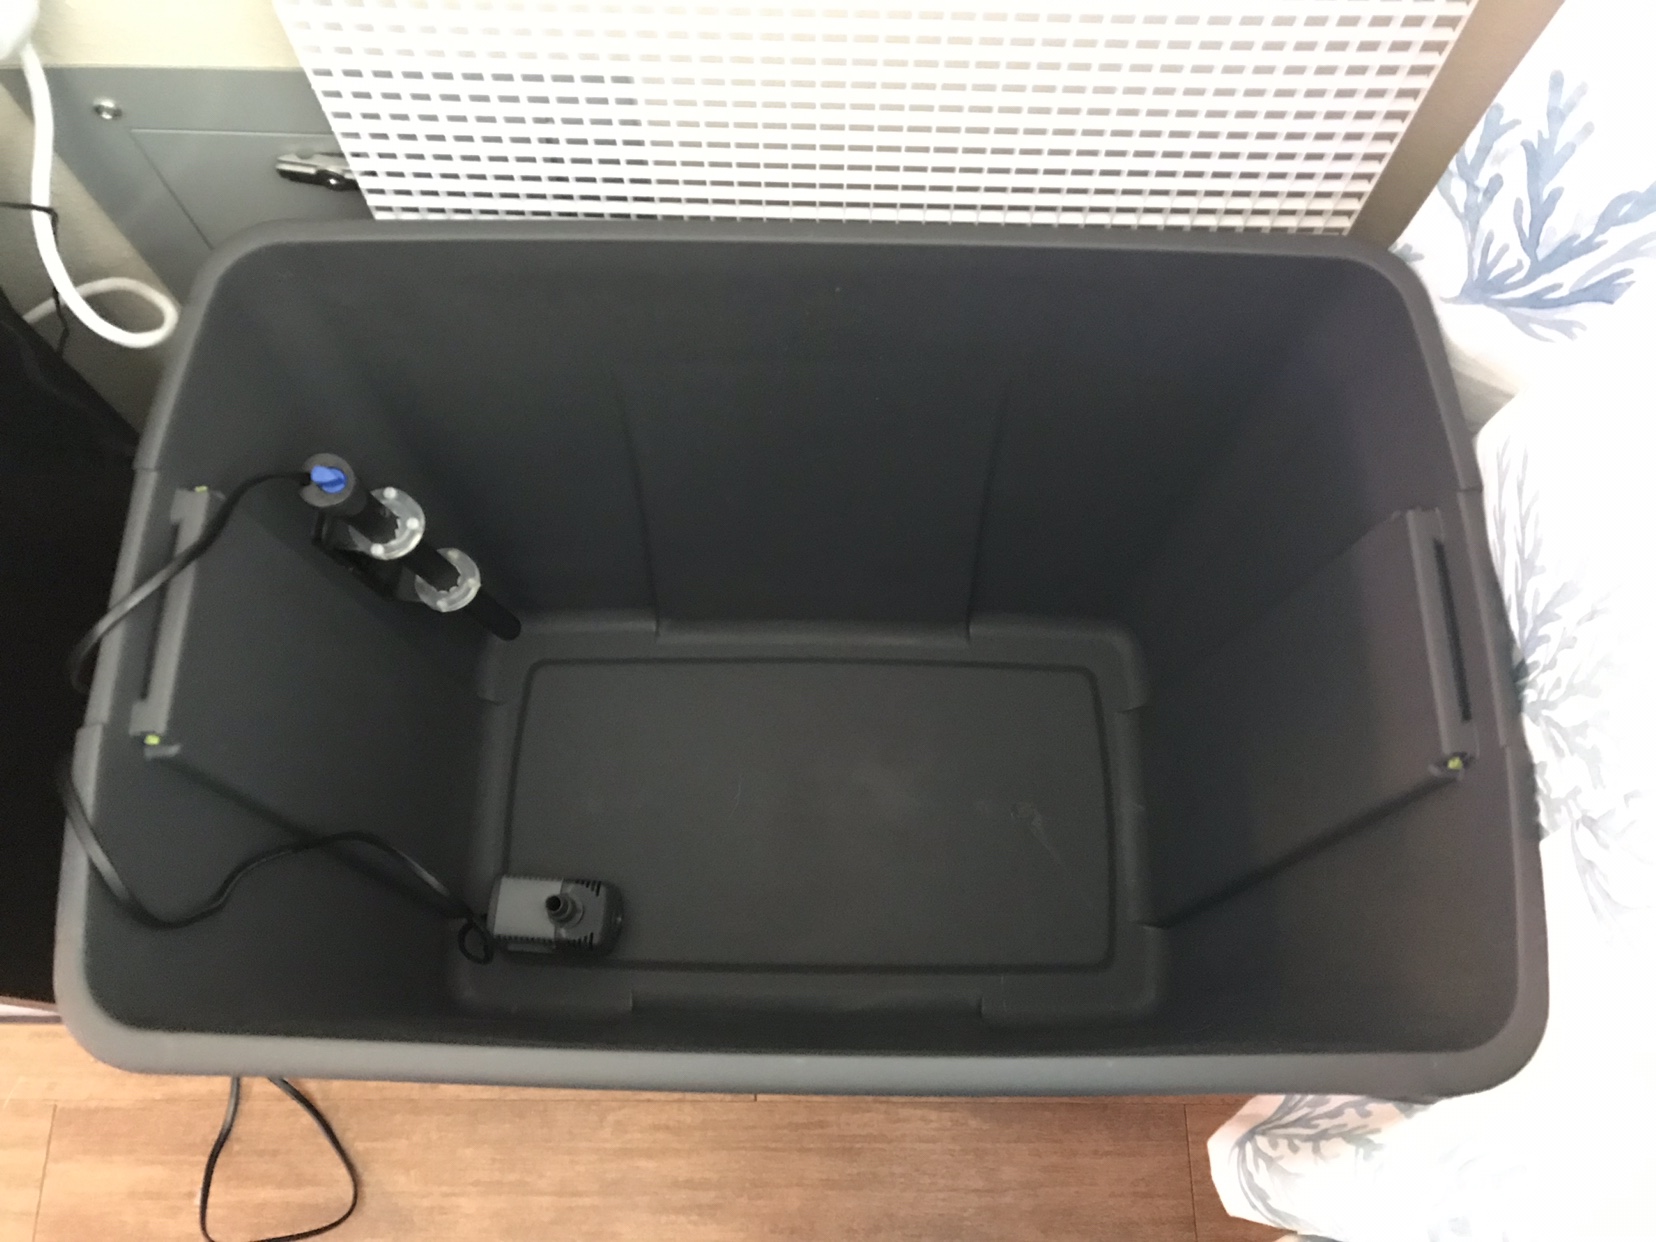
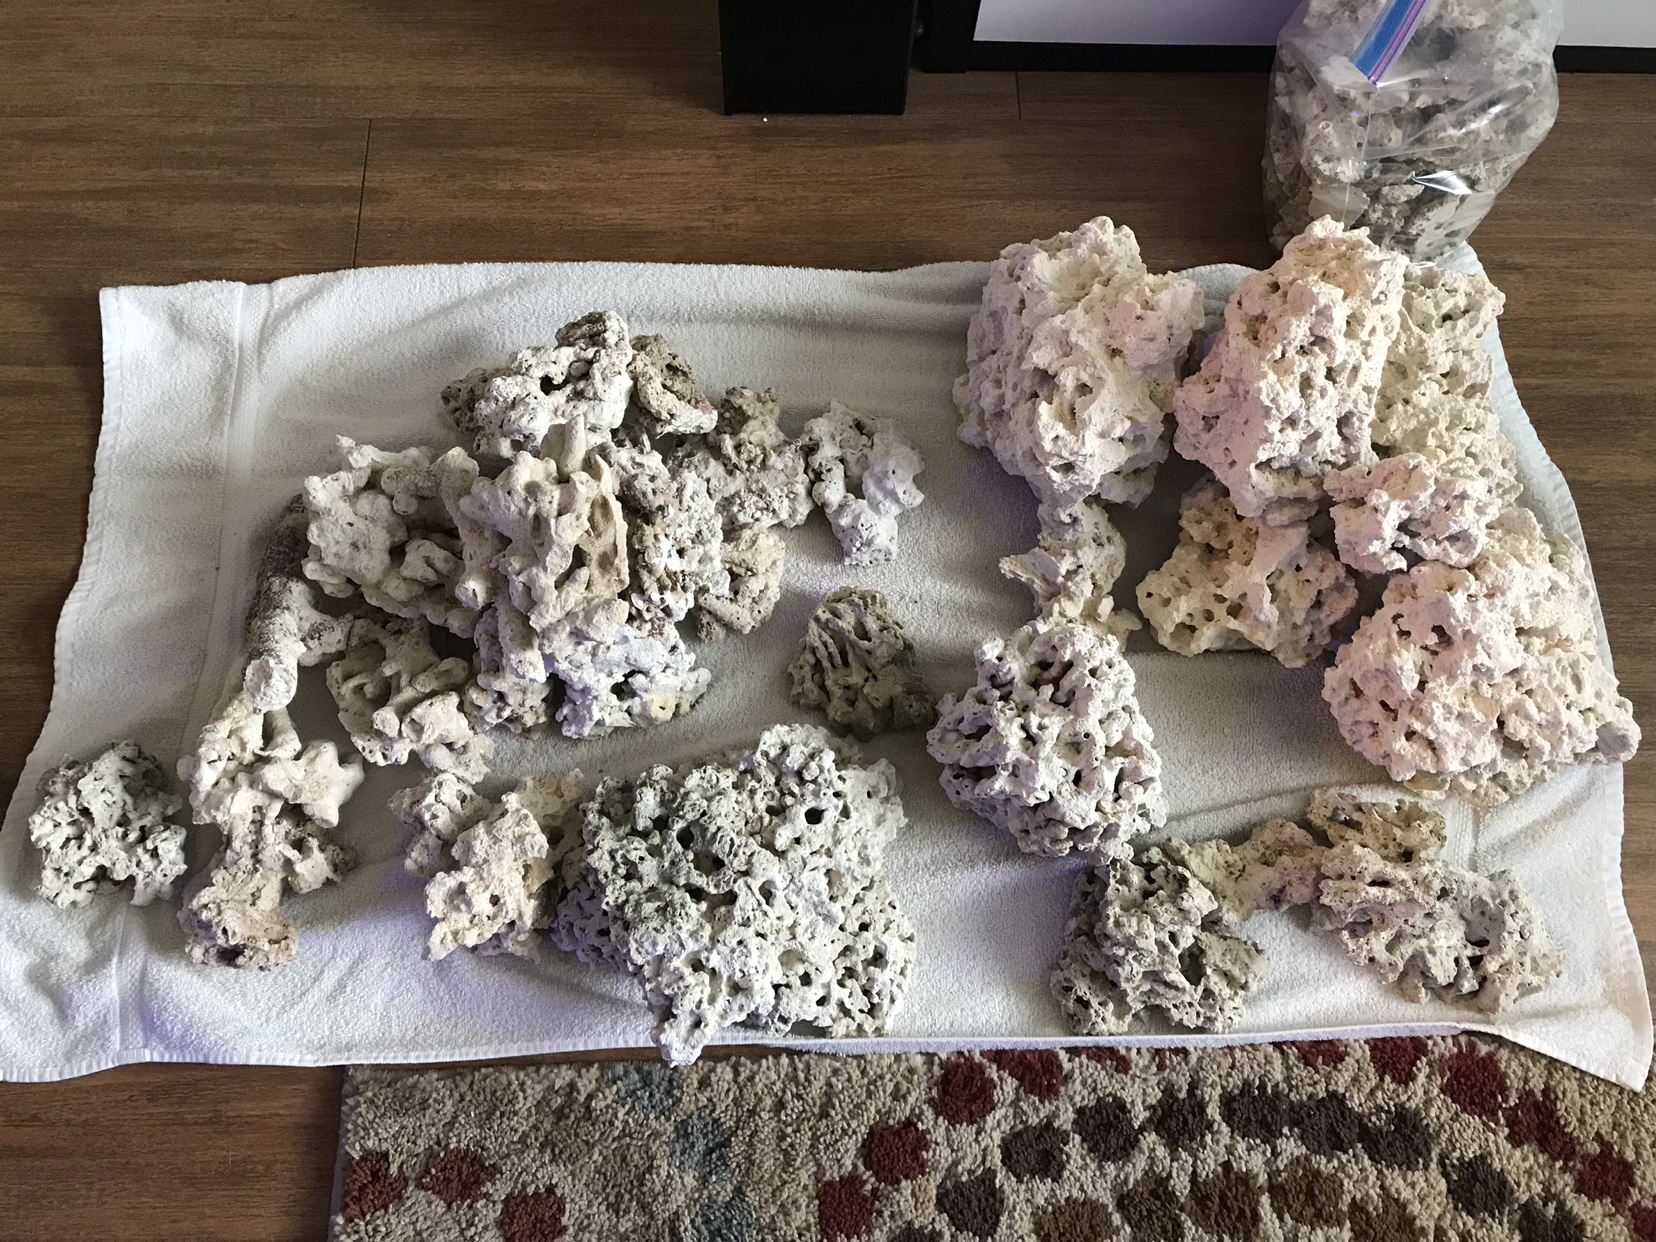
Now that my weekends are freed up from wedding chores, I have time to focus on my build. Today I sorted through the rock I got from fellow hobbyists and picked out rocks that look similar in texture and shape. I then got them wet! Not quite in the new tank, but in the tote that I will have them curing/cycling in.
f3f8615f195b611d6e727b849afa487a.jpg
e5a6bf35da942c1e35c886d98f671014.jpg
e19747b3601fc47d322e090507c248d6.jpg

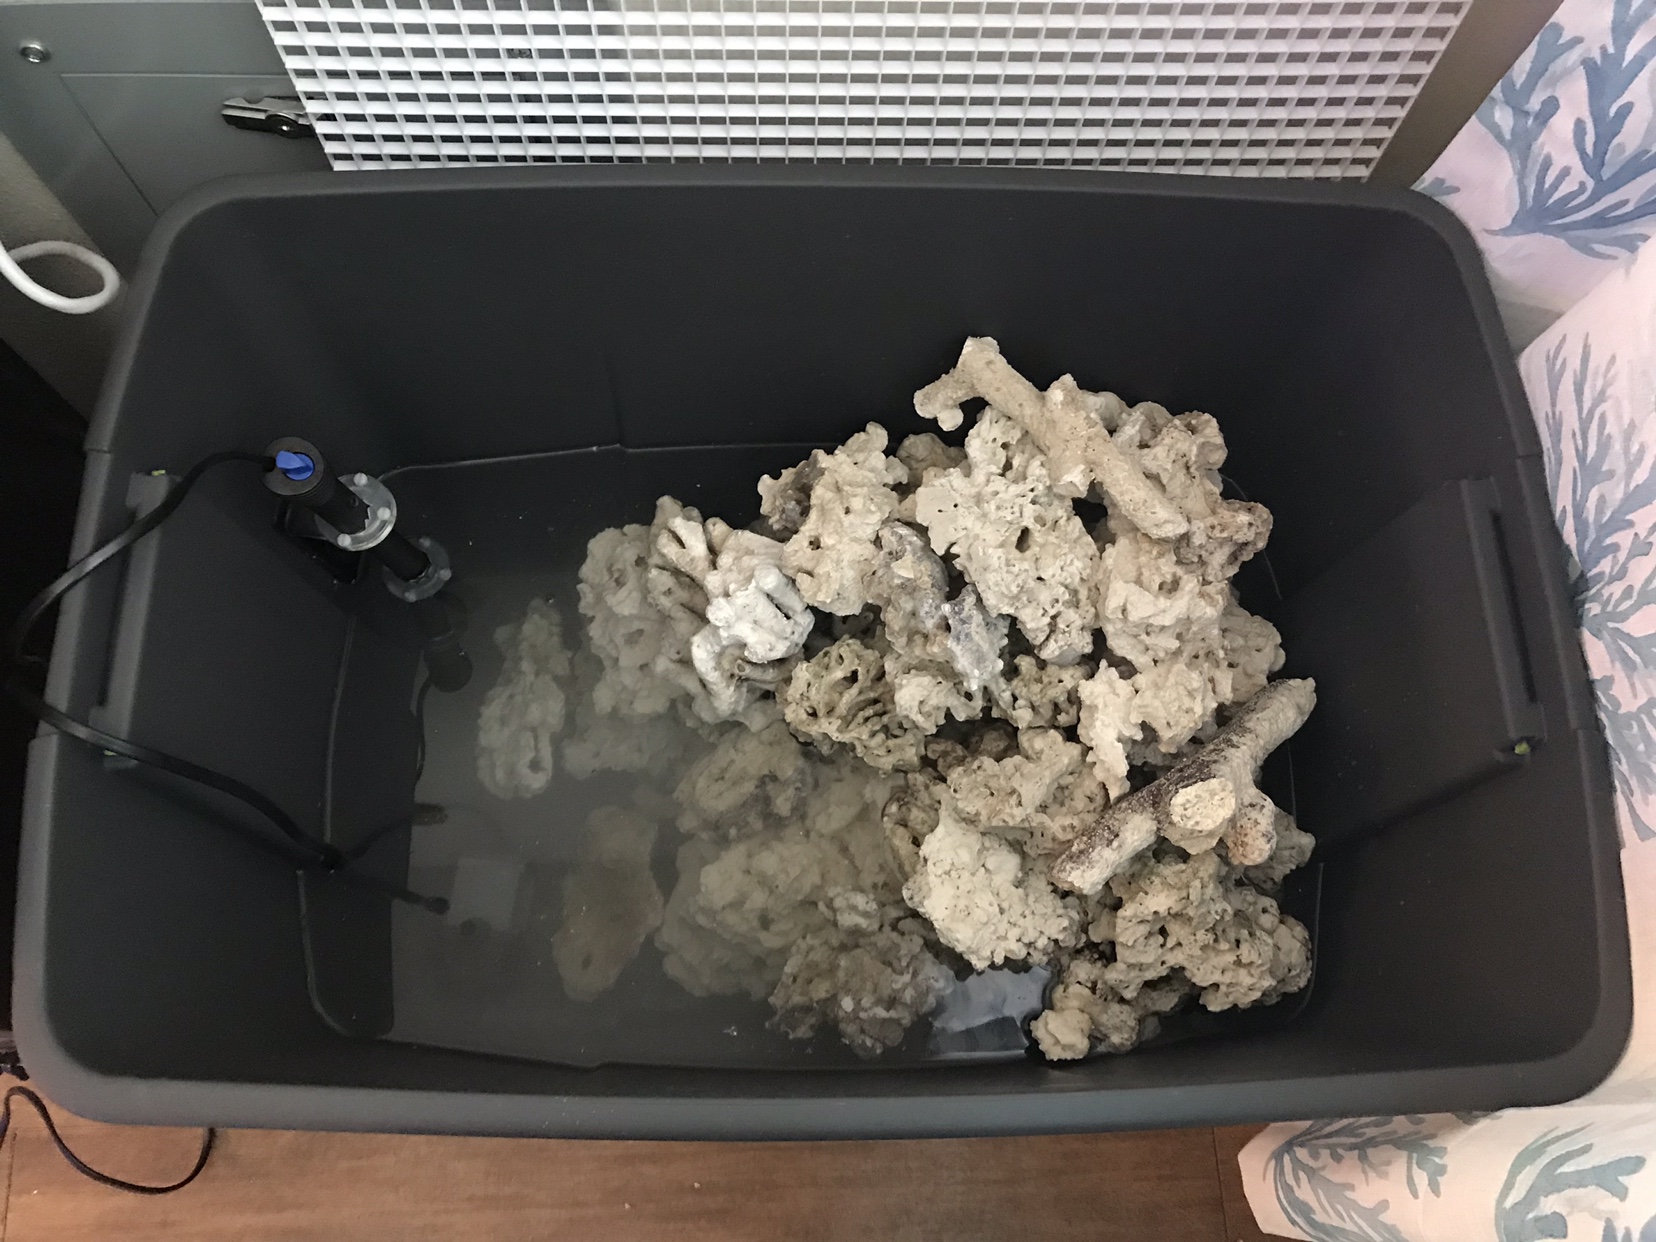
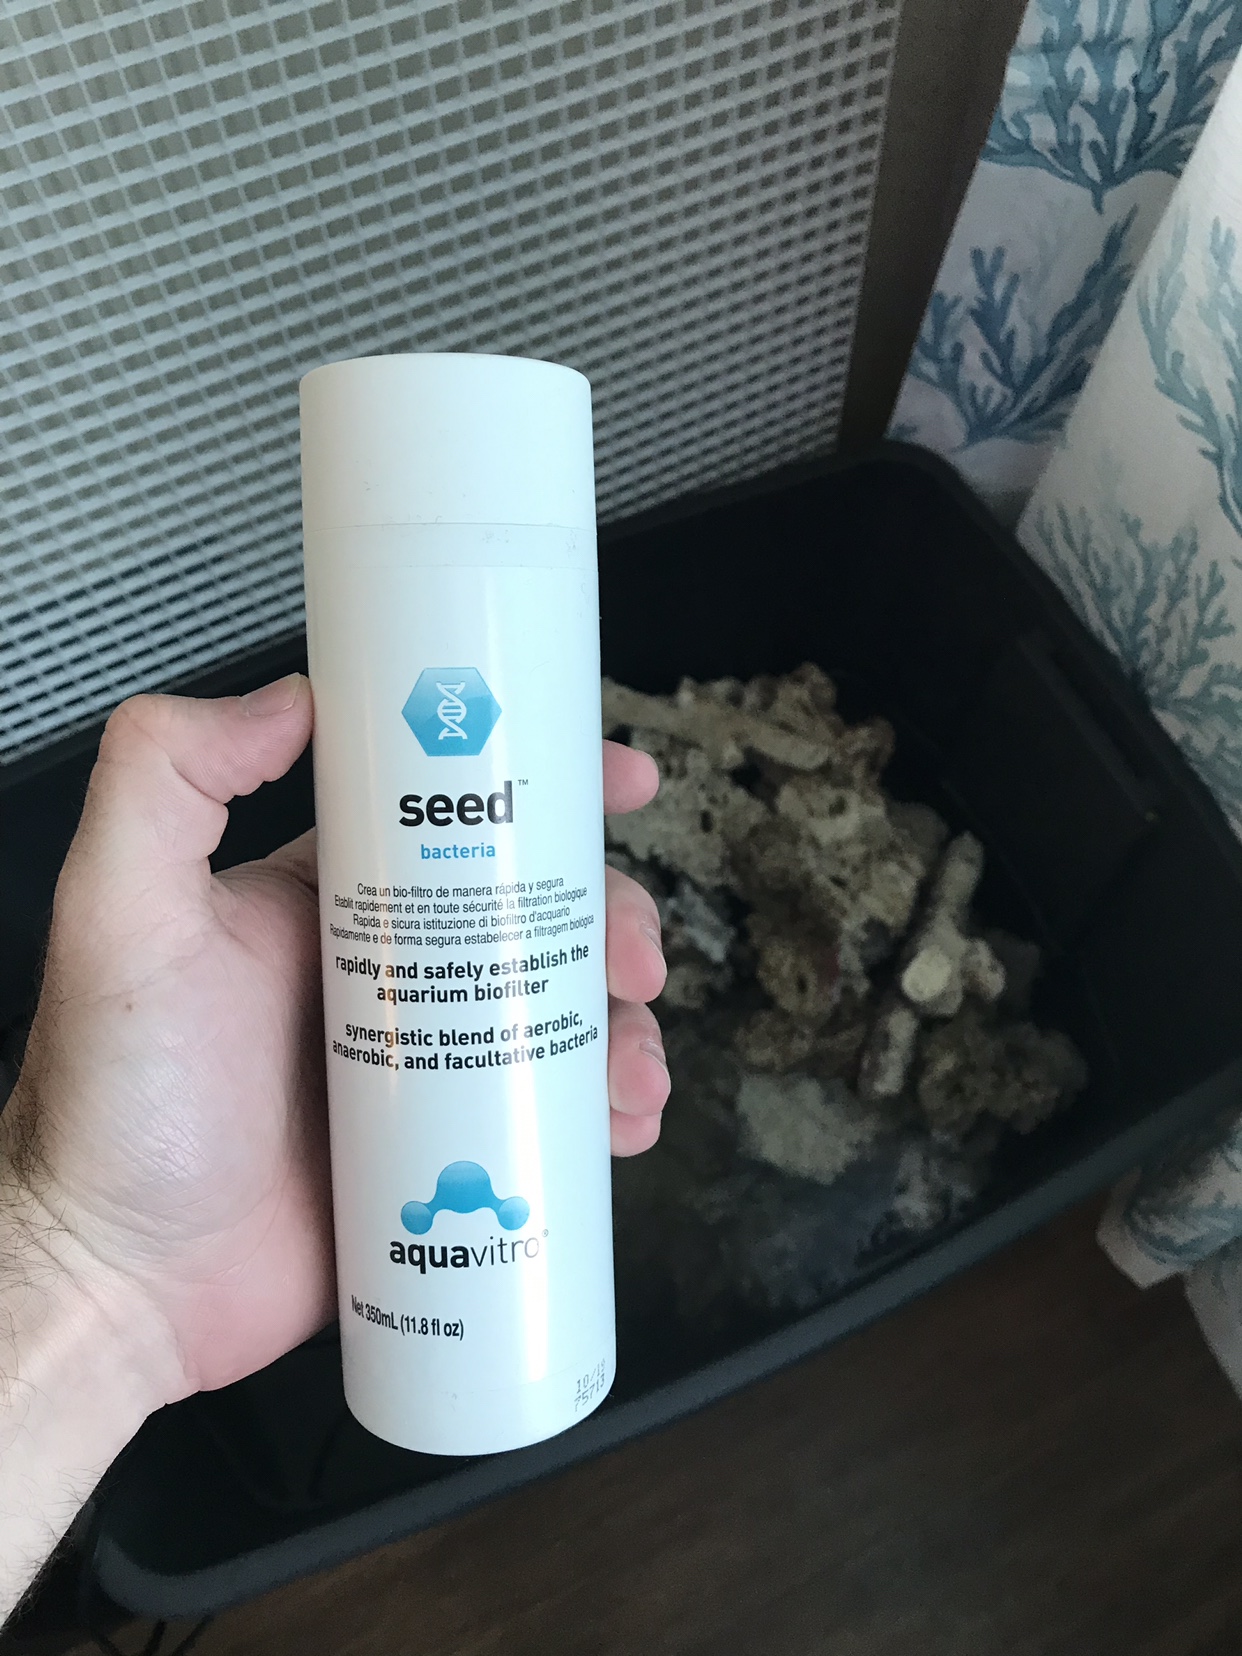
My plan is to let the water get to temperature over the next day or two. I will then add a frozen cube of mysis shrimp to get some nitrates and ammonia levels. I have a bottle of bacteria that I won in a raffle a year or so ago. I plan to dump this in after the mysis cube melts and has time to degrade.
f763197adc173fa66bc7c959a019afc5.jpg

The egg crate in the back will be used to build a frag rack for the current tank. May get to that this week!
 
Last edited:
OP
OP
AwildcatsZ

AwildcatsZ

Active Member
View Badges
Joined
Aug 4, 2016
Messages
409
Reaction score
570
Location
Orange County
Rating - 0%
0   0   0
Last night I cut the pieces for the frag rack that will be going into my current tank. I also put in an order for 200 frag plugs. If the plugs arrive before the weekend, I plan to start breaking down my current rock work and coral colonies.
IMG_8197.jpg

I will have to put it together inside my tank, as the filter and skimmer prevent me from sliding it in when already assembled.

I also added the first frozen cube of mysis to the dry rock bin and the first dose of bacteria. Test kits arrive today to keep track of the cycle.
 
OP
OP
AwildcatsZ

AwildcatsZ

Active Member
View Badges
Joined
Aug 4, 2016
Messages
409
Reaction score
570
Location
Orange County
Rating - 0%
0   0   0
Weekend Update!
57816938455__2F937FDD-6A48-4B3D-B51B-F06C09F71A3D.JPG


The dry rock is still cycling. Not much to report there. My focus this weekend was put on my current tank and getting that broken down and fragged. Even with all of the planning I did, the daily mental run threw of how it is going to go down, and the encouragement of my wife...it turned out to be a very long and tedious task.

I went rock by rock and broke off all of my colonies and then proceeded to break down those colonies further into frags. I dipped the majority of the frags in a freshwater bath to remove flatworms and then into a holding container. The same process was done for the remaining live rock which I put back into the tank to keep a biological filter. After 6 long hours, my beautiful display tank came down and now it looks like I run a LFS. While sad to see it go, I know this is for the best when starting my new RSR 250!

My plan is to sell/trade frags locally. If you are in the Orange County, California area and want some generous frags at a great price, let me know!

IMG_8231.jpg
Last look before it all came down...

IMG_8237.jpg
IMG_8240.jpg


Finished product. Now my goal is to keep the frags alive and healthy as we await our moving date. I also plan to dose flatworm eXit in a few days after the frags have healed and are settled in.

IMG_8236.jpg
 
Last edited:

ChrisQ0904

Valuable Member
View Badges
Joined
Dec 8, 2013
Messages
1,196
Reaction score
663
Location
Florida
Rating - 100%
1   0   0
Cant wait to see the 250 running. I myself just got married in January and just recently setup a reefer 250 as well. Wish the best of luck moving forward.

Now that I think about it, I even got a good deal on my tank which matches your theme apparently. I bought it off of someone who received it with a blown out front panel of the overflow. Was able to pick it up for only $50 and then another $25 for a new piece of glass.
 
OP
OP
AwildcatsZ

AwildcatsZ

Active Member
View Badges
Joined
Aug 4, 2016
Messages
409
Reaction score
570
Location
Orange County
Rating - 0%
0   0   0
Frags are all looking healthy! Only a few minor casualties... Here are a few pics!
IMG_8250.JPG
IMG_8248.JPG
IMG_8246.JPG
IMG_8243.JPG


We also found out our moving date is August 30th! This gives plenty of time for the rock to cycle and for me to move some frags! May be pretty quiet on the build thread between now and then.
 
OP
OP
AwildcatsZ

AwildcatsZ

Active Member
View Badges
Joined
Aug 4, 2016
Messages
409
Reaction score
570
Location
Orange County
Rating - 0%
0   0   0
Few things to report on with the move/build:

1. Our moving date got pushed up to July 12th! This means things will be happening a bit sooner (hooray! not sure my patience was going to hold).
2. The rock has been cycling and the ammonia levels have dropped to zero, nitrates have shot up, and there are a bit of phosphates detectable. I did a 10 gallon water change and added two damsels to the tote. I plan to return them back to the LFS after the move. I hate the idea of harming fish/animals.
3. I have been selling off quite a few frags and have enough money to purchase the remaining items I need for the build. The list includes the following:
  • WXM Module
  • New probes for Apex (pH, Temp, Salinity)
  • Apex Flow Monitoring Module
  • 7 gallon glass cube which I plan to use as a refugium
  • Clearview Lid (after discussing with the wife, we both decided that a little extra money on a nice lid will complete the look of the build)
  • PVC and Fittings for the plumbing
4. Stocking list will be coming next! Hold onto your wrasses.

Photo of my mother jawbreaker looking glorious!

IMG_8436.PNG
 
OP
OP
AwildcatsZ

AwildcatsZ

Active Member
View Badges
Joined
Aug 4, 2016
Messages
409
Reaction score
570
Location
Orange County
Rating - 0%
0   0   0
Today I got my shipment from BRS! Almost all of the pieces have been acquired. My next project is going to be looking into cabinets to begin building my control board! Moving day is creeping up and I want to be prepared!

cd5663b0f4908df91865272184c88cc0.jpg
827df11469b83100f1106eddba71fce1.jpg
 
Last edited:
OP
OP
AwildcatsZ

AwildcatsZ

Active Member
View Badges
Joined
Aug 4, 2016
Messages
409
Reaction score
570
Location
Orange County
Rating - 0%
0   0   0
This weekend I spent some time getting a game plan for my Apex display/organization cabinet. The wife and I took a trip to Ikea where we found the perfect piece to work with.
Ikea Cabinet.JPG


The cabinet has the high gloss white finish which is very similar, if not exact, to the Reefer cabinet. It also provides enough space for all of the Apex equipment, as well as the ATO reservoir. I am deciding to go with the 10 gallon reservoir from Trigger Systems as my current 29 gallon tank goes through about 3 gallons every 4 days. The 10 gallon will give me the confidence to leave on longer vacations.

After bringing the cabinet home, I decided to "build" the layout in SketchUp. This gives me the ability to try many layouts before putting any drills to wood. A few attempts later and I came up with a layout that works best with cable management and aesthetics in mind.
Apex Cabinet.jpg


I also laid out the sump and 7.5 gallon refugium that I will be implementing under the DT itself. I got this idea from another build thread and loved the idea of an "external" refugium. I have an old AI Prime light that I believe will work with the refugium, or I may order a cheap grow light off of Amazon.

The plan is to make a trip to my In-Laws in the coming weeks to build the false wall of the display cabinet prior to the move. This way it will be plug and play while my focus is put towards plumbing.

Rock Update: All is checking out with ammonia and nitrites. I have noticed a little bit of phosphates starting to creep up. This may be from the rock itself? I plan to do a water change today and keep monitoring.
 
OP
OP
AwildcatsZ

AwildcatsZ

Active Member
View Badges
Joined
Aug 4, 2016
Messages
409
Reaction score
570
Location
Orange County
Rating - 0%
0   0   0
I had an opportunity to build my Apex equipment cabinet this weekend so it’s all prepared for the move one month away.

First step was to modify the shelf height of the Ikea cabinet. I lowered the shelf to allow 18” of clearance at the bottom. This will be where my ATO reservoir sits.

f71f46483aff5f33dd8e6f0089066113.jpg
112ae61eb65c40004c7eeeef2292214c.jpg


Next was cutting the false wall/mounting board for the Apex. The wall has hinges to allow easier access to the plugs in the back. I got this idea from a few people on R2R and BRS.

b8aaad1b711174fcda843265016d933e.jpg

bd4eabc72dbb63090a6861782321b280.jpg


The color scheme I decided to go with was white and orange for this build. White board with orange grommets has a nice look to it. This color scheme will carry through to the plumbing of the tank.

e1a9b30cc66ca556621b47aaa4df7841.jpg


Once everything was dry, all that was left was to hang the wall/door. This proved to be a little challenging to keep proper and even gaps on the edges. The only thing that went wrong is that the added weight of the equipment throws the frame of the entire cabinet off balance. In return the wall/door catches on the shelf. I have to lightly lift when pulling to open it. I plan to strengthen the frame with some supports to help this issue.

442670d06aab7281002fe1899843595d.jpg
 
OP
OP
AwildcatsZ

AwildcatsZ

Active Member
View Badges
Joined
Aug 4, 2016
Messages
409
Reaction score
570
Location
Orange County
Rating - 0%
0   0   0
T-Minus 21 days until the move.

My focus right now is keeping all of my frags healthy. It looks like I have successfully solved my flatworm issue by doing a freshwater dip of all the live rock, followed by two treatments with Flatworm Exit. Haven't seen a flatworm in over 2 weeks (fingers crossed). I have been continuing the fight against aiptaisa with Aiptaisa-X and seem to be winning right now. I have a few small ones that I can't seem to reach, but none on the frag plugs.

My new problem is green hair algae... It's starting to get out of control on the egg crate itself, which is causing my frags stress. It isn't growing on any of the live rock I have in the tank, which makes me wonder if the egg crate is leaching phosphates. I have upped my water changes to twice a week to try to reduce nutrients.

@TheHarold hooked me up with some custom orange mounts for my EcoTech and Reef Octopus controllers. These will look great in the cabinet and give it that extra touch I'm always looking for. I would recommend reaching out to him if you need any custom 3D printing. Great guy to chat with and great customer service.

IMG_8883.jpg
 
OP
OP
AwildcatsZ

AwildcatsZ

Active Member
View Badges
Joined
Aug 4, 2016
Messages
409
Reaction score
570
Location
Orange County
Rating - 0%
0   0   0
Moving day happened to be moved up a week!

Day 1 (July 3rd)
We got the keys to our place on the 3rd which allowed us to get in and clean those hard to get to places and do an inspection for any damage left by the previous tenants. Everything looked good, but this wall will look much better once the tank is installed!

IMG_9093.jpg


When we left the place on the we had a run in with the new neighbors...they didn't care at all that we were new to the neighborhood, LOL!

IMG_9126.jpg


Day 2 (July 4th)
Nothing tank related, but managed to set up our new entertainment center. Wife and I moved the majority of our small nik naks and clothes. Felt the rumbles of the 6.4 magnitude earthquake (now known as the foreshock). Nothing happened with the current tank.

58404508896__56447DBF-09B7-4B5E-BC21-F079AE90F6BF.JPG


Biggest news was that my brother and soon to be sister-in-law got engaged! I wish them the best on their new journey!

IMG_9117.JPG


Day 3 (July 5th)
Moved the majority of our stuff to the apartment. Just finished moving the couch up three flights of stairs (yeah, no elevator...) when we took a break and felt the rumbles of the 7.1 magnitude earthquake. That one swayed quite a bit in the new place. Wife said the tank in the old apartment had some waves from the shaking. Made me paranoid about setting up the new tank...but...quickly got over it.

IMG_9132.jpg
IMG_9133.jpg


Plus, after moving this thing up the stairs...its getting set up. Earthquake or not.

Day 4 (July 7th)
With all of the major pieces of the apartment moved and unpacked, it was time to assemble the tank stand. Who knew that all those ikea cabinets and dressers were just practice for the main event! I always questioned the stability of the Red Sea stands, but now I know they are held together by which seemed like 300 anchors and fasteners...LOL.

IMG_9136.jpg


Got the stand finished and set the tank on top. Proceeded to level the tank with a few small shims under the front. It was just under 1/4" off level from front to back. Left to right is spot on level. Placed the equipment cabinet next to it to see how it all fits and looks. I am very please with it. Just need to get doors on the cabinet, but I am waiting until everything is set up so I'm not dealing with those swinging around.

IMG_9140.jpg


With the majority of the day left, I made an attempt at dry fitting the plumbing. I went to Lowe's and bought cheap white PVC and some fittings (most of which I did not need) for practice. My first attempt looked like this:

IMG_9149.jpg


While this looks "cooler", its efficiency wasn't the best. It contained two 45s and four 90s...this would've killed the flow off of my return pump. So after a few grunts and groans I decided to take a second shot at it. Option 2 is much more streamline and more efficient. It is all dry fit and numbered so it makes it easy to glue it all together.

58424493458__DDDCB023-2255-45C1-893B-8D8D69BACD9D.JPG


I have a 1" return line going to the FMM before the first 90. This leads to two 1" to 1/2" threaded T fittings. I am going to cap these fittings until I manage to find some smaller reactors to mount on the left wall. Finally it leads to another 90 that reduces to 3/4" and back into the DT.

Next is to wait for my orange sch. 40 PVC to arrive for pick up at Lowe's. I plan to plumb the drain and emergency drain with orange as well. I also want to get grey sch. 80 fittings. I like the look of grey and orange better.
 
OP
OP
AwildcatsZ

AwildcatsZ

Active Member
View Badges
Joined
Aug 4, 2016
Messages
409
Reaction score
570
Location
Orange County
Rating - 0%
0   0   0
@AwildcatsZ How long do you foresee your cycle to take from water-in-tank to the beginning of stocking livestock?

I don't expect there to even be a cycle as I have been "cycling" the dry rock since April. I have two damsels living in a tote with the live rock and it has already gone through a cycle and has been stable since June. I feed as it were a normal tank. Nitrates are sitting at 10 and phosphates are barely detectable with a Salifert test kit.

The plan is to add the water and rock from the tote, add sand, this weekend and run for a week to ensure I have everything set up properly. This is my first time with the majority of this level of equipment, so I am more worried about the equipment being set up wrong than the tank cycling. If all goes well I plan to add the three fish I currently have and some of the corals the following weekend.
 
Last edited:

USMCHerkNav

New Member
View Badges
Joined
Jun 9, 2019
Messages
20
Reaction score
90
Rating - 0%
0   0   0
Moving day happened to be moved up a week!

Day 1 (July 3rd)
We got the keys to our place on the 3rd which allowed us to get in and clean those hard to get to places and do an inspection for any damage left by the previous tenants. Everything looked good, but this wall will look much better once the tank is installed!

IMG_9093.jpg


When we left the place on the we had a run in with the new neighbors...they didn't care at all that we were new to the neighborhood, LOL!

IMG_9126.jpg


Day 2 (July 4th)
Nothing tank related, but managed to set up our new entertainment center. Wife and I moved the majority of our small nik naks and clothes. Felt the rumbles of the 6.4 magnitude earthquake (now known as the foreshock). Nothing happened with the current tank.

58404508896__56447DBF-09B7-4B5E-BC21-F079AE90F6BF.JPG


Biggest news was that my brother and soon to be sister-in-law got engaged! I wish them the best on their new journey!

IMG_9117.JPG


Day 3 (July 5th)
Moved the majority of our stuff to the apartment. Just finished moving the couch up three flights of stairs (yeah, no elevator...) when we took a break and felt the rumbles of the 7.1 magnitude earthquake. That one swayed quite a bit in the new place. Wife said the tank in the old apartment had some waves from the shaking. Made me paranoid about setting up the new tank...but...quickly got over it.

IMG_9132.jpg
IMG_9133.jpg


Plus, after moving this thing up the stairs...its getting set up. Earthquake or not.

Day 4 (July 7th)
With all of the major pieces of the apartment moved and unpacked, it was time to assemble the tank stand. Who knew that all those ikea cabinets and dressers were just practice for the main event! I always questioned the stability of the Red Sea stands, but now I know they are held together by which seemed like 300 anchors and fasteners...LOL.

IMG_9136.jpg


Got the stand finished and set the tank on top. Proceeded to level the tank with a few small shims under the front. It was just under 1/4" off level from front to back. Left to right is spot on level. Placed the equipment cabinet next to it to see how it all fits and looks. I am very please with it. Just need to get doors on the cabinet, but I am waiting until everything is set up so I'm not dealing with those swinging around.

IMG_9140.jpg


With the majority of the day left, I made an attempt at dry fitting the plumbing. I went to Lowe's and bought cheap white PVC and some fittings (most of which I did not need) for practice. My first attempt looked like this:

IMG_9149.jpg


While this looks "cooler", its efficiency wasn't the best. It contained two 45s and four 90s...this would've killed the flow off of my return pump. So after a few grunts and groans I decided to take a second shot at it. Option 2 is much more streamline and more efficient. It is all dry fit and numbered so it makes it easy to glue it all together.

58424493458__DDDCB023-2255-45C1-893B-8D8D69BACD9D.JPG


I have a 1" return line going to the FMM before the first 90. This leads to two 1" to 1/2" threaded T fittings. I am going to cap these fittings until I manage to find some smaller reactors to mount on the left wall. Finally it leads to another 90 that reduces to 3/4" and back into the DT.

Next is to wait for my orange sch. 40 PVC to arrive for pick up at Lowe's. I plan to plumb the drain and emergency drain with orange as well. I also want to get grey sch. 80 fittings. I like the look of grey and orange better.
Looking good! I have been following along for some time as I am about to start my RSR 250 build in the next month or so. One question. Shouldn't the emergency drain pipe go into the same area of the sump as the main drain?
 
OP
OP
AwildcatsZ

AwildcatsZ

Active Member
View Badges
Joined
Aug 4, 2016
Messages
409
Reaction score
570
Location
Orange County
Rating - 0%
0   0   0
Looking good! I have been following along for some time as I am about to start my RSR 250 build in the next month or so. One question. Shouldn't the emergency drain pipe go into the same area of the sump as the main drain?
Thanks for following along! It is absolutely supposed to back into the same area as the main drain. After that post I had the same exact thought and did a little research. Good catch and good luck with your build! So far I am very please with the RSR 250 and can't wait to get it wet (fingers crossed...this Sunday)!
 

High pressure shells: Do you look for signs of stress in the invertebrates in your reef tank?

  • I regularly look for signs of invertebrate stress in my reef tank.

    Votes: 31 31.3%
  • I occasionally look for signs of invertebrate stress in my reef tank.

    Votes: 25 25.3%
  • I rarely look for signs of invertebrate stress in my reef tank.

    Votes: 18 18.2%
  • I never look for signs of invertebrate stress in my reef tank.

    Votes: 25 25.3%
  • Other.

    Votes: 0 0.0%
Back
Top