Tim's 800 Gallon Phoenix Reef

OP
OP
garbled

garbled

Well-Known Member
View Badges
Joined
Nov 10, 2018
Messages
772
Reaction score
1,045
Rating - 0%
0   0   0
I could probably build the big empty box for a plywood sump, but it's the baffles that baffle me. I don't know that I could achieve what I want without acrylic cutting skills I don't have. Also, I kinda want to be able to see in there, it's in a crappy position, and I already have to strain my neck to see the innards as is.

I think I want to try this stream 3 in a vertical orientation, with the little flow nozzle thing. I'm curious if it will do what I want or not. I'm slightly terrified of a sandstorm, but because this will basically be an emergency pump that just happens to provide extra flow, I could turn it down if need be.

I spent a few hours over the last few days evaluating the tank, and I think I more or less understand the problem now.

Step 1) Have family life interfere with Reefing.
Step 2) Something ain't right with the water in Peoria.
Step 3) RO is not cutting it, DI resin use going through the roof.
Step 4) Nitrates!

Basically, both my softy tank (in another house, on a separate RO) had the same cyano bloom at the same time. I think they did something to the water, and with my attention elsewhere, the DI resin usage exploded, and stuff got through.

So now the solution is that I'm just going to replace the membrane, because now I don't trust it. Oh, and the tank is back on the wagon, time for more vodka.
 

count krunk

Valuable Member
View Badges
Joined
Jul 17, 2017
Messages
2,316
Reaction score
4,243
Location
ATL, GA
Rating - 0%
0   0   0
Just read through the thread, awesome! I can't imagine having a tank so large. I don't think I want to

Hopefully family problems were solved.

What skimmer are you running? If you ever want to drop some dough in a sump reach out to melev reef I bet he would enjoy building you a big one. With an 800g tank I think you could use like a 200g sump. Why do you go two sumps vs one?
 
OP
OP
garbled

garbled

Well-Known Member
View Badges
Joined
Nov 10, 2018
Messages
772
Reaction score
1,045
Rating - 0%
0   0   0
The expense of a tank this big cannot be understated. The other day I was actually trying to remember what skimmer model I had so I could look something up about it, and had to dig through old receipts and what not, and decided to do a quick inventory of major parts and write down model numbers and prices so I could keep track. I ended up using Snipe-IT, which is an IT inventory tracking software, and kinda ideal for something this big and stupid. Anyhow.. just counting the stuff I bought in the recent 2 years from BRS/Marine Depot, (ie, none of the amazon/DIY/misc supplies, just the big items) I'm at $5900. So add to that probably about $3.5k in consumables and rocks, and you are at nearly $10k. I probably have about $2k more to throw at it before I'm happy. That doesn't count my previous screwups, nor the tank/stand. I think a good number for a tank this size is $20k (I'm not sure how much an 800 would cost these days, so maybe more? I paid $6k). Thats $20k in equipment, rocks, sand, water. No life. No ongoing replacement/consumables.

Skimmer is a Reef Octopus Elite 200SSS Space Saver Super Cone Skimmer. I'm pretty happy with it. I think the problem I had was just the water level, and having raised it up now, it seems to be doing well.

I had to go 2 sumps because of bad decisions:
1) The stand is basically divided by uprights, so I have 3 36" cube sections down there.
2) The overflows are on the sides, so they are 10ft apart. To get both overflows working, I end up needing 2 sumps.

I went with the sumps I did, because when I re-started this project, the sump design of the old setup was broken. I kept putting fixing it off because I would fix it perfectly one day, but basically never did. I just went out and purchased sumps because I needed to move forward, not wait for perfection. I can go back and retrofit perfection I think. I hope. Maybe.

This is all a learning process. You buy a thing, you design a thing. You realize later that was a bad idea. But you really couldn't have known that back when you did the thing. You can only really ever know that by doing it, and watching how it plays out. Then you know, ok, yeah, turns out this thing works the way it does, and now that I know that, I can make the right choice. It feels wasteful, and you kinda want to kick your past self, but he had no way of knowing then. This is why you see so many build threads by the same people over and over. They did something, learned, and said "OK, time to tear down the 80G and build a 120G with everything I learned." With an 800, I'm just not willing to say the words "tear down".

I think my thread comes off a little more "oh my, doom", because I'm being really transparent about my screwups, because I kinda want people to understand that when they made their stupid decision to route that pipe the way they did, they just shouldn't kick themselves too much. Everyone out there is making mistakes they regret. It happens. Learn. Adapt. Make new ones.

Thanks for reading my whole diatribe! Hope you enjoyed it!
 

count krunk

Valuable Member
View Badges
Joined
Jul 17, 2017
Messages
2,316
Reaction score
4,243
Location
ATL, GA
Rating - 0%
0   0   0
Thanks for explaining. Anyone reefing knows how they could tear down and start again better!

My current is a 40g which makes it my 4th build.

I suspected stand supports might be the boogyman for a single sump.

Could you explain your overflows a bit more? My understanding is you have two durso stand pipe overviews that can handle an absurd amount of flow.

Oh and to help you with fish visualization, I think 20-35 tangs would be the right number :D
 
OP
OP
garbled

garbled

Well-Known Member
View Badges
Joined
Nov 10, 2018
Messages
772
Reaction score
1,045
Rating - 0%
0   0   0
Right, so I have 2 1.5" Dursos. One on each far corner of the tank. The ancient setup had them running full blast into giant rubbermaid tubs, connected to two 3000GPH Dolphins running full out. Admittedly, this was far better than what I have now. Back then the dursos would run at full siphon 24/7. Now I have to continually fiddle them to tune the flow rate, because they want to just suck the whole tank down, but the return pumps can't keep up.

Actually, what I have is 2 1.5" holes in the bottom of the overflow areas. Inside the overflow, I have 2" pipe to build the Dursos, running down to a 1.5" adapter at the bottom. Then on the underside of the tank I do the same thing, 1.5 -> 2" adapter, and then I adapt it again into 2 1" pipes to feed the tiny sumps.

I think my ideal setup for a sump would be to utilize the full space for each section, which gives me roughly 30x36". I want refugium, a place for some equipment like the skimmer, and rollermats. Then most likely a big 2-3" hole on the sides, where I will run an interconnect pipe between the two sumps, so they balance, with a gate valve in the middle of that pipe, or somewhere, so I can cut them off from one another if I have to. Basically I would want 2 mirror image sumps, one right, one left. I kinda utilize the center section for various equipment, like the kalk, calcium reactor, ATO res., etc.

Mmm.. dreams of new sumps.. oh how I want you.
 

Cabinetman

Well-Known Member
View Badges
Joined
May 3, 2016
Messages
720
Reaction score
712
Location
Nova Scotia Canada
Rating - 0%
0   0   0
An easy Solution to your overflow problem would be to drill a hole at the top of the tank to act as an emergency overflow which by all rights and means you should have in case one of your pipes were to get block with something. Then you could have just a trickle going down it and run everything else at full syphon
 
OP
OP
garbled

garbled

Well-Known Member
View Badges
Joined
Nov 10, 2018
Messages
772
Reaction score
1,045
Rating - 0%
0   0   0
He isn't running at full siphon bc his returns can't keep up, is my understanding.
Exactly. I think I have a plumbing plan for post-new-sump that will add some emergency stuff. The idea of drilling this tank gives me so many heebie jeebies I'm not even going to think about it.

What I didn't mention is that the overflows have each 2 3/4" holes in the bottom, where you run the pump returns back up. I'm thinking of bypassing those by running pipe up the back of the tank, and then over the top of the overflow, and into the outputs that are in the side of the overflow. Then I would have the 2 smaller 3/4" holes available for emergency and balance overflow.

Hrmmmmm... This is really tempting.. Darn you people for giving me ideas. Now I'm going to go over there and measure for what pipe I would need...
 

count krunk

Valuable Member
View Badges
Joined
Jul 17, 2017
Messages
2,316
Reaction score
4,243
Location
ATL, GA
Rating - 0%
0   0   0
For peace of mind I think moving to 4 drains, two mains plus two emergencies with be ideal with a sump rebuild.

A 35x35x24 gives you about 120g so prob running at 80-90g per sump.

Something to think about ;)
 

Sisterlimonpot

Effortless Perfection
View Badges
Joined
Jul 15, 2009
Messages
3,871
Reaction score
7,909
Location
Litchfield Park
Rating - 0%
0   0   0
can you do this with a durso and still have it pretty quiet? I know this is how you tune bean animals.
A durso can be converted into a Herbie which offers better protection but sheds the emergency drain and uses a full siphon and open drain.

I wouldn't add a gate valve to a durso, that's begging for problems.
 
OP
OP
garbled

garbled

Well-Known Member
View Badges
Joined
Nov 10, 2018
Messages
772
Reaction score
1,045
Rating - 0%
0   0   0
So I've spent the last 2 hours doing math, and putting things in carts to see what it would cost to do a conversion to this on the output side. About a grand in fittings and replacement bits. Yipe. That doesn't cover the swap to emergency overflows, it just allows for it, though, to be honest, they wouldn't be as hard to retro in.. maybe.. I think.. hrmm..

Definitely no gate valve on the return. I see no need for that kind of danger. My thinking is if I do this, it opens up the ability to do a sort of modified bean-animal with 3/4" emergency and second drain pipes. It also changes the output to much larger tubing, so I'll have less flow restrictions, and maybe a bit more power at the top. It also leaves me open to easily swap out the pump to something else if I ever get a new sump.

Stop making me spend money. :)

Basically the setup I have right now is this:

Neptune COR20 -> 1" reducer -> 2x 3/4" pipes feeding into the bulkheads that go to 2x 3/4" tubing to the outputs. Currently uses 2 1" 90 sweeps into a 1" T and 1" street 90 that feed the two 3/4" bulkheads.

Conversion would be:
2" Pipe from near the sump, to the corner of the tank. Then 1.5" up the side of the tank to a 1.5" -> dual 3/4" barb adapter, and 2 3/4" barbs basically making a U-turn over the top of the overflow cutout into the existing 3/4" outputs.

This changes the COR20 to having 1.25" output from the pump up to the 2" stuff (about 2 feet of 1.25") and then adds about 4 feet of 2" pipe and 3 feet of 1.5" pipe, and 4 2" 90 bends.

It's more bends, but the pipe is way bigger, and lets me change pumps in the future if that becomes worthwhile. Hrmm.. Seriously considering this.. Just ran some flow calculations. If I'm not way off, which I probably am not here.. my total pumping loss on the current setup is apparently in the 5000ft range. New setup would be around 400ft. Wow.
 
Last edited:
OP
OP
garbled

garbled

Well-Known Member
View Badges
Joined
Nov 10, 2018
Messages
772
Reaction score
1,045
Rating - 0%
0   0   0

Day 19, Let there be moonlight​


After a long hiatus of barely making any progress, I'm back at it again.

In the meantime, some minor problems cropped up. The first one being, I think the membrane on the RO died at some point, as I have *alot* of cyano in the tank. Originally I wasn't sure what was going on, and just kind of siphoned it out a little, and assumed it was a cycle. But then my other tank, my 125 softy tank, started having the exact same problem. Now, these tanks are on separate RO's, separate buildings, and the softy tank, well, it has no fish, and nothing new has gone into that tank in years, so, for it to suddenly sprout a cyano issue is odd. Even more odd, that tank suddenly started regrowing razor caulerpa that hasn't been in there for over 15 years.

Sudden cyano, ancient caulerpa resurrection, that tells me something is off with the feed water. On the big tank, I decided to replace the DI resin, which was out sooner than it should have been. 3 days later, it was used up again. Yep, that membrane has had it, and the one on the other tank is slightly older even than that.

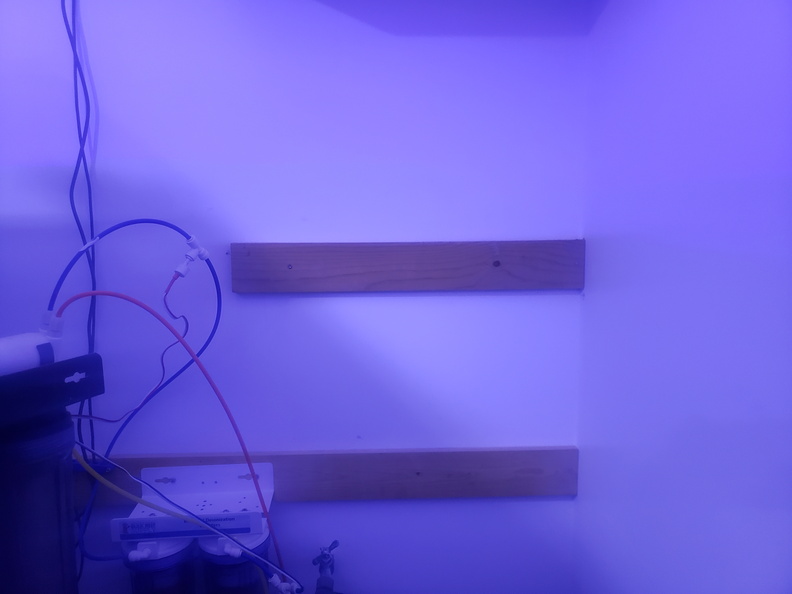
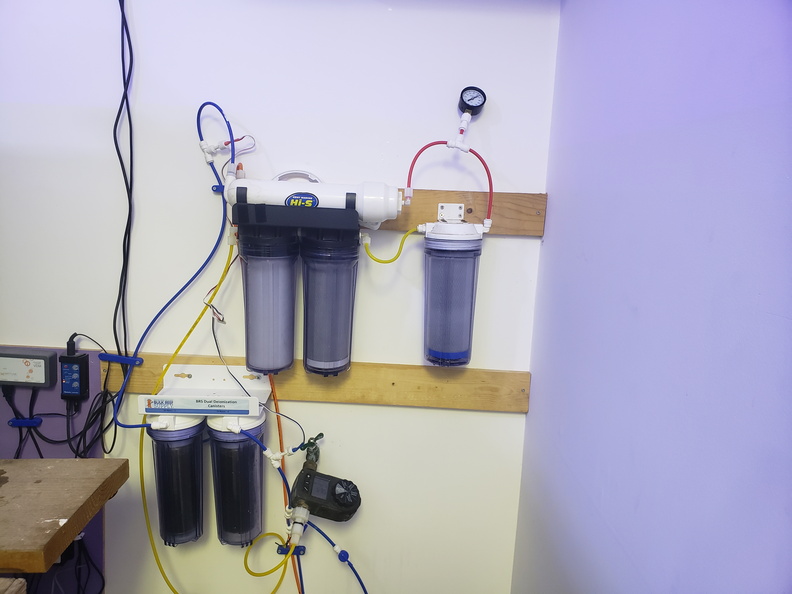
So, step 1, start running vinegar again. Step 2, full replacement of the membrane and all the filters on both RO's. While I was at it, I added another stage to the RO, a second carbon block, just for sanity's sake. I also wasn't super happy with how the RO was mounted to the drywall. The screws were a little loose, and when you cranked on it with the filter wrench you had a terror that it was going to rip off the wall.

So I took the RO down, and mounted a board on the wall:
20201223_173145


Then, I added back the unit, and the new extra carbon block filter:

20201223_184032

And after a few days of running both the new water, and the vinegar, the cyano is slowly receding. Whatever was in the water (likely nitrates, my tap water has nitrates) was just obnoxious. Now I just need to up the algae harvest, and get things back on track.

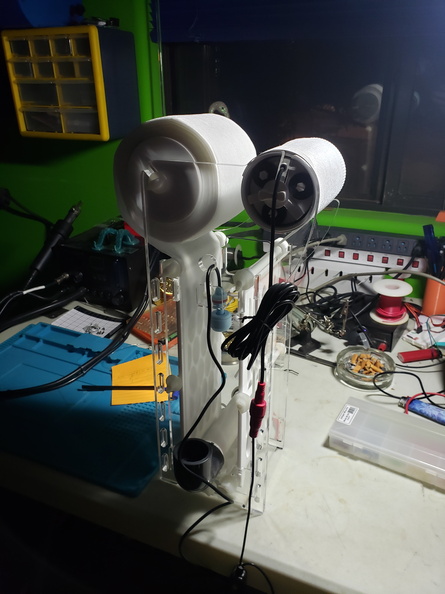
Next on the list is the filthy obnoxious filter socks. This tank just grinds socks like there is a sale on them. Swap a sock in, 2 days later it's brown and overflowing. I just cannot keep up with a 2 day replacement cycle and constant cleaning of them. It's too much. Sadly, these sumps are not ideal for a rollermat, but I'm determined to do something anyhow, so I ordered a Clarisea SK-3000.
20201226_181622

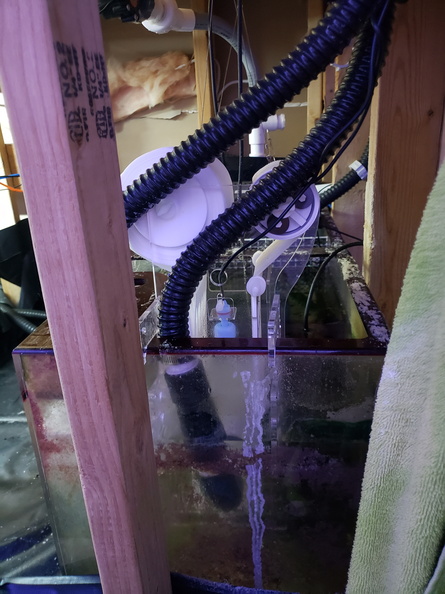
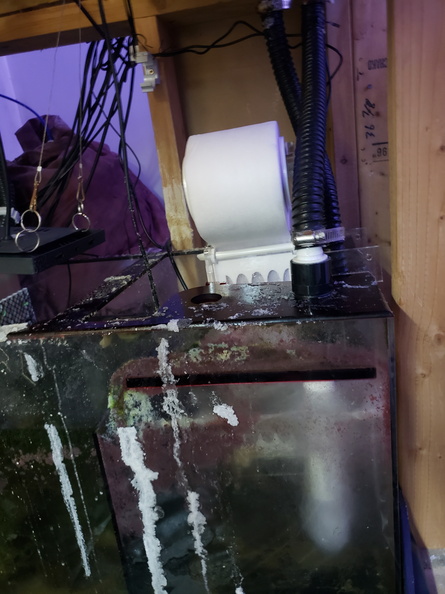
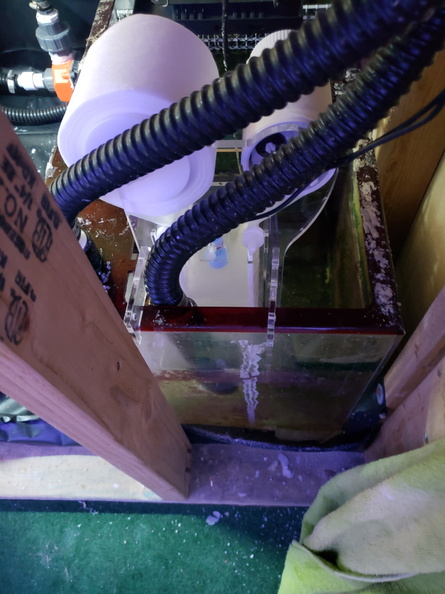
There is room on the right sump for this, for the left, definitely not without use of a saw... which.. I'll probably do.. because hate socks. I assembled the SK-3000, and crammed it into the sump. I ended up re-routing one of the overflows from the split into it, and the other I just took the sock off. Even some filtration is better than what I've had, which is just dirty socks that need to be laundered and replaced more often than I actually do.

20201226_184630

20201226_184639

20201226_184650

I actually ended up flipping it around to the right side of the sump, and modifying the inlet a bit. I also found that it wasn't getting enough of the flow, because if the flow was backed up, instead it would choose to use the alternate path rather than raising the level and triggering the motor. So obnoxious. So now I have a restriction on the non-Clarisea path, and will test that for a few days to see if that helps or not. The return plumbing of this tank is just way too complex.

But I said moonlight. And you heard me say it, and this whole time you've been reading and saying "none of this sock nonsense has anything to do with the phase of the moon!" Right you are.

20201227_111939

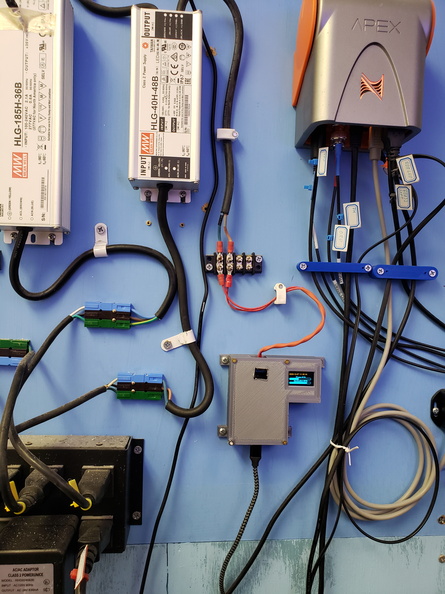
I recently posted an article on how to make one of these bad boys. Moonlight for a Neptune Apex controlled Aquarium. Previously, I had a hackjob of moonlight.

My setup was 5 10W LED's, with an 80 watt driver (80, because bad decision dinosaur). With the Apex, I couldn't actually do lunar phase, so I rigged one where the lunar phase was over the course of 1 week. It was hackish and I hated it. The new controller toy I built would let me do true lunar phase, with proper time and everything controlled entirely by the Apex. The problem was, that 80W driver was too powerful. If I limited the power going to the driver, it basically cut down the resolution of the moon transition when it went from 0-100%, and that annoyed me. Alot. So to fix this, I replaced it with a 40W driver. This means my 10W LED's now get a maximum of about 8W or so at 100%, which is actually more than enough for the moonlighting.

With that in mind, I programmed the serial port Blue channel on one of my VDM's, to provide the fake moonrise/moonset ramp that the ESPLunar requires, and boom, everything worked perfectly.
Now by using the "If Moon" statement in the Apex, to run the outlet, and a few "If Moon" statements hooked to profiles on the VDM, I have really accurate moonlight on this aquarium. The rise and set is at the right time, the maximum power is the right percentage for the phase of the moon, and I have a true 29.5 day cycle! I expect a written thank you note from all my fish now.

I think going forward, I have some major changes to make. I want to redo the plumbing of the return lines. They just have far too much restriction, and I'm only getting about 500gph per side out of the COR20's. That's obnoxious. I've ordered some 2" and 1.5" pipe from BRS, which hopefully arrives before this weekend, and I might spend a few hours doing a return plumbing replacement. Hopefully this also gives me more room to move around under the stand, and with that, maybe I can figure out how to jam another Clarisea in the left sump. With more room down there, I might be able to rethink some of the overflow plumbing, and potentially convert to a modified bean animal, maybe, not sure about that.

My fish population has ebbed and flowed. The Anthias were a bad idea, but I knew that. The current population is as follows:
  • 1 Ruby Longfin Fairy Wrasse
  • 9 Bar gobies
  • 1 Scissortail dartfish
  • 1 Foxface Rabbit
  • 1 Copperband Butterfly
  • 1 Purple firefish
  • 1 Banggai cardinal
  • 4 pajama carninals
The copperband was an amazing addition. He has wiped out the aipstasia completely, and has actually transitioned to eating frozen food with everyone else. The foxface is big and healthy, and I'm super happy with the bar gobies. Once the last of the cyano is wiped out, I'll be back to the LFS for more fish.

And now, dreaming of a shipment of pipe fittings and analog to digital voltage converters, I rest my weary head...
 

Creating a strong bulwark: Did you consider floor support for your reef tank?

  • I put a major focus on floor support.

    Votes: 34 44.2%
  • I put minimal focus on floor support.

    Votes: 19 24.7%
  • I put no focus on floor support.

    Votes: 22 28.6%
  • Other.

    Votes: 2 2.6%
Back
Top