What Do You Wish You Had Known Before Ordering a Custom Tank??

Eye H8 Empty V

Active Member
View Badges
Joined
Jan 11, 2019
Messages
462
Reaction score
729
Location
Magnolia, TX
Rating - 0%
0   0   0
Think I’m about ready to pull the trigger on putting my deposit down for my big tank upgrade and I’ve gone back and forth with a couple of configurations whether it be height, width, overflow style, stand considerations, etc. I think I’ve landed on a 48x24x18 (90G) from Reef Savvy.

What do you wish you had known or considered before ordering a custom tank??

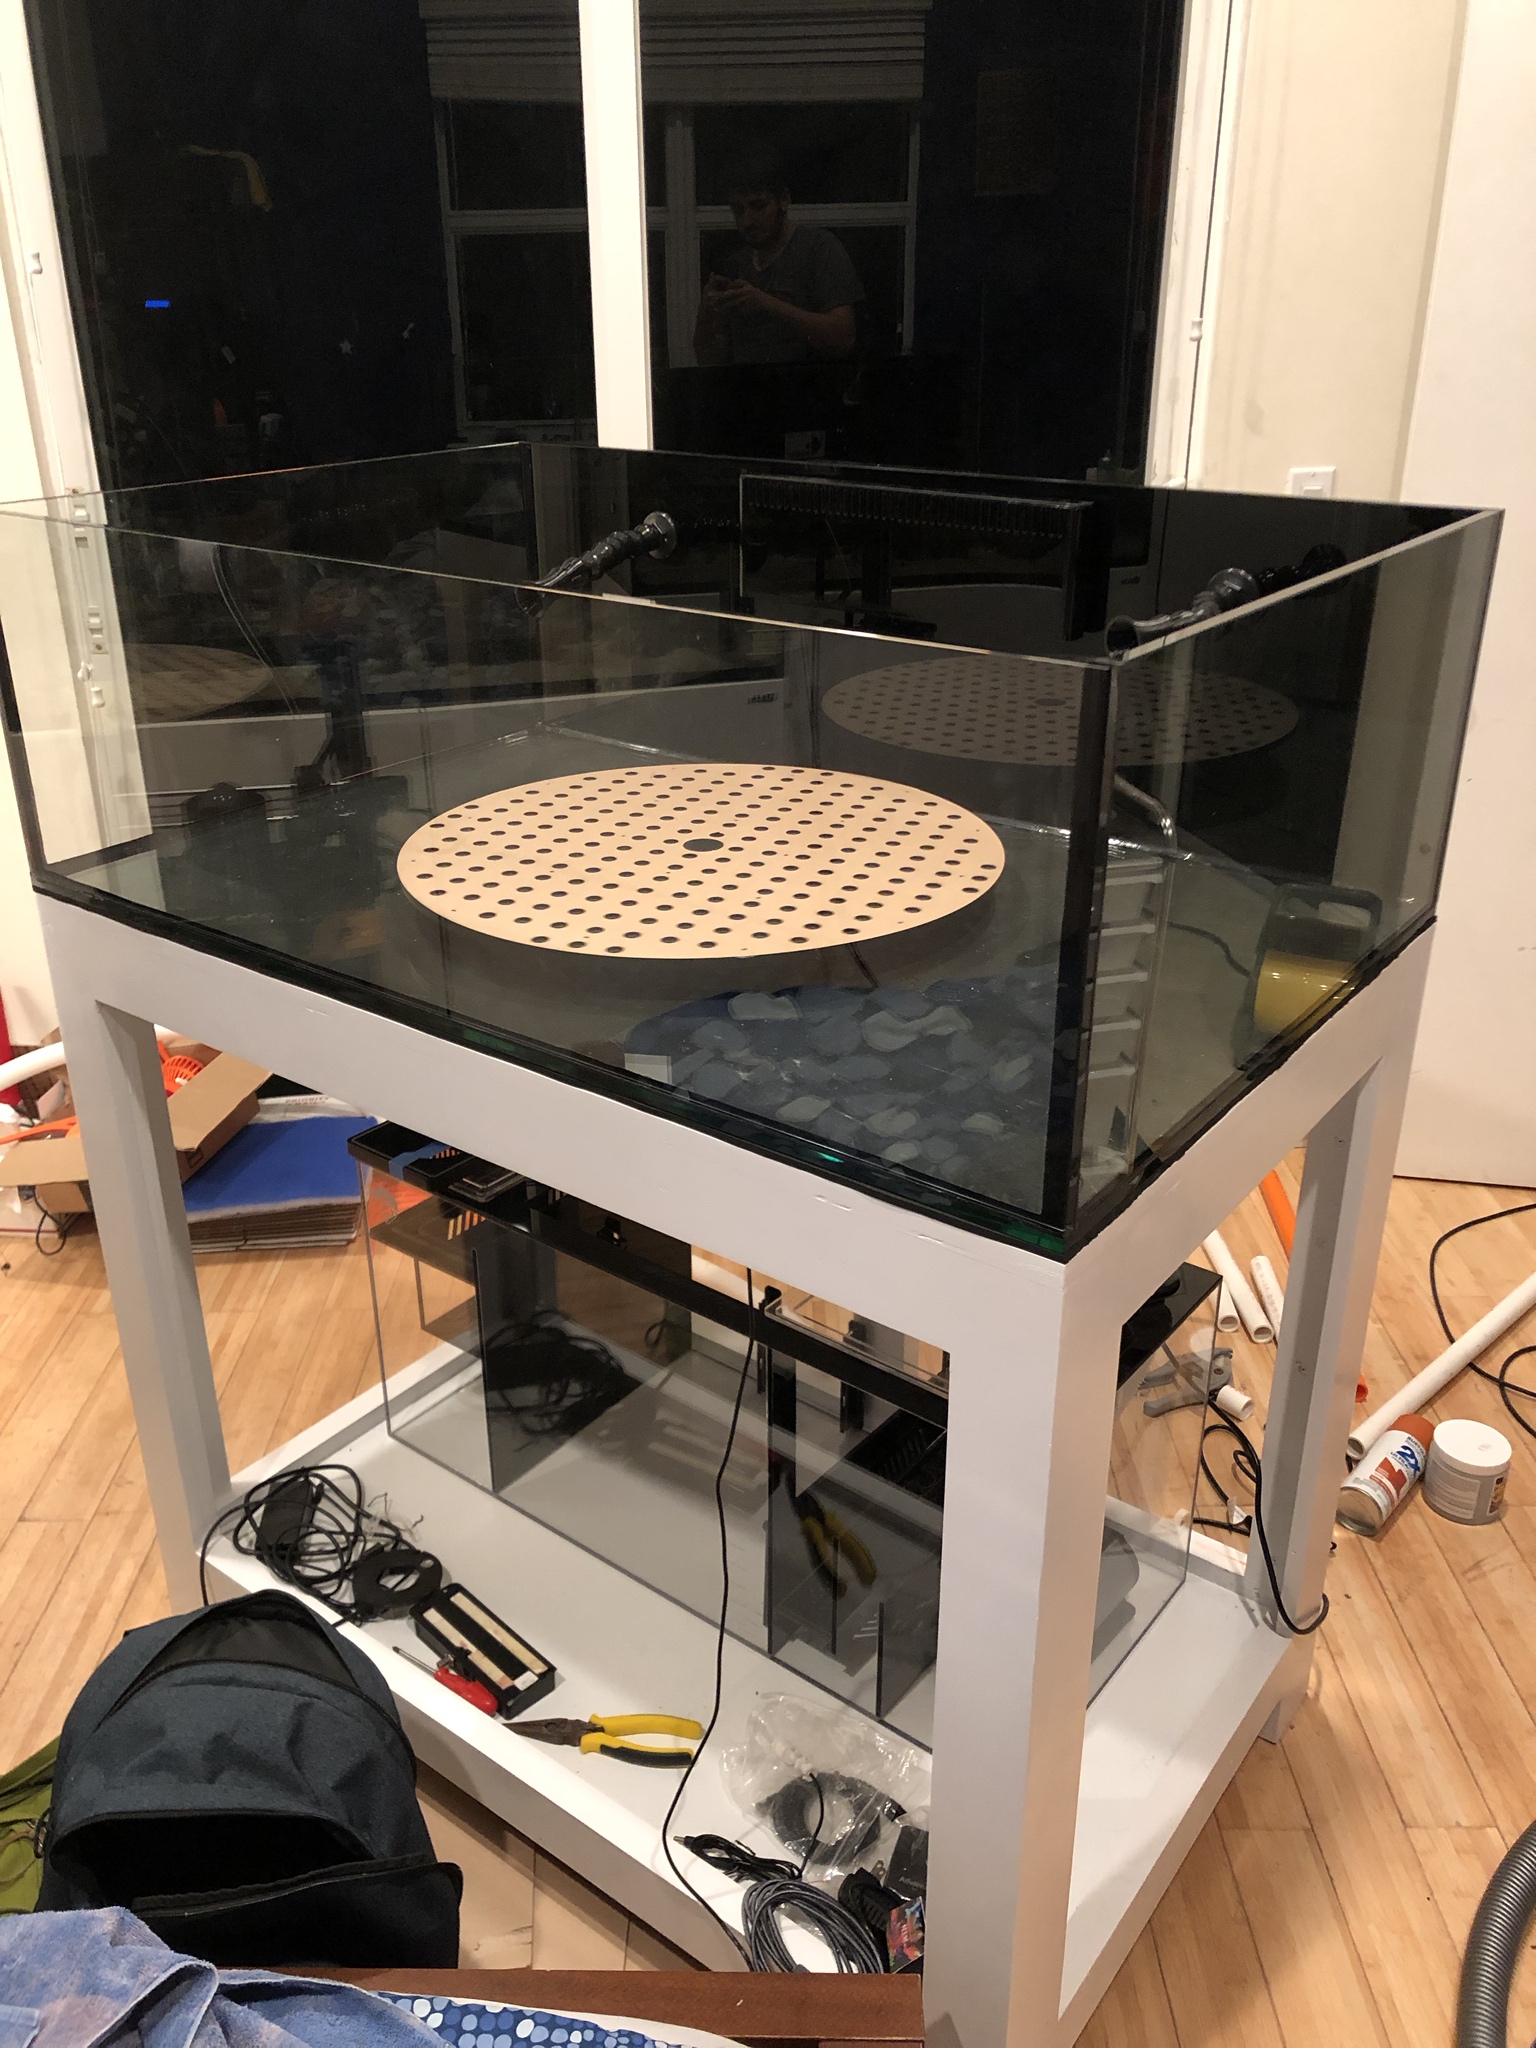
I ordered the same exact size tank from Glass Cages. Low Iron glass for the front and sides and custom overflow. My overflow only had 2 holes drilled, 1.5” and 1”.

If I could do it again I would have had 3 holes for the overflow for a Bean Animal style drain or durso and a 3rd for the return line. I ended up having a local glass shop drill a hole in the back right for the return line.

I can’t go any wider thank 48” wide due the the wall I’m putting it up against. If I were to do it again I would have ordered a 140g, 48x24x24. The extra 6” is negligible but additional 50 gallons (55% increase) more will in my uninformed opinion will increase tank stability significantly. I’ll post some pics tomorrow.
 

ca1ore

10K Club member
View Badges
Joined
Oct 28, 2014
Messages
13,847
Reaction score
19,706
Location
Stamford, CT
Rating - 0%
0   0   0
I’ve always tended to the view that custom is only worth the premium once you get into really huge tanks (though there are some nice, smaller tanks in this thread). I’ve had a progression of tanks over the years all the way up to the Marineland 265 .... so have learned a lot about what I disliked about them. When I decide to go really big, I went for my first custom tank (also my first acrylic tank). Although there is always the temptation for bigger (I could have fit a 9’ tank), I got pretty much exactly what I wanted and have had no regrets.
DD402655-BB10-439B-874A-4FD03658D3AB.png
 

WallyB

REEF Techno-Geek
View Badges
Joined
Jan 24, 2017
Messages
3,127
Reaction score
8,094
Location
GTA Toronto, CANADA
Rating - 0%
0   0   0
Think I’m about ready to pull the trigger on putting my deposit down for my big tank upgrade and I’ve gone back and forth with a couple of configurations whether it be height, width, overflow style, stand considerations, etc. I think I’ve landed on a 48x24x18 (90G) from Reef Savvy.

What do you wish you had known or considered before ordering a custom tank??
Well you are considering a similar Tank size I got Custom Built....Just over a year ago (110Gal)
It's for an in Wall Setup, so not typical standard dimensions (46x24x22)

I have no regrets in any of my custom design specs (A year later)....

New110GTank-1.jpg


New110GTank-2.jpg


Some things I considered, and for you to think about when you design your own tank.

0) First of all. No regrets (Zero) on my Tank dimensions or Tank Volume (which goes well with my 50 Gallon DIY Sump)
----> Bit of a reach across to opposite bottom with 22" height but manageable (with Stool), and allows me to have better rockscape height (and room for Corals to Grow upward) ** BIG PLUS on extra Height is room for Circulation pump mounting and Water flow space above corals, so no direct flow hitting corals ** OVERALL Better Flow dynamics with reflective bounce off walls.

----> Even though I went with 46" width (not 48" Standard), I have no issues with 54W T5 DIY fixture with LED (XR30) in Center and LED Actinic Bar Front of tank.

----> 24" Depth is fantastic since my other 90 Gal (48x18x23) Off The Shelf tank is only 18" so NOW I have a Center Placed Rock Scape two Islands (with plenty perimeter space all around).

1) All Glass edges are polished and bevelled.
2) I saved some money doing Starphire Glass on only 2 viewing sides. Normal Glass on Back. Tempered on Left.
3) I decided on Clear Silicone on ONE Right/Front Corner (Exposed viewing side), while rest of Corners/Edges are BLACK Silicone
---- > You can see the Clear Silicone Corner in First Photo (with the sparkle of light). Sparkles just as nice with Water and Tank Lighting.
---- > This decision (Clear-Silicone) worried me to death before delivery (folks saying it would go yellow/Green with Algae)...I was also worried I would miss the Black Slick Border Look.
-----> Love it, looks amazing from Corner. Still clear (Since good silicone trimming was done by Manufacterer [MIRACLES] )
-----> Also was worried about doing Softer Starphire glass (for Possible Scratches). Not a scratch after year+ of glass cleaning (using a steel blade on a Tunze Strong Glass Cleaner)

4) Black Film bottom was perfect (since I don't have sand bed)...Over Time, it's covering with Coraline.
5) Chose Black film on Overflow Side (looks great from front/side viewing), small downside is I can't see into tank from that side (but overflow would block most of view anyway)
6) EuroReef Top (with 6 Holes [different sizes] drilled for wire/cords, Hoses and a Custom Fit Sea Swirl in one corner). No spills, and I can Push Surface/Wave Flow like never before.
--> EuroBrace Top is nice not just for spill guard but handy for attaching a Net Top, and placing Vacation Feeder, also handy for placing tools during maintenance work.
--> NOTE: I had the EuroBrace Top Trim different width (Front side is wider)

7) I didn't ask and was surprised by the Inside Tank Glass Bottom Trim/Bracing (Only found out when tank arrived)
---> Manufacturer said Makes tank stronger and better seal for long term.
---> Doesn't Interfere in any way. I got used to it and after a while actually like it a lot (Crabs and snail crawl along the path)

8) I had the Viewing Sides Trim Cut off on Front of Glass (It remains on bottom)

9) Build-in-SIDE-Overflow with Double drain is running quiet and problem free (Overflow is black. Photo has while film on acrylic Baffle before it was removed). SIDE Overflow is fine behind Wall (but probably not if you want a 3 sided viewing)
--> External Overflow is Much better than an internal Overflow Box.
--> I have my Gyre mounted on the OverFlow Side (with External-Magnet inside Overflow), as see in photo (which also shows Sea Swirl and Cords thru EuroTop Holes)...You can also see the bottom-inside-trim-Edge.
NewTankInside.jpg


Here is another In-wall Corner-View perspective from an older photo when tank was new.
110GSideView.jpg


Since someone posted that Stand has to be built right for Tank Warranty. Just over design it for Strength. Perfectly Square and Level. My Tank sits SOLID on this DIY Stand and was Certified by Tank Maker for Warranty Eligible.
110GalTankStand.jpg


Enjoy your custom Tank design brainstorming.
Quite exciting.

Spend lots of time listening to other Folks input, but thinking of everything to make "YOU" Happy.
 
Last edited:

JoshH

Tank Status: Wet...ish, growing things....
View Badges
Joined
Dec 3, 2016
Messages
9,994
Reaction score
35,393
Location
Humble
Rating - 0%
0   0   0
I like the one piece brace with the rounded inside corners.

Thank you, I really really like it too, the only thing that would make it better is if the inside edge was polished but if I'm being honest I don't even know if it's possible to polish with the inside curves.
 

Smprc

Active Member
View Badges
Joined
Jan 26, 2017
Messages
185
Reaction score
146
Location
Upland, CA
Rating - 0%
0   0   0
Just wanted to add my 2 cents...I have a 72x24x24 peninsula. After owning it for almost 2 years, I definitely would have gotten more depth. Say 28 to 30. And I would have cut 4 or so inches from the top. Its tough to reach the bottom and the depth gives more room for aquascaping and cleaning and what not. Guess, I am echoing several other posts. Also, I struggled with flow and had no choice to but to add a gyre on the "open" end of the peninsula. I tried so hard but there is no way to generate enough flow. However had I gone wider, 2 gyres placed vertically on the return end might have been enough...and I have a closed loop as well. But again, these are issues specific to the peninsula design, which I love.
 
OP
OP
LilElroyJetson

LilElroyJetson

Valuable Member
View Badges
Joined
Oct 21, 2015
Messages
1,153
Reaction score
2,110
Location
Charlotte, NC
Rating - 0%
0   0   0
EXACTLY. +10000000000

I have a custom Miracles tank: 60 x 24 x 29. And the single BIGGEST mistake I made was not going at least 30” in depth or 36” would have been great.

IMHO don’t go 24”. You regret It for years.

I may or may not have just asked for my quote to be re-worked for 30” width (48x30x18)... ;Greedy
 
OP
OP
LilElroyJetson

LilElroyJetson

Valuable Member
View Badges
Joined
Oct 21, 2015
Messages
1,153
Reaction score
2,110
Location
Charlotte, NC
Rating - 0%
0   0   0
It’s pretty sick. Corner reinforced with acrylic triangles, low iron, modular marine overflow, the works. Had to be custom for my experimental coral system. I’m starting plumbing now and should have it wet this weekend. Thrilled that I also won a Maxspect skimmer earlier this week here on R2R, will go perfectly with the build.

(Spinning motorized frag rack that holds 200 corals).
YYwYclK.jpg

The tank looks great! Looking forward to seeing your thread once the experiment’s up and running!
 
OP
OP
LilElroyJetson

LilElroyJetson

Valuable Member
View Badges
Joined
Oct 21, 2015
Messages
1,153
Reaction score
2,110
Location
Charlotte, NC
Rating - 0%
0   0   0
Snazzy! While if were posting pictures...

20190527_144656.jpg
20190527_141240.jpg
20190527_144620.jpg

Josh, we are ALWAYS posting pictures on here...even unsolicited ones! Haha. That tank looks absolutely incredible, especially the one-piece brace. Who built it? What are your dimensions? And why isn’t it wet yet?!
 
OP
OP
LilElroyJetson

LilElroyJetson

Valuable Member
View Badges
Joined
Oct 21, 2015
Messages
1,153
Reaction score
2,110
Location
Charlotte, NC
Rating - 0%
0   0   0
Well you are considering a similar Tank size I got Custom Built....Just over a year ago (110Gal)
It's for an in Wall Setup, so not typical standard dimensions (46x24x22)

I have no regrets in any of my custom design specs (A year later)....

New110GTank-1.jpg


New110GTank-2.jpg


Some things I considered, and for you to think about when you design your own tank.

0) First of all. No regrets (Zero) on my Tank dimensions or Tank Volume (which goes well with my 50 Gallon DIY Sump)
----> Bit of a reach across to opposite bottom with 22" height but manageable (with Stool), and allows me to have better rockscape height (and room for Corals to Grow upward) ** BIG PLUS on extra Height is room for Circulation pump mounting and Water flow space above corals, so no direct flow hitting corals ** OVERALL Better Flow dynamics with reflective bounce off walls.

----> Even though I went with 46" width (not 48" Standard), I have no issues with 54W T5 DIY fixture with LED (XR30) in Center and LED Actinic Bar Front of tank.

----> 24" Depth is fantastic since my other 90 Gal (48x18x23) Off The Shelf tank is only 18" so NOW I have a Center Placed Rock Scape two Islands (with plenty perimeter space all around).

1) All Glass edges are polished and bevelled.
2) I saved some money doing Starphire Glass on only 2 viewing sides. Normal Glass on Back. Tempered on Left.
3) I decided on Clear Silicone on ONE Right/Front Corner (Exposed viewing side), while rest of Corners/Edges are BLACK Silicone
---- > You can see the Clear Silicone Corner in First Photo (with the sparkle of light). Sparkles just as nice with Water and Tank Lighting.
---- > This decision (Clear-Silicone) worried me to death before delivery (folks saying it would go yellow/Green with Algae)...I was also worried I would miss the Black Slick Border Look.
-----> Love it, looks amazing from Corner. Still clear (Since good silicone trimming was done by Manufacterer [MIRACLES] )
-----> Also was worried about doing Softer Starphire glass (for Possible Scratches). Not a scratch after year+ of glass cleaning (using a steel blade on a Tunze Strong Glass Cleaner)

4) Black Film bottom was perfect (since I don't have sand bed)...Over Time, it's covering with Coraline.
5) Chose Black film on Overflow Side (looks great from front/side viewing), small downside is I can't see into tank from that side (but overflow would block most of view anyway)
6) EuroReef Top (with 6 Holes [different sizes] drilled for wire/cords, Hoses and a Custom Fit Sea Swirl in one corner). No spills, and I can Push Surface/Wave Flow like never before.
--> EuroBrace Top is nice not just for spill guard but handy for attaching a Net Top, and placing Vacation Feeder, also handy for placing tools during maintenance work.
--> NOTE: I had the EuroBrace Top Trim different width (Front side is wider)

7) I didn't ask and was surprised by the Inside Tank Glass Bottom Trim/Bracing (Only found out when tank arrived)
---> Manufacturer said Makes tank stronger and better seal for long term.
---> Doesn't Interfere in any way. I got used to it and after a while actually like it a lot (Crabs and snail crawl along the path)

8) I had the Viewing Sides Trim Cut off on Front of Glass (It remains on bottom)

9) Build-in-SIDE-Overflow with Double drain is running quiet and problem free (Overflow is black. Photo has while film on acrylic Baffle before it was removed). SIDE Overflow is fine behind Wall (but probably not if you want a 3 sided viewing)
--> External Overflow is Much better than an internal Overflow Box.
--> I have my Gyre mounted on the OverFlow Side (with External-Magnet inside Overflow), as see in photo (which also shows Sea Swirl and Cords thru EuroTop Holes)...You can also see the bottom-inside-trim-Edge.
NewTankInside.jpg


Here is another In-wall Corner-View perspective from an older photo when tank was new.
110GSideView.jpg


Since someone posted that Stand has to be built right for Tank Warranty. Just over design it for Strength. Perfectly Square and Level. My Tank sits SOLID on this DIY Stand and was Certified by Tank Maker for Warranty Eligible.
110GalTankStand.jpg


Enjoy your custom Tank design brainstorming.
Quite exciting.

Spend lots of time listening to other Folks input, but thinking of everything to make "YOU" Happy.

I really appreciate this thoughtful write-up with all the photos and information you provided for context!! Not only was I seeking help in this thread but also hoping it would serve as a future reference to others making custom orders, and posts like this really make the thread a valuable source of information.

Your tank is unreal! Obviously a lot of thought was put into it and it looks great. You guys are making me give eurobracing another long hard thought but I love the look of a rimless. Does cleaning the underside of the brace ever become a pain? Also, the additional height to assure room for coral growth and flow going over the top is important. I’m set on the shallow look but it’s an important consideration. I’d go 16” if I could but it’s hard enough to keep the sand in place with 18” of height if the flow is as strong as it should be.
 

TheHarold

5000 Club Member
View Badges
Joined
Oct 3, 2015
Messages
5,145
Reaction score
8,758
Rating - 0%
0   0   0
The tank looks great! Looking forward to seeing your thread once the experiment’s up and running!

I may or may not make a thread for it. I put a bunch of time into my other build threads and it’s seems like very few people see it, compared to some threads that are constantly “at the top”. Though I bet the spinning would the thread some traffic
 

jschultzbass

Valuable Member
View Badges
Joined
Dec 29, 2011
Messages
1,422
Reaction score
1,044
Location
Cloquet, MN
Rating - 0%
0   0   0
You know, if you aren't completely stuck on custom.... Waterbox makes a couple tanks in that size range. I have the 170.4/5 which is 55x26x24 @ $2800. I love the dimensions and tank quality is phenomenal. And it comes with everything including sump and all plumbing. Their 130.4 is 48x24x22 @ $2250
 

WallyB

REEF Techno-Geek
View Badges
Joined
Jan 24, 2017
Messages
3,127
Reaction score
8,094
Location
GTA Toronto, CANADA
Rating - 0%
0   0   0
I may or may not have just asked for my quote to be re-worked for 30” width (48x30x18)... ;Greedy
I agree that more depth can be a good thing (assuming you can reach into tank from front and back)

Make note....You just went from a 90 Gallon tank to 112 Gallon (32 Gallons more isn't much, yet that means 3.2Gallons more for a 10% water Change, 6.4Gal for 20% Change. Small consideration but think about it)
Also with 6" more width you need to consider lighting coverage (if you want Coral coverage for the extra 3" front and back).

Also when playing with Tank Dimensions, my supplier gave me limits on Structural Integrety size for 1/2" Glass vs 3/4" which changes cost and weight of tank.

And last but not least. When you increase tank size (water [surface area]), sump size overhead capacity will be affected to handle overflow drain when reutrn pump is powered off (So sump doesn't overfill and flood). It may not be much, but depending on plumbing design it can be more or less.
This calculator is helpful http://www.reefcentral.com/index.php/sump-volume
 
Last edited:

WallyB

REEF Techno-Geek
View Badges
Joined
Jan 24, 2017
Messages
3,127
Reaction score
8,094
Location
GTA Toronto, CANADA
Rating - 0%
0   0   0
I really appreciate this thoughtful write-up with all the photos and information you provided for context!! Not only was I seeking help in this thread but also hoping it would serve as a future reference to others making custom orders, and posts like this really make the thread a valuable source of information.

Your tank is unreal! Obviously a lot of thought was put into it and it looks great. You guys are making me give eurobracing another long hard thought but I love the look of a rimless. Does cleaning the underside of the brace ever become a pain? Also, the additional height to assure room for coral growth and flow going over the top is important. I’m set on the shallow look but it’s an important consideration. I’d go 16” if I could but it’s hard enough to keep the sand in place with 18” of height if the flow is as strong as it should be.
Yes, your thread will hopefully be useful to many. Wish I had this when I was designing my tank.

Since you are NOT going with In-Wall. I too would probably go rimless for the Slick look.

A Shiny brand new (DRY) Tank is never the same wet and a year+ later. So here is some honesty...

On the Topic of Euro-Reef Brace Cleaning......It's not hard to do.....With a Glass Safe Sponge-Pad.
I just cleaned right now and took a before an after photo.

EuroTopClean.jpg


As you can see in Top Right Photo. I push surface Flow hard enough to splash the Rim Top. So it's never crystal clear view anyway. (Could be clear with less Surface Agitation flow)

AGAIN. Rimless will always look better in an open view.

You also have to consider if you go rimless, will you THEN COVER IT anyway? To prevent fish from Jumping out.
I had no Net cover for a few months and Lost Jumping Wrasses, Gobies, etc.

Now my Tank looks like this (but behind a wall....WHO CARES)
2019-08-15_TankTopNet.jpg
 

CaliReefs

Community Member
View Badges
Joined
May 25, 2019
Messages
62
Reaction score
52
Location
UCLA
Rating - 0%
0   0   0
First, depending on the size of the tank you wish to have built, I would find a reputable builder that specializes in that tank size.

I’ve done business with both large scale builders and consumer scale builders. From my experiences, I suggest pay the extra cost and have the large scale builder make small ad big tanks for you. The quality is unmatched.

Next, I would recommend only have a half a deposit. Some of the consumer builders tend to take months of not nearly a year to build a small custom tank. In my experience, holding the remaining balance helps motivate them to complete the job in a timely manner.

Watch for bubbles in seams and weak joints. You would be surprised what I have witnessed some builders pass as a safe joint or seam.

Always overbuild. 1” is my favorite for small tanks.
 

Darth.Daddy12

Active Member
View Badges
Joined
Aug 5, 2019
Messages
305
Reaction score
243
Location
Palm Coast
Rating - 0%
0   0   0
Think I’m about ready to pull the trigger on putting my deposit down for my big tank upgrade and I’ve gone back and forth with a couple of configurations whether it be height, width, overflow style, stand considerations, etc. I think I’ve landed on a 48x24x18 (90G) from Reef Savvy.

What do you wish you had known or considered before ordering a custom tank??
That’s a good size. Biggest expense long term is lighting and that fits perfectly while still giving the depth to scape. Many will say they wish they went deeper then 24” but then you will have to go to a hybrid lighting system to get decent spread as most led lights are designed for 24x24 spreads.

If you go deeper then 24” you also run into lighting issues as you’ll have no choice but to run the best of the best most powerful lighting available unless you don’t want corals under the 16”-18” mark.

General rule of thumb cost wise is to kept to 24x24x24 increments as that’s what best suits lighting.

I for one would love say a 72”x36”x30” tank. Issue is that compared to say a 72x24x24 would require double to cost in lighting minimum. Much of those lights being turned down in intensity to get coverage so a lot of money going to waste really.

Depends a lot on what corals you desire to grow as well. But best long term is keep width to 24” and depth no more then 30” for best range of selection in both coral and lighting.

The difference between lighting a 24” tall tank and 30” tank properly though is thousands. You can get by with mid range lighting till you exceed 18” after that you have to go quality. Beyond 24” you have to go top of the line and scape plays a huge factor as you’ll be blasting the top corals at 6-800+ and only getting 76-125 at the sand bed.

Get the longest tank you desire and stick to 24x24 for width and depth. This will cut down the cost by 1/2 easy. Ever see a rimless tank running 4-6” water level below the top? It’s cause they don’t have enough lighting to get that deep in the tank. Stick to the 24x24x24 peramitiers. It would be nice to have deeper tanks that are somewhere around 23-30” tall but the different in lighting needs doesn’t overcome the other issues. Proof in point look at mister tanks custom built. They are normally going to 3-4’ deep and not much more then 36” tall. All comes down to lighting.

A hybrid setup will cover a 36” deep tank just fine however the cost over a regular 24” doesn’t justify the cost.

Key is to provide as much front to back (depth) scape as possible leaving room for circulation of water. This will give the most room for corals.manu scape to look of the rock but experienced people scape to the shading of full grown corals.
 

JasReef

Active Member
View Badges
Joined
Aug 5, 2015
Messages
211
Reaction score
302
Location
New Braunfels,TX
Rating - 0%
0   0   0
Don't assume they will do things, like make a cover for the overflow. Also had a custom Sump made and I thought the bulkheads would come with it for the price I paid but those were extra too.

The point is agree on everything that you get with it before you pay for it.
 

JoshH

Tank Status: Wet...ish, growing things....
View Badges
Joined
Dec 3, 2016
Messages
9,994
Reaction score
35,393
Location
Humble
Rating - 0%
0   0   0
Josh, we are ALWAYS posting pictures on here...even unsolicited ones! Haha. That tank looks absolutely incredible, especially the one-piece brace. Who built it? What are your dimensions? And why isn’t it wet yet?!

It's a 60" L x 30" W x 17" High starfire peninsula built by Miracles Aquariums here in Canada. And it's currently dry as there are numerous projects that need completing before it can be filled, I'm slowly checking them off the list but it takes time. I've gone with a basement sump room which had added significantly to the scope of work.

And to everyone else posting I believe @LilElroyJetson's tank is only 18" High, NOT 30" it will be 48" L x 30" W x 18" High so no need to worry about reaching anything or light penetration
 

Falcon53

Active Member
View Badges
Joined
Jul 19, 2016
Messages
194
Reaction score
172
Rating - 0%
0   0   0
I wish I went wider than the typical 24". It is an arbitrary common number, but doesn't really let you make a good "depth" within the aquascape.

I agree...go wider/deeper than 24"...36" deep tanks look amazing.

24" isn't really arbitrary. Sheets of glass are 48" x 96" so the 24" dimension minimizes waste. Additionally, most standard doors are 30" wide, so that is part of it as well. A 36" deep tank is not going through most doors unless it's turned on it's side (if the tank is not more than 24" in height), which I am not sure can be done safely on large tanks.
 
Back
Top