With Headaches and Lessons Learned a New Tank Build

OP
OP
Ditto

Ditto

Valuable Member
View Badges
Joined
Apr 25, 2017
Messages
2,229
Reaction score
2,972
Location
Albany, NY
Rating - 0%
0   0   0
My lights have been humming along to a shedule and my one blue chromie is enjoying the tank to itself.

It looks like the algae bloom is well under way as seen in this picture:
835F26FF-422B-420F-82F9-5B75476DC639.jpeg

Been testing every two days:
My ammonia is still at 0
My nitrite is at 0
My Nitrate is at 0
My PH is steady at 8.0 (I had to installed a CO2 scrubber will post about that)
O2 is at 97%
ORP is at 255 and rising
My phosphate is also at 0

This weekend I am going to configure for the AWC of 15 gallons per week.

Overall just taking my time.
 
OP
OP
Ditto

Ditto

Valuable Member
View Badges
Joined
Apr 25, 2017
Messages
2,229
Reaction score
2,972
Location
Albany, NY
Rating - 0%
0   0   0
Busy Day Today:

First up the Avast Barrel Tender is fully installed:

I used one of these from Amazon: (https://www.amazon.com/Adapter-sign...139&sr=8-2-fkmr2&keywords=EZsync+Female+D-Sub) which was needed to connect to the GHL PL-ADIN Card.

I connected mine as follows with the above Terminal:
Wires to the Terminal adapter I used above:
White - Low (Pin 3)
Red - High (Pin 4)
Black - Common (Pin 8)

Once Installed I had to do some testing with the Barrel Tender in and out of water:

Determine the Digital Inputs being used by Barrel Tender
Open GCC Desktop Software
Click System
Click 1-10V Interfaces
I watched as I tested the Low and High, which will provide a check-mark when they are shown activated which for me was when barrel was EMPTY.
Barrel_ATO1.png


Click on Each one and Provide a name, for me it was Barrel Low and Barrel High, do not forget to Save

Program Advance Gate Logic for the Barrel Tender

Now the Programming Logic, this is where for some reason my was Different then @Marco@GHLUSA (For some reason when they were both inverted it would turn the outlet off and never back on even when the barrel was empty)

Click Programming Logic
Select the Gate you wish to use for me it was G22
Set Digital: Input 2
Reset Digital: Input 3 Inverted
Function: SR-Flipflop

Barrel_ATO2.png


Once you have your Programming logic done you need to assign it to the outlet that the Barrel Tender is installed on:

Configure Outlet Barrel Tender is Plugged Into:
Click System
Click Switch Channels and Outlets
Click the Switch Channel (Outlet) you have your Barrel Tender plugged into
Function: Programmable Logic 22
Do not forget to Provide a name and Description
And do not forget to setup the blackout delay
Last do not forget to save.

Barrel_ATO3.png


I needed this up and running fully so I could proceed to the next step which was the AWC with the Maxi :)
 
OP
OP
Ditto

Ditto

Valuable Member
View Badges
Joined
Apr 25, 2017
Messages
2,229
Reaction score
2,972
Location
Albany, NY
Rating - 0%
0   0   0
Now with the Barrel Tender Running :) It is time to setup ATO(Auto Top Off) and AWC(Auto Water Changing). I already had ATO setup but had to make changes to it with AWC. The last thing you want is your ATO to go off while your changing out the water so the steps below are for both the ATO, and the AWC :)

For My Setup I am using Two optical Sensors for the ATO and Two Float Sensors for the AWC, I could have done it with 3, but went with additional redundancy with the ATO.

Setting up the ATO without AWC

Configure Two Sensors for ATO Control:
First Configure the Level Sensors ( I am using Two Optical Sensors Plugged into (Sensor 1 and Sensor 2) both plugged into the P4 using a PL-LY Splitting Cable. (https://www.aquariumcomputer.com/usa/product/pl-ly/))
Open up My GHL Desktop Software
Expand Probe/Sensor Menu Option
Click Level
Click on Control Circuit 1 (We are now going to Setup up the ATO sensors)
Control Circuit 1
Operational Mode:
ATO with 2 Sensors
Maximiun On time: 10 Minutes (Great Safety Feature)
Auto top off (ATO): Always Active
Used Sensors for this Control: Sensor 1 and Sensor 2
In GHL Control Center: Enter in GHL Control Center Description
In device: Enter in Device a Description
ATO_2 Sensors.png

Save Settings

Setup Maxi to Use ATO:

Expand Dose Overview
Click Dosing Pump that you are going to use for ATO (For me it is Dosing Pump 9)
Capacitiy: XXXXX (I set mine to 18,927 or 5 Gallons)
Minmium: 200 Ml
Pump Setting:
Flowrate of the pump (Make sure you calibrate your pump, this will allow you to see how much water your using)
Max. Speed: (3 Fast)
Description in GHL Control Center: XXXXX
Description in ProFilux: XXXX
Pump Reacts to
Switch Channel Index XX: (This is the Switch Channel you want this pump to react to, I am using Switch Channel 64)
ATO_Doser_Setup.png

Save Settings

Configure Switch Channel for ATO:
Expand System
Click on the Switch Channel you used in the step above for me it was 64
Function: Fill Water (ATO Only) and the Control Circuit we used for the ATO above for me it was Control Circuit 1
In GHL Control Center: Description
In ProFilux: Description
Fill Water ATO Only2.png

Save Settings

Setting up AWC

Configure Two Sensors for AWC Control:

First Configure the Level Sensors ( I am using Two Float Sensors (Sensor 5 and Sensor 6) both plugged into the Expansion Box V2 using a PL-LY Splitting Cable. (https://www.aquariumcomputer.com/usa/product/pl-ly/))
Open up My GHL Desktop Software
Expand Probe/Sensor Menu Option
Click Level
Click on Control Circuit 1 (We are now going to Setup up the ATO sensors)
Control Circuit 5
Operational Mode:
Water Sensor
Maximum
On time:
30 Minutes (When you first set this up, you need to pay attention and actually watch how long it takes, use the Reset Error Automatically and once you have the time place the time interval inside the box and unchecked the Reset Error. Mine took Approx 22 Minutes, so I went with 30 Minutes max, I plan to turn it down to 25 in a few days once I monitor it some more)
Automatic Water AWC Activate Through Timer: XX (For me I am using Timer 29)
Used Sensors for this Control: Sensor 5 (High Water AWC Sensor) and Sensor 6 (Low Water AWC Sensor)
In GHL Control Center: Enter in GHL Control Center Description
In device: Enter in Device a Description
AWC_2 Sensors.png

Save Settings

Configure Drain Maxi Doser (This is the Doser that will be drawing water out of the tank for AWC):

Expand Dose Overview
Click Dosing Pump that you are going to use for ATO (For me it is Dosing Pump 11)
Capacity: XXXXX (I set mine to 18,500 Approx 5 Gallons)
Minimum: 200 Ml
Pump Setting:
Flowrate of the pump
(Make sure you calibrate your pump, this will allow you to see how much water your using)
Max. Speed: (3 Fast)
Description in GHL Control Center: AWC - Tank Water
Description in ProFilux: AWC - Tank Water
Pump Reacts
to Switch Channel:
Index 37 (Drain Water Switch Channel)

AWC Pump Tank Water.png

Save Settings

Configure Fill Maxi Doser (This is the Doser that will be placing new saltwater into the tank for AWC):

Expand Dose Overview
Click Dosing Pump that you are going to use to pump fresh saltwater into the tank (For me it is Dosing Pump 12)
Capacity: XXXXX (I set mine to 18,500 Approx 5 Gallons)
Minimum: 200 Ml
Pump Setting:
Flowrate of the pump (Make sure you calibrate your pump, this will allow you to see how much water your using)
Max. Speed: (3 Fast)
Description in GHL Control Center:
AWC - SaltWater
Description in ProFilux: AWC - Tank Saltwater
Pump Reacts
to Switch Channel:
Index 38
(Fill Water Switch Channel)
AWC Pump Salt Water.png

Save Settings

Configure Drain Switch Channel for AWC:
Expand System
Click on the Switch Channel you used above for the Drain maxi for me 37
Function: Drain Water and the Control Circuit we used for the AWC above for me it was Control Circuit 5
In GHL Control Center: Drain Water
In ProFilux: Description: Drain Water

switchchannel_drain.png

Save Settings

Configure Fill Switch Channel for AWC:

Expand System
Click on the Switch Channel you used above for the Drain maxi for me 38
Function: Fill Water and the Control Circuit we used for the AWC above for me it was Control Circuit 5
In GHL Control Center: Fill Water
In ProFilux: Description: Fill Water
switchchannel_fill.png

Save Settings

Setup the Event Timer for the AWC to take place:
Expand Process
Click on the Timer you used in the AWC Level Control for me it was 29
Description In GHL Control Center: AWC
Description in In ProFilux: Description: AWC
Specify the days of the week you want your AWC to take place: I am dong smaller water changes, so twice a day every day of the week.
Switchmode: Event Start

event_start1.png

Save Settings

This would complete the AWC Setup. If you want to change out more water just separate the high and low water sensors. The High Water Sensor should be at the same exact level as your ATO upper level, and your Lower AWC water sensor can go as low as you wish).

Because I used different sensors, I had to also program Advance Logic onto my ATO Switch Channel, with below. This prevented the ATO to run while the tank was draining :)

Advance Programmable Logic for the ATO to shutdown while AWC is taking place:
Click Programming Logic
Choose a Gate to Program your Programmable Logic for me it was Gate 6
Input 1: The Fill Water ATO
Input 2: The Timer that was used for the AWC events to take place for me 29 (Inverted)

ATO_Advance Logic.png

Apply Advance Logic to the Switch Channel used for the ATO:
Expand System
Click on the Switch Channel you used in the step above for me it was 64
Function: programmable Logic and the gate logic I programmed in the step above which for me was 6
PL6.png


AWC, and ATO fully working now on the new tank :)
 
OP
OP
Ditto

Ditto

Valuable Member
View Badges
Joined
Apr 25, 2017
Messages
2,229
Reaction score
2,972
Location
Albany, NY
Rating - 0%
0   0   0
A received an text alert from the P4 to my phone last night that a leak was detected by my ATO.

Low and behold there was, it looked like the Rubbermaid container I was using to store my ATO and also used for my Salt mixing station cracked. Water everywhere :( The good news it was in the cellar so no damage, just my shop vac at 2:00am cleaning up the water :)

So this time around I decided no Rubbermaid but actual Water storage containers. A quick run to Farm and Family two 35 Gallon Water containers and wala, a new ATO and Salt Mixing station :)

Should have just done it that way to begin with, lesson learned.

The Home Depot bucket is my current ATo container I had enough water left in the bottom to at least fill a a bucket for my Dining Room Tank.
ATO1.jpeg

ATO3.jpeg


Salt Mixing Station, power by the Blueline HD100 pump. (This also allows me if need be to pump up to the tank if a large water change is needed)
ATO2.jpeg

Avast Barrel Tender fits on the container very nicely.
ATO4.jpeg


From Start to Finish about 2 hours worth of work, plus the 1 hour cleanup :)
 
OP
OP
Ditto

Ditto

Valuable Member
View Badges
Joined
Apr 25, 2017
Messages
2,229
Reaction score
2,972
Location
Albany, NY
Rating - 0%
0   0   0
Yesterday I also set up one of my Auto feeders for the tank. Since I travel I needed to make sure some of my suspended coral food gets done at the same time each and every day. I could not expect friends and family to come over for example at 9:00 at night for broadcast feed the tank :)

Step 1:
I needed to plumb the dosing lines from where they were going to dose from and to. This is important because the food is going to remain refrigerated I need to dose and then reverse the dose so that the food left in the dosing tube is returned to the refrigerator. To start to determine how much to dose, I used ATO water to determine how much water was in the line.

Below is my cup of ATO water next to me dosing station and refrigerator.
AutoFeed1.jpeg


Step 2 - I then placed a measuring container at the end of the dosing line. I then filled the line until it began to drip into the measuring container and then removed the glass of water.

Then I manually ran the pump to see how much water was inside the measuring cup (Emptying the dosing line). For example on pump one it stated 16ml of water was in the line. I did this a few times to make sure it was exact.

Then it rest was easy.
Autofeed2.jpeg


Step 3
I then for example would decide how much I needed to dose, and add it to the measurement I made above. So if I was going to dose 31ML normally I would make the dose 47ML, to make sure 31 ML would enter the tank and 16ML was used to fill the dosing line.

Then using the GHL App all I did was program my dosing pumps to first run in reverse (I did this as a way to mix the solution before dosing) then dose the solution and then reverse again emptying the dosing line. Have to love the GHL dosing pump, reverse action :)

Below is my Dosing pump 13, where it first runs 75 in reverse, before dosing 31ML into the tank, then it reserves again for 50ml to remove any fluid inside the line.

dosing_times.png


Can not stress enough you need to do this a few times, it not always straight forward, on one of mine it was 17ml in the line and I needed to dose 10ml and it was not 27Ml but 25ML.

Also you need to test when done with your dosing solution to make sure the numbers remain the same :)

Once done place your dosing containers in the fridge and your all set :)
Autofeed3.jpeg
Autofeed4.jpeg


Now my suspended food will dose without any intervention :)
 
OP
OP
Ditto

Ditto

Valuable Member
View Badges
Joined
Apr 25, 2017
Messages
2,229
Reaction score
2,972
Location
Albany, NY
Rating - 0%
0   0   0
Loving that, the back flush to stir is great. :)

Agree with you 100%!!!

I watched it today again and it is working perfectly and will remove one task that in all honesty I sometimes forgot or was just not home in time and did it different hours.
 

Tristren

Well-Known Member
View Badges
Joined
May 16, 2017
Messages
786
Reaction score
808
Location
Ottawa
Rating - 0%
0   0   0
Yesterday I also set up one of my Auto feeders for the tank. Since I travel I needed to make sure some of my suspended coral food gets done at the same time each and every day. I could not expect friends and family to come over for example at 9:00 at night for broadcast feed the tank :)

Step 1:
I needed to plumb the dosing lines from where they were going to dose from and to. This is important because the food is going to remain refrigerated I need to dose and then reverse the dose so that the food left in the dosing tube is returned to the refrigerator. To start to determine how much to dose, I used ATO water to determine how much water was in the line.

Below is my cup of ATO water next to me dosing station and refrigerator.
AutoFeed1.jpeg


Step 2 - I then placed a measuring container at the end of the dosing line. I then filled the line until it began to drip into the measuring container and then removed the glass of water.

Then I manually ran the pump to see how much water was inside the measuring cup (Emptying the dosing line). For example on pump one it stated 16ml of water was in the line. I did this a few times to make sure it was exact.

Then it rest was easy.
Autofeed2.jpeg


Step 3
I then for example would decide how much I needed to dose, and add it to the measurement I made above. So if I was going to dose 31ML normally I would make the dose 47ML, to make sure 31 ML would enter the tank and 16ML was used to fill the dosing line.

Then using the GHL App all I did was program my dosing pumps to first run in reverse (I did this as a way to mix the solution before dosing) then dose the solution and then reverse again emptying the dosing line. Have to love the GHL dosing pump, reverse action :)

Below is my Dosing pump 13, where it first runs 75 in reverse, before dosing 31ML into the tank, then it reserves again for 50ml to remove any fluid inside the line.

dosing_times.png


Can not stress enough you need to do this a few times, it not always straight forward, on one of mine it was 17ml in the line and I needed to dose 10ml and it was not 27Ml but 25ML.

Also you need to test when done with your dosing solution to make sure the numbers remain the same :)

Once done place your dosing containers in the fridge and your all set :)
Autofeed3.jpeg
Autofeed4.jpeg


Now my suspended food will dose without any intervention :)
That's great. This is something that I have been planning on (eventually) setting up for a while now, with some Reef Nutrition foods.

Correct me if I'm wrong but, the way you have that set up, every time you dose you are adding 78mls to your dosing container. Hopefully you don't forget about it for too long...

Cheers, Tony
 
OP
OP
Ditto

Ditto

Valuable Member
View Badges
Joined
Apr 25, 2017
Messages
2,229
Reaction score
2,972
Location
Albany, NY
Rating - 0%
0   0   0
Only 16ml of fluid is going back in :)

The first 75ml is air to help stir content.

Then the 47ml which 16 is used to fill line.

The 75ml (besides this being for stirring) it provides safety if for some reason the 50ml at the end of the dosing the 47ml does not fully clear the line :)

All in all I am putting 16ml back in each time I do this from the 47ml I originally took out in the dose.:)
 
Last edited:
OP
OP
Ditto

Ditto

Valuable Member
View Badges
Joined
Apr 25, 2017
Messages
2,229
Reaction score
2,972
Location
Albany, NY
Rating - 0%
0   0   0
Quick Sunday update:

The auto feeder is working great !! I watch the food dispense and then get drawn back into the fridge without any issues.

The tank is slowly clearing up from the algae outbreak the clean up crew is chomping away.

3D9EB9B6-0557-4B8D-B5AA-97BA575BE54B.jpeg


What in store next?
I was going to go with Mp40 and Mp60
In this tank but decided to try something different for additional flow.

Right now I have a red dragon 3 pump which is right now going at 980 gallons and hour, which is at 160 watts and I have 70 watts worth of power I can still put through it.

I want to randomize the flow and decided I will hook up the red dragon 3 pump, and two Tunze pumps to the P4 allow me to control them as stream pumps.

I am going to try for a low and high tide, base, with thunderstorm effects :)

The pumps are on order along with the specialized cables needed to connect them to the GHL this is gonna to be fun to try :)
 

Tristren

Well-Known Member
View Badges
Joined
May 16, 2017
Messages
786
Reaction score
808
Location
Ottawa
Rating - 0%
0   0   0
Only 16ml of fluid is going back in :)

The first 75ml is air to help stir content.

Then the 47ml which 16 is used to fill line.

The 75ml (besides this being for stirring) it provides safety if for some reason the 50ml at the end of the dosing the 47ml does not fully clear the line :)

All in all I am putting 16ml back in each time I do this from the 47ml I originally took out in the dose.:)
Ok. So the other end of the tube is in the air above the water? And the only fluid returned to the bottle is the extra amount in the tube itself.
 

Tristren

Well-Known Member
View Badges
Joined
May 16, 2017
Messages
786
Reaction score
808
Location
Ottawa
Rating - 0%
0   0   0
L
Quick Sunday update:

The auto feeder is working great !! I watch the food dispense and then get drawn back into the fridge without any issues.

The tank is slowly clearing up from the algae outbreak the clean up crew is chomping away.

3D9EB9B6-0557-4B8D-B5AA-97BA575BE54B.jpeg


What in store next?
I was going to go with Mp40 and Mp60
In this tank but decided to try something different for additional flow.

Right now I have a red dragon 3 pump which is right now going at 980 gallons and hour, which is at 160 watts and I have 70 watts worth of power I can still put through it.

I want to randomize the flow and decided I will hook up the red dragon 3 pump, and two Tunze pumps to the P4 allow me to control them as stream pumps.

I am going to try for a low and high tide, base, with thunderstorm effects :)

The pumps are on order along with the specialized cables needed to connect them to the GHL this is gonna to be fun to try :)
Looking forward to it.
 
OP
OP
Ditto

Ditto

Valuable Member
View Badges
Joined
Apr 25, 2017
Messages
2,229
Reaction score
2,972
Location
Albany, NY
Rating - 0%
0   0   0
@Tristan - yes 100% correct they are hanging above the water line and the only return to the fridge is the fluid inside the tube :)
 

EdsReefOdyssey

Active Member
View Badges
Joined
Oct 29, 2017
Messages
153
Reaction score
79
Rating - 0%
0   0   0
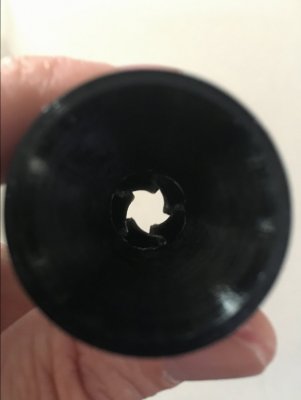
The Vivid Creative Aquatics (https://vividcreativeaquatics.com/)
random flow generators arrived today.

Once the tank is setup I plan to post videos of the patterns they make. Quality of the plastic they used for theses is quite good.

FEBB4343-B041-43AE-97B1-C741D8BA109F.jpeg


It is a interesting patten when looking through the nozzle.
8CE17082-F6EB-452F-BE35-1986F3C4C1BD.jpeg
Are you still using these? Would you recommend them?
 

Creating a strong bulwark: Did you consider floor support for your reef tank?

  • I put a major focus on floor support.

    Votes: 34 44.2%
  • I put minimal focus on floor support.

    Votes: 19 24.7%
  • I put no focus on floor support.

    Votes: 22 28.6%
  • Other.

    Votes: 2 2.6%
Back
Top