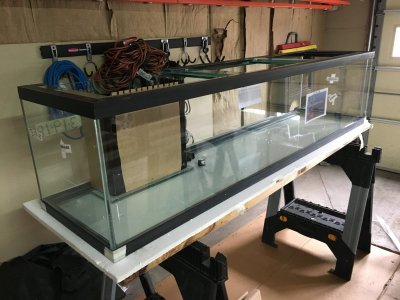
With Headaches and Lessons Learned a New Tank Build

OP
OP
Ditto

Ditto

Valuable Member
View Badges
Joined
Apr 25, 2017
Messages
2,229
Reaction score
2,972
Location
Albany, NY
Rating - 0%
0   0   0
@EdsReefOdyssey - yes I am using two on this tank at a flow rate of approx 950 GPH. That T into the two random flow generators.

And yes would highly recommend them they do exactly what is asked of them it a random flow. I had to twist the head and mark where they need to align on my pipe so that the random down does not disrupt the sand bed like a sand storm.

I have yet to have any other flow in the tank but these, if I could add two more I would . Maybe in my next tank a closed loop :)
 
Last edited:

Vivid Creative Aquatics

Upgrade Your Flow!
View Badges
Joined
Oct 12, 2017
Messages
1,381
Reaction score
1,939
Location
Phoenix, AZ
Rating - 0%
0   0   0
@EdsReefOdyssey - yes I am using two on this tank at a flow rate of approx 950 GPH. That T into the two random flow generators.

And yes would highly recommend them they do exactly what is asked of them it a random flow. I had to twist the head and mark where they need to align on my pipe so that the random down does not disrupt the sand bed like a sand storm.

I have yet to have any other flow in the tank but these, if I could add two more I would have maybe I my next tank a closed loop :)
Just stumbled across your build thread earlier today - read through the whole thing. Your tank looks petty cool
Really liking the long and shallow dimensions and your micro-fridge auto feeder - Love it!

Thanks for including the 3/4in RFG Nozzles in your Flow solution. I would be interested in seeing a video of the that, given the position of the nozzles and the length of the tank.

Fallowing along :)
 
OP
OP
Ditto

Ditto

Valuable Member
View Badges
Joined
Apr 25, 2017
Messages
2,229
Reaction score
2,972
Location
Albany, NY
Rating - 0%
0   0   0
If someone wants to give me any ideas on how to show the random flow generator in the tank I willing to try :)

My plan is to adjust the flow from 650 gph up to 950gph.

Since the flow will be reduced to the random flow generators the power heads will create additional flow and turbulence on the far corner of the tank. Again it may not be needed and will not know till I begin adjusting the flow with the P4 to simulate high, and low tied.
 
OP
OP
Ditto

Ditto

Valuable Member
View Badges
Joined
Apr 25, 2017
Messages
2,229
Reaction score
2,972
Location
Albany, NY
Rating - 0%
0   0   0
@Vivid Creative Aquatics thank you, could you provide me a good idea on how to show the flow? I tried air pump, I could lower the water in my sump temporarily but I watch your demo’s and it always a clean bubble effect.

No issues doing a video, I actually have one of the random flows on the locline turned down more because of it location and provides the entire flow for the left side of the tank without any issues.

If I could do I again, I should have had them place the overflow more in the middle and not offset to the left. I beleive all I would have ever needed was the random flow generators for a tank of this size.

But again the pumps I am adding are for testing to see if the far right will need it, I can also still push another 70 watts of flow through them but it seems with the T 950 is a good random flow.
 

Vivid Creative Aquatics

Upgrade Your Flow!
View Badges
Joined
Oct 12, 2017
Messages
1,381
Reaction score
1,939
Location
Phoenix, AZ
Rating - 0%
0   0   0
@Vivid Creative Aquatics thank you, could you provide me a good idea on how to show the flow? I tried air pump, I could lower the water in my sump temporarily but I watch your demo’s and it always a clean bubble effect.

No issues doing a video, I actually have one of the random flows on the locline turned down more because of it location and provides the entire flow for the left side of the tank without any issues.

If I could do I again, I should have had them place the overflow more in the middle and not offset to the left. I beleive all I would have ever needed was the random flow generators for a tank of this size.

But again the pumps I am adding are for testing to see if the far right will need it, I can also still push another 70 watts of flow through them but it seems with the T 950 is a good random flow.

If you want to show flow with bubbles the easiest way is to use a wooden air stone placed in front of or near the return pump inlet - at least that's how we do it. It's the only way we have found to show the flow coming out of the RFGs without interfering with the function.

Another option are those fake silicone anemones. they are good at showing flow. In fact, they might even be a good option just for testing the flow around your tank without having to move live coral around.
 
OP
OP
Ditto

Ditto

Valuable Member
View Badges
Joined
Apr 25, 2017
Messages
2,229
Reaction score
2,972
Location
Albany, NY
Rating - 0%
0   0   0
Tank is going along smoothly. Still have a slight algae breakout but the CUC are clearing up it as it comes. I am noticing a drop in Alkalinity of .2 per day so I began dosing just Alkalinity Component 2 from Aquaforest of 27ML per day to keep me steady at 8.1.

At the same time I started my Phyto and pods production, which will serve to feed both tanks. I been using Aqua Barn phyto and pods but decided it was time to attempt begin growing my own pods and phyto as paying the monthly shipment was just getting to be to much of an expense. The last time I attempted to do this I crashed usually once a month, and my pods just did not seem to flourish. So with some reading of the forums, I decided to try a different approach and went with the Poseidon Reef System Combo (https://poseidonreefsystems.com/t/phytotank-complete-kits) with extra Phyto tank. I went with this as a full proof way to ensure I can grow Pods, and Phyto without any issues and if it crashes they will go ahead and re-seed me for free which I thought was great since I know I may screw this up along the way.

The Kit Arrived today and no damage in the box, and very well packed:

Instructions in the Box and on top, and not a note that says please go to our website and print these off. +1 for including them in the box :)
phyto1.jpg


3 Liter Glass Jars with Rubber lids, that have a thumb screw clamp. (The one on the left will be my new dosing container of Phyto for both tanks.

phyto2.jpg


Some Spare supplies!!

phyto3.jpg


Setup was quite simple, Put the two tubes into the Cap, once goes into the Jar which will be supplied by Air, the other will be on the outside of the cap and is a Air Vent.
phyto5.jpg


Put a Bag into the Jar
phyto6.jpg


Add Newly Mixed Sal Water first about 1/4 of the way full then add one bag of Poseidon Reef Systems Starter Phyto.

phyto7.jpg


Add your Fertilizer for your Phyto

phyto9.jpg


And then add more freshly mixed saltwater till you get to the line (Opps went a little over on this picture)

phyto10.jpg


For the Pods, the same setup but this gets installed:
phuyo12.jpg


Add 1/4 Freshly Salt mix, then a Phyto Starter Kit, then the Bag of Pods Culture (Not the best picture of the Pods, but there were quite a few swimming around in the mixture). Then fill to the line :)

phyto8.jpg


Set your Timer on your Controller to 16 Hours on your controller. GHL App, took less then 1 minute in the app) (Set your timer, and then apply the timer to the switch channel)
timer1_phyto.png
timer2_phyto.png


Like Magic Pods and Phyto are now cultivating
(The one on the left is the Pods, the one on the Right is new Phyto, the dimmer switch reduces the light output on the Pods by 50%)
phyto13.jpg


Connect them to a air pump to both Phyto Tanks, set the air bubbles (Pods, about 5-6 at a time, and the Phyto full open)

Entire setup took about 30 minutes. Special thanks to Poseidon Reef Systems for answering all my questions!!

I will report back in 7-10 days on the results :)
 
OP
OP
Ditto

Ditto

Valuable Member
View Badges
Joined
Apr 25, 2017
Messages
2,229
Reaction score
2,972
Location
Albany, NY
Rating - 0%
0   0   0
Thought I post a few pictures of the tank. It is coming along nicely, the algea is still an the outbreak stage and the CUC are trying to keep up :). I am starting to see bright green algea appear on the rocks, but also some shades of purple and pink. Tank Parameters show no issues :)
tank_update912018.jpg


This was at a local LFS, and was in bad shape, I placed it inside the QT tank for almost 9 weeks thinking it was going to die, but it came back and just transferred it to the display tank.
tank_update_9012018.jpg


My Clown loves this Coral, all they do is swim through it all day!!
tank_update_09012018.jpg


I did also get done programming Stream Pump groups on this tank. I was going to do the standard Vortech, but wanted to try something a bit different and placed Tunze pumps into the tank, that the GHL could also control. I will post the instructions in my next post :)
 
OP
OP
Ditto

Ditto

Valuable Member
View Badges
Joined
Apr 25, 2017
Messages
2,229
Reaction score
2,972
Location
Albany, NY
Rating - 0%
0   0   0
My First batch of Phyto and Pods were a success, and the second batch is underway. If somoene can give me an idea how to take a good picture of the pods it would help show the success that I had. I had was 1000's of pods swimming around in the container. I have restarted the process by utilizing 1/3 of the Pods left over in the first first batch and adding 2/3 directly to the tank. Lesson learn (Do it at night next time). I used 1000ml of the Phyto to seed the new patch, 1500ml to seed to new batch of pods, and 5000ml to feed my tank. Since I produce phyto every 7-10 days I will not run out with 500ml only going to the tank.


phyto2.jpg
 

WWIII

2500 Club Member
View Badges
Joined
Jan 13, 2016
Messages
3,739
Reaction score
7,701
Location
Louisville, KY
Rating - 0%
0   0   0
Tank is going along smoothly. Still have a slight algae breakout but the CUC are clearing up it as it comes. I am noticing a drop in Alkalinity of .2 per day so I began dosing just Alkalinity Component 2 from Aquaforest of 27ML per day to keep me steady at 8.1.

At the same time I started my Phyto and pods production, which will serve to feed both tanks. I been using Aqua Barn phyto and pods but decided it was time to attempt begin growing my own pods and phyto as paying the monthly shipment was just getting to be to much of an expense. The last time I attempted to do this I crashed usually once a month, and my pods just did not seem to flourish. So with some reading of the forums, I decided to try a different approach and went with the Poseidon Reef System Combo (https://poseidonreefsystems.com/t/phytotank-complete-kits) with extra Phyto tank. I went with this as a full proof way to ensure I can grow Pods, and Phyto without any issues and if it crashes they will go ahead and re-seed me for free which I thought was great since I know I may screw this up along the way.

The Kit Arrived today and no damage in the box, and very well packed:

Instructions in the Box and on top, and not a note that says please go to our website and print these off. +1 for including them in the box :)
phyto1.jpg


3 Liter Glass Jars with Rubber lids, that have a thumb screw clamp. (The one on the left will be my new dosing container of Phyto for both tanks.

phyto2.jpg


Some Spare supplies!!

phyto3.jpg


Setup was quite simple, Put the two tubes into the Cap, once goes into the Jar which will be supplied by Air, the other will be on the outside of the cap and is a Air Vent.
phyto5.jpg


Put a Bag into the Jar
phyto6.jpg


Add Newly Mixed Sal Water first about 1/4 of the way full then add one bag of Poseidon Reef Systems Starter Phyto.

phyto7.jpg


Add your Fertilizer for your Phyto

phyto9.jpg


And then add more freshly mixed saltwater till you get to the line (Opps went a little over on this picture)

phyto10.jpg


For the Pods, the same setup but this gets installed:
phuyo12.jpg


Add 1/4 Freshly Salt mix, then a Phyto Starter Kit, then the Bag of Pods Culture (Not the best picture of the Pods, but there were quite a few swimming around in the mixture). Then fill to the line :)

phyto8.jpg


Set your Timer on your Controller to 16 Hours on your controller. GHL App, took less then 1 minute in the app) (Set your timer, and then apply the timer to the switch channel)
timer1_phyto.png
timer2_phyto.png


Like Magic Pods and Phyto are now cultivating
(The one on the left is the Pods, the one on the Right is new Phyto, the dimmer switch reduces the light output on the Pods by 50%)
phyto13.jpg


Connect them to a air pump to both Phyto Tanks, set the air bubbles (Pods, about 5-6 at a time, and the Phyto full open)

Entire setup took about 30 minutes. Special thanks to Poseidon Reef Systems for answering all my questions!!

I will report back in 7-10 days on the results :)


How's the phyto/pods project coming along?
 
OP
OP
Ditto

Ditto

Valuable Member
View Badges
Joined
Apr 25, 2017
Messages
2,229
Reaction score
2,972
Location
Albany, NY
Rating - 0%
0   0   0
@WWIII it been working great.

Here is a quick video of the Pods, I have about another 7 days before I can cultivate them but it been very very easy to do with the setup.


As for Phyto I am also doing great, I am cultivating 2.7 liters every 9 days without any issues. Both tanks are now using the new Phyto instead of Algea barn Phyto and no issues to report.
 
OP
OP
Ditto

Ditto

Valuable Member
View Badges
Joined
Apr 25, 2017
Messages
2,229
Reaction score
2,972
Location
Albany, NY
Rating - 0%
0   0   0
Ditto had to make it into the picture :) I finally ordered a par meter and it has arrived. Apogee MQ-510, so that I can begin to take readings on the tanks. Our local LFS does not rent them so I decided it was time to have one. I plan to take readings all over the tank and post the results. Based on my initial testing I know already I may need to turn my lights up a little hehe.

2C802752-279A-450F-BB41-14C3D71D12E3.jpeg
 
OP
OP
Ditto

Ditto

Valuable Member
View Badges
Joined
Apr 25, 2017
Messages
2,229
Reaction score
2,972
Location
Albany, NY
Rating - 0%
0   0   0
Lesson one, should have gotten a par meter sooner for the new tank :(

07D8A16B-C7F8-4242-B673-E13877ABB264.jpeg

Want to start that the coral been doing ok but noticed they just have not popping like the other tank.

So with the apogee par meter I took readings and at the base of the sand it was 40 with the glass cover on and 55 without out.

What I did notice that the light from the lightbars is even throughout the tank readings all over the sandbed were between 40-50 or 55-65.

This is with the light approx 8.5” inches off the water.

I uninstalled one the lights from being attached to the canopy and and placed it on its feet on the tank.
ABCF1516-B18B-41E4-B818-3F7E213F2026.jpeg


My par readings at the sand bed Increased to 125-135 which is more what it needs to be increasing up to 450 to the highest most rock formation.

Tomorrow I plan to demount the rest of the lights from the canopy.

My total light capacity with two light bars is approx 210 watts so I ordered another 160cm deep antic. Once this one is installed the mitras simulation bars will no longer be used as the light bars will pretty much cover the entire top of the tank.
 

Tristren

Well-Known Member
View Badges
Joined
May 16, 2017
Messages
786
Reaction score
808
Location
Ottawa
Rating - 0%
0   0   0
Lesson one, should have gotten a par meter sooner for the new tank :(

07D8A16B-C7F8-4242-B673-E13877ABB264.jpeg

Want to start that the coral been doing ok but noticed they just have not popping like the other tank.

So with the apogee par meter I took readings and at the base of the sand it was 40 with the glass cover on and 55 without out.

What I did notice that the light from the lightbars is even throughout the tank readings all over the sandbed were between 40-50 or 55-65.

This is with the light approx 8.5” inches off the water.

I uninstalled one the lights from being attached to the canopy and and placed it on its feet on the tank.
ABCF1516-B18B-41E4-B818-3F7E213F2026.jpeg


My par readings at the sand bed Increased to 125-135 which is more what it needs to be increasing up to 450 to the highest most rock formation.

Tomorrow I plan to demount the rest of the lights from the canopy.

My total light capacity with two light bars is approx 210 watts so I ordered another 160cm deep antic. Once this one is installed the mitras simulation bars will no longer be used as the light bars will pretty much cover the entire top of the tank.

I have mine on their feet on the tank. Working well so far, though like you at some point I'll be adding another (a deep blue).

Cheers, Tony
 

EAsalty

Community Member
View Badges
Joined
Jan 12, 2016
Messages
93
Reaction score
27
Location
Nashville
Rating - 0%
0   0   0
Beautiful build! Glasscages is building my custom rimless 150 gallon coast-to-coast (bean animal) and stand. I had plans to purchase the synergy CL44, or TS44, but tired of filter socks and uncertain about using the Triton method. However, you inspired me to have Glasscages build a glass sump (48x18x17) and use filter floss instead of filter socks. If you do not mind, could you share your sump measures or blueprint?
Thanks
 

Teri NewbieReefer

Active Member
View Badges
Joined
Oct 2, 2018
Messages
497
Reaction score
762
Location
Mount Vernon, WA
Rating - 0%
0   0   0
Incredible build. Shows how new I am to all of this - It took me forever to read through your build, but just because I had to stop and look up the products/items you used. Didn't realize all the selection of items there is out there! Lol. Love that I'm seeing new products and procedures over what little I've seen locally.
 

EAsalty

Community Member
View Badges
Joined
Jan 12, 2016
Messages
93
Reaction score
27
Location
Nashville
Rating - 0%
0   0   0
Friends came over today and help me break down the tank so I could begin to stain and expoxy the inside.

Now with it fully apart And fully inspected I for sure would buy again from them. The overall quality (except) for two of the eurobrace seams which could be cleaner(will scrape the excess), and some overcuts on the doors which are covered the overall tank quality is very good.

A1EF7D57-17FF-4430-BEC2-241662755ABC.jpeg


You can see the over run on this door in the upper left corner but it is hidden by the door. Laid out the shelves for the equipment and to make sure no issues placed a dosing container in to make sure height was ok.

1F81731F-638B-45FD-8714-21362A1C6C0A.jpeg


A1EF7D57-17FF-4430-BEC2-241662755ABC.jpeg


Tank off the stand awaiting to go back home I may rock scape the overflow.
8A08285E-A2AF-4A82-B54C-C1435111F32B.jpeg

I went for now with Glasscage sumps also. From left to right will be input from the tank to the first chamber which a algae reactor and two avast spyglass reactors will be off my manifold, the next chamber will be the royal exclusive skimmer and the last chamber the red dragon return pump.
147038FE-6E31-46CF-95DE-CF343428D77F.jpeg


The bulkheads will be two schedule 80 1 inch and 1/2 drain from the overflow and one schedule 80 1 inch return line.

The inside of the cabinet will be painted with pond armor expoxy to make sure inner cabinet is water resistant. Outside will be stained and then an expoxy clear coat for also water resistance.

If the weather holds and does not get to cold in the garage should have it painted and sealed and in the house within 2 weeks.

Beautiful Build! Glasscages is building my 150 gallon coast-to-coast (bean animal) and stand. I had plans to purchase the Synergy CL44 or TS44, but I am tired of using filter socks and uncertain about the triton method, which could be risky on my end (upgrading from my heavily stocked mature 90 gallon mixed-mostly SPS tank). Your build inspired me to contact Glasscages to include a 65 gallon glass sump designed to use filter floss. If you do not mind, could you share your blueprint or diagram for your sump?
 
OP
OP
Ditto

Ditto

Valuable Member
View Badges
Joined
Apr 25, 2017
Messages
2,229
Reaction score
2,972
Location
Albany, NY
Rating - 0%
0   0   0
@EAsalty - I was not going to mention this yet as I was awaiting it to arrive, so I will just announce it now :)

My Glass Cages sump is 48x12x17
Chamber 1 (Egg Crate) 5x12
Chamber 2 (Skimmer) 14x12
Chamber 3(Reactor Chamber or could be reefgium) 14x12
Chamber 4 (Return Chamber) 8x12
You loose 1 inch for the outer glass walls, leaving 6 inches left which are used for the bubble traps :)

It is a well made sump, and it would have worked for me if I did not make a mistake. My Mistake was I could not fit my skimmer in Chamber 3 like I wanted to which has the correct water height, which caused me to move my skimmer to chamber 2, which in turn is causing me some issues. I forgot about the euro brace that would appear in chamber 3 (I know that now) but if knew that would have done a different design. So when designing make sure you ask them where the brace will be if they do brace it (My Mistake). I went with it and thought I could work through it, and decided no I will change it out. If i had to do it again, I would order it all again from them and just go where are those bracing again hehe.

So I will be swapping out my sump with a custom sump, I had to go with a custom sump because how do you fit a 48 inch sump through a 22 inch hole now that the tank is in place :) (I can not use the side door as not enough room :)

Advance Acrylics is making me a custom sump with the designs laid out below. Even thou it has 2 4" filter socks configuration this will have 2 Klir as the sump will come with the two Klir at the same time tested and configured. Since I had to split the sump in 1/2 we had to design it in such a way to make sure it could support the 1000+ GPH, and make up for the loss of 4 inches. To make up for this the sump will be 1" wider and 1" higher.
upload_2018-10-3_20-59-23.png
 
Last edited:
OP
OP
Ditto

Ditto

Valuable Member
View Badges
Joined
Apr 25, 2017
Messages
2,229
Reaction score
2,972
Location
Albany, NY
Rating - 0%
0   0   0
@Teri NewbieReefer - Thank you!! The items are endless out in the reefing world, these forums do a great job educating but also showing what works and does not work to fellow reefers! One of the best forums out here for reefers!!
 

EAsalty

Community Member
View Badges
Joined
Jan 12, 2016
Messages
93
Reaction score
27
Location
Nashville
Rating - 0%
0   0   0
@EAsalty - I was not going to mention this yet as I was awaiting it to arrive, so I will just announce it now :)

My Glass Cages sump is 48x12x17
Chamber 1 (Egg Crate) 5x12
Chamber 2 (Skimmer) 14x12
Chamber 3(Reactor Chamber or could be reefgium) 14x12
Chamber 4 (Return Chamber) 8x12
You loose 1 inch for the outer glass walls, leaving 6 inches left which are used for the bubble traps :)

It is a well made sump, and it would have worked for me if I did not make a mistake. My Mistake was I could not fit my skimmer in Chamber 3 like I wanted to which has the correct water height, which caused me to move my skimmer to chamber 2, which in turn is causing me some issues. I forgot about the euro brace that would appear in chamber 3 (I know that now) but if knew that would have done a different design. So when designing make sure you ask them where the brace will be if they do brace it (My Mistake). I went with it and thought I could work through it, and decided no I will change it out. If i had to do it again, I would order it all again from them and just go where are those bracing again hehe.

So I will be swapping out my sump with a custom sump, I had to go with a custom sump because how do you fit a 48 inch sump through a 22 inch hole now that the tank is in place :) (I can not use the side door as not enough room :)

Advance Acrylics is making me a custom sump with the designs laid out below. Even thou it has 2 4" filter socks configuration this will have 2 Klir as the sump will come with the two Klir at the same time tested and configured. Since I had to split the sump in 1/2 we had to design it in such a way to make sure it could support the 1000+ GPH, and make up for the loss of 4 inches. To make up for this the sump will be 1" wider and 1" higher.
upload_2018-10-3_20-59-23.png

@Ditto, thank you for sharing this valuable information. My stand is the same as your stand 60x24x36, although I am adding end doors on both sides. I have some concerns about the middle brace as well. I am using a Glasscages 65 gallon glass aquarium (48x18x17) with the middle brace in the center of the tank. I have a new lifereef SV3-24 skimmer with a 9x12 footprint and have plans to use two media reactors. If you do not mind, what are some suggestions on designing my Glasscages sump to accommodate the middle brace and use my lifereef skimmer and in sump media reactors? Thanks
 

Algae invading algae: Have you had unwanted algae in your good macroalgae?

  • I regularly have unwanted algae in my macroalgae.

    Votes: 44 35.5%
  • I occasionally have unwanted algae in my macroalgae.

    Votes: 27 21.8%
  • I rarely have unwanted algae in my macroalgae.

    Votes: 9 7.3%
  • I never have unwanted algae in my macroalgae.

    Votes: 9 7.3%
  • I don’t have macroalgae.

    Votes: 31 25.0%
  • Other.

    Votes: 4 3.2%
Back
Top