Koz's 125 Gallon Upgrade

Which brand skimmer have you had most success with?

  • Reef Octopus

    Votes: 6 54.5%
  • Bubble Magus

    Votes: 5 45.5%
  • Aqua Maxx

    Votes: 0 0.0%

  • Total voters
    11
  • Poll closed .

koz99gst

New Member
View Badges
Joined
Apr 10, 2014
Messages
19
Reaction score
0
Location
Northern California
Rating - 0%
0   0   0
Hey everyone! I'm new here and still somewhat new to the reef scene. I started my very first reef in March of 2013 and I was immediately hooked. I started with a nice 60 gallon tank with a canister filter. I quickly learned that I needed a sump and skimmer so I made the transition and added an overflow box and got some better equipment. Along the way I learned a lot and it has come time to UPGRADE!! So, this is going to be my journey setting up my new (used) 125 gallon tank... Hope you all enjoy, and suggestions are always welcome.

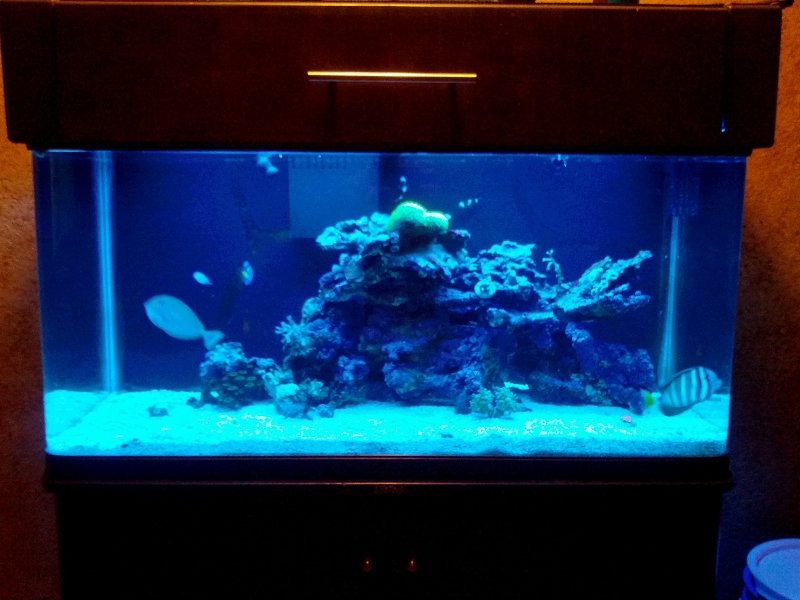
My 60 gallon 9/20/2013:

08d1b8b0-4ff3-4991-97b4-c1dfebba5167_zps051fa5e0.jpg


My 60 gallon more recent:

7b2f1676-20be-4d92-b726-f061966af261_zps408fa97e.jpg


and now.......


the new used 125 gallon acrylic:


83c0c5cf-e371-477c-890b-009e2b8f7d92_zps0122430d.jpg


351e3b91-1a0a-498b-a361-298e81e62e3c_zps779e0ac4.jpg


7f54f6bc-ac29-4706-ab0b-cc7de44e5ff8_zps516f42ce.jpg


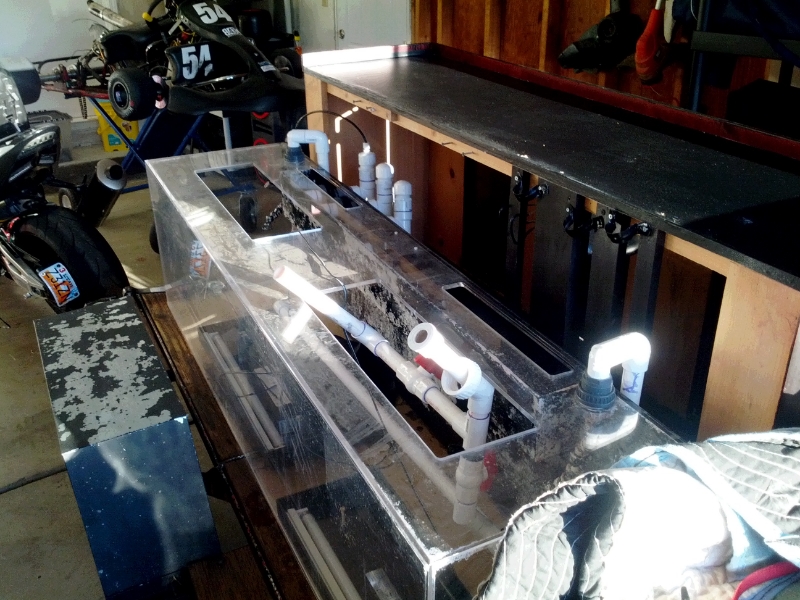
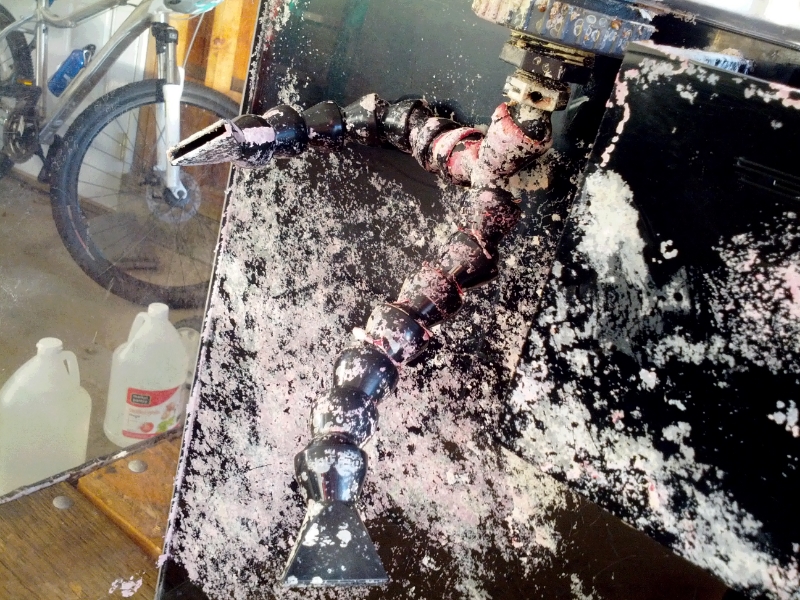
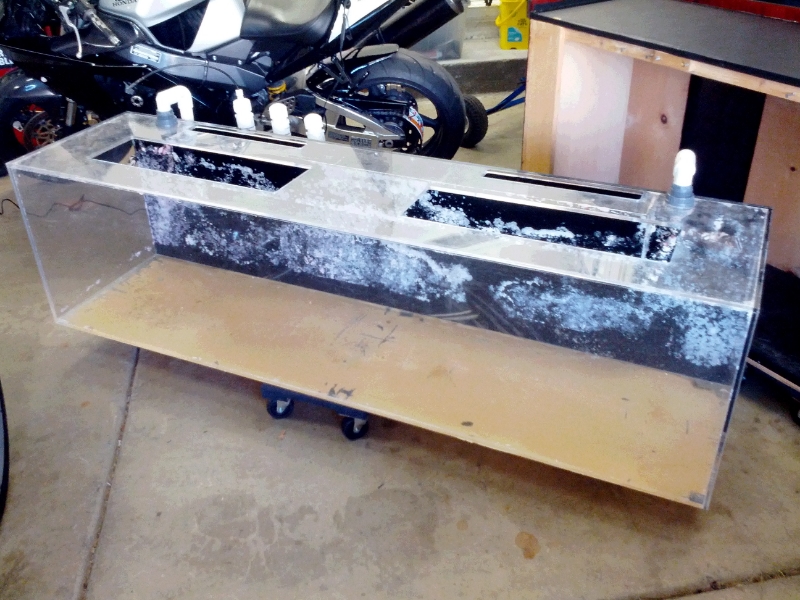
As to be expected with any used tank it's a bit dirty with some dry coralline algae and has tons of scratches (nothing that can't be fixed with a little elbow grease). What really drew me to this tank is that it came with: built in overflow, plumbing, heaters, Hydor Koralia wave makers, sump, an external Iwaki return pump, and a beautiful dark cherry stand. The price was right so I went for it. I plan to include a DIY LED setup. Stay tuned for a vinegar bath and some scratch removal action!
 

Rob&Gab

unregistered
View Badges
Joined
Feb 20, 2013
Messages
6,615
Reaction score
78
Location
whitestone, Queens NY
Rating - 0%
0   0   0
awesome!!!!!


i voted reef octopus. i love that skimmer and will go with them till i dont no when . maybe when the world stops spinning. :p
 
OP
OP
K

koz99gst

New Member
View Badges
Joined
Apr 10, 2014
Messages
19
Reaction score
0
Location
Northern California
Rating - 0%
0   0   0
awesome!!!!!


i voted reef octopus. i love that skimmer and will go with them till i dont no when . maybe when the world stops spinning. :p

Thanks for checking out my build and voting. Any specific model of Reef Octopus that you would suggest that I check out for this 125?
 

jason g

Well-Known Member
View Badges
Joined
Dec 4, 2013
Messages
602
Reaction score
137
Location
Fresno, CA
Rating - 0%
0   0   0
That's going to be one awesome looking setup. Ill be sure to follow your progress.
 
OP
OP
K

koz99gst

New Member
View Badges
Joined
Apr 10, 2014
Messages
19
Reaction score
0
Location
Northern California
Rating - 0%
0   0   0
OP
OP
K

koz99gst

New Member
View Badges
Joined
Apr 10, 2014
Messages
19
Reaction score
0
Location
Northern California
Rating - 0%
0   0   0
Alrighty then...... I got some work done on it and so far so good. Gave it a good vinegar bath and got it nice and clean. What I uncovered underneath all the coralline algae was not pretty though...

Scratchville:

a125635f-0738-42a7-acfa-f7bb9eb42851_zps0a97b136.jpg


So.... Luckily I have experience wet sanding and buffing car paint so this should be a breeze. First, I wet sanded all surfaces with 800, 1000, 1200, 1500, and then 2000 grit sand paper. Then, with a 9" wool pad on a buffer, I applied Meguiar's PlastX (which is a clear plastic cleaner and polish) and buffed out all the fine scratches from the sand paper. With all the fine scratches removed, the deeper scratches caused by rocks and such became clearly visible. To make it easier to see them while wet sanding, I filled them in with a sharpie.

After first round of buffing and sanding:

463ee747-cb07-46a2-87ae-ab24ce80f99e_zps64398ad0.jpg


Getting a little better:

52f1a5bb-0e8e-43f7-8f68-2470e5020320_zps53a09505.jpg


After repeating the wet sanding and buffing process 3 more times, I was able to completely remove the deep scratches. I then put the tank on some moving dollies and filled it up with water for a leak test.

Completed wet sand and buffing:

6cda541a-2798-400c-9887-191e1e3a7e7d_zpsab12f96d.jpg


0764894c-6dee-4b35-8eca-cc8cff218466_zpsadadda2a.jpg


I think it came out pretty good. It's now sitting in the garage doing a leak test. Update coming soon.
 

prsnlty

Jackie
View Badges
Joined
Jun 22, 2011
Messages
7,541
Reaction score
5,235
Location
Citrus Co, Florida
Rating - 0%
0   0   0
Nice work, looks new again!

Following along :)

I agree with Rob& Gab about the Reef Octopus. I have the same one and it's great! Mine is in the livingroom and don't really notice it. LOL, could be due to the loud overflow though...
 

jason g

Well-Known Member
View Badges
Joined
Dec 4, 2013
Messages
602
Reaction score
137
Location
Fresno, CA
Rating - 0%
0   0   0
Wow it sure does look brand new. How long did it take to remove all the scratches out? :smile:
 
OP
OP
K

koz99gst

New Member
View Badges
Joined
Apr 10, 2014
Messages
19
Reaction score
0
Location
Northern California
Rating - 0%
0   0   0
Thanks, I'm pretty happy with how it came out. It took me about 6 hours over the course of two days for the whole process. I'm still looking at different skimmers. I really like the Reef Octopus but after ordering my LED kit, funds are kinda tight and I need to stick with something in the $150-$300 range that will fit in a stand that has 28" of clearance.

Now for an update. The tank passed the leak test and I brought it inside to start working on the plumbing. Also my sand and rocks from reefrocks.net came in. I gotta tell you, I'm impressed. I got 100lbs of rock and 120lbs of aragonite sand for $189 shipped! I will include some better pics for you guys when I start aquascaping.


Brought the tank inside, cleaned up the stand and canopy, and set it up to get a look with it clean:

b8334025-0850-4a58-992f-584c1ce359de_zps23365c7e.jpg


Boxes of sand:

319c2db5-a0c2-48d1-a958-6c30ce97b19c_zpscfaaaaf7.jpg

875606fc-6d42-4a30-8110-35af6894d917_zpscaa53c1f.jpg


Boxes of rocks:

1e7927b9-58df-4f80-ae58-856bddf67a1c_zpse3b93199.jpg

43f092a0-e954-4a2a-b438-a11cfbaa4117_zps529e3d0f.jpg


Everything was very well packed. Hopefully everything goes smoothly with the plumbing and I can start aqauscaping tomorrow.
 

revhtree

Owner Administrator
View Badges
Joined
May 8, 2006
Messages
47,898
Reaction score
88,392
Rating - 100%
1   0   0
Nice tank!
 

fishroomlady

2500 Club Member
View Badges
Joined
Mar 3, 2013
Messages
2,628
Reaction score
106
Location
Milford, OH
Rating - 0%
0   0   0
wow, that transformation is amazing. That is acrylic, correct? I truly understand how much work that was to buff that into what you did. Nice work!
 
OP
OP
K

koz99gst

New Member
View Badges
Joined
Apr 10, 2014
Messages
19
Reaction score
0
Location
Northern California
Rating - 0%
0   0   0
Nice tank!

Thank you!

wow, that transformation is amazing. That is acrylic, correct? I truly understand how much work that was to buff that into what you did. Nice work!

Yes, it is acrylic. Luckily I already had all the tools to do it. It was just a matter of taking the time to get it done. Thank you!

The tank looks brand new! Is the sand dry also? That's a really good deal :)

Jackie

Yes, it's 120lbs of dry Bahama aragonite.

Great build! You're right, the dark wood is a great complement to the tank. Looking forward to seeing more photos!

The stand was definitely a major selling point. That was my wife's only request, a nice stand.
 
OP
OP
K

koz99gst

New Member
View Badges
Joined
Apr 10, 2014
Messages
19
Reaction score
0
Location
Northern California
Rating - 0%
0   0   0
Update: The plumbing was a success and I moved the tank to it's final resting place in my living room. Once it was moved I started some pre-aquascaping. I started by finding pictures of fellow reefer's tanks for inspiration. I chose two natural looking structures that caught my eye and used those as a reference. Then, I laid out a large piece of cardboard on my garage floor and marked out the tank dimensions. After that I removed all the dry rock from the boxes and arranged them in front of my work area. After about a half an hour stacking and re-stacking, I created two structures that I was happy with. I took these structures and drilled holes all over them for coral plugs, I learned with my first tank that it was difficult to properly place corals without plug holes.

All 100lbs of rock arranged in my work area:

3486234e-976a-43d1-8335-c50f68a0c0eb_zpsadabece8.jpg


Drilled holes for coral plugs (the pink tape is for proper depth of holes) :

4d67d6f6-6a6d-4226-aaa0-8204bb586886_zpsd8557867.jpg


Perfect plug fitment:

3632d8a6-d03b-4575-b39c-c006104e8540_zpse7852456.jpg


The two structures I created:

IMG_20140317_153142_zpsb0cfdfea.jpg

57ec264c-f680-4738-8097-6b574d92f6da_zps09d0a0db.jpg


So far, everything is going fairly smooth. I was finally able to decide on a skimmer, I went with the Reef Octopus NWB150. It was in my price range, all the reviews I read on it were positive, and I still get the reliability and customer support of Reef Octopus. Please tell me I made the right choice. Also, I'm still waiting on my DIY LED kit to come in so I can get started on that. This was my last update for about two weeks because I'm going to Hawaii. Hopefully I can get more aquascape ideas while I'm out diving :)
 

Clink51

Community Member
View Badges
Joined
Mar 19, 2014
Messages
42
Reaction score
1
Location
NYC
Rating - 0%
0   0   0
Tagging along dude, this looks like a fun one! How are you keeping the rocks together? are you doing a bleach wash or an acid wash?
 

Form or function: Do you consider your rock work to be art or the platform for your coral?

  • Primarily art focused.

    Votes: 20 8.2%
  • Primarily a platform for coral.

    Votes: 43 17.7%
  • A bit of each - both art and a platform.

    Votes: 162 66.7%
  • Neither.

    Votes: 12 4.9%
  • Other.

    Votes: 6 2.5%
Back
Top