I decided to post the history of my nano since I've been active on R2R more often lately.
Here's the timeline with notable events, good or bad:
Dec 15, 2022
Decided to jump back in to reefing after 6 or 7 years and a house move. I gotta admit my main motivation was the popularity of the various BRS series' making it look easier than my previous experience. My wife also enjoys saltwater more than the freshwater tanks or Hogg Island Boa I keep so that part was easy.
I had a leftover 8.8 gallon cube that wasn't being used so I started planning and designing everything on the cheap. Spoiler alert: everything was eventually replaced or upgraded so the "cheap" actually ended up costing more.
Leftover tank, rock from my tank 6 years prior, an awesome tidal 35 filter and a 50w heater. Off to the races!

Feb 9, 2023
Tank cycled, a couple clownfish added, some canary corals added. Got a couple Jebao SW2 powerheads for random flow.
The rock is still very white from my bleach bath and vinegar soak prior to setting up the tank ( had quite a bit of algae from the last tank on it).

Feb 18, 2023 - DINO's
After a week away for work without testing parameters, some possible missed feedings by my wife (yes I'm passing the blame ) and a bottomed out phosphate and nitrate level we have a wonderful mix of Cyano and Dinoflagellates!! DUN-DUN-DUUUUN!!!
Pretty awful but I was expecting some uglies to appear. I got a little worried after discovering they were dinos.

March 11, 2023 - Dino's on the run
After some thorough research on Mack's Dino FB page I picked up a microscope, ID'd the little suckers that were causing me grief and started the recommended nutrient dosing, UV, and manual removal (siphoning and changing filter floss daily). Also stopped water changes and by mid March the Dinos were no more.
Amazingly, my snails, fish and coral all powered through unscathed by the dreaded Ostreopsis ovata.

April 7, 2023 - Rip Clean'd
All was not hunky dory after the eradication of the Dino's unfortunately. The removal of such a large mass of organisms just left a gaping hole in the trophic web and various algaes were happy to fill it. I tried picking off the rocks as it grew but soon got overwhelmed and decided to play my hail-mary card with a "rip clean". Seeing the results of a few other nano tanks on various forums convinced me that this could be my way out of the algae woes.
After a full day of sand bed rinsing (way more crap came out than expected - must have been all the dead dino's) and bunch of knifing off the algae that covered my rocks the tank looked great and I was able to maintain it for quite a few months.

May 20, 2023 - Hitting its stride
Tank did amazingly well after the rip clean and coralline was blooming everywhere. I had to start manual dosing of 2 part to keep up with the Ca/Alk demands. To this point I had been using Kalkwasser as the majority of my top off water.
Coralline growth a month after rip clean.

Summer, 2023 - BRYOPSIS
At some point in the summer I added a coral that must have had some Bryopsis on it. I was peroxide dipping but it obviously got through the dip. After a few week long camping trips in July, August and September it got away from me. My daily tweezing again wasn't cutting it. It was around this time I started to seriously think about upgrading the little cube to something I could run dosing pumps on and have more breathing room for my work trips, camping trips and ski trips that my family and I regularly take. I started designing each component of the new tank to reduce everyday maintenance and reliance on manual work so that I could leave with some confidence in my tank stability.
Final 8.8 cube FTS after another few rock rasping sessions. Started Fluconazole around this time to hopefully eradicate the Bryopsis before transferring livestock to the new tank.

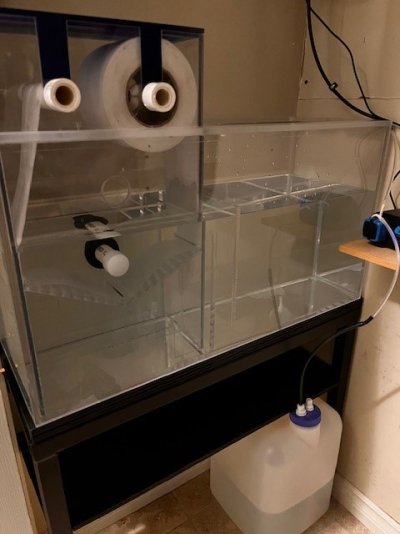
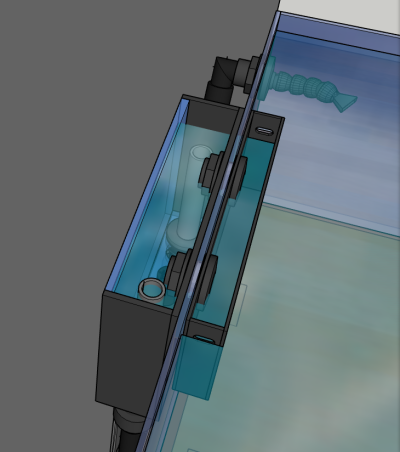
Next post I'll share the designs for the new system, how it progressed and how the Fluconazole worked out....
Thanks for stopping by!
Here's the timeline with notable events, good or bad:
Dec 15, 2022
Decided to jump back in to reefing after 6 or 7 years and a house move. I gotta admit my main motivation was the popularity of the various BRS series' making it look easier than my previous experience. My wife also enjoys saltwater more than the freshwater tanks or Hogg Island Boa I keep so that part was easy.
I had a leftover 8.8 gallon cube that wasn't being used so I started planning and designing everything on the cheap. Spoiler alert: everything was eventually replaced or upgraded so the "cheap" actually ended up costing more.
Leftover tank, rock from my tank 6 years prior, an awesome tidal 35 filter and a 50w heater. Off to the races!
Feb 9, 2023
Tank cycled, a couple clownfish added, some canary corals added. Got a couple Jebao SW2 powerheads for random flow.
The rock is still very white from my bleach bath and vinegar soak prior to setting up the tank ( had quite a bit of algae from the last tank on it).
Feb 18, 2023 - DINO's
After a week away for work without testing parameters, some possible missed feedings by my wife (yes I'm passing the blame
) and a bottomed out phosphate and nitrate level we have a wonderful mix of Cyano and Dinoflagellates!! DUN-DUN-DUUUUN!!!Pretty awful but I was expecting some uglies to appear. I got a little worried after discovering they were dinos.
March 11, 2023 - Dino's on the run
After some thorough research on Mack's Dino FB page I picked up a microscope, ID'd the little suckers that were causing me grief and started the recommended nutrient dosing, UV, and manual removal (siphoning and changing filter floss daily). Also stopped water changes and by mid March the Dinos were no more.
Amazingly, my snails, fish and coral all powered through unscathed by the dreaded Ostreopsis ovata.
April 7, 2023 - Rip Clean'd
All was not hunky dory after the eradication of the Dino's unfortunately. The removal of such a large mass of organisms just left a gaping hole in the trophic web and various algaes were happy to fill it. I tried picking off the rocks as it grew but soon got overwhelmed and decided to play my hail-mary card with a "rip clean". Seeing the results of a few other nano tanks on various forums convinced me that this could be my way out of the algae woes.
After a full day of sand bed rinsing (way more crap came out than expected - must have been all the dead dino's) and bunch of knifing off the algae that covered my rocks the tank looked great and I was able to maintain it for quite a few months.
May 20, 2023 - Hitting its stride
Tank did amazingly well after the rip clean and coralline was blooming everywhere. I had to start manual dosing of 2 part to keep up with the Ca/Alk demands. To this point I had been using Kalkwasser as the majority of my top off water.
Coralline growth a month after rip clean.
Summer, 2023 - BRYOPSIS
At some point in the summer I added a coral that must have had some Bryopsis on it. I was peroxide dipping but it obviously got through the dip. After a few week long camping trips in July, August and September it got away from me. My daily tweezing again wasn't cutting it. It was around this time I started to seriously think about upgrading the little cube to something I could run dosing pumps on and have more breathing room for my work trips, camping trips and ski trips that my family and I regularly take. I started designing each component of the new tank to reduce everyday maintenance and reliance on manual work so that I could leave with some confidence in my tank stability.
Final 8.8 cube FTS after another few rock rasping sessions. Started Fluconazole around this time to hopefully eradicate the Bryopsis before transferring livestock to the new tank.
Next post I'll share the designs for the new system, how it progressed and how the Fluconazole worked out....
Thanks for stopping by!
Last edited: