72x30x18 DIY build thread

Kodski

Well-Known Member
View Badges
Joined
Jan 28, 2020
Messages
880
Reaction score
837
Rating - 0%
0   0   0
how much did that run you? The glass here was roughly $1k. came with nice beveled edges. May drill tomorrow for the overflow box from @modularmarine
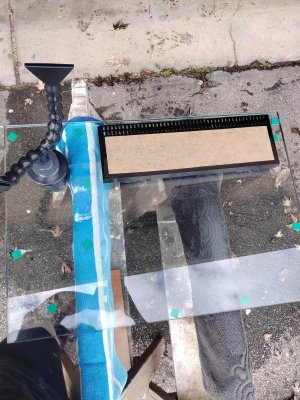
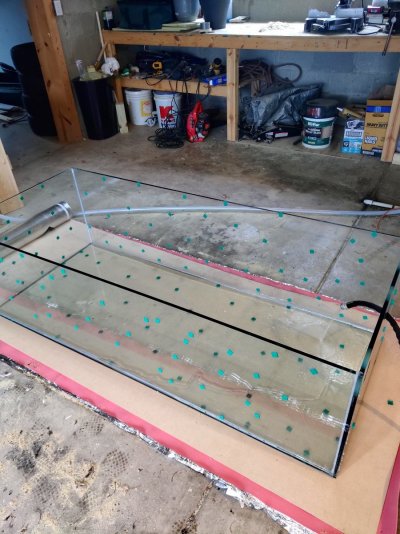
I found the tank on marketplace and paid $180 for it. It needed to be resealed and figured I'd adjust the dimensions while I was at it. Currently its 72"x18"x30" and I don't like the idea of such a narrow and deep tank. I have access to a water jet table to cut the glass down, as well as large polishing machines. I work for a quartz, granite, marble shop and glass is actually pretty similar to some of the stone we work with.
 

John08007

Well-Known Member
View Badges
Joined
Apr 4, 2019
Messages
945
Reaction score
653
Rating - 0%
0   0   0
I found the tank on marketplace and paid $180 for it. It needed to be resealed and figured I'd adjust the dimensions while I was at it. Currently its 72"x18"x30" and I don't like the idea of such a narrow and deep tank. I have access to a water jet table to cut the glass down, as well as large polishing machines. I work for a quartz, granite, marble shop and glass is actually pretty similar to some of the stone we work with.
Wow, never knew that glass could be cut like that. Maybe post a video of the cutting/polishing process, would be cool to see.
 

tricky_tran

Well-Known Member
View Badges
Joined
Oct 4, 2020
Messages
766
Reaction score
2,871
Location
Los Angeles
Rating - 0%
0   0   0
anyone know where i should drill my return hole height wise?

How many are you putting in? i suggest 2 on either side of the back panel maybe an inch under the water line. dont forget to put in a check valve so if you lose power, it all doesnt siphon back into the sump.
 

Kodski

Well-Known Member
View Badges
Joined
Jan 28, 2020
Messages
880
Reaction score
837
Rating - 0%
0   0   0
Wow, never knew that glass could be cut like that. Maybe post a video of the cutting/polishing process, would be cool to see.
I plan on documenting the whole build pretty well once it gets going. It will be a little while though.


@Nate Chalk I usually try to drill them as high as possible without causing issues with the bullkheads hitting the top rim or lip.
 
OP
OP
Nate Chalk

Nate Chalk

7500 Club Member
View Badges
Joined
Nov 15, 2018
Messages
9,631
Reaction score
30,585
Location
no
Rating - 0%
0   0   0
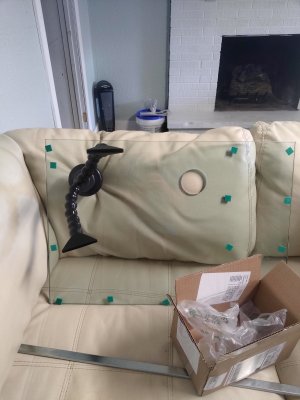
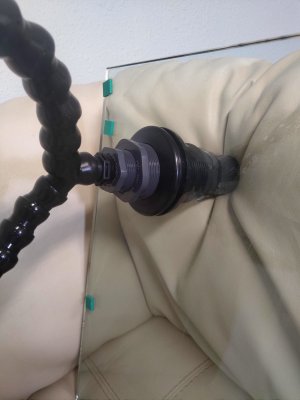
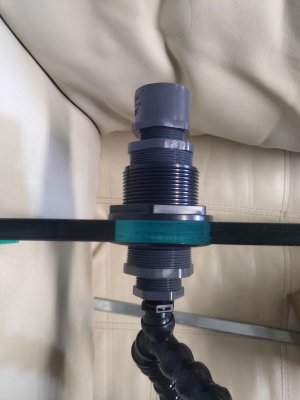
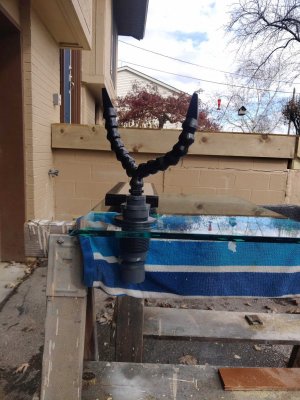
Plumbing came in , wanted to see what the return would look like with reducers. Not terrible. May get another length of loc line. But overall looks good. Return will be 1 1/4 inch pipe . This goes to a 2 inch bulk head , and back down to 3/4 inch locline .

Next steps are drill the hole for the return and then assemble the glass panels

16050294554115632237529958303583.jpg 16050294791832951191964100750321.jpg 1605029490936179286247258896061.jpg
 
OP
OP
Nate Chalk

Nate Chalk

7500 Club Member
View Badges
Joined
Nov 15, 2018
Messages
9,631
Reaction score
30,585
Location
no
Rating - 0%
0   0   0
3rd and final hole is drilled and everything looks good?

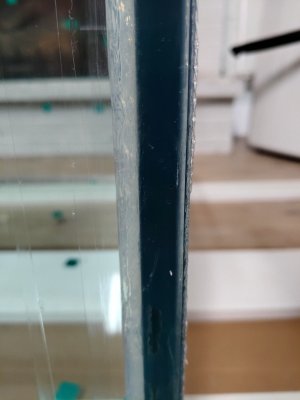
Next steps are silcone the panels together. Any words of advice here? I have 99.99% confidence on the side seams , the bottom glass panel seam is what im wondering about. How do I get a gap between the panels there and also run a smooth bead.

IMG_20201111_125155.jpg IMG_20201111_125214.jpg
 
OP
OP
Nate Chalk

Nate Chalk

7500 Club Member
View Badges
Joined
Nov 15, 2018
Messages
9,631
Reaction score
30,585
Location
no
Rating - 0%
0   0   0
3rd and final hole is drilled and everything looks good?

Next steps are silcone the panels together. Any words of advice here? I have 99.99% confidence on the side seams , the bottom glass panel seam is what im wondering about. How do I get a gap between the panels there and also run a smooth bead.

IMG_20201111_125155.jpg IMG_20201111_125214.jpg
O yeah and I am also working on the deck :)
 
OP
OP
Nate Chalk

Nate Chalk

7500 Club Member
View Badges
Joined
Nov 15, 2018
Messages
9,631
Reaction score
30,585
Location
no
Rating - 0%
0   0   0
I am currently working on building my first DIY aquarium. I've notice two different constructions of the 5 panels for an aquarium.

1. The side panels are mounted directly on top of the bottom panel.
2. The side panels are mounted to the side of the bottom panel.

Which is better? Is there a difference?
 

John08007

Well-Known Member
View Badges
Joined
Apr 4, 2019
Messages
945
Reaction score
653
Rating - 0%
0   0   0
3rd and final hole is drilled and everything looks good?

Next steps are silcone the panels together. Any words of advice here? I have 99.99% confidence on the side seams , the bottom glass panel seam is what im wondering about. How do I get a gap between the panels there and also run a smooth bead.

IMG_20201111_125155.jpg IMG_20201111_125214.jpg
People and tank builders use small thin plastic shims to space the panels. They are small enough that they are typically left in
 
OP
OP
Nate Chalk

Nate Chalk

7500 Club Member
View Badges
Joined
Nov 15, 2018
Messages
9,631
Reaction score
30,585
Location
no
Rating - 0%
0   0   0
Sure there are YouTube videos, i think some people cut up a credit card with a hole punch
Found the silicone bumpers, they are basically the same as the cabinet bumpers. Ordered 1/16 inch thick , 1/4 inch. should be perfect for spacing the glass and they can be left in.
 
OP
OP
Nate Chalk

Nate Chalk

7500 Club Member
View Badges
Joined
Nov 15, 2018
Messages
9,631
Reaction score
30,585
Location
no
Rating - 0%
0   0   0
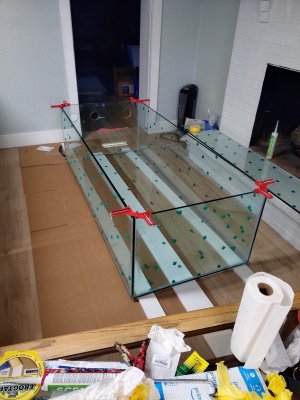
My wife helped to silicone and set up. Used ge scs1200 clear.

Was much more challenging using the injection method. Used the bead on the seam and squish together method after we got poor injection.

Inside bead was easier as we've done a few bathrooms.

Hopefully it holds , will water test in a day or two.

IMG_20201115_153010.jpg IMG_20201115_152948.jpg
 
OP
OP
Nate Chalk

Nate Chalk

7500 Club Member
View Badges
Joined
Nov 15, 2018
Messages
9,631
Reaction score
30,585
Location
no
Rating - 0%
0   0   0
My wife helped to silicone and set up. Used ge scs1200 clear.

Was much more challenging using the injection method. Used the bead on the seam and squish together method after we got poor injection.

Inside bead was easier as we've done a few bathrooms.

Hopefully it holds , will water test in a day or two.

IMG_20201115_153010.jpg IMG_20201115_152948.jpg
Added my larger c clamps to the edges to help hold the panels tighter together, leaving room so that all the silcone was not pushed out
 

John08007

Well-Known Member
View Badges
Joined
Apr 4, 2019
Messages
945
Reaction score
653
Rating - 0%
0   0   0
I
Waiting on the silicone to cure..... I want to water test today (day 2) but i am going to wait the full 7 days for a full cure.
Would, especially if you have some thicker joints. I've heard that once the smell goes away its cured-not sure if its true or not.
 

TOP 10 Trending Threads

WHICH OF THESE CREEPY REEF CRITTERS IS MOST LIKELY TO GIVE YOU NIGHTMARES? (PICTURED IN THE THREAD)

  • The Bobbit Worm

    Votes: 47 67.1%
  • The Goblin Shark

    Votes: 4 5.7%
  • The Sea Wolf

    Votes: 0 0.0%
  • Giant Spider Crabs

    Votes: 1 1.4%
  • The Stargazer Fish

    Votes: 5 7.1%
  • The Giant Isopod

    Votes: 8 11.4%
  • The Giant Squid

    Votes: 1 1.4%
  • Other (Please explain!)

    Votes: 4 5.7%
Back
Top