Hey guys and girls. So it’s been a long time since I posted. Basically since I stopped reefing due to various reasons, mainly work and the upcoming relocation.
Anyhow, a friend asked if I would make home some frag racks for his retail tank. Which I could I was more than happy to do since I miss making stuff lol.
The requirements were, good looking, height adjustable, identifiable markings for pricing, can be used to transport coral, stackable and suitable for 25mm plugs.
So. To get on with it then here we go.
Products used:
So, let’s get into it.
First step is equally marking up all the plug locations. A little bit of division will get you through this.
Step two,
make a mess with the drilling. You know you’re doing something worth doing when you have a mess to show for it. Just get it gone before the wife returns home lol. Drilled the holes for the legs and plugs using the step drill bit. I find that a smoother safer way to drill Arcrylic.
Step three,
Test fit the leg holders. The holes needed a little sanding via the dremmel as did the plug holes just to tidy things up.
Step four,
Sand the edges of the tray with 1000-2000 grit sand paper to get a nice smooth finish before flame treating them for that glass like look.
Step five,
Cut the legs to size, I used the hack saw and cut a couple of mm into the rod before rotating it constantly until it popped off. I think this to be the best way to cut small Arcrylic items for a more accurate cut. You can use the dremmel but this can get hot and cause the Arcrylic to melt and stick to the blade. Proceed to sand and heat tray the cuts as before.
Step six,
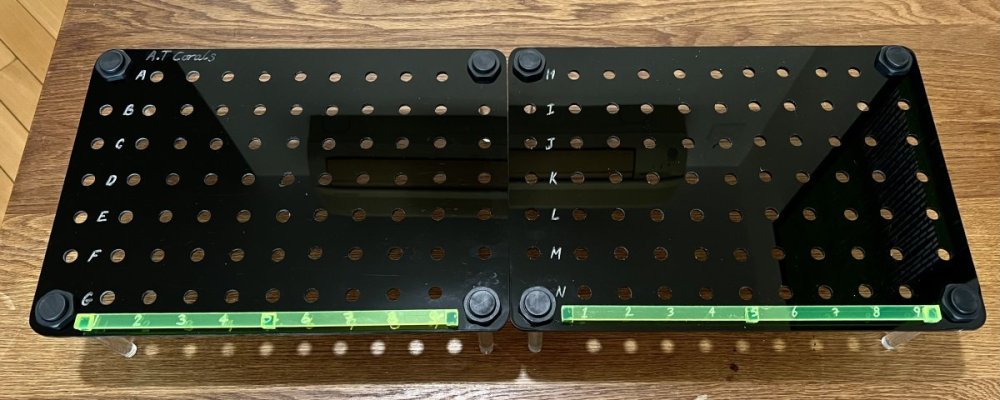
For the green number bar I simply cut 6 small pieces of green Arcrylic and stuck two together to use as an elevator for the number rod. I did this to help with the fluorescence of the green as it would have been a little dark if glued directly onto the black Arcrylic.
Step seven,
Simple engraving tool used to etch the Alphabetical on the left side of the tray, this is obviously for identifying each plug.
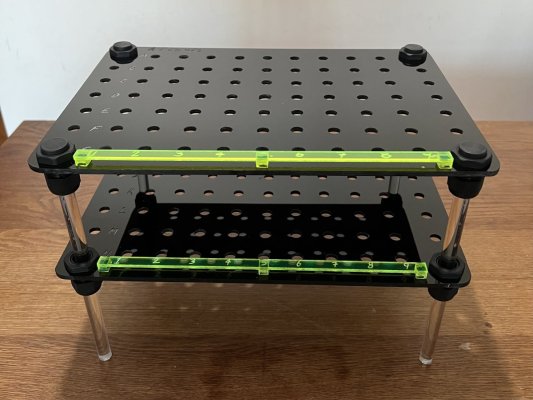
So the finished result isn’t to bad. It took about 2hrs to make one rack with the drilling included. Sure the finish isn’t retail worthy. But it is just another DIY project after all. It gets the job done. The legs can be swapped out for any height legs as they are hand tightened in only. Not glued, it’s stackable for transporting corals as both trays legs are in the same place, it’s labeled and for $28USD to build I think good value.
All products were purchased locally but can be purchased on Amazon.com. Including colored 12mm a Arcrylic rods for the legs.


Anyhow, a friend asked if I would make home some frag racks for his retail tank. Which I could I was more than happy to do since I miss making stuff lol.
The requirements were, good looking, height adjustable, identifiable markings for pricing, can be used to transport coral, stackable and suitable for 25mm plugs.
So. To get on with it then here we go.
Products used:
- 3.5mm Black Arcrylic sheet
- 3mm Green Arcrylic sheet
- 12mm Clear Arcrylic rod
- 1/2” Electrical fittings
- Cordless drill
- Step drill bit
- Hack saw
- Dremmel
- Sandpaper 1000/2000Grit
- Flame thorch
- Weld on 4 Arcrylic bond
- Syringe for above
So, let’s get into it.
First step is equally marking up all the plug locations. A little bit of division will get you through this.
Step two,
make a mess with the drilling. You know you’re doing something worth doing when you have a mess to show for it. Just get it gone before the wife returns home lol. Drilled the holes for the legs and plugs using the step drill bit. I find that a smoother safer way to drill Arcrylic.
Step three,
Test fit the leg holders. The holes needed a little sanding via the dremmel as did the plug holes just to tidy things up.
Step four,
Sand the edges of the tray with 1000-2000 grit sand paper to get a nice smooth finish before flame treating them for that glass like look.
Step five,
Cut the legs to size, I used the hack saw and cut a couple of mm into the rod before rotating it constantly until it popped off. I think this to be the best way to cut small Arcrylic items for a more accurate cut. You can use the dremmel but this can get hot and cause the Arcrylic to melt and stick to the blade. Proceed to sand and heat tray the cuts as before.
Step six,
For the green number bar I simply cut 6 small pieces of green Arcrylic and stuck two together to use as an elevator for the number rod. I did this to help with the fluorescence of the green as it would have been a little dark if glued directly onto the black Arcrylic.
Step seven,
Simple engraving tool used to etch the Alphabetical on the left side of the tray, this is obviously for identifying each plug.
So the finished result isn’t to bad. It took about 2hrs to make one rack with the drilling included. Sure the finish isn’t retail worthy. But it is just another DIY project after all. It gets the job done. The legs can be swapped out for any height legs as they are hand tightened in only. Not glued, it’s stackable for transporting corals as both trays legs are in the same place, it’s labeled and for $28USD to build I think good value.
All products were purchased locally but can be purchased on Amazon.com. Including colored 12mm a Arcrylic rods for the legs.