Hi,
I have experience with freshwater, but this is my first adventure into reefing and saltwater, including my first time with a sump.
I have tried to search and watch tons of youtube videos until my eyes bleed, but I am a little uncertain about all the nuances of how to work with my sump.
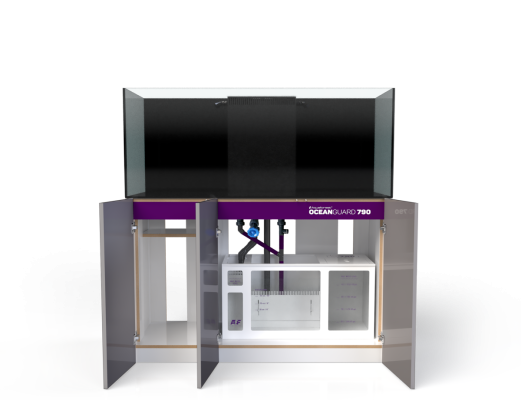
So for reference I have the AquaForest AF OceanGuard 790 aquarium and sump. https://aquaforest.eu/ocean-guard/product/af-oceanguard-790/
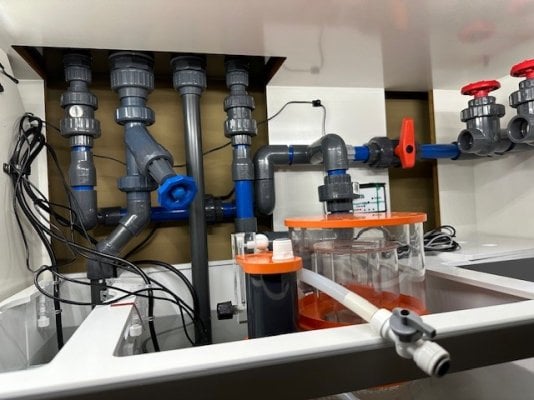
I've finished the plumbing, and am trying to decide where to put everything. With everything being the ATO level sensors, the heaters, and the controller probes (as i'm using an APEX.)
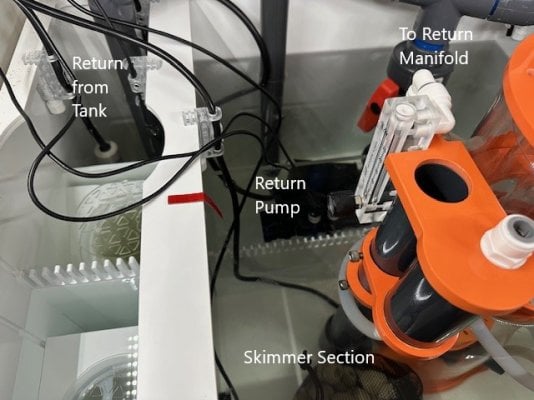
So yesterday, I got the tank filled and turned on the return pump (Sicce SDC 7). I was watching the flow through all the sections, from inlet, through the socks, into the Skimmer section, through some "comb like" pieces, into a mini section, then into the return pump area.
So I guess there is some sort of balancing act that needs to occur here? Where I dial in a flow and tune the return valve so that I arrive at a constant level of water in the return chamber? I mean I watched the level carefully and even though the skimmer section was staying ok, the return pump section almost emptied. Is there some "trick" to balancing the flow? Should I be looking to maintain a constant level in the return pump area, and set the ATO level sensors to this level? Kind of think it might be obvious but I'm just not sure.
I can attach photos if that would help.
Thanks in advance,
Drew
I have experience with freshwater, but this is my first adventure into reefing and saltwater, including my first time with a sump.
I have tried to search and watch tons of youtube videos until my eyes bleed, but I am a little uncertain about all the nuances of how to work with my sump.
So for reference I have the AquaForest AF OceanGuard 790 aquarium and sump. https://aquaforest.eu/ocean-guard/product/af-oceanguard-790/
I've finished the plumbing, and am trying to decide where to put everything. With everything being the ATO level sensors, the heaters, and the controller probes (as i'm using an APEX.)
So yesterday, I got the tank filled and turned on the return pump (Sicce SDC 7). I was watching the flow through all the sections, from inlet, through the socks, into the Skimmer section, through some "comb like" pieces, into a mini section, then into the return pump area.
So I guess there is some sort of balancing act that needs to occur here? Where I dial in a flow and tune the return valve so that I arrive at a constant level of water in the return chamber? I mean I watched the level carefully and even though the skimmer section was staying ok, the return pump section almost emptied. Is there some "trick" to balancing the flow? Should I be looking to maintain a constant level in the return pump area, and set the ATO level sensors to this level? Kind of think it might be obvious but I'm just not sure.
I can attach photos if that would help.
Thanks in advance,
Drew


")
![20240430_085727[1].jpg](https://www.reef2reef.com/data/attachments/3563/3563516-8e87923291c6178a33b8bc753699b247.jpg "20240430_085727[1].jpg")