300 gallon/125 gallon attempted build

Homer Allman

Active Member
View Badges
Joined
Jun 28, 2015
Messages
236
Reaction score
89
Location
Briery Branch, Va
Rating - 0%
0   0   0
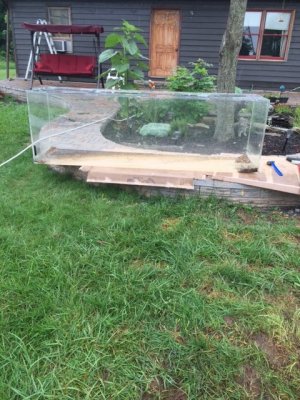
Currently I am running a 125 gallon glass tank with a 46 gallon sump tank, just a tank. I came across a good deal on a 300 gallon acrylic tank. I want to combine the two into a 425 gallon system. I will build the cabinets and do my own t5 lighting on the 300 gallon tank. My current 125/46 setup has an overflow box with a return pump. On this new build I want to run the ultimate pumping set up but I am totally clueless. I know the acrylic can be drilled, so I'll do what it takes to get it right. Any help would be appreciated. I'll start updating with pictures next week when the tank arrives.
 
OP
OP
H

Homer Allman

Active Member
View Badges
Joined
Jun 28, 2015
Messages
236
Reaction score
89
Location
Briery Branch, Va
Rating - 0%
0   0   0
Step one.
 

Attachments

  • IMG_0086.JPG
    IMG_0086.JPG
    101.7 KB · Views: 286
OP
OP
H

Homer Allman

Active Member
View Badges
Joined
Jun 28, 2015
Messages
236
Reaction score
89
Location
Briery Branch, Va
Rating - 0%
0   0   0
Here's a very detailed photo shoot of a 28" x 96" x 42" stand. This is only the skeleton. I will face it later on with Hickory.
This is also my complete cut list for this massive stand. You could modified the lengths to suit your stands needs. Let me know if you have any questions.

Cut List
2- 2x4x96
2- 2x10x96
8- 2x4x41 1/2
7- 2x4x25
7- 2x10x25
12- 2x4x285/8
Plywood 28x96
IMG_0071.JPG
IMG_0072.JPG
IMG_0073.JPG
IMG_0074.JPG
IMG_0075.JPG
IMG_0076.JPG
IMG_0077.JPG
IMG_0078.JPG
IMG_0079.JPG
IMG_0080.JPG
 
Last edited:

Harold Green

Well-Known Member
View Badges
Joined
May 21, 2014
Messages
812
Reaction score
281
Location
cleveland tx.
Rating - 0%
0   0   0
I don't know exactly what you have in mind but if you build your stand or rebuild the 125 stand so that the tops of both tanks are the same level you can plumb them together much easier or set the 300 up high enough that you can drill the end so it will drain down into the 125 and all you have to do is pump water from the 125 back into the 300. I'd consider making the 125 a refusium. One that large should be able to handle the 300 easily while the old sump can still be used for filter socks, heaters, skimmer if there's enough room.
 
OP
OP
H

Homer Allman

Active Member
View Badges
Joined
Jun 28, 2015
Messages
236
Reaction score
89
Location
Briery Branch, Va
Rating - 0%
0   0   0
Harold that is exactly my plan. The center braces are easily removable for me to get the 125 underneath. I will have an external pump doing to work below. It will take me some time to get it all together and figured out. Thank you for commenting and looking.
 

Harold Green

Well-Known Member
View Badges
Joined
May 21, 2014
Messages
812
Reaction score
281
Location
cleveland tx.
Rating - 0%
0   0   0
When I built my 210g last year I used a 75 for the sump. I built the stand so one end panel is removable to slide the 75 in as it won't fit through the front of the stand. I think the sump should be as large as you can make it. Just remember, big skimmers in the sump need plenty of overhead clearance to service and you may need to have a nearby cabinet to hold controllers and keep it all neat. It takes a bit of time but you have to plan on the sump holding drain down water and I like to allow for ato failure that might dump the entire ato reservoir into the sump. What's left will be the normal height of the sump water level and that will determine skimmer height if it's going in the sump.
 

Saybng

Active Member
View Badges
Joined
May 7, 2012
Messages
161
Reaction score
29
Location
Ventura
Rating - 0%
0   0   0
I noticed your building your stand on your brick driveway..hopefully when u move it to its resting place (hopefully level) that's it's not racked...just my 2€
 
OP
OP
H

Homer Allman

Active Member
View Badges
Joined
Jun 28, 2015
Messages
236
Reaction score
89
Location
Briery Branch, Va
Rating - 0%
0   0   0
The stand is in it's final resting place and it turned out fine. I did not use any glue in case I wanted to take it apart one day. It's sits on a concrete floor, so no worries about weight and I was able to get it level.


I have painted the back of the tank flat black. The only thing that is holding me back is knowledge and cash. Both will come with time. :) I did get my 300 lbs of black sand. It's just hanging idle though until I can get some more goodies. I will post more as I get it done.
 
Back
Top