Coral Beauty & the Clown Fish (Innovative EXT170)

JM302

Active Member
View Badges
Joined
Aug 20, 2012
Messages
201
Reaction score
272
Location
Charlotte, NC
Rating - 0%
0   0   0
Welcome to our build thread! As with about everything in life, my lovely wife @LeeLoo Lola and I will be sharing this build thread as this is our tank and our shared hobby. We've been reefing together for more than 20 years and this thread will chronicle our latest project.

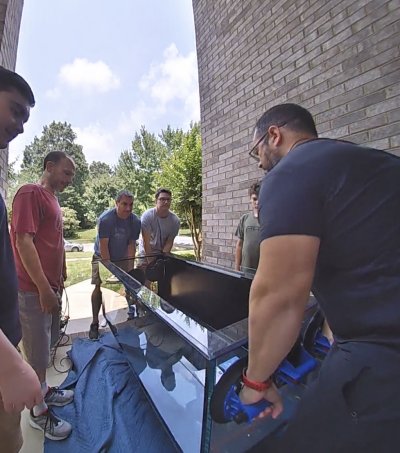
Dimensionally, this is my absolute favorite tank - ever. It's an Innovative Marine EXT170 - 59x30x22. I would have loved the EXT200 (+1ft longer), unfortunately the designated wall will only support the 5ft tank. We have a ~2 year old Innovative Marine EXT75 - it's too small. Great tank, nice quality. It's given us a run for our money too. It was our first and LAST dry rock / dry sand start.

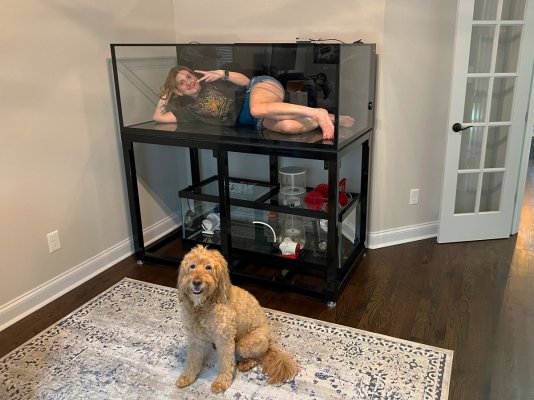
Although I really like the quality of the Innovative tank - I am NOT a fan of the APS stand - at all. It really surprises me that this seems to be such an unpopular opinion too. So with that said, my first project in preparation for the tank was to have a custom steel stand built.


Plans for the new 170:

(Strike-through items are deviations from the original plan. Bold are actuals)

LPS/Softie dominant - fish heavy (we love fish)
(3) XR15 G6 Pros
(2) 48" Blade Glows

40B Sump
60B Sump
Red Sea Reefmat 1200
or 500 (up for discussion)
25w AquaUV sterilizer (existing from my old 150 and already has a new bulb)
(2) Cor20's for Return (Currently have 1 on existing tank)
(1) Cor15 Fuge Pump (Currently feeding the external fuge)

Ecotech Vectra L2 Return Pump
(2) MP40mQD (From existing tank)
(2) Tunze 6095 (bought new with 15% off)
(1) Tunze 6208 Comline Wavebox
(1) Tunze 6105 Eco
Tunze 3155 ATO
(From existing tank)
20G External fuge with Kessil H160 Tuna Flora
In-sump fuge with Kessil H160 Tuna Flora
SRO XP2000 Skimmer - From my old 150G. Will replace the AC Pump with a new VarioS-4s
SRO XP2000 Skimmer with a VarioS-4s pump
100lbs Tampa Bay Saltwater Rock + Mature Rock from the 75g
170lbs Tampa Bay Saltwater Sand


Lots of decisions to make and can't wait to get some others opinions. I'm the gear guy. Chrissy is the coral / fish picker / feeder / money spender.

Current Fish list:
(1) Biota Yellow Tang
(1) White tail Bristletooth Tang
(1) Tomini Tang
(1) Magnificent Foxface
(1) Coral Beauty
(1) Flame Angel
(2) Watanabei Angels
(2) Semi-Storm Clowns
(1) Firefish
(1) Royal Gramma
(1) Starry Blenny
(1) Diamond Goby
(4) Lyretail Anthias
(2) Pajama Cardinals
(1) Bangaii Cardnial


More updates to follow!

The thread title wasn't my pick but I'm guessing I'm the clown in this scenario.

Timeline:

5/26 - APS Stand Review and Steel Stand Plans
7/1 - Tank moved to office
7/2 - Removed restrictions from the returns
7/3 - Some wood panels made for the stand
7/9 - Leak test and Plumbing
7/25 - Mounting APEX Modules on DIN Rail
8/11 - I've got crabs

Jeff & Chrissy
 
Last edited:
OP
OP
JM302

JM302

Active Member
View Badges
Joined
Aug 20, 2012
Messages
201
Reaction score
272
Location
Charlotte, NC
Rating - 0%
0   0   0
So the tank showed up unexpectedly today. For anyone considering an Innovative MTO (Made to Order) tank, they quoted me 12 - 16 weeks. It arrived exactly 16 weeks and 3 days after ordering.

I work from home... sat on meetings ALL day, dipped out for a few minutes to take a quick shower. Noticed my phone lighting up while I was in the shower. I jump out and check and I have a text message from an unknown number:

IMG_4932 2.jpg


I mean it was fine but sheesh.... I literally had NO idea the tank was being delivered today. Last I heard, Innovative had sent the tank to the shipper in California mid last week. We're in NC. Sooo yeah. Mad rush to get outside to meet the driver.

For anyone in the Charlotte NC Area that gets a delivery from YRC Freight... Sammy was fantastic. He let me inspect the tank, took all the wood from the crate back with him, helped me get the tank on the dollies, etc. He was super friendly and pleasant.

Here's the tank in all it's glory.... Silicone looks great. Glass is crystal clear. They even use low iron glass on the external overflow. I'm sure it's leftover from their smaller tanks... but still. Very happy with the construction.

IMG_4926.jpg


More to come ....
 
OP
OP
JM302

JM302

Active Member
View Badges
Joined
Aug 20, 2012
Messages
201
Reaction score
272
Location
Charlotte, NC
Rating - 0%
0   0   0
So - the stand...... Let's talk about that. This is two parts:

1: My dislike of the APS Stand
2: The creation of my steel stand

The APS Stand... I understand my opinion is unpopular here. Most people seem to really like the stand. From an aesthetic standpoint, it looks fine. The extruded aluminum is good too. What I do not like is the fastener system. I could only assume to make it easier on the end-user they use this cam-lock system to assemble the stand. It reminds me of something you'd get from IKEA.

On my EXT75, when I use my magnet cleaner, I can see the stand moving. It's completely unnerving.

Note to Innovative Marine: Should you use brackets with actual nuts and bolts to make the stand completely rigid... it would be much better. It would take a bit longer to assemble... but totally worth it. I'm sure there is a lot of engineering involved in designing this stand by people a lot smarter than me but you ought to consider using some real fasteners for assembly - especially on these larger tanks.

Now - onto the fun part. I'm in no way an expert in structure or Fusion 360 - but I went to Youtube University and did the best I could to learn it and design my stand.

I'm pretty involved in the car scene and because of that I have a lot of friends that are professional welders. I drew up this plan and gave it to my buddy who is a professional TIG welder. This is 2x2 HREW steel with .125 wall thickness. It was about $300 in materials and I spotted my buddy the cash for his welding materials (filler rods / argon gas / etc). All in (including the powder coating I was a little over $600).

f360.JPG

Although a simple design, there are a few things I accounted for:
1: The ability to easily attach a wooden face frame / doors without having to drill into the stand.
2: The ability to level it - perfectly.
3: The ability to hold the tank and maybe a car too.. at the same time.
4: Make sure there is no exposed steel or ways for the salt water to easily penetrate the structure.

My closest friend is a machinist. I had him make me the inserts for the levelers. They were designed to fit right into the 2x2 tubing and welded in.
334894842_871954674107170_4458767718145985951_n.jpg


The levelers were purchased from Grainger. They are 3/8-16 and good for 2,000lbs each. More than enough. Finding decent levelers that weren't astronomically expensive proved more difficult than I thought. I am quite satisfied with these. I also went to Lowes and found 2" round felt adhesive pads and attached them to the feet to protect my hardwood floors. The great thing is the bottom of the stand is off the floor, so if there was any water 'issue', I could get under the stand to dry it up.


grainger.JPG


Here are the inserts into the freshly cut legs

336519205_765336308175400_4102996638241604021_n.jpg


Watching my design come to life was exciting! The frame is just tack welded at this point.

327035972_1395643524502473_7302359142246082518_n.jpg


Grabbed the truck and picked the completed stand up and sent it off to the powder coater. Minor challenge during the fab... my friend is a professional welder but not a professional fabricator. We had a little bow in the top rail from the heat. Minor issue. We were able to heat it back up and flatten it out w/o much of a problem. Powder coating...$137. Can't beat that.

IMG-4895.jpg


And this will be the final resting place for the tank when the time comes

IMG-4930.jpg


Clearly the carpet won't be under there once the tank is in place. Chrissy needs to find something smaller.
 
OP
OP
JM302

JM302

Active Member
View Badges
Joined
Aug 20, 2012
Messages
201
Reaction score
272
Location
Charlotte, NC
Rating - 0%
0   0   0
Big (busy) week ahead of us.

The delay in setting up the new 170 is we're about to have our hardwood floors refinished. Our home is about 15 years old and with our two doodles using the downstairs as a race track, they've done a number to the floor's finish. Shelby (the youngest) is finally losing that crazy puppy energy and although I would have preferred to wait another year to have them done, the incoming 170 is sort of making this a now or never decision. After some debate, we've decided NOW is the answer. With that we need to empty the entire downstairs, including the existing tank / fuge. The floor sanding starts next Monday, June 5th.

Here's the two nut jobs. Shelby is the middle.

346994286_1590538078118952_4293339900050377375_n.jpg
346641907_274098191719423_1306526449575575077_n.jpg
346969924_185739970666352_8777066694189169601_n.jpg


Moving the 75 is going to be stressful for me especially considering it will be from Office -> Garage -> Office -> 170. I'm going to have to space things out a bit to reduce stress on the fish and coral. I am lucky to have some great help though. The move will happen on Saturday.

I have a mini split (Heat & A/C) in the Garage, so I'll be able to keep it right at 75 degrees day and night while the tank is there.

The high-level plan is:

1: Have a lot of extra water made and ready (100g)
2: Drain Tank / Sump / Fuge into the 40 breeders and a few buckets
3: Move rock / corals and fish (except for sand) to the breeders. I also have a 100G Rubbermaid trough in the case I need it.
3: Relocate Tank / Stand / Fuge
4: Put it back in the 75 exactly the way it was.

I'm thinking this disturbance won't cause much of any mini cycle. It should be quick and painless. I'd expect the rock structures and corals to be in the 40b for an hour or two tops.

IMG-4934.jpg

The Fuge is 20G High Aqueon tank drilled with a Modular Marine Overflow fed by a cor15 at 40%. I'll post more on that another day. All I can say is I love it.

Wish me luck........ I feel like I'm going to need it.
 

hans4811

Active Member
View Badges
Joined
Dec 30, 2019
Messages
425
Reaction score
393
Location
Jax, FL
Rating - 0%
0   0   0
Question…could you not have taken the APS stand and just ‘reinforced’ it with some strategically placed aluminum bar and tig welded those in, rather than starting from scratch ?

I ask as I’m thinking of upgrading with this tank as well and I’ve heard the same thing about that stand, sadly, but that was my first thought…

love the dimensions on it…the xtra wide 30”

can you post a pic of the APS stand ? Dying to see what this thing looks like and why it’s so bad !
 
Last edited:
OP
OP
JM302

JM302

Active Member
View Badges
Joined
Aug 20, 2012
Messages
201
Reaction score
272
Location
Charlotte, NC
Rating - 0%
0   0   0
Question…could you not have taken the APS stand and just ‘reinforced’ it with some strategically placed aluminum bar and tig welded those in, rather than starting from scratch ?

I ask as I’m thinking of upgrading with this tank as well and I’ve heard the same thing about that stand, sadly, but that was my first thought…

love the dimensions on it…the xtra wide 30”

can you post a pic of the APS stand ? Dying to see what this thing looks like and why it’s so bad !

The extruded aluminum is powder coated, so to tig weld, you'd need to do some grinding. By time you cleaned it up, tig'd it and had the powder coat fixed.... I'm not sure you'd gain any ground. I tried to find extruded aluminum fasteners that would work with the APS but no such luck. The way those cam locks are designed take up the entire space.

Had I not had a friend who was a professional welder, I would have bought one of those extruded aluminum stands that have real fasteners. Those are super rigid and safe compared to this APS design.

The APS stand for the 170 will never come out of the box - I'll just sell it for cheap money so I don't have to store it.

It's tough to get this on video but check this out from my 75 with the APS stand. I'm BARELY doing anything. Watch the water line and watch the green leather. This was like a 2 finger push... So translate that into a magnet cleaner and it's doing the same exact thing. It's no bueno.


OP
OP
JM302

JM302

Active Member
View Badges
Joined
Aug 20, 2012
Messages
201
Reaction score
272
Location
Charlotte, NC
Rating - 0%
0   0   0
And we're back...... The good news is I'm back working in my office and the tank is in here safely with me!

The tank was heavy, but not as heavy as I was prepared for. I borrowed 8 suction cups from my LFS, got some friends together and made the plan. The tank was already on dollies, so we wheeled it from the garage to the front porch.

2023-07-02_13-48-41_000.jpg


2023-07-02_13-47-11_000.jpg

People of all ages coming to help! One of my friends took the initiative to go measure clearances with the front door. Turns out, the tank is 33.5 inches with the overflow and I had a little less than that with the door hung on the 36" door. So the door came down for the extra space.

I popped the door from the hinges while the rest wheeled the tank, and we began to execute the plan. If @LeeLoo Lola wasn't hiding during the move, I would have had better pictures, so security camera pics will have to do. Once it was in the doorway, we had a heavy duty rubber wheeled dolly ready. We sat the tank down on the dolly and wheeled the back half over the threshold and a short trip to the office. The tank was easily dead lifted onto the stand and put in place.

2023-07-02_13-44-36_000.jpg
2023-07-02_13-44-44_000.jpg

Look Mom, 1 hand.... This guy alone made this move easy.

2023-07-02_13-43-22_000.jpg

Some blankets on the freshly refinished hardwoods and the rubber wheeled dolly ensured we didn't damage anything. That dolly was LIFE saving for the inside move. It has 4 casters so it was easy to swing around the corner.

2023-07-02_13-18-06_334 (1).jpg

2023-07-02_13-18-17_826 (1).jpg

And of course, the obligatory 'I can fit in the tank' shot...


2023-07-01_19-20-32_492.jpg

That stand though.. I'm in love (the girl isn't bad either :face-blowing-a-kiss:). This baby does not suffer from the 'APS wobble' ™

Tomorrow I'll talk about plumbing... I have a lot of thoughts and found a disturbing 'feature' of this tank which my EXT 75 does not have. And oh yeah, the 40B was a no go.... too small after I realized my dedicated external fuge idea wasn't going to fit the way I wanted it to, so a 60B with a fuge section it is.

Updates will be coming much more frequently now! I'm hoping to put my TBS order in in the next two weeks. I'm waiting for a custom-made PVC fitting for the return pump and once that comes in - I'll get er' going.
 

Attachments

  • 2023-07-02_13-44-37_000.jpg
    2023-07-02_13-44-37_000.jpg
    313.2 KB · Views: 65
  • 2023-07-01_19-20-32_492.jpeg
    2023-07-01_19-20-32_492.jpeg
    204.6 KB · Views: 47

billyocean

10K Club member
View Badges
Joined
Feb 10, 2018
Messages
27,757
Reaction score
46,429
Location
Atlanta
Rating - 0%
0   0   0
Nice! Are you going to wrap the stand legs and attach the skin with doors or use inset magnets where you can pull of panels?
 
OP
OP
JM302

JM302

Active Member
View Badges
Joined
Aug 20, 2012
Messages
201
Reaction score
272
Location
Charlotte, NC
Rating - 0%
0   0   0
Nice! Are you going to wrap the stand legs and attach the skin with doors or use inset magnets where you can pull of panels?
I put those little tabs in each corner of the stand with a hole in them. I'll use screws from the inside to attach a face frame, then build and install doors. If I need to remove it all for whatever reason, 10 screws or so and It's off.
 
OP
OP
JM302

JM302

Active Member
View Badges
Joined
Aug 20, 2012
Messages
201
Reaction score
272
Location
Charlotte, NC
Rating - 0%
0   0   0
A trip to Lowe's and two sheets of 1/2" MDF later I've got some interior walls and a floor on the stand. Had to get creative to fit the bottom, but it came out great. My intention is to prime the MDF then install some shower pan liner to create a basin of sorts.... just in case. Can't ruin these new floors.

Here's the progress for the day:
IMG_5027.jpg
 
OP
OP
JM302

JM302

Active Member
View Badges
Joined
Aug 20, 2012
Messages
201
Reaction score
272
Location
Charlotte, NC
Rating - 0%
0   0   0
If you own this tank, about to setup this tank, or are considering purchasing a similar IM tank...... they're very nice. For a mass produced tank, they are so close to perfect.... The few things that make it 'imperfect' are so easily avoidable. I don't comprehend some of the decisions here. Let's talk about the return bulkhead and the locline that is installed.

The bulkhead. It's very nice. Gasket in the front, o-ring on the back. Heavy duty. I like it.

8.jpg

6.jpg

This is the locline they send along with the tank

1.jpg

Obviously there are two of them - but here's where it gets fun.

10.jpg

That's how much it's restricted before going into the locline wye. That hole is TINY. So all the flow of your tank is going through two holes that size. I ended up going with a Vectra L2 for my return. That is a large pump for this tank, but I had planned on running it around 50% or whatever looks right flow wise. Those restrictions would make that pump, or any pump for that matter, unbelievably inefficient.

What's even more interesting is they glue in a small bushing as seen in the next picture.

4.jpg

This allows the locline wye to push in as shown below. Not to mention you can also see how grossly undersized the locline is.

5.jpg

So that bushing - it's glued in and it's metric. So utility knife came out and I removed the bushing.

9.jpg

Success... now I can put a 3/4" locline adapter in there. Oh guess what? The entire fitting on the inside is metric. So the outside is 3/4" - the inside is 25mm. *Sigh*. One of the reasons I appreciated IM Tanks was the SAE fittings.

The return holes in the tank are too small for a traditional bulkhead - so changing bulkheads was not an option.

I put my thinking cap on and was trying to find a way to adapt 25mm to 3/4". Out comes Fusion 360 and luckily McMaster-Carr sells locline. I imported a 3/4" male locline threaded adapter, created a construction plane where the threads started and added a 25mm OD slip fitting.

12.png

I sent this to my buddy who loves to 3d print. He pulled out some black ABS and an hour later this popped out.

11.jpg

Great news, it works perfectly. It presses in to the bulkhead firmly and the 3/4" locline fit perfectly on the other end.

Success for real this time.... I'll be running 1" all the way up to that 90 at which it reduces to 3/4". The pump will have 1.25" which will split to (2) 1" lines.

7.jpg

It's 1.5mm shy of 3/4" all the way through. Huge improvement. Something so simple shouldn't be quite this challenging.

13.jpg

For the record, my EXT 75 does not have these bulkheads. They were true 3/4" on both sides.

So for anyone that doesn't want to needlessly overwork their return pumps - this will make a huge difference.

A bunch of stuff is showing up later this week. Not sure what's next. I'm sort of stuck until my custom made pvc fitting arrives for the return pump. Though I have been laying in bed at night thinking of cable management... ooof.
 
OP
OP
JM302

JM302

Active Member
View Badges
Joined
Aug 20, 2012
Messages
201
Reaction score
272
Location
Charlotte, NC
Rating - 0%
0   0   0
Back to the return plumbing.... after lots of searching on the interwebs, I found a manifold that I'm going to use on my return pump. I had two goals really:

1: Make the return system as efficient and least restrictive as possible (oversized pipe)
2: Use as few 90° fittings as possible

The idea here is - 1 1/4" nylon hose out of the pump (Vectra L2) to a 1 1/4" barb into the bottom of the manifold. The manifold outputs will be reduced to 1" and return to the tank.

The idea of running into a 90 degree tee wasn't appealing. I think every tank in my life had been run directly into a tee. I think flow meters really opened up my eyes here - when you're dealing with 5 feet of actual head pressure with a 2000GPH pump and between the head pressure and 90's you end up pushing 400gph at 100%..... meh.

There are many advantages of having an efficient return plumbing setup. The two I'm hoping for are:

1: Increased efficiency: Less power consumption with higher flow
2: Increased longevity: Less wear and tear on the pump by running at reduced RPM

2023-07-07_11-37-45_302.jpg 2023-07-07_11-38-05_133.jpg 2023-07-07_11-37-52_651.jpg

Assuming UPS isn't lying to me..... The rest of what I'm waiting for should be here today. This weekend I hope to configure the sump, tackle the plumbing AND leak test....... If that all goes well, TBS order on Monday.
 

Algae invading algae: Have you had unwanted algae in your good macroalgae?

  • I regularly have unwanted algae in my macroalgae.

    Votes: 39 34.2%
  • I occasionally have unwanted algae in my macroalgae.

    Votes: 23 20.2%
  • I rarely have unwanted algae in my macroalgae.

    Votes: 9 7.9%
  • I never have unwanted algae in my macroalgae.

    Votes: 8 7.0%
  • I don’t have macroalgae.

    Votes: 31 27.2%
  • Other.

    Votes: 4 3.5%
Back
Top