Hi Folks,
I thought I would share with you my simple, cheap and easy to build DIY Anemone guard for my MP40’s. In Australia, it’s often hard to find the right tools and parts to follow other peoples designs. Looks ugly sure, but I can’t see how you could make one that isn’t.
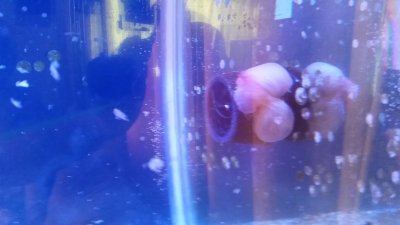
As you can see in the first picture the need to have guards when you first introduce an Anemone (aka NEM) into your tank (or permanently as they can move at anytime). My BTA floated straight into the Vortech within the first hour despite introducing it into the tank already attached to a rock. The Vortech foam covers work brilliantly and saved me that time, but I found within 12-24 hours the flow would be restricted by at least 50%, then 75%+ within 48hours as they clog up with food and detritus. My first generation guards used flyscreen, or small mesh holes but like the foam protectors they just clog up after a few days. So I knew I needed the guard to have large enough intake holes to not clog, yet small enough to not allow a small NEM to get through into the propellers.
It works by stopping a NEM from getting chopped up by the propeller if it gets sucked into the sides. It's tentacles hopefully aren’t long enough to get into the propeller (use at your own risk, measure the distance between your protector and the propeller vs the size of the NEM tentacles), and at the very least it might give some of the tentacles a haircut but its foot/body/base can’t get sucked in. The front is OK to stay open as the force of the powerhead will blow the NEM away from it. The design isn’t 100% safe, for example, if you had a power outage (and no battery backup tisk tisk) the NEM could float inside the protector then when the power returns it gets sucked in and chopped up – extremely unlikely given the powerhead is off so not it won't be ‘sucking’ the NEM in, in the first place.
Steps;
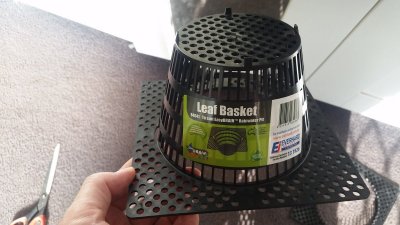
1. (AUS) – Get a water tank leaf collector from Bunnings - $7.85 as per photo
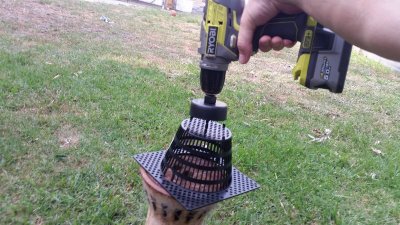
2. Safety Glasses on - use a Holesaw 76mm (or closest you can find to 80 or 3 1/8”) and drill a hole right in the middle (< 80mm for an MP40, for MP10 it would be smaller, MP60 larger). Don't go wider than 80mm, this only works if the hole on your protector is smaller than the magnet side of the Vortech wetside.
3. Safety Glasses on - use a Dremel (or round metal file or sandpaper if you have all day) to slightly widen the hole after you drill it by a few mm, go slow and stop to test pushing the MP40 wet side head into it regularly to make sure you don’t go too far. Again a tight grip, careful not to break your vortech ‘cage’ by using too much force. You want it tight enough to hold on, but loose enough to be able to take on and off without much force/effort/risk of damage (for future cleaning of the wet side)
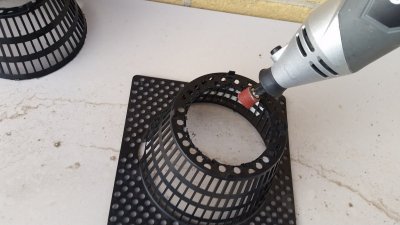
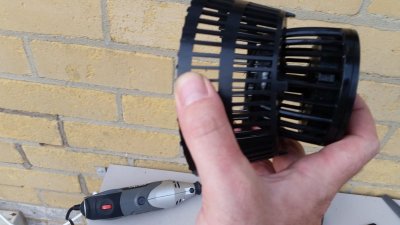
The design is forgiving if you don’t make a clean hole or the cut looks ugly, you just want to be able to gently push the vortech wet side head into the hole so it's a tight fit all the way up to the base, but not so tight that the protecter pushes itself back out under force. It is this tight grip that allows it to hold on and not get blown out when you turn the Vortech back on
Once your Vortech wet side fits snug in the hole;
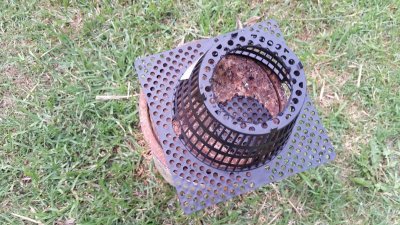
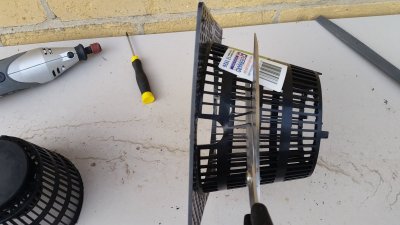
4. Get some sharp scissors, cut around the middle ring as per photo to separate the top and bottom half. Use the dremel again to smooth off the little ‘tabs’ left standing
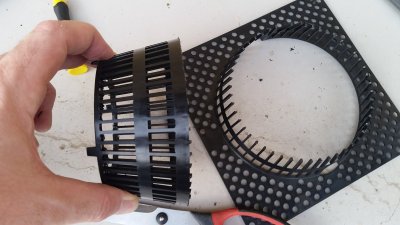
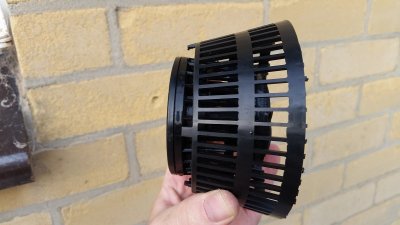
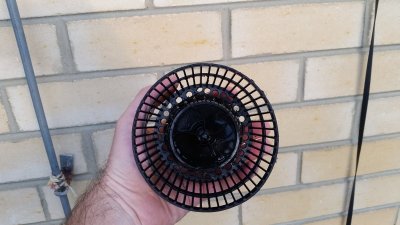
5. Wash the Vortech wet side and new protector thoroughly to get off any plastic burs, then give it a test drive. If the hole is the right size it should fit perfectly and stay on when the Vortech is run at full power. Mine haven’t come off in over a months use now…
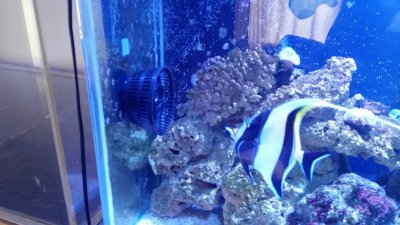
<Gill always be photo bombing>
I thought I would share with you my simple, cheap and easy to build DIY Anemone guard for my MP40’s. In Australia, it’s often hard to find the right tools and parts to follow other peoples designs. Looks ugly sure, but I can’t see how you could make one that isn’t.
As you can see in the first picture the need to have guards when you first introduce an Anemone (aka NEM) into your tank (or permanently as they can move at anytime). My BTA floated straight into the Vortech within the first hour despite introducing it into the tank already attached to a rock. The Vortech foam covers work brilliantly and saved me that time, but I found within 12-24 hours the flow would be restricted by at least 50%, then 75%+ within 48hours as they clog up with food and detritus. My first generation guards used flyscreen, or small mesh holes but like the foam protectors they just clog up after a few days. So I knew I needed the guard to have large enough intake holes to not clog, yet small enough to not allow a small NEM to get through into the propellers.

It works by stopping a NEM from getting chopped up by the propeller if it gets sucked into the sides. It's tentacles hopefully aren’t long enough to get into the propeller (use at your own risk, measure the distance between your protector and the propeller vs the size of the NEM tentacles), and at the very least it might give some of the tentacles a haircut but its foot/body/base can’t get sucked in. The front is OK to stay open as the force of the powerhead will blow the NEM away from it. The design isn’t 100% safe, for example, if you had a power outage (and no battery backup tisk tisk) the NEM could float inside the protector then when the power returns it gets sucked in and chopped up – extremely unlikely given the powerhead is off so not it won't be ‘sucking’ the NEM in, in the first place.
Steps;
1. (AUS) – Get a water tank leaf collector from Bunnings - $7.85 as per photo

2. Safety Glasses on - use a Holesaw 76mm (or closest you can find to 80 or 3 1/8”) and drill a hole right in the middle (< 80mm for an MP40, for MP10 it would be smaller, MP60 larger). Don't go wider than 80mm, this only works if the hole on your protector is smaller than the magnet side of the Vortech wetside.


3. Safety Glasses on - use a Dremel (or round metal file or sandpaper if you have all day) to slightly widen the hole after you drill it by a few mm, go slow and stop to test pushing the MP40 wet side head into it regularly to make sure you don’t go too far. Again a tight grip, careful not to break your vortech ‘cage’ by using too much force. You want it tight enough to hold on, but loose enough to be able to take on and off without much force/effort/risk of damage (for future cleaning of the wet side)


The design is forgiving if you don’t make a clean hole or the cut looks ugly, you just want to be able to gently push the vortech wet side head into the hole so it's a tight fit all the way up to the base, but not so tight that the protecter pushes itself back out under force. It is this tight grip that allows it to hold on and not get blown out when you turn the Vortech back on
Once your Vortech wet side fits snug in the hole;
4. Get some sharp scissors, cut around the middle ring as per photo to separate the top and bottom half. Use the dremel again to smooth off the little ‘tabs’ left standing


5. Wash the Vortech wet side and new protector thoroughly to get off any plastic burs, then give it a test drive. If the hole is the right size it should fit perfectly and stay on when the Vortech is run at full power. Mine haven’t come off in over a months use now…


<Gill always be photo bombing>


