So this all began back in January but I will get started with the background and then try to get up to speed over the next few posts.
This is my first time diving into an aquarium of any kind, let alone a reef tank, so needless to say it has been both extremely intimidating and exciting. After doing way too many hours of reading and watching and creeping around on this forum, I finally decided to place an order for one of the new ProStar ProClear Rimless tanks that were supposed to roll out at the beginning of the year. After several delays from China when the virus initially broke out over there, the first shipment of tanks finally came in and none of the peninsula tank orders had been fulfilled. There was initially no indication when they would come in or if they would even come in at all which was a huge blow to the initial excitement and anticipation, and I had already run a new 20amp outlet, ripped out the carpet and l put in waterproof vinyl flooring (can be seen in later photos), built the mixing station and installed the RO/DI system, and reinforced the floor joists.


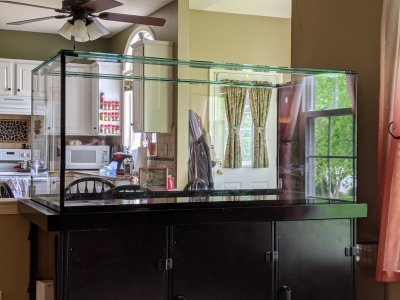
So to keep the momentum going, I decided I was going to go even bigger and get everything custom made. This put me in contact with Pat at Coast to Coast Custom Aquariums. He responded to my original inquiry within minutes and after a day or two of back and forth and discussing all of the options it was decided that I would go with a 62" x 31.5" x 28" euro braced peninsula with an external scupper box as he called it. He sent updates throughout the process and even as the virus escalated and everything was shutting down, he still managed to meet his original guaranteed 10 week deadline. I cannot recommend Pat and Coast to Coast enough as the tank itself is absolutely gorgeous and his service and communication were top notch.

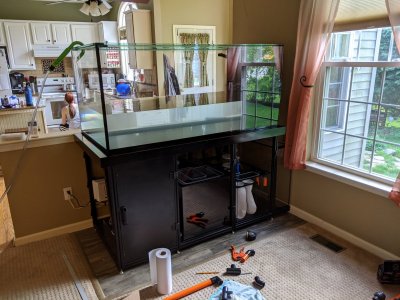
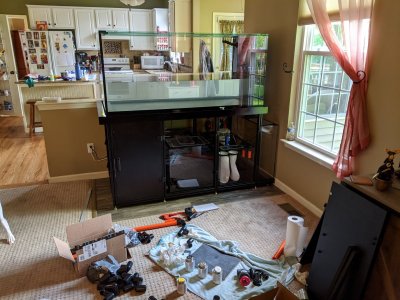
Once the tank size was determined, I started figuring out the stand and the sump. Originally I was going to have a coworker help to weld a steel stand, but I was barely going to be able to get the tank in the house and did not see how I was going to get the stand in. I had seen a few examples here and there of stands using aluminum extrusions. I reached out to Rankin Automation and they quickly turned around rendering which was exactly what I was looking for. But this too turned into an adventure as the first shipment came quicker than expected, but they made the whole thing from clear silver instead of the black anodized. They were extremely accommodating and re-placed the order immediately with no questions asked. This, however, took much longer than expected with the quarantine in full swing, and I was counting down the days hoping it would arrive before I had to pick the tank up. Luckily it did arrive in time and was actually a breeze to assemble. Here it is with some of the panels and the battery backups already mounted.

Overall, process working with Rankin was extremely smooth and the customer service was exceptional so I would highly recommend using them as well.
For the sump, I went back and forth several times between getting something custom made or just going with one of the generic pre made sumps. I wanted a larger refugium than anything I found that would fit under the setup, so ultimately I went with a 2 tank sump and separate ATO reservoir from Modular Marine. The response time was fantastic and there was constant communication throughout the process for updates, modifications, and working out the details. Also got photos of this progression along the way as well.

So now I can happily sit here and say that the initial setback in the first tank wound up turning into a much more fun and rewarding (albeit more expensive) process and without a doubt have a setup that I am much happier with. All of the vendors I mentioned above were all exceptional to work with and would highly recommend to anyone.
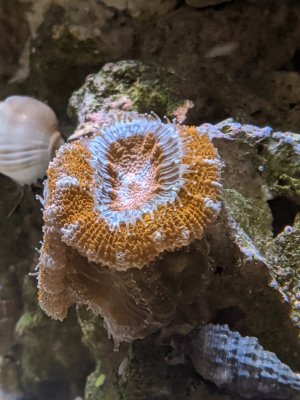
That is all I have time for now but will try to get another update in later tonight. Everything is currently setup and running with some fish and a few corals so there is still plenty before I get all caught up.
This is my first time diving into an aquarium of any kind, let alone a reef tank, so needless to say it has been both extremely intimidating and exciting. After doing way too many hours of reading and watching and creeping around on this forum, I finally decided to place an order for one of the new ProStar ProClear Rimless tanks that were supposed to roll out at the beginning of the year. After several delays from China when the virus initially broke out over there, the first shipment of tanks finally came in and none of the peninsula tank orders had been fulfilled. There was initially no indication when they would come in or if they would even come in at all which was a huge blow to the initial excitement and anticipation, and I had already run a new 20amp outlet, ripped out the carpet and l put in waterproof vinyl flooring (can be seen in later photos), built the mixing station and installed the RO/DI system, and reinforced the floor joists.
So to keep the momentum going, I decided I was going to go even bigger and get everything custom made. This put me in contact with Pat at Coast to Coast Custom Aquariums. He responded to my original inquiry within minutes and after a day or two of back and forth and discussing all of the options it was decided that I would go with a 62" x 31.5" x 28" euro braced peninsula with an external scupper box as he called it. He sent updates throughout the process and even as the virus escalated and everything was shutting down, he still managed to meet his original guaranteed 10 week deadline. I cannot recommend Pat and Coast to Coast enough as the tank itself is absolutely gorgeous and his service and communication were top notch.
Once the tank size was determined, I started figuring out the stand and the sump. Originally I was going to have a coworker help to weld a steel stand, but I was barely going to be able to get the tank in the house and did not see how I was going to get the stand in. I had seen a few examples here and there of stands using aluminum extrusions. I reached out to Rankin Automation and they quickly turned around rendering which was exactly what I was looking for. But this too turned into an adventure as the first shipment came quicker than expected, but they made the whole thing from clear silver instead of the black anodized. They were extremely accommodating and re-placed the order immediately with no questions asked. This, however, took much longer than expected with the quarantine in full swing, and I was counting down the days hoping it would arrive before I had to pick the tank up. Luckily it did arrive in time and was actually a breeze to assemble. Here it is with some of the panels and the battery backups already mounted.
Overall, process working with Rankin was extremely smooth and the customer service was exceptional so I would highly recommend using them as well.
For the sump, I went back and forth several times between getting something custom made or just going with one of the generic pre made sumps. I wanted a larger refugium than anything I found that would fit under the setup, so ultimately I went with a 2 tank sump and separate ATO reservoir from Modular Marine. The response time was fantastic and there was constant communication throughout the process for updates, modifications, and working out the details. Also got photos of this progression along the way as well.
So now I can happily sit here and say that the initial setback in the first tank wound up turning into a much more fun and rewarding (albeit more expensive) process and without a doubt have a setup that I am much happier with. All of the vendors I mentioned above were all exceptional to work with and would highly recommend to anyone.
That is all I have time for now but will try to get another update in later tonight. Everything is currently setup and running with some fish and a few corals so there is still plenty before I get all caught up.


