Maggie's 7 gallon hex build

Mhamilton0911

BitterSalty
View Badges
Joined
Jul 8, 2021
Messages
4,390
Reaction score
20,924
Location
Idaho
Rating - 0%
0   0   0
And like magic, another tank appears! Voila!
Black Magic GIF by Little Mix


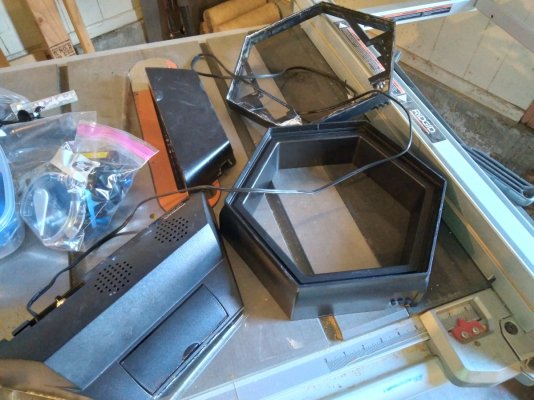
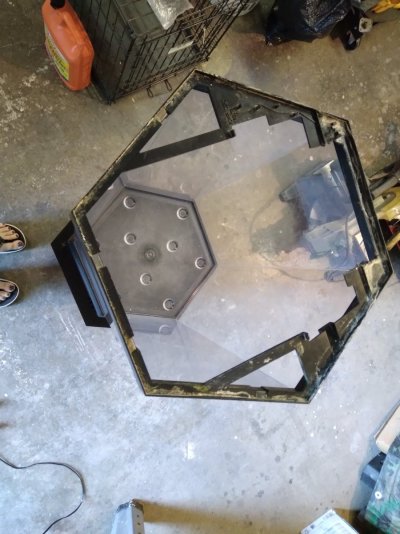
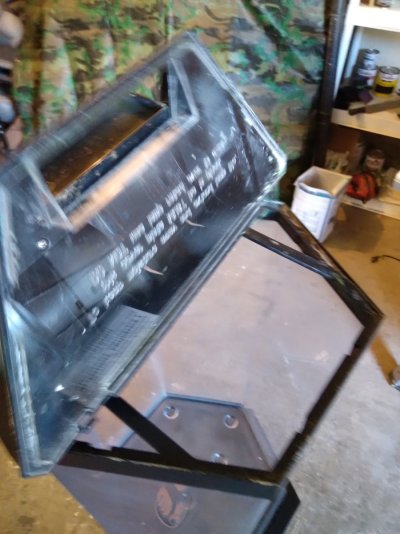
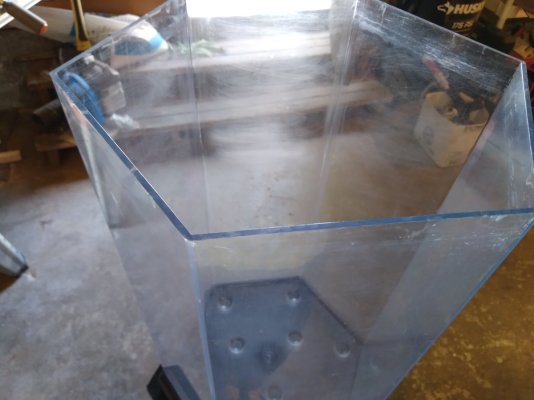
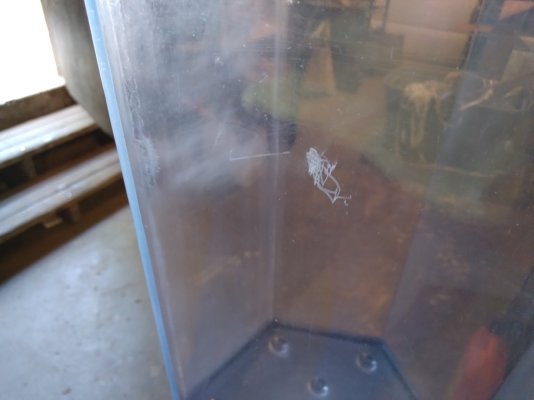
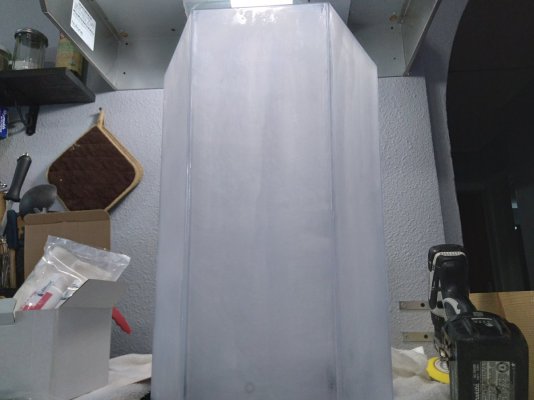
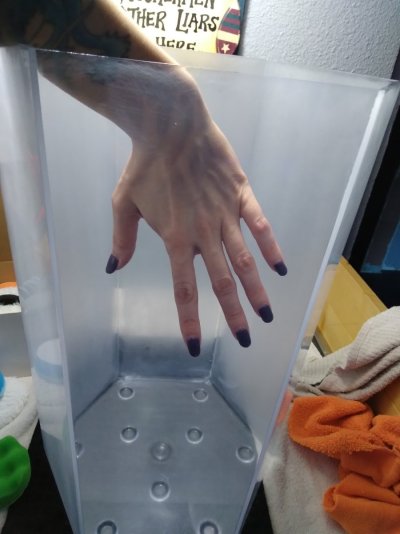
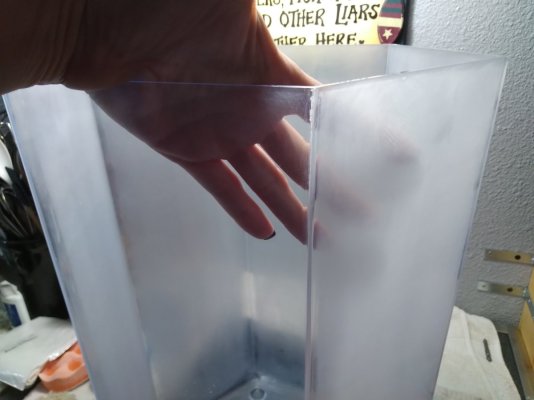
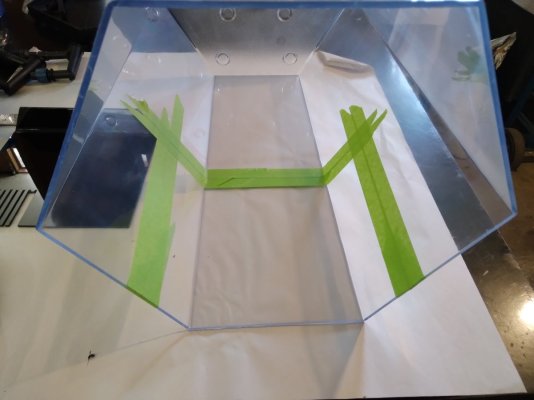
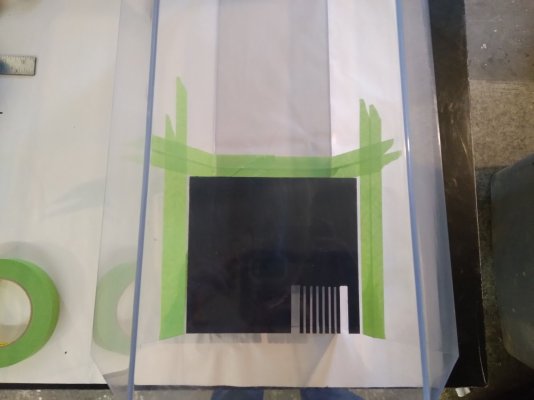
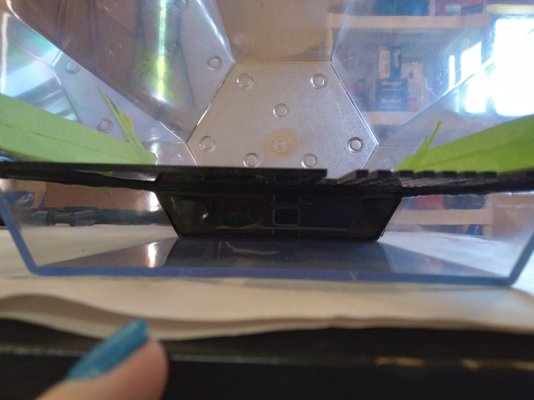
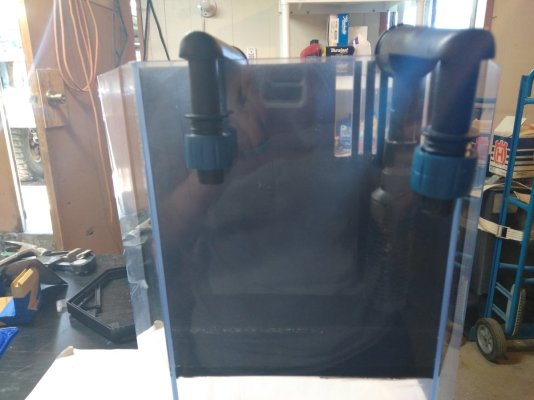
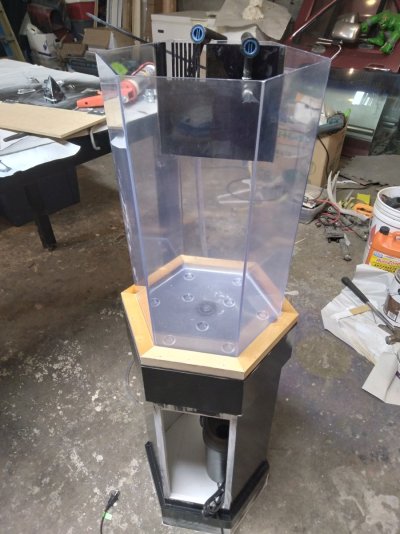
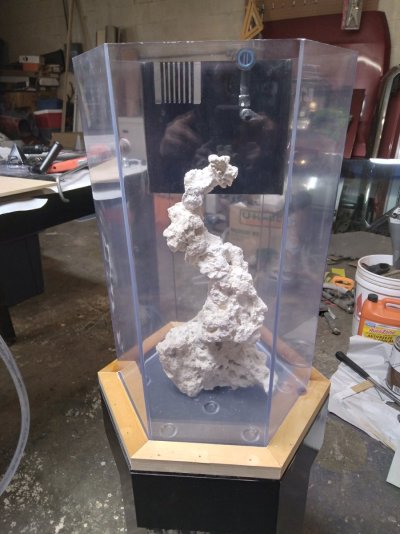
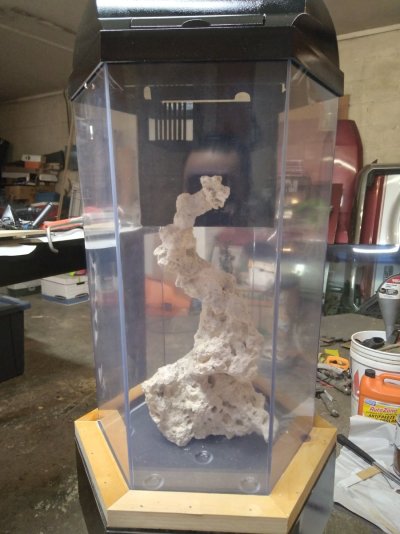
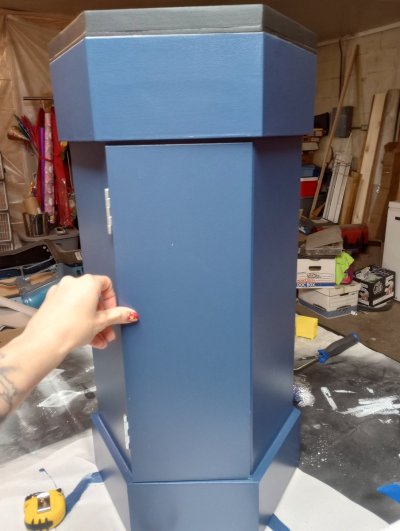
Enter the 7 gallon hexagon acrylic tank! I liked the tall and narrow footprint and it just spoke to me.
20220826_101816.jpg


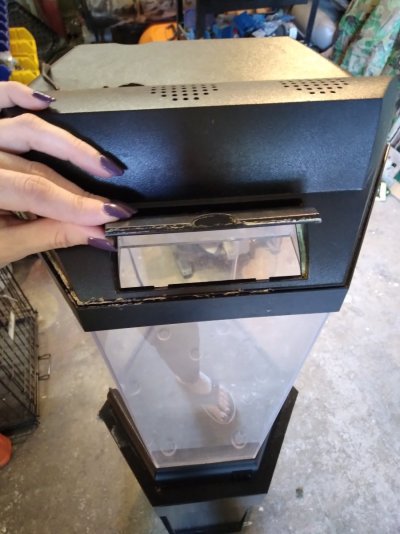
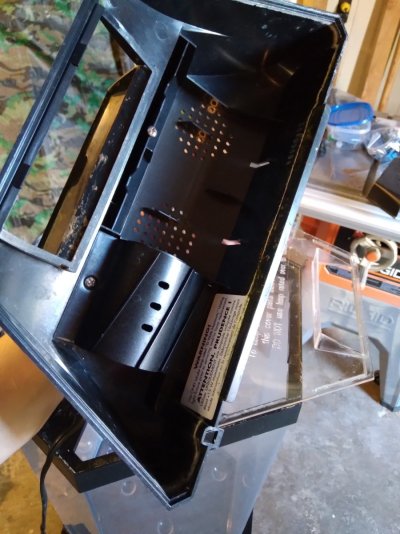
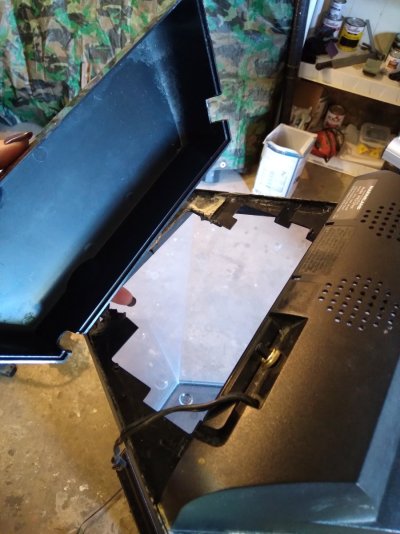
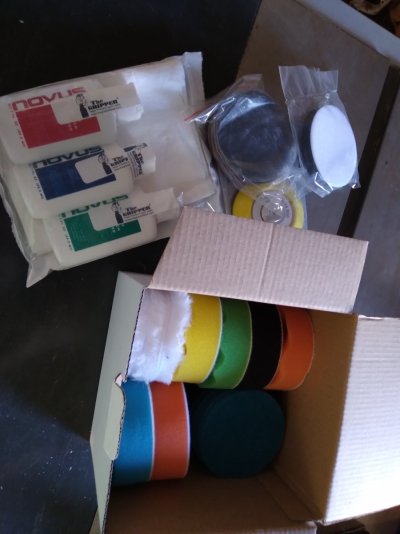
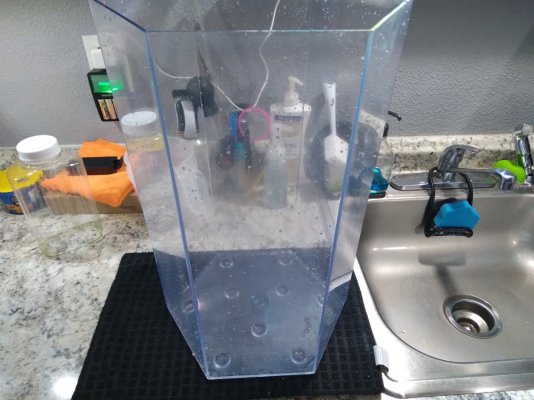
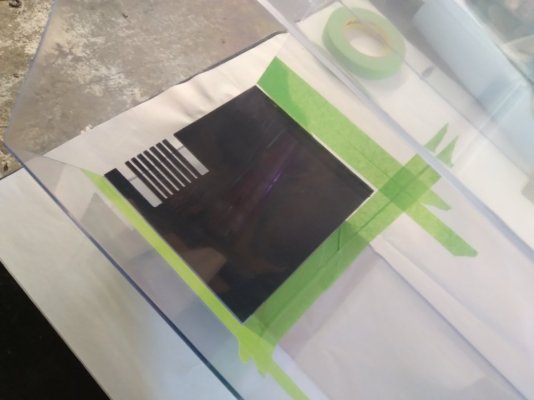
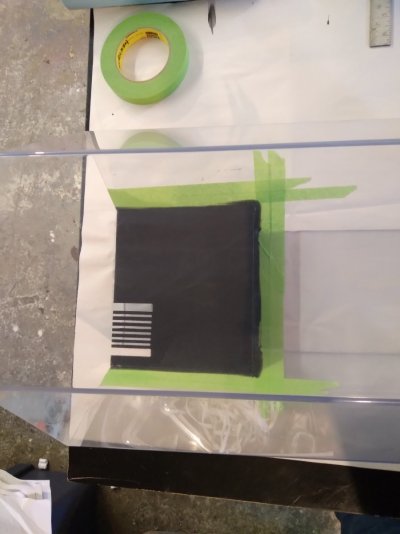
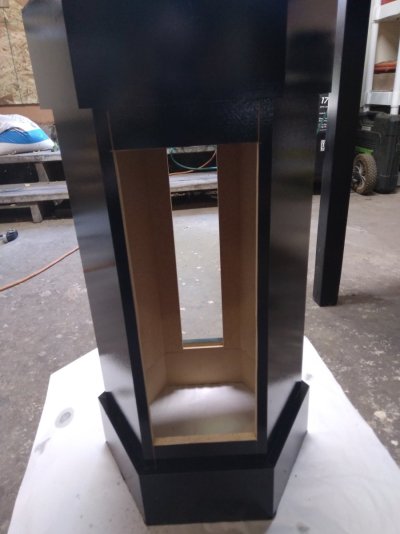
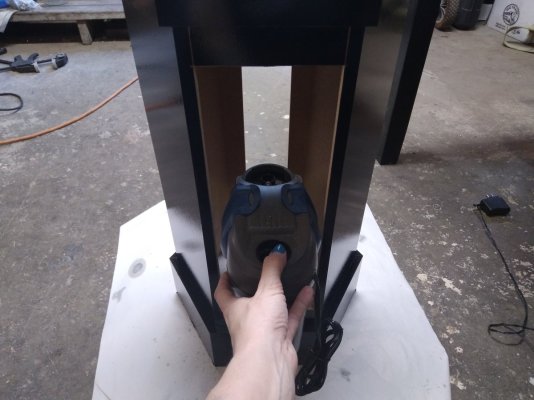
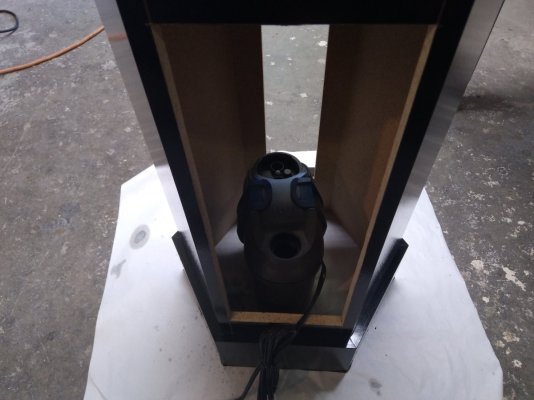
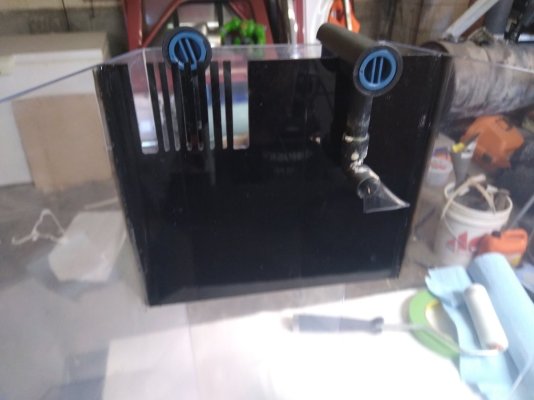
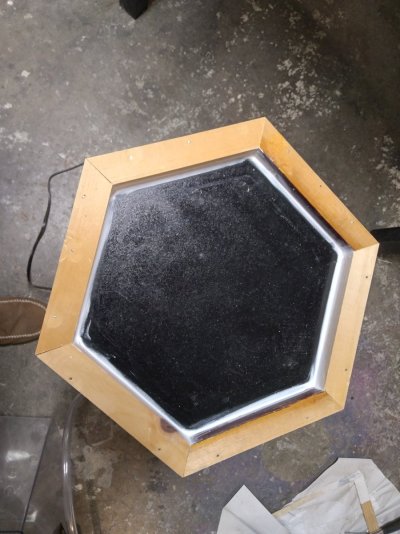
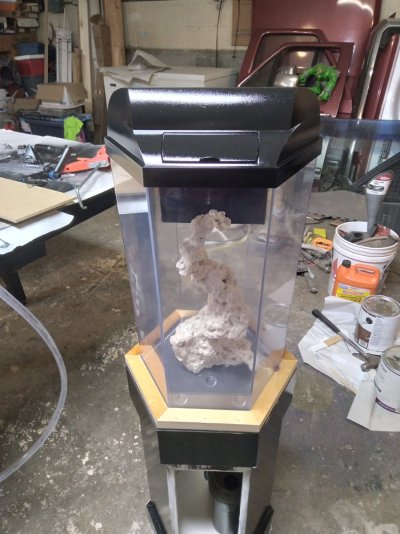
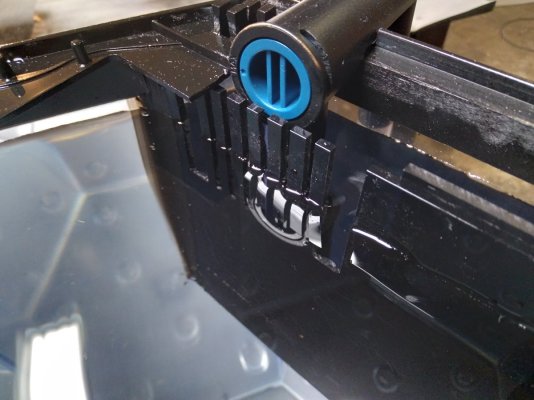
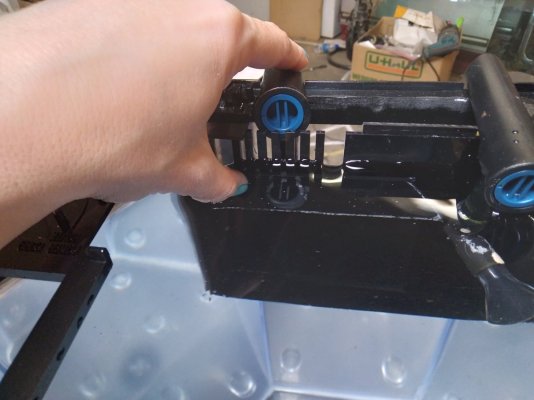
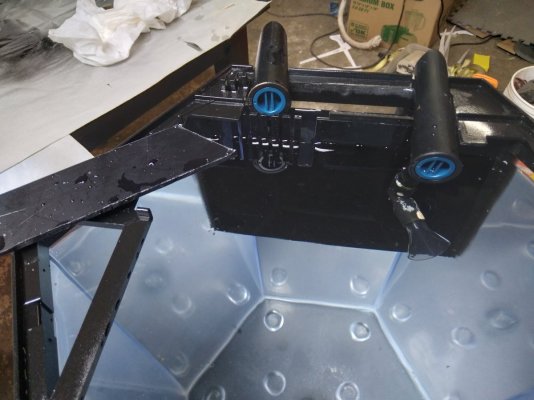
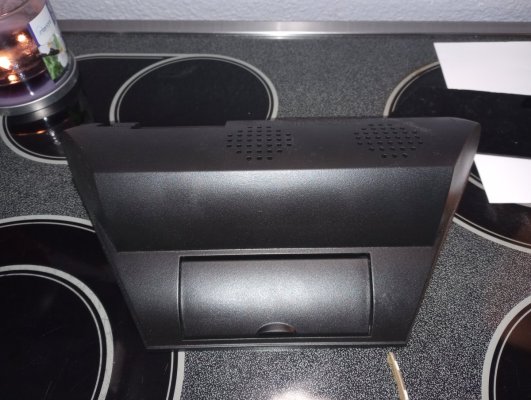
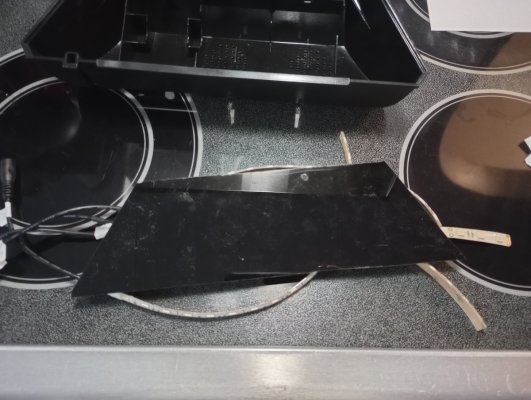
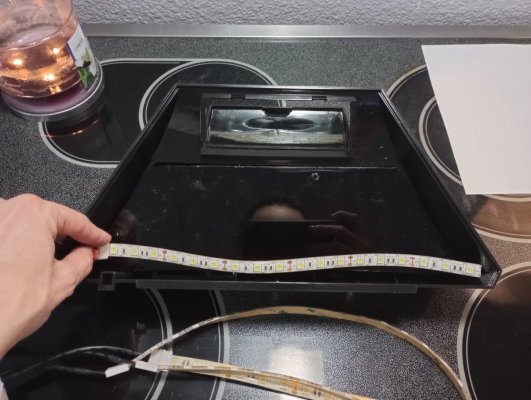
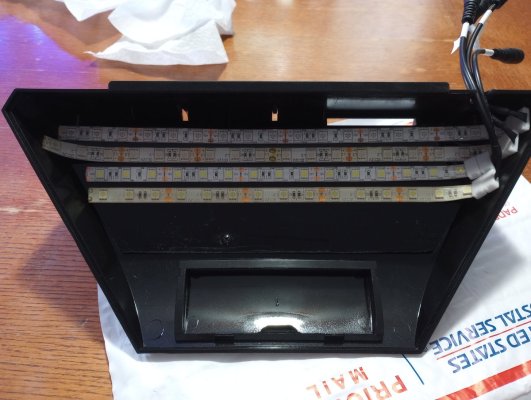
It came with the stand, and a base for the tank to sit in/on but considering the rock I'll have on the bottom I think it's safer to be directly on the wood. It also came with a plastic trim ring, and 2 covers for the light and what was once built in filtration.

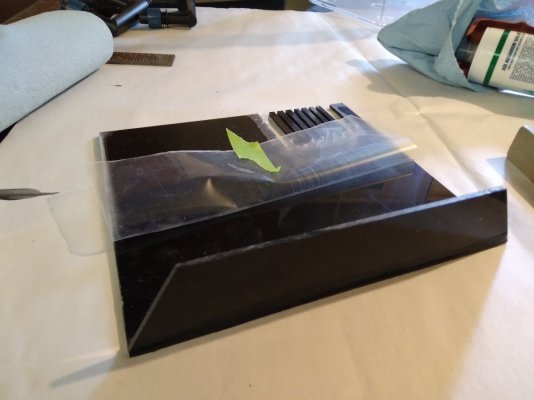
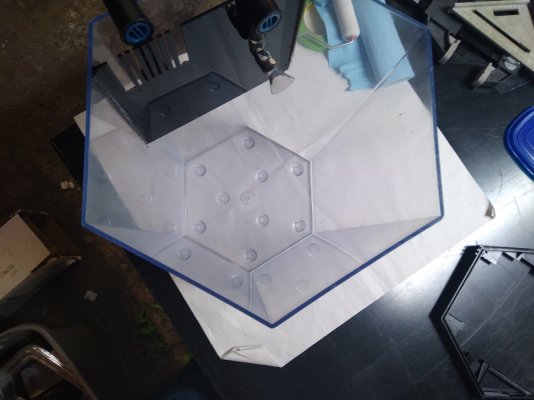
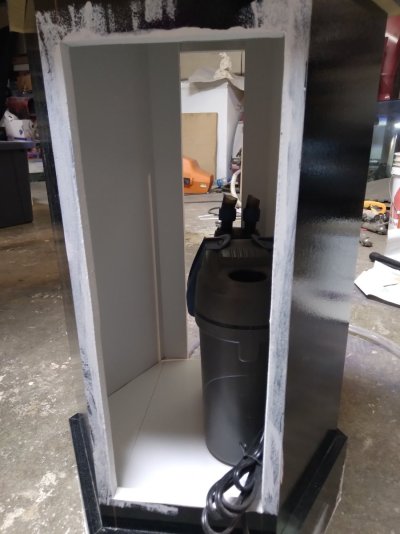
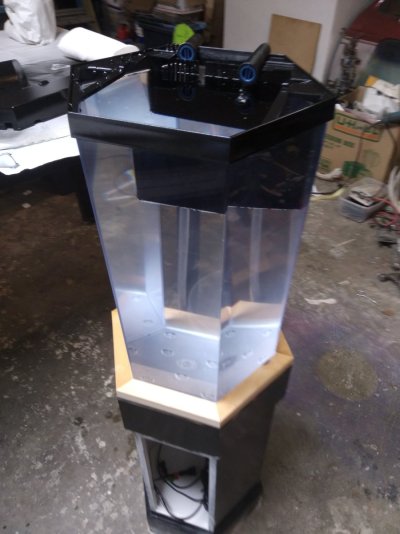
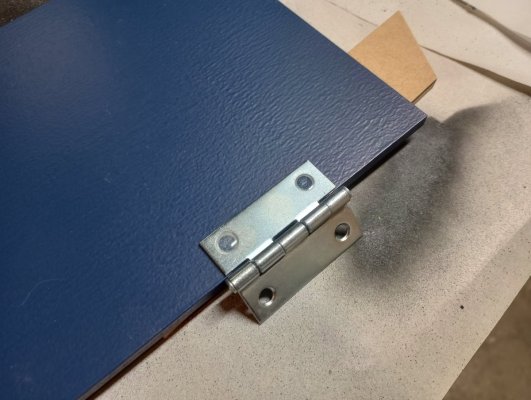
My kids immediately asked for it in thier room, so I'll likely use the top pieces to minimize light spill. This will be a heavy DIY build because I want to try some things. It's happening.

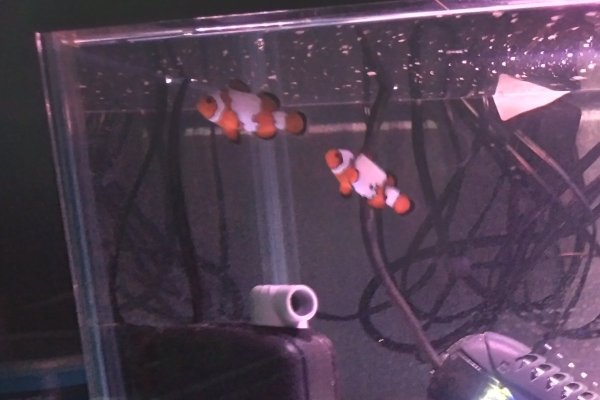
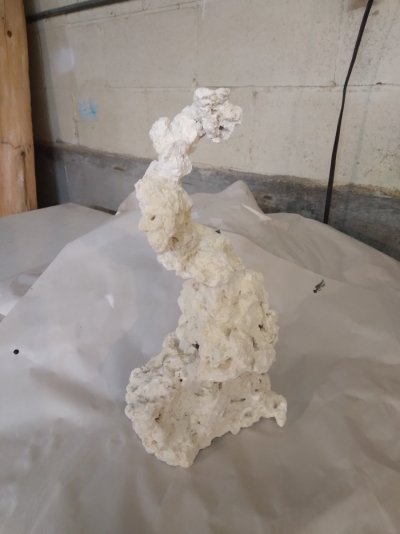
Wanting to do a pair of fancy clownfish for this one and try my hand at anenomes again.
 
OP
OP
Mhamilton0911

Mhamilton0911

BitterSalty
View Badges
Joined
Jul 8, 2021
Messages
4,390
Reaction score
20,924
Location
Idaho
Rating - 0%
0   0   0
So the tank came with a bottom peice to sit on, but it leaves the center unsupported so I'm going to have it directly on the wood stand. The top pieces were a trim ring and the light cover(which was a bulb of some sort) and a cover for the old built in filtration. I'll be removing the light base and DIY-ing leds in its place. I'll clean up all the plastic and repaint so it all looks new.
I like that it has a feeding hole and that with all the top pieces on should help minimize extra light spill.
 

Attachments

  • 20220826_101729.jpg
    20220826_101729.jpg
    203.2 KB · Views: 56
  • 20220826_101830.jpg
    20220826_101830.jpg
    144 KB · Views: 51
  • 20220826_101909.jpg
    20220826_101909.jpg
    178.1 KB · Views: 49
  • 20220826_101856.jpg
    20220826_101856.jpg
    175.2 KB · Views: 50
  • 20220826_101847.jpg
    20220826_101847.jpg
    150.4 KB · Views: 46
  • 20220826_101840.jpg
    20220826_101840.jpg
    159.5 KB · Views: 52
OP
OP
Mhamilton0911

Mhamilton0911

BitterSalty
View Badges
Joined
Jul 8, 2021
Messages
4,390
Reaction score
20,924
Location
Idaho
Rating - 0%
0   0   0
First thing needing to be done though is a good buffin'. She's a little hazy, with a few scratches. I have extensive experience with cutting and buffing autos so this is an easy task. I ordered the Novus compounds and a headlight resto buffing kit for the 3" buff pads.

Let's get buffin'!
 

Attachments

  • 20220826_102019.jpg
    20220826_102019.jpg
    105.3 KB · Views: 50
  • 20220826_102016.jpg
    20220826_102016.jpg
    106.5 KB · Views: 49
  • 20220826_102012.jpg
    20220826_102012.jpg
    79.1 KB · Views: 43
  • 20220826_102032.jpg
    20220826_102032.jpg
    105.2 KB · Views: 48
OP
OP
Mhamilton0911

Mhamilton0911

BitterSalty
View Badges
Joined
Jul 8, 2021
Messages
4,390
Reaction score
20,924
Location
Idaho
Rating - 0%
0   0   0
It is fun! It's 12" wide and 18" tall so I may have to experiment lighting to get the best results. But so far I love it.

I spent the last 2 days sanding and buffing. I think it turned out great. I probably have a little more buffing on the outside, but the inside is ready to go. Filled with water several times to check my work. It looks so good with water!
 

Attachments

  • 20220826_140638.jpg
    20220826_140638.jpg
    65.9 KB · Views: 49
  • 20220826_133301.jpg
    20220826_133301.jpg
    117.5 KB · Views: 48
  • 20220827_075039.jpg
    20220827_075039.jpg
    60.5 KB · Views: 53
  • 20220827_075024.jpg
    20220827_075024.jpg
    110.6 KB · Views: 48
  • 20220827_075051.jpg
    20220827_075051.jpg
    90.8 KB · Views: 55
  • 20220827_094728.jpg
    20220827_094728.jpg
    173.8 KB · Views: 56
OP
OP
Mhamilton0911

Mhamilton0911

BitterSalty
View Badges
Joined
Jul 8, 2021
Messages
4,390
Reaction score
20,924
Location
Idaho
Rating - 0%
0   0   0
Ok, so I know I hate canister filters for reef tanks, but I'm doing one on this tank. So because of the dimensions of this tank I didn't want to lose inside real-estate for an all in one compartment, but I need the weir teeth of an overflow box for surface skimming. I also didn't want to drill and sump this small tank. So I mashed together all of that. I made a slim overflow box to essentially hide the intake of the canister filter. And the out flow will sit just over the overflow box and will look like any other all in one when done. My canister filter has a built in heater so that's out of the way in the display, so the overflow box will have just enough room for the intake and sponges or floss, whichever I decide to use. The inside of the canister will just hold rocks or ceramic media. All fine filtering will be in the overflow box with floss/sponge for easy cleaning so I won't have to mess with the canister often. Hopefully my design will function as I hope.

I have cut the acrylic and plan on gluing and silicone-ing later today.
 
OP
OP
Mhamilton0911

Mhamilton0911

BitterSalty
View Badges
Joined
Jul 8, 2021
Messages
4,390
Reaction score
20,924
Location
Idaho
Rating - 0%
0   0   0
I gave it one last inside buff, since I'll never be able to once filled. I cut the weir teeth large on the sides and thin in the middle so I know I'll have enough flow for the demand of the canister intake, I plan on placing sponge behind it so no fish get back there.

And I siliconed the "overflow" in place and I'll wait a day or so to cure.

I did wait to long to pull the tape and it pulled some of the already dry silicone, but enough of the wet was left so I was able to smooth it back out.
 

Attachments

  • 20220904_125122.jpg
    20220904_125122.jpg
    97.9 KB · Views: 54
  • 20220904_134606.jpg
    20220904_134606.jpg
    93.2 KB · Views: 42
  • 20220904_134633.jpg
    20220904_134633.jpg
    81.1 KB · Views: 49
  • 20220904_134640.jpg
    20220904_134640.jpg
    97.5 KB · Views: 48
  • 20220904_134645.jpg
    20220904_134645.jpg
    85.9 KB · Views: 47
  • 20220904_135209.jpg
    20220904_135209.jpg
    97.8 KB · Views: 47
  • 20220904_135220.jpg
    20220904_135220.jpg
    110.9 KB · Views: 48
OP
OP
Mhamilton0911

Mhamilton0911

BitterSalty
View Badges
Joined
Jul 8, 2021
Messages
4,390
Reaction score
20,924
Location
Idaho
Rating - 0%
0   0   0
Had hubs cut the hole on the stand for the door, it originally had a tiny opening, but not big enough for anything, so I'm using the original hole as the back and the new hole for the front. It fits the filter perfectly. I need to run and get wood for the door but for now I'm priming and painting.

Also placed the intake and outflow, looks good and I'm happy with the size, it's slim but it really only needed to hide the intake so it definitely works for that.
 

Attachments

  • 20220905_123540.jpg
    20220905_123540.jpg
    111.1 KB · Views: 49
  • 20220905_123617.jpg
    20220905_123617.jpg
    145.4 KB · Views: 47
  • 20220905_123608.jpg
    20220905_123608.jpg
    130.9 KB · Views: 45
  • 20220905_123427.jpg
    20220905_123427.jpg
    122 KB · Views: 48
  • 20220905_123439.jpg
    20220905_123439.jpg
    98.4 KB · Views: 46
  • 20220905_123443.jpg
    20220905_123443.jpg
    120.3 KB · Views: 54
OP
OP
Mhamilton0911

Mhamilton0911

BitterSalty
View Badges
Joined
Jul 8, 2021
Messages
4,390
Reaction score
20,924
Location
Idaho
Rating - 0%
0   0   0
Since I only have a few things left to do I went ahead and grabbed my snowflakes :cool:

Currently in a 5g qt on my counter waiting for thier tank to be finished.
 

Attachments

  • 20220910_063612~2.jpg
    20220910_063612~2.jpg
    101.7 KB · Views: 46
OP
OP
Mhamilton0911

Mhamilton0911

BitterSalty
View Badges
Joined
Jul 8, 2021
Messages
4,390
Reaction score
20,924
Location
Idaho
Rating - 0%
0   0   0
I've been working on the stand. I haven't taken in progress pics because I've had to bribe my toddler with my phone to sneak to the garage.

But, so much has happened! It originally had only one cut out in the back, so I had hubs cut the front for a door. I fully painted the inside white, cut wood for a bottom shelf for the filter to sit on, also cut a 'trim ring' for the tank to sit in so it isn't able to slide off the stand. Caulked inside that ring. Cut a door and found hinges and magnet closures. Painted the top pieces. Glued rock structure.

Today I'll be priming and painting the outside. I originally decided gloss black (and bought all gloss), but now I'm thinking matte finish instead, so I think I'll just use a matte finish urethane over. I'll respray the plastic top pieces though.
 

Attachments

  • 20220912_104616.jpg
    20220912_104616.jpg
    181.4 KB · Views: 38
  • 20220912_104629.jpg
    20220912_104629.jpg
    183.6 KB · Views: 35
  • 20220912_104638.jpg
    20220912_104638.jpg
    126.9 KB · Views: 32
  • 20220912_104727.jpg
    20220912_104727.jpg
    93.4 KB · Views: 36
  • 20220912_104759.jpg
    20220912_104759.jpg
    167.7 KB · Views: 36
  • 20220912_104929.jpg
    20220912_104929.jpg
    192.5 KB · Views: 37
  • 20220912_104941.jpg
    20220912_104941.jpg
    159 KB · Views: 45
OP
OP
Mhamilton0911

Mhamilton0911

BitterSalty
View Badges
Joined
Jul 8, 2021
Messages
4,390
Reaction score
20,924
Location
Idaho
Rating - 0%
0   0   0
Filled with water this morning to check my connections for leaks, so far so good, nice and dry. I hope it's enough flow, looks ok with nothing in it, so we'll have to see once the rock and sand is in, worst case I'll add a power head, no big deal. Plus I don't plan on sps here, rather I'm going to try anenomes so I'm hoping to avoid an additional power head.

One thing I did see is too much water going through the weir teeth. I originally cut them thin, but second guessed myself and worried there would not be enough water flowing through so I opened the sides. I planned on cutting sponge to cover it and filter large particles. But it seems like I need to fashion an adjustable weir "gate" so I can fine tune the flow. I'm thinking simple cut acrylic piece big enough to cover the slots and magnets to hold and provide 'adjustments'. I held a piece in place and it looks like it will work. That's the fun in DIY, you try shhht till it works.


Attachments

  • 20220913_085514.jpg
    20220913_085514.jpg
    129.5 KB · Views: 40
  • 20220913_091441.jpg
    20220913_091441.jpg
    112.2 KB · Views: 39
  • 20220913_091505.jpg
    20220913_091505.jpg
    146.2 KB · Views: 37
  • 20220913_091540.jpg
    20220913_091540.jpg
    117.3 KB · Views: 44
  • 20220913_091556.jpg
    20220913_091556.jpg
    140.4 KB · Views: 38
OP
OP
Mhamilton0911

Mhamilton0911

BitterSalty
View Badges
Joined
Jul 8, 2021
Messages
4,390
Reaction score
20,924
Location
Idaho
Rating - 0%
0   0   0
Oh the stand.... Well I first bought gloss paint for it, then decided I want a matte finish. Painted with the matte, didn't like how it turned out. Then sanded, re-primed and now waiting for paint again. Now being undecided and trying to pick between a navy blue stand or just black like I intended.

In the meantime I ordered a court jester goby, love it. Just picked it up yesterday, and I've already seen it eat so that's good. I don't know if it were wild or aquacultured, but it's eating so I'm happy.

So yeah, definitely need to finish the stand. Literally everything else is ready, even fish are ready.

IMG_20220922_133926556.jpg
 
OP
OP
Mhamilton0911

Mhamilton0911

BitterSalty
View Badges
Joined
Jul 8, 2021
Messages
4,390
Reaction score
20,924
Location
Idaho
Rating - 0%
0   0   0
Well I got the lights finally that I wanted to use but I'm not sure about them ... Bought from eBay, from the 21ledUSA seller, which I've seen referenced before for supplement actinic lights, any who, because I wanted to keep the original good the lights will be pretty close to the water so I went with a gummy type led strip that I'm suppose to encase in silicone to further waterproof it. They claim all this and that about the superior led strips they use but to me, 2 of 4 look very yellow, which might be ok? I don't know, but the supposed 420mn strip is very weak, again maybe it's supposed to be, I don't know.

I'm kind of limited with the retrofitting, unless I want to ditch the top... we'll see.


I might end up trying the new noopsyche mini light for this!

IMG_20220926_191739676.jpg IMG_20220926_191605179_HDR.jpg IMG_20220926_191654832.jpg
 
OP
OP
Mhamilton0911

Mhamilton0911

BitterSalty
View Badges
Joined
Jul 8, 2021
Messages
4,390
Reaction score
20,924
Location
Idaho
Rating - 0%
0   0   0
Any way to check par with them? They look dim in photo but that's super unreliable
No I didn't have a par meter, I rented one a while back for my other tank... I am thinking I'll need one in the future so I'll likely be searching for one at some point.

But I did hold them over my main tank, and it's 18" deep like this new hex tank, so I felt like it was a good test, and although it wasn't as lit up as I wanted, it was surprisingly bright all the way to the sand bed and the blue strip and the uv purple strip made my corals pop like I've never seen before, so I'm going to give this strip set a shot.

I'm not looking for sps in this tank, just whatever I chuck in there from my main tank, and one day another anemone, but I want this tank mature before then so I should be about to get my use out of these lights in the mean time.

Biggest challenge was I'm trying to keep the original hood on this tank so the available light options need to be slim to fit in there, plus not too long either. Which is why I went to this strip type set, I can trim every 2 inches, if needed. And I'm supposed to encase the edges with silicone to waterproof the wires further. But really, in the end, if I end up hating the light I can chuck the hood and use any pendant light for it, I might try one of those new noopsyche minis if I go that route.
 
OP
OP
Mhamilton0911

Mhamilton0911

BitterSalty
View Badges
Joined
Jul 8, 2021
Messages
4,390
Reaction score
20,924
Location
Idaho
Rating - 0%
0   0   0
Got my stand painted, it's blue now. And got the hinges and the door on, just waiting on the epoxy to dry for the magnet closure.

Also working on the lights, mounting them to a piece of acrylic that I can screw into the hood, and getting those silicone sealed.

Tank should be wet tomorrow or the next day!!

Need to buy more silicone to seal the lights, so a few more days unveils my local store had some in stock....

Have a my pair of snowflake clowns, a neon cleaner goby and a court jester goby ready for their new home.
 

Attachments

  • IMG_20221001_132701616_HDR.jpg
    IMG_20221001_132701616_HDR.jpg
    135.9 KB · Views: 35
  • IMG_20221001_132620843_HDR.jpg
    IMG_20221001_132620843_HDR.jpg
    174.8 KB · Views: 35
  • IMG_20221001_155913262.jpg
    IMG_20221001_155913262.jpg
    228.4 KB · Views: 35
  • IMG_20221001_155924954_HDR.jpg
    IMG_20221001_155924954_HDR.jpg
    165.5 KB · Views: 36
  • IMG_20221001_155947417_HDR.jpg
    IMG_20221001_155947417_HDR.jpg
    202.3 KB · Views: 38
  • IMG_20221001_170613821.jpg
    IMG_20221001_170613821.jpg
    169.6 KB · Views: 36

Reefing threads: Do you wear gear from reef brands?

  • I wear reef gear everywhere.

    Votes: 17 13.8%
  • I wear reef gear primarily at fish events and my LFS.

    Votes: 7 5.7%
  • I wear reef gear primarily for water changes and tank maintenance.

    Votes: 1 0.8%
  • I wear reef gear primarily to relax where I live.

    Votes: 19 15.4%
  • I don’t wear gear from reef brands.

    Votes: 70 56.9%
  • Other.

    Votes: 9 7.3%
Back
Top