New territory: 3D printing from unboxing to first print. Follow along!

dantimdad

7500 Club Member
View Badges
Joined
Jun 24, 2009
Messages
9,619
Reaction score
41,788
Location
Hartselle Alabama
Rating - 0%
0   0   0
Not sure if this should go here. If not, please move accordingly.

We have wanted a 3D printer for years but could never afford one. This year was no different but, the boys have had to put up with a lot this year and bloomed in slack. I bit the bullet and started searching for one at least close to within budget.

After a debacle of ordering the Geeetech A10 and having to cancel, Amazon came to the resue! We ordered a Creality Ender3 for the family Christmas present.

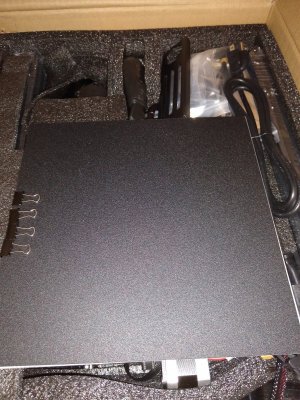
Today, the box arrived:

IMG_20181219_163656986.jpg


Tim was off school after finals today and I got the notice it was in the carport so I had him bring it inside and look for damage. Luckily, the linebacker who usually decides to spike are packages on the goal line must have been benched today because it was still box shaped.


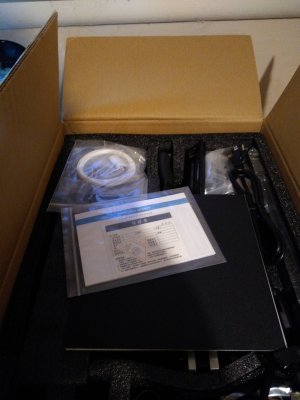
When I got home, I set to work unboxing and inventorying. Now, keep in mind, the only experience I have with 3D printed stuff is emailing my buddy at work a picture or file from Thingiverse and saying "There are fajitas for you after this is done printing."

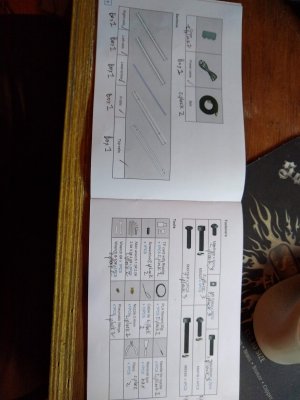
I was a bit anal with my inventory procedure:
IMG_20181219_171124.jpg

IMG_20181219_163830.jpg

IMG_20181219_163747.jpg

Not only was every part accounted for, every screw and bolt, they included extras for the inevitable of %^&* I dropped one! Daniel, your eyes are better look on the floor for it!

The parts seem well built and they even included all the tools your will need for assembly and adjustments and test piece of filament.

This is where we are at the moment. I will keep you updated as we got along.
 
OP
OP
dantimdad

dantimdad

7500 Club Member
View Badges
Joined
Jun 24, 2009
Messages
9,619
Reaction score
41,788
Location
Hartselle Alabama
Rating - 0%
0   0   0
So this is where we ran into a snag building the printer:
IMG_20181219_192504.jpg


Somehow you are supposed to slide the T nuts from the spool holder through the p-membrane of this dimension into another so the bolts are not blocking this from happening.

Once I realized the instructions are translated from Chinese to Ikea then to broken English it all became perfectly evident they had switched steps. Easy, right? Why didn't I just predict that was going to happen to avoid such flouting of the laws of physics? :confused:

Well, we jumped that hurdle and I told Igor, err, I mean, Daniel to throw the switch! NOTHING! What the what?! Noooooo!

Then I remembered seeing a video to where they said the most common start up problem was overlooking the switch for 110-220V. Again, Chinese->Ikea->broken English. Change that and....


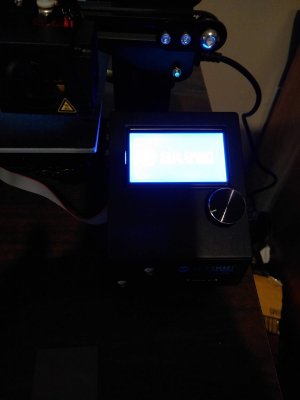
IMG_20181219_194056.jpg

We have POWAH!

Up next: the Lone Ranger rides!

IMG_20181219_194056.jpg
 
Last edited:
OP
OP
dantimdad

dantimdad

7500 Club Member
View Badges
Joined
Jun 24, 2009
Messages
9,619
Reaction score
41,788
Location
Hartselle Alabama
Rating - 0%
0   0   0
I didn't get a video of what was about to occur I really wish I had. I think that it may be a good thing because (if you remember the aforementioned translations.) I created a 4th language in the instructions myself. (Sorry about that baby Jesus. I promise to do better)

Anyhow, there are 749 different plugs to hook up all are labeled on the plug end but NOT where you plug them in. You have to rely on Chinese->Ikea->broken English to tell you where to plug them.

Now, Daniel is in robotics at school so he wanted to do the stepper motor connections because "I got this"

So, after the power up, bed levelling and initial feeding of the filament all checked out, we put the sd card in the slot and tried to print the test dog.

A hint of plastic smell, the whir of fans, the hum of stepper motors and... Well, I have no idea what just happened but I am 86% sure the noise coming from the motors was 3 part harmony of the William Tell Overture. It was beautiful except for the fact this thing is not a one man band and I paid money for it to actually print!

UGH! Daniel had to go back to his mom's at this point, I am trying to decide whether to register my new language with the authorities right under Klingon as a legit form of communication and contemplating having a $235 door stop that I will stub my toe on for the foreseeable future.

As fate would have it, I have had wicked insomnia for the last week. (Which may explain my very short fuse) When I can't sleep, I work on stuff. God, help poor Sherry when I run out of quiet things to do and there is woodworking to be done. :D

I tried new firmware, a new version of slicing software and a new download of the test dog. Nothing. Then I noticed that when I homed the print head, it pulled the filament all the way back out. That's not right. Why would it do that and not move the head to home?

EUREKA! Three of the plugs are the same and "I got this" swapped two of them. He had the X-axis plug in the filament motor and vice versa. I quickly swapped them over, went to the test dog (4th dang iteration) and, Do you believe in miracles? It worked!

So after the tiny little dog printed, I printed this:
IMG_20181220_054148.jpg


Guess what it is and you win the solid gold cupie doll. ;)
 
Last edited:
OP
OP
dantimdad

dantimdad

7500 Club Member
View Badges
Joined
Jun 24, 2009
Messages
9,619
Reaction score
41,788
Location
Hartselle Alabama
Rating - 0%
0   0   0
So that brings us up to this morning. 2 hours of sleep, I have already had 32 oz. of coffee, posted updates and sent Daniel (aka "I got this") a text with a picture of the print.

I hope you enjoyed this and, if you are desperate enough to ask ME for help, I will do my best if you buy one of these to assist in any way I can.

Now, I have to actually learn to use a modeling program to draw my own stuff instead of raiding the fridge of the 3D world that is Thingiverse. ;)
 
Last edited:

crusso1993

7500 Club Member
View Badges
Joined
Oct 21, 2018
Messages
8,671
Reaction score
44,649
Location
SW, FL, USA
Rating - 0%
0   0   0
Following along... just out of curiosity; why did you have to cancel the Geeetech and switch to Creality?
 

Larry L

Valuable Member
View Badges
Joined
Nov 4, 2014
Messages
1,348
Reaction score
1,426
Location
x
Rating - 0%
0   0   0
I've got a Creality CR-10S and have been super happy with it. Like yours I also found it to be nicely built, good packaging, extra parts just in case... Following along to see how things go with yours.
 

crusso1993

7500 Club Member
View Badges
Joined
Oct 21, 2018
Messages
8,671
Reaction score
44,649
Location
SW, FL, USA
Rating - 0%
0   0   0
I have this exact same printer.. So far so good But there is a learning curb.
I know you've been busier than a one legged man at an butt kicking contest but I'm still looking forward to seeing some builds from you!
 
OP
OP
dantimdad

dantimdad

7500 Club Member
View Badges
Joined
Jun 24, 2009
Messages
9,619
Reaction score
41,788
Location
Hartselle Alabama
Rating - 0%
0   0   0
Following along... just out of curiosity; why did you have to cancel the Geeetech and switch to Creality?

Basically geeetech lied and said it would be shipped to my house by Friday well Sunday they sent a message saying they made a mistake and asked if I would be willing for them to ship from Europe "sometime" in n January. Uh no.
 
Last edited:

crusso1993

7500 Club Member
View Badges
Joined
Oct 21, 2018
Messages
8,671
Reaction score
44,649
Location
SW, FL, USA
Rating - 0%
0   0   0
Basically geewtech lied and said it would be shipped to my house by Friday well Sunday they sent a message saying they made a mistake and asked if I would be willing for them to ship from Europe "sometime" in n January. Uh no.
Well, that sucks but I'm glad you got it worked out. Did you buy directly from Geeetech or a distributor? I've been keeping an eye on them and the Creality at Banggood, which has some pretty aggressive pricing on both models.
 

ca1ore

10K Club member
View Badges
Joined
Oct 28, 2014
Messages
13,961
Reaction score
19,813
Location
Stamford, CT
Rating - 0%
0   0   0
Ah, too funny. My 16 year old son is Mr. I Got This ...... unfortunately he usually isn’t. I cannot stand the suspense, what was that red thing you printed?
 

Erica-Renee

Valuable Member
View Badges
Joined
Oct 4, 2017
Messages
1,596
Reaction score
3,290
Location
lost
Rating - 0%
0   0   0
We need to exchange notes. I have some questions.

Sure . The thing i have found about 3d printers is Each one thou identical will need slightly different tinkering and Settings.. I am going to post things i have had to do to mine then a link to the best Most accurate information i have found on the internet.
1. Adjust the upright supports so the printer sets flat on all 4 feet . Do this by loosing the two screws on one side and slightly apply pressure then re tighten them.
2. The bowden tube couplers Must not have any play in them.. I fixed mine with a zip tie.They claim its best to replace them.
3. Belt tension and running.. You need to adjust this so the belt is just tight enough so it does not slip , Adjust the motor pulley so the belt does not bind or rub side of guide pulley .
4.Adjust the Rollers . (on each axis roller set .. there is one of them that has a cam nut . You turn that to adjust the roller tension . You want it as loose as you can have it without the rollers being loose or shaky .. Carriage needs to move Super smooth .. this and belt tension until its perfect ..
5. Get a Glass bed .. I cut mine from window glass.. you can buy from home -deport or the like . NO Reason to pay 40.00 for it
6. Bed Leveling.. NO MATTER WHAT THEY SAY DO NOT USE PAPER . Get a filler gauge .15 Level bed with both hot end and bed heated.
7 . Go to the link below and Read READ AND Reread.. Use a small cube print to test with and the 4 small cubes to test extruder retension...

I can print pla with all the default settings in Cura and its fine..
pet-g IS A BUGGER To get right.. I print at 240 No fin on first 4 layers . speed at 38 then 45 on remaining layers with fan at 60 % .

I was having BIG ISSUES WITH Filament getting tangled. Until i READ Again on the site im posting below . BE SURE TO Check for a knot in your filament ..

I am rambling now So here is the Guide and Advice i found most useful..

OH MOST IMPORTANT THING.. CHECK AND ADJUST THE E axis . if this is off Nothing above matters ..
https://www.matterhackers.com/support

Start with the Guides for beginning and work your way thru them The more you read and adjust the more you will understand how each setting applies to your print and printer settings .
Just grabbing loading and using someone elses print profiles is not the right way to go. You have to develope your own . Based on how your printer behaves , Its location and Ambient temp..

The above is what helped me may or may not be exactly what you need ..

Any Questions Please ask.. I AM ALSO JUST Learning. So by no means a expert source... Well unless its about your HOME. I GOT THAT ..
 

Managing real reef risks: Do you pay attention to the dangers in your tank?

  • I pay a lot of attention to reef risks.

    Votes: 139 43.0%
  • I pay a bit of attention to reef risks.

    Votes: 113 35.0%
  • I pay minimal attention to reef risks.

    Votes: 50 15.5%
  • I pay no attention to reef risks.

    Votes: 16 5.0%
  • Other.

    Votes: 5 1.5%
Back
Top