

- Joined
- Jun 19, 2017
- Messages
- 53
- Reaction score
- 64
I have an Innovative Marine Nuvo Fusion 50 Lagoon Tank (https://www.reef2reef.com/threads/nuvo-fusion-50-lagoon-not-many-on-here.320526/). Awesome tank. But one thing about these tanks I don't love is the display water level. It just seems to low for me, so I decided to raise it. I imagine this mod could be useful for anyone with these Fusion tanks.
I don't want to change anything as far as the return pump (wouldn't make a difference in water height) or raise the level in the back of the tank, so I cut little pieces of plastic to fit right behind the overflow.
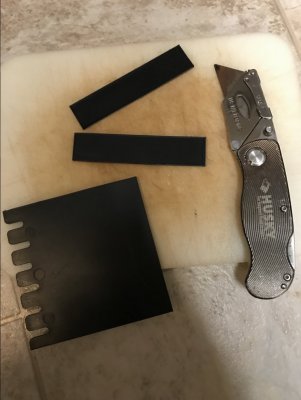
I invested heavily") in a separator from a fishing tacklebox (irony at its best). Cut it to fit right above the little water ramp in the tank.
in a separator from a fishing tacklebox (irony at its best). Cut it to fit right above the little water ramp in the tank.
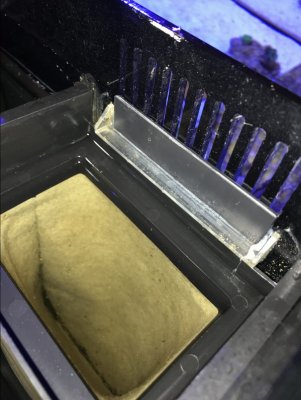
I held one side while my wife held the other in place to see how it the water level will look when the return pump is on. Looks great!
At this point, I removed a couple of gallons from the display and rear section and dried the acrylic I'd be siliconing this against. I put a goopy amount (accurate, I know) of silicone and pushed it toward the overflow.

At first, a bunch of silicone gooped through the grates, so I used a cotton swab to remove the bulk and clean it up a little. I don't like this, because it looks like a mod - I want everything to look super clean with this tank. Fortunately, the silicone "dried" clear, so it isn't visible. I put a plastic clamp on both the pieces to keep them flush against the overflow during the initial cure.
Once it set, I put the water I removed previously back in the tank and turned the return pump on.
BOOM - raised the water level about 3/4", so about 3/4" from the top of the tank.
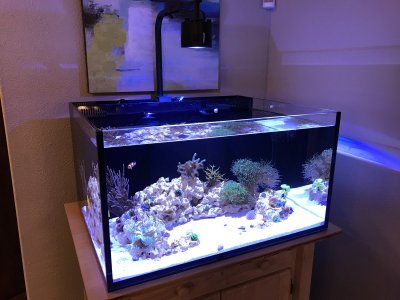
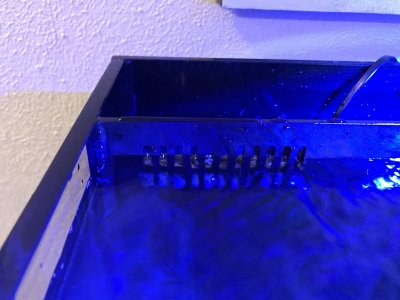
BEFORE (pumps were off for this picture, so actually a tad lower than usual):
AFTER:
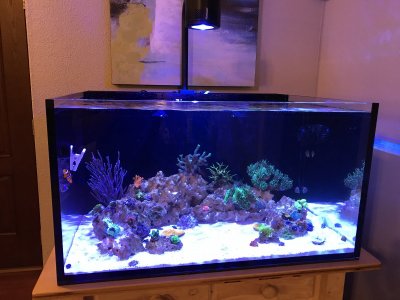
Fortunately, there's still room at the overflow.
Anyway, looks like this little FREE mod was worth it. Time will tell if anything proves to be a problem. Of course, if anyone has any suggestions or questions, let me know!


I don't want to change anything as far as the return pump (wouldn't make a difference in water height) or raise the level in the back of the tank, so I cut little pieces of plastic to fit right behind the overflow.
I invested heavily
in a separator from a fishing tacklebox (irony at its best). Cut it to fit right above the little water ramp in the tank.
I held one side while my wife held the other in place to see how it the water level will look when the return pump is on. Looks great!
At this point, I removed a couple of gallons from the display and rear section and dried the acrylic I'd be siliconing this against. I put a goopy amount (accurate, I know) of silicone and pushed it toward the overflow.
At first, a bunch of silicone gooped through the grates, so I used a cotton swab to remove the bulk and clean it up a little. I don't like this, because it looks like a mod - I want everything to look super clean with this tank. Fortunately, the silicone "dried" clear, so it isn't visible. I put a plastic clamp on both the pieces to keep them flush against the overflow during the initial cure.
Once it set, I put the water I removed previously back in the tank and turned the return pump on.
BOOM - raised the water level about 3/4", so about 3/4" from the top of the tank.
BEFORE (pumps were off for this picture, so actually a tad lower than usual):
AFTER:
Fortunately, there's still room at the overflow.
Anyway, looks like this little FREE mod was worth it. Time will tell if anything proves to be a problem. Of course, if anyone has any suggestions or questions, let me know!


