Reefs Anonymous 48 gallon reef build prescription.

Reefs anonymous

Active Member
View Badges
Joined
Jan 8, 2017
Messages
322
Reaction score
274
Rating - 0%
0   0   0
I have been around reef aquariums for some time now but have been more or less out of the hobby for the past few years using only a nano to keep my feet wet in salt as I navigated life's responsibility as a parent. Now that my kids have all left and gotten their young profession started, I can now concentrate on my 4th love (wife, 2 daughters, then reef, lol).

Reefing started for me when I first saw a salt water aquarium with 5 yellow tangs with a wet/dry filter at a friends house who lives in another country. I was in awe and bought my first book on salt water aquariums (internet wasn't invented yet! Lol). I read up on the subject and dove into a 55 gallon tank. Now 26 years and a few tanks later, Im starting my new build. With a little help and encouragement from you reefers I'm hoping for it to be a full blown sps with a few lps sprinkled around (gotta please the wife).

So how did I get here? Well I went to a LFS and found a deal of a life time. A 4 sided low iron, polished beveled edges, rimless aquarium. It was after Black Friday and I was looking over the tank that had a sale price of $190 and I was wondering if the sale would still be offered when the sales rep came over and said "you can take it home for $139". I immediately said "pack that baby up, I'll explain to the wife later"! LOL! So off in the car it went and the rest is history.

Here is a few pictures of the tank.
IMG_0544.JPG

IMG_0545.JPG


And a couple pictures of the edges
IMG_0548.JPG

IMG_0549.JPG
 
OP
OP
Reefs anonymous

Reefs anonymous

Active Member
View Badges
Joined
Jan 8, 2017
Messages
322
Reaction score
274
Rating - 0%
0   0   0
The sump of choice. What I was looking for was a sump that could handle a decent flow that would minimize micro bubbles back into the tank. After shopping and research the internet for weeks, I found what I think is the perfect sump for me. It needed to be small enough to fit under the stand with enough space left over for a chiller and top off reservoir. It also needed to have adjustable water level for the protein skimmer, dosing pump pipes, and Test lead holders. I really want to keep the under stand area clean and neat as possible. I've had my share of messy under cabinet and this time round I want to keep it looking professional.

Here's the sump that I selected. It's the ice cap IC-RS24. The thing I really like about this sump is that it has a built in 3 gallon top off reservoir. One less thing to buy and one less thing I have to worry about storing under the cabinet.

IMG_0537.JPG


Top view as I unbox


IMG_0538.JPG


Side view

IMG_0539.JPG


Doing pump pipes and test lead holders.

IMG_0540.JPG


Cover for fresh water topoff

IMG_0542.JPG


And the specs.

IMG_0557.JPG

IMG_0558.JPG

IMG_0559.JPG

Adjustable water height
IMG_0560.JPG
 
OP
OP
Reefs anonymous

Reefs anonymous

Active Member
View Badges
Joined
Jan 8, 2017
Messages
322
Reaction score
274
Rating - 0%
0   0   0
So what do I use for an overflow? I decided to use a tried and proven glass-holes overflow. It's rated for 700 gallons/hr but I have to down size the return to a 1" pipe. That will probably drop me to 300-500 gals/hour. I figure that should be more than enough return for the filter to operate efficiently for a 50 gallon display. Here's a few pics of the product.

How I received it shipped. It includes the diamond bit for installation.


IMG_0534.JPG


Assembled

IMG_0535.JPG


And the 1" return hose.

IMG_0561.JPG


Now comes the question. Where should I install the overflow box along the length of the tank? Should I put it in the center of the tank or should I off center it about a 1/3 of the way? The reason I'm thinking 1/3 is because I think I'll be using a mp 10 pump below the overflow on the back of the tank and a sea swirl on the opposite side of the overflow on the back of the tank. Any suggestions out there and why you think so? Thanks
 
OP
OP
Reefs anonymous

Reefs anonymous

Active Member
View Badges
Joined
Jan 8, 2017
Messages
322
Reaction score
274
Rating - 0%
0   0   0
Ok. Took a deep breath and started the build. Positioned the glass hole overflow. Take into consideration water flowing through teeth at 1/2 to 1/3 all the way up, I am looking for water line about 1 1/2"-1 1/34" below the rim, so I drilled the tank after positioning the overflow at 1" from the top.

IMG_0572.JPG


And started the drilling process. The noise is like gears slipping. I put very little pressure to make the bit do the work. After about 5-10 mins success!

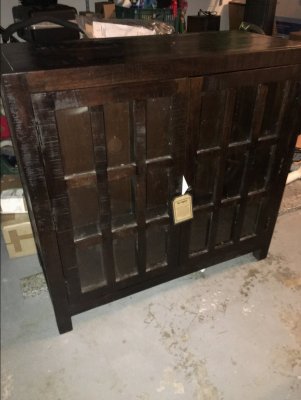
Now a picture of the stand. I wanted something alittle different but not to diy simply because I don't have the skills, time, or patients to make it look "finished"

IMG_0562.JPG
 
OP
OP
Reefs anonymous

Reefs anonymous

Active Member
View Badges
Joined
Jan 8, 2017
Messages
322
Reaction score
274
Rating - 0%
0   0   0
the stand needed beefing up so I added wood support inside the interior. Seems like it should be able to hold the weight. Anxiously I wanted to see what the setup might look like. Called the wife to help me put the tank on the stand. So here is the setup before cleaning the glass and with glass holes overflow installed.

IMG_0576.JPG


And inside the stand

IMG_0577.JPG

I got he sump, chiller, and two part containers inside. Fits perfectly! I will now figure out shelving for the misc stuff we all use for testing and junk we keep to clean the tank.

I will either frost or tint the glass on the stand to keep the look clean.

IMG_0576.JPG
 
OP
OP
Reefs anonymous

Reefs anonymous

Active Member
View Badges
Joined
Jan 8, 2017
Messages
322
Reaction score
274
Rating - 0%
0   0   0
its sunday, show us more progress :)

Well some progress. I painted the back of the tank. I also completed most of the under cabinet area. I cut out a piece of a yoga mat for the tank to sit on top of the stand. This is to even out any imperfections of the surface of the stand to the bottom of the tank. I'm now water testing the tank and stand in the garage. No need to test in the house in the event the whole thing fails and I get flooded and go to the dog house. Here's a picture of the tank with back painted black on top of stand under water pressure test. This is to make sure tank has no leaks and to make sure the stand can handle the weight pressure. I know there will be more weight added than that of fresh water but that's the best I can do for now.

IMG_0590.JPG


The water level looks low but that's because I haven't turned on any return pump. I expect to get at least 1/2" more water into the tank once I turn on the return pump.

IMG_0592.JPG


This is to show how the stand has been beefed up. I added some wood and attached to the legs of the stand. I also added a Neptune controller.

IMG_0591.JPG


IMG_0552.JPG


I bought this cable online for the Neptune. It cost a whopping $2. I'm going to wire my own float switch for the ato instead of paying $30 something for the break out box.

IMG_0553.JPG


My plan is to leave the water in the tank for a couple of days. Then once I feel comfortable the entire setup is good, I will move it into the house and complete the build and fill with salt water.
 
Last edited:

MaddyP

'Til Reefdom Come...
View Badges
Joined
Jul 21, 2016
Messages
1,907
Reaction score
4,530
Location
Vancouver, WA
Rating - 0%
0   0   0
The sump of choice. What I was looking for was a sump that could handle a decent flow that would minimize micro bubbles back into the tank. After shopping and research the internet for weeks, I found what I think is the perfect sump for me. It needed to be small enough to fit under the stand with enough space left over for a chiller and top off reservoir. It also needed to have adjustable water level for the protein skimmer, dosing pump pipes, and Test lead holders. I really want to keep the under stand area clean and neat as possible. I've had my share of messy under cabinet and this time round I want to keep it looking professional.

Here's the sump that I selected. It's the ice cap IC-RS24. The thing I really like about this sump is that it has a built in 3 gallon top off reservoir. One less thing to buy and one less thing I have to worry about storing under the cabinet.

IMG_0537.JPG


Top view as I unbox


IMG_0538.JPG


Side view

IMG_0539.JPG


Doing pump pipes and test lead holders.

IMG_0540.JPG


Cover for fresh water topoff

IMG_0542.JPG


And the specs.

IMG_0557.JPG

IMG_0558.JPG

IMG_0559.JPG

Adjustable water height
IMG_0560.JPG

You might want to water test the Ato section of this sump. I have the next size up and there was a small leak between the Ato section and skimmer section. I had to seal this myself with some Weldon-16.

Aside from this small problem, I love my sump. Eventually I'll turn the Ato section into a fuge and use an external Ato reserve.
 
OP
OP
Reefs anonymous

Reefs anonymous

Active Member
View Badges
Joined
Jan 8, 2017
Messages
322
Reaction score
274
Rating - 0%
0   0   0
You might want to water test the Ato section of this sump. I have the next size up and there was a small leak between the Ato section and skimmer section. I had to seal this myself with some Weldon-16.

Aside from this small problem, I love ,y sump. Eventually I'll turn the Ato section into a fudge and use an external Ato reserve.

Thanks for the heads up! I will definitely do that! What size tank do you have that sump on and is the ato section a decent enough size for the size tanks evaporation?
 
Last edited:
OP
OP
Reefs anonymous

Reefs anonymous

Active Member
View Badges
Joined
Jan 8, 2017
Messages
322
Reaction score
274
Rating - 0%
0   0   0
This pass weekend had terrible weather all Sunday. Rain, rain and more rain, so I took the time to move the tank into the house and break down the nano. I must admit, my plumbing and electrical work isn't as neat as some of those OCD reefers here on R2R but I'm pretty sure it's good enough to be successful at keeping a reef. So here's my setup while I wait for the sand to settle. It sits in my dining room so I can see it everytime I sit to eat. Yup, I actually use my dining room. So here's the current equipment specs of the tank.

48 gallon 36x18x18 rimless aquatop tank.
ATI sun power 6 x39 watt T5's
Icecap 24 Reef Sump
Apex Neptune controller w EB 832
1/10 hp chiller
3 BRS dosing pumps ca, alk, & ATO
Modified IM media reactor (removed pump and plummed into return pump)
Skimz SN123 Mini Protein Skimmer DC motor
Sea swirl wave maker for my return
Ecotech MP10
Current USA eFlux DC Flow 1050 GPH return pump
Glass holes 1500 GPH overflow box

IMG_0628.JPG

Patiently waiting for sand storm to clear up.
 
OP
OP
Reefs anonymous

Reefs anonymous

Active Member
View Badges
Joined
Jan 8, 2017
Messages
322
Reaction score
274
Rating - 0%
0   0   0
When I was assembling the equipment for this tank I wanted to stress a very quiet tank. Nothing drive me more crazy than hearing a train run through the house like some of my other older tanks. So this tank is extremely quiet. When sitting 3 feet from the tank you can barely hear it. I hear a small trickle and a slight sound from the ecotech MP10. I actually had that same pump on a nano and is was so loud I was disputing getting the MP10QD. But for some reason the old mp10 on this tank is way more quiet! I'm happy I don't have to replace that pump. This 48 gallon tank has tons of random water movement between the mp10 and 1050 GPH return pump through the sea swirl and the lighting should be way more than enough for me to keep sps.
 
OP
OP
Reefs anonymous

Reefs anonymous

Active Member
View Badges
Joined
Jan 8, 2017
Messages
322
Reaction score
274
Rating - 0%
0   0   0
A quick review of the ICECAP sump. I really like the quality build of this sump and the fact that it contains a 3 gallon area for ATO water. That saves space under the cabinet, which is a huge deal for a 36x18 tank, and also requires one less piece of equipment to buy simply because it's built in. I think that's actually pushed me to buy this sump because I didn't want any unsightly equipment outside my cabinet. I would recommend this sump to anyone who is concerned about space saving under their cabinet. It's truly a decent design IMHO.
 
OP
OP
Reefs anonymous

Reefs anonymous

Active Member
View Badges
Joined
Jan 8, 2017
Messages
322
Reaction score
274
Rating - 0%
0   0   0
IMG_0551.JPG

This is the pump I chose for my return. It's a fully controllable DC pump. It's inaudible at full blast and has infinite control from zero to 1050 GPH. I really like the fact I can control the flow to minimize micro bubbles in the tank. It come with the entire feet system made out of vibration reducing rubber bottom so there is no vibration caused by the pump either. I'm very satisfied with this pump. Now only time will tell of longevity of the pump.
 
OP
OP
Reefs anonymous

Reefs anonymous

Active Member
View Badges
Joined
Jan 8, 2017
Messages
322
Reaction score
274
Rating - 0%
0   0   0
Tank has been running just over 2 weeks. The water is crystal clear and since I transferred all my rocks from another tank the cycle was very quick. I had a dying sps from my nano perk up after the first week. Polyps are extended and the colors are coming back. I decided to support my lfs and bought 5 sps frags. After their initial dip and placement all are displaying major polyp extension. I installed new bulbs in my light fixture and since the frags came from a led tank, I'm slowly increasing duration of the t5 lights. Here's a pic from tonight of the tank.

IMG_0685.JPG


I'm monitoring my ca-400, alk 7.7 and mg- 1050 measures tonight 730pm. Relative to 2 nights ago, the ca seems stable, alk dropped dkh, and mg fell 150. In not going to dose just yet as I want to make sure the parameters are falling and that it's just not an error on my part measuring.
 
OP
OP
Reefs anonymous

Reefs anonymous

Active Member
View Badges
Joined
Jan 8, 2017
Messages
322
Reaction score
274
Rating - 0%
0   0   0
Here's a pic of my frags on my rack. I'm acclimating to light slowly and will move to the rocks in about a week or so.
IMG_0686.JPG

IMG_0687.JPG


And my token lps from my nano days.

IMG_0688.JPG
 
OP
OP
Reefs anonymous

Reefs anonymous

Active Member
View Badges
Joined
Jan 8, 2017
Messages
322
Reaction score
274
Rating - 0%
0   0   0
I'm using the skimz D.C. Controllable skimmer and this thing is awesome! It's super quiet, almost inaudible, has tons of controls from the variable pump, to the adjustable air intake, and adjustable water export. It's well made. The only issue I have is the cup fits tightly, but to get around that I use Vaseline to lube the grommet.
IMG_0691.JPG
 

When to mix up fish meal: When was the last time you tried a different brand of food for your reef?

  • I regularly change the food that I feed to the tank.

    Votes: 30 27.3%
  • I occasionally change the food that I feed to the tank.

    Votes: 35 31.8%
  • I rarely change the food that I feed to the tank.

    Votes: 35 31.8%
  • I never change the food that I feed to the tank.

    Votes: 7 6.4%
  • Other.

    Votes: 3 2.7%
Back
Top