OP
OP
- Joined
- Mar 15, 2014
- Messages
- 450
- Reaction score
- 585
Lots of exciting updates and progress (and pics) today!
Major construction projects at the new house are just about done. I need to finish sanding and sealing the concrete countertops, install the sink, and we are DONE! We move in next Saturday, so it's a good thing we have finished a lot of these projects (floors, trim, painting etc.)
Everyday more packages arrive on my doorstep, which is exciting. Today it was various plumbing parts and my dry rock (80#s reef saver and 20#s Pukani)
I finished priming the stand this afternoon. I am going to clear coat it in a matte poly spray this weekend. I also got the tank drilled for the Reef Savvy Overflow:

The hardest part was getting the template aligned correctly. I didn't want it too low, and have the water-line be visible, but I didn't want to go too high and be unable to get the weir off either. I set the top of the internal box about 1/4 of an inch below the trim. I think this will keep the water line hidden. There is some play as the holes are slightly bigger than the bulkheads.
Once I had the template right, it was time to get to drilling:


I went very slow, applied NO pressure and started the bit on an angle to avoid it skipping around. Each cut took a few minutes and there was very little chipping.
The result:


I literally could not be happier with how it turned out. You can see in the above picture how there is just less-than a 1/4 inch between the top of the internal box and the inside lip of the trim.
I took the rock out of the box-o-packaging peanuts and threw it in the tank. This is the result with ZERO planning. I just pulled pieces out and set them in. It came out pretty good. There are some changes I will make. It was clear that I stood on one side of the tank as I laid it out. I have to get used to the idea that this tank will be viewable from all 4 sides (I don't think I am going to black out the far end of the tank. I want to see the whole friggen thing:


End view:

Right side:

Middle:

Left:

End under the overflow box:

Other side (it looks too flat!)

With a few tweaks, I think this is pretty much the look I am going for. 3 structures, maybe some bridges between. Lots of caves. Thoughts? Critiques?
As we were finishing up tonight, I talked my wife into helping me carry the stand into the house so we could get a feel for how it will look. The room is a giant living room, dining room, kitchen with vaulted ceilings:


The TV will eventually go above the fireplace (once I build our barnwood mantle) with an L-shaped sectional which will run along the wall and then 90 degrees toward the kitchen. I am also going to build a 6x18" barnwood bar top which will come off of the island.
Managing the move, along with all of the tank prep has been daunting, but I can see a light at the end of the tunnel finally.
One question, about the support under the floors. Here is what I am looking at under the tank:


The I-beam in the left of these pics sits just about where the overflow end of my tank sits (the jut out in the wall is where the window is behind my tank). There is another I-beam just to the right in the second pic on the other side of the heat duct. The joists run parallel to the tank. Do I need to put in a beam and some floor jacks? I can if the consensus is that I should. I have the floor jacks, and frankly, why not?
Those are the updates for now (as if that isn't a lot for one day...) I am going to rinse the reef saver rock and throw as much of it as I can in my sump, tank and refugium to try to get it seeded. I am going to throw the 20#s of Pukani in my saltwater mixing barrel with heater and a powerhead to get all of that organic junk off. A few more days and this baby is going to be ready for water.
Major construction projects at the new house are just about done. I need to finish sanding and sealing the concrete countertops, install the sink, and we are DONE! We move in next Saturday, so it's a good thing we have finished a lot of these projects (floors, trim, painting etc.)
Everyday more packages arrive on my doorstep, which is exciting. Today it was various plumbing parts and my dry rock (80#s reef saver and 20#s Pukani)
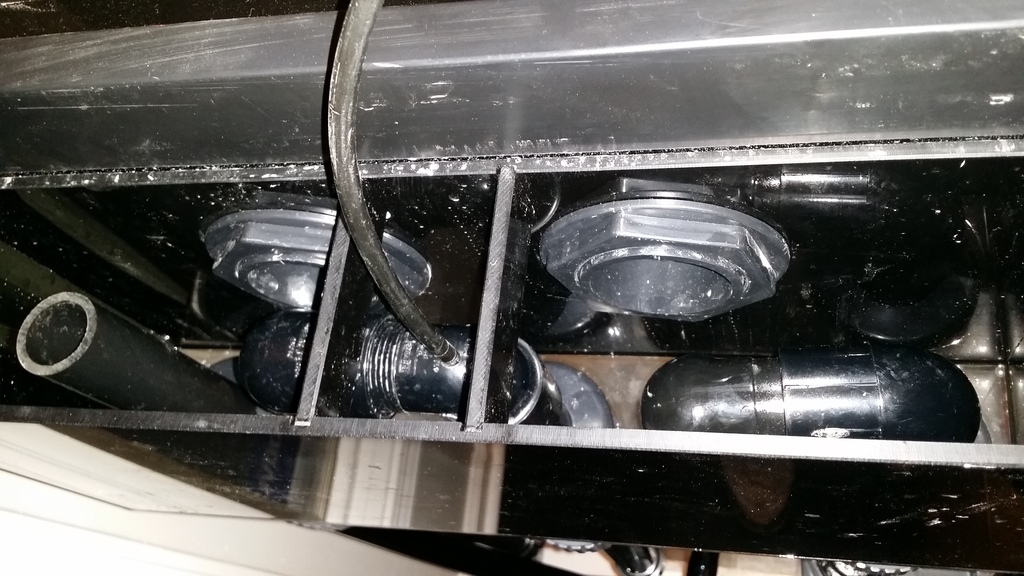
I finished priming the stand this afternoon. I am going to clear coat it in a matte poly spray this weekend. I also got the tank drilled for the Reef Savvy Overflow:
The hardest part was getting the template aligned correctly. I didn't want it too low, and have the water-line be visible, but I didn't want to go too high and be unable to get the weir off either. I set the top of the internal box about 1/4 of an inch below the trim. I think this will keep the water line hidden. There is some play as the holes are slightly bigger than the bulkheads.
Once I had the template right, it was time to get to drilling:
I went very slow, applied NO pressure and started the bit on an angle to avoid it skipping around. Each cut took a few minutes and there was very little chipping.
The result:
I literally could not be happier with how it turned out. You can see in the above picture how there is just less-than a 1/4 inch between the top of the internal box and the inside lip of the trim.
I took the rock out of the box-o-packaging peanuts and threw it in the tank. This is the result with ZERO planning. I just pulled pieces out and set them in. It came out pretty good. There are some changes I will make. It was clear that I stood on one side of the tank as I laid it out. I have to get used to the idea that this tank will be viewable from all 4 sides (I don't think I am going to black out the far end of the tank. I want to see the whole friggen thing:
End view:
Right side:
Middle:
Left:
End under the overflow box:
Other side (it looks too flat!)
With a few tweaks, I think this is pretty much the look I am going for. 3 structures, maybe some bridges between. Lots of caves. Thoughts? Critiques?
As we were finishing up tonight, I talked my wife into helping me carry the stand into the house so we could get a feel for how it will look. The room is a giant living room, dining room, kitchen with vaulted ceilings:
The TV will eventually go above the fireplace (once I build our barnwood mantle) with an L-shaped sectional which will run along the wall and then 90 degrees toward the kitchen. I am also going to build a 6x18" barnwood bar top which will come off of the island.
Managing the move, along with all of the tank prep has been daunting, but I can see a light at the end of the tunnel finally.
One question, about the support under the floors. Here is what I am looking at under the tank:
The I-beam in the left of these pics sits just about where the overflow end of my tank sits (the jut out in the wall is where the window is behind my tank). There is another I-beam just to the right in the second pic on the other side of the heat duct. The joists run parallel to the tank. Do I need to put in a beam and some floor jacks? I can if the consensus is that I should. I have the floor jacks, and frankly, why not?
Those are the updates for now (as if that isn't a lot for one day...) I am going to rinse the reef saver rock and throw as much of it as I can in my sump, tank and refugium to try to get it seeded. I am going to throw the 20#s of Pukani in my saltwater mixing barrel with heater and a powerhead to get all of that organic junk off. A few more days and this baby is going to be ready for water.


") .
.