180g Bow-Front + many beers and tears (lots o pics)

Rag Gnar

Community Member
View Badges
Joined
Feb 20, 2019
Messages
73
Reaction score
109
Rating - 0%
0   0   0
Follow my Fiancée and I as we go through the highs and lows of building a dream setup.

Finally bought my first house, which means it is time for my dream tank!

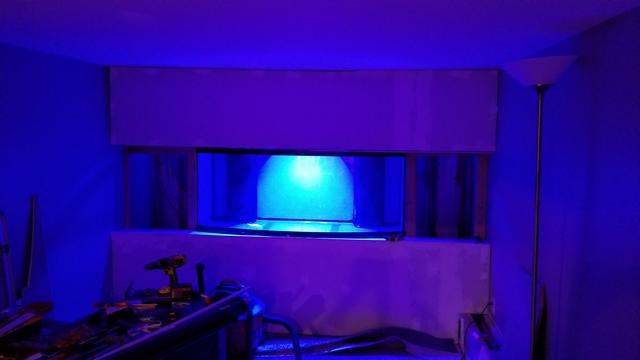
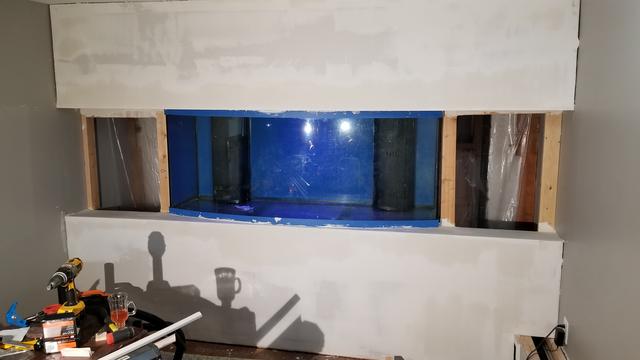
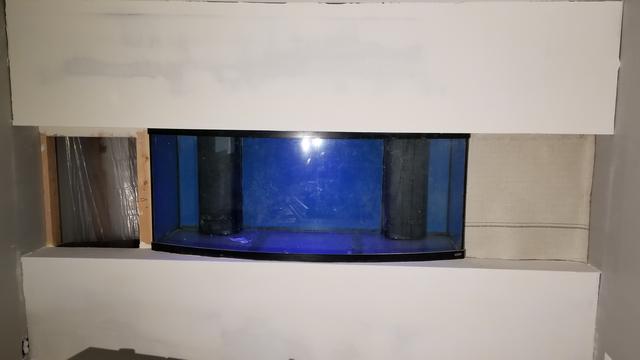
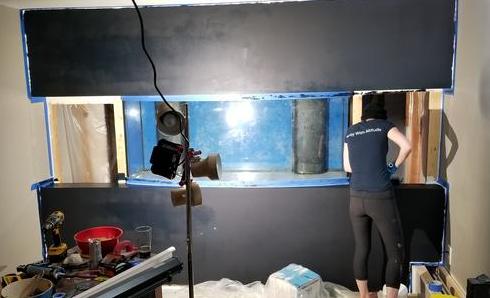
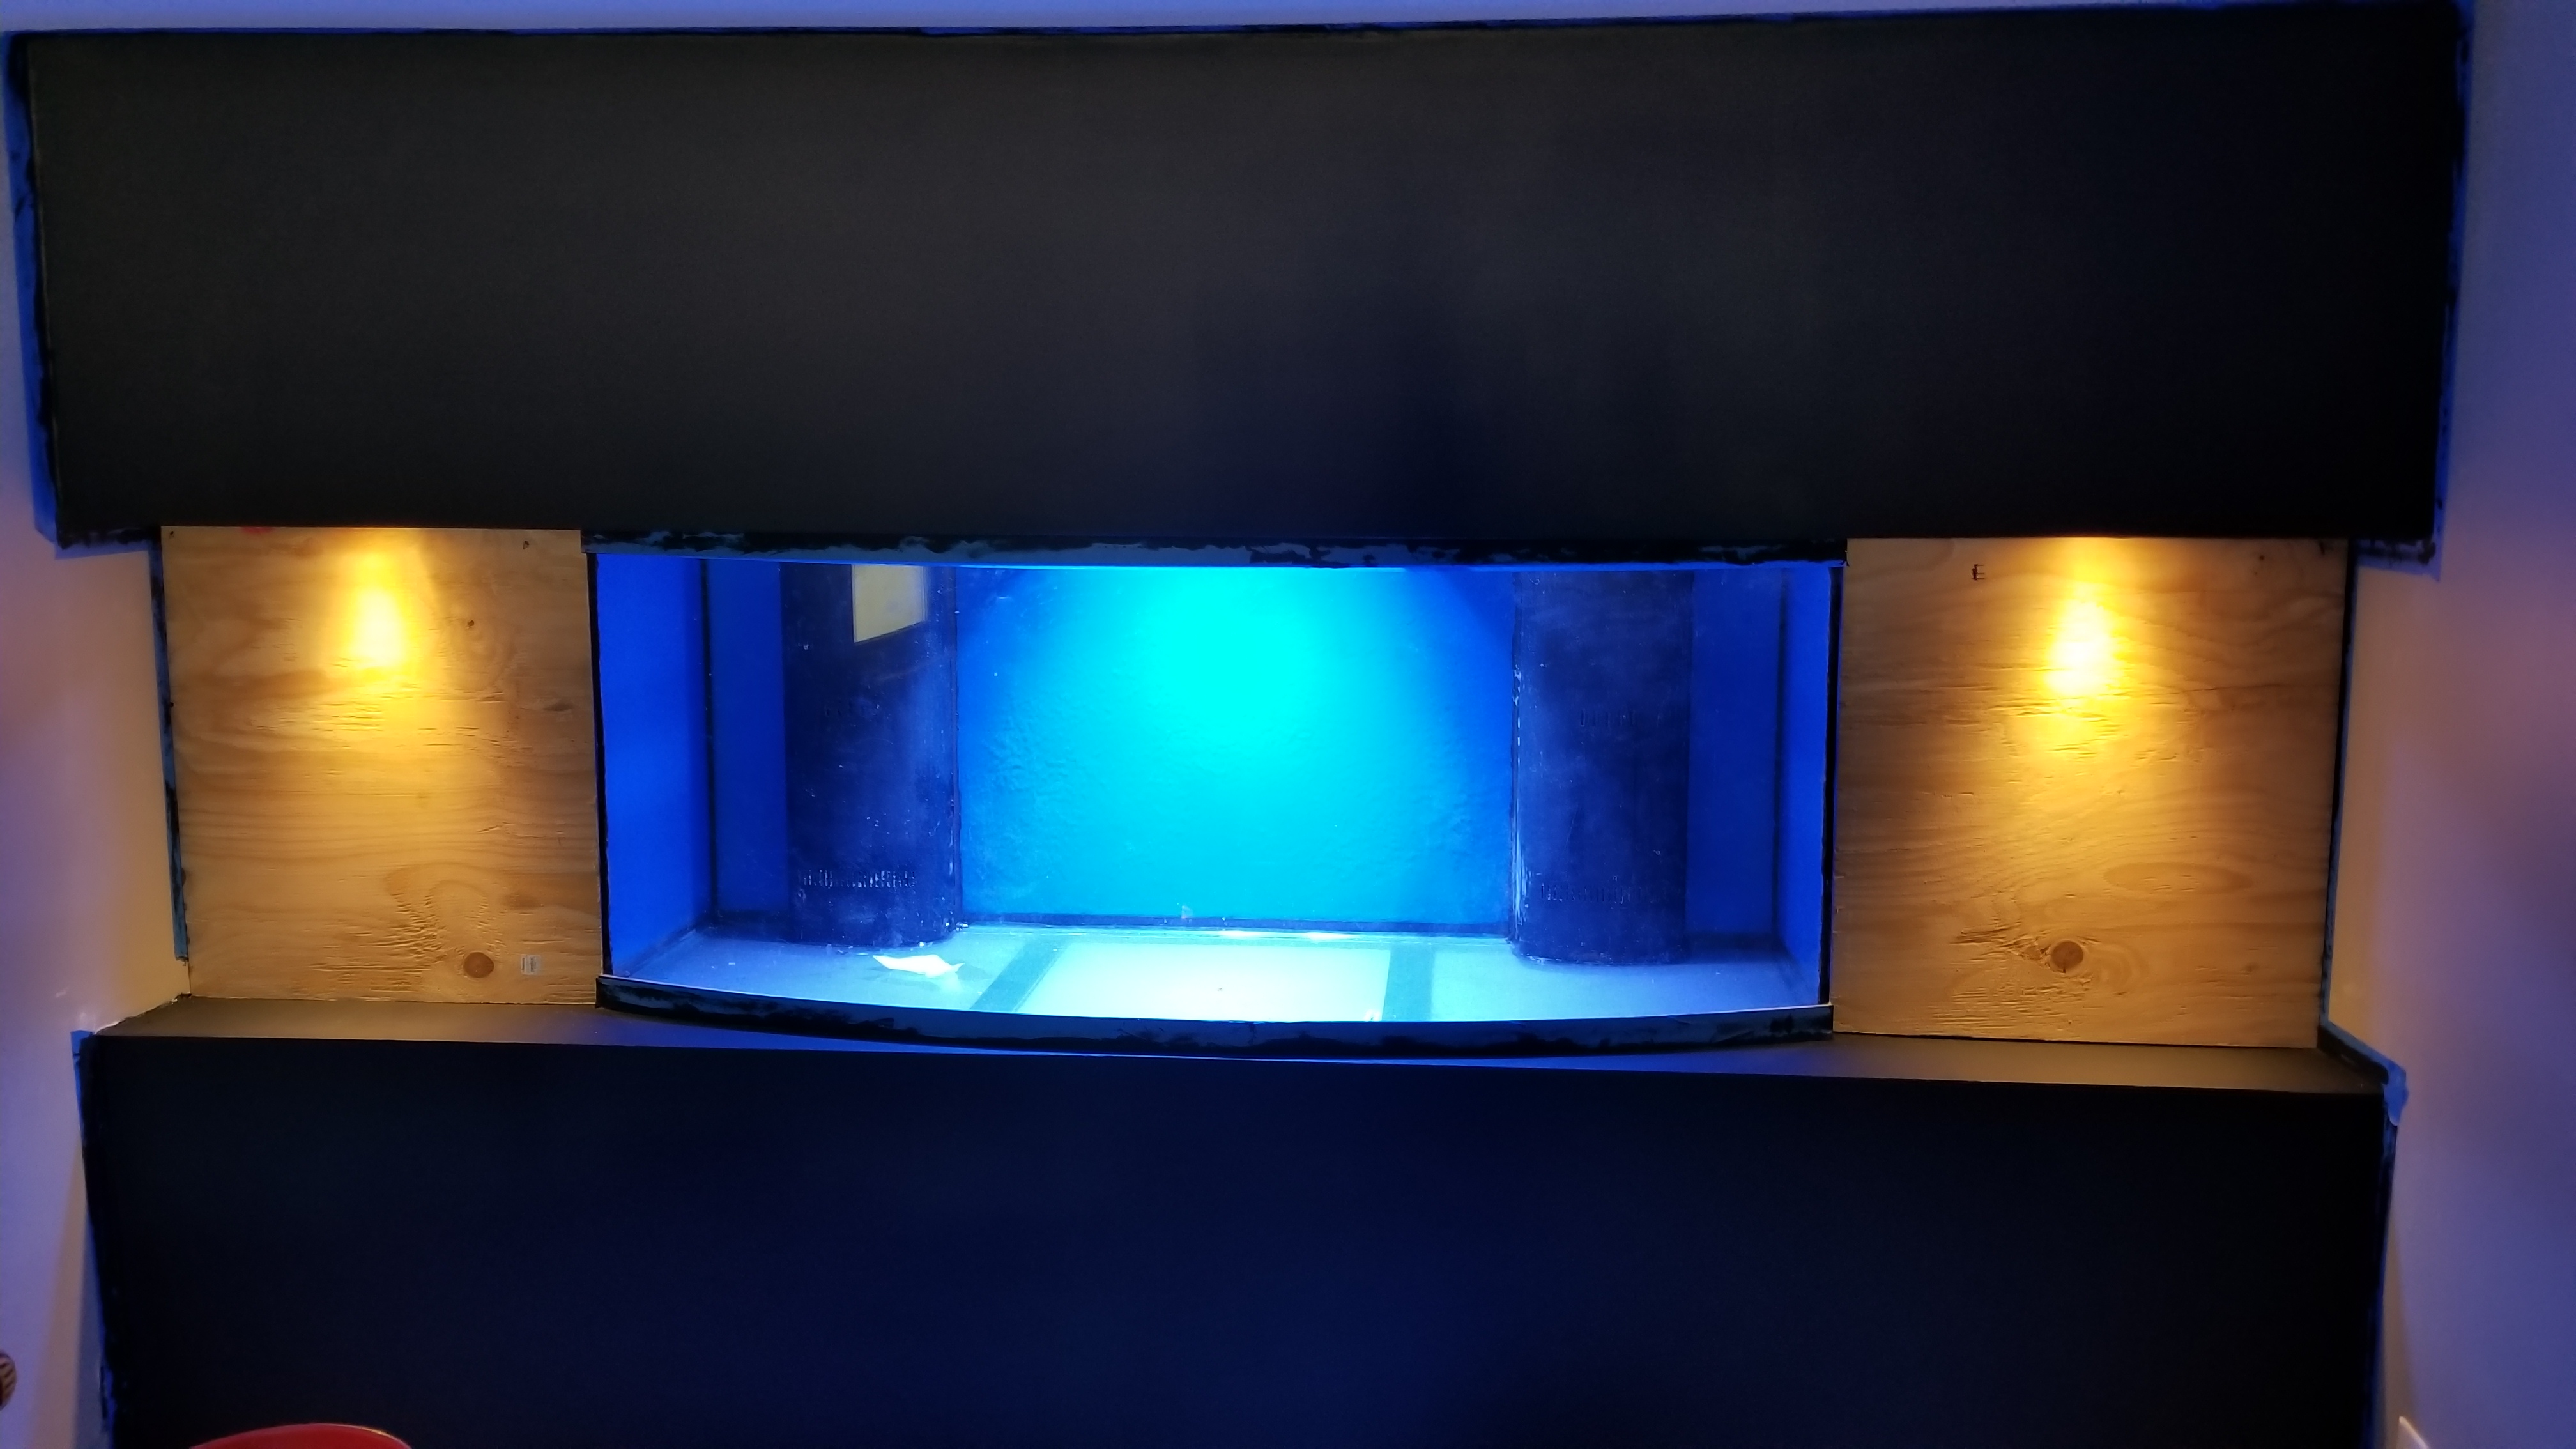
The Vision: AN IN-WALL WINDOW TO THE OCEAN!!!!
buuuut reality and $$$ will make this a challenge.
The Tank: 175 gallon RR oceanic bow front

idskSLN.jpg


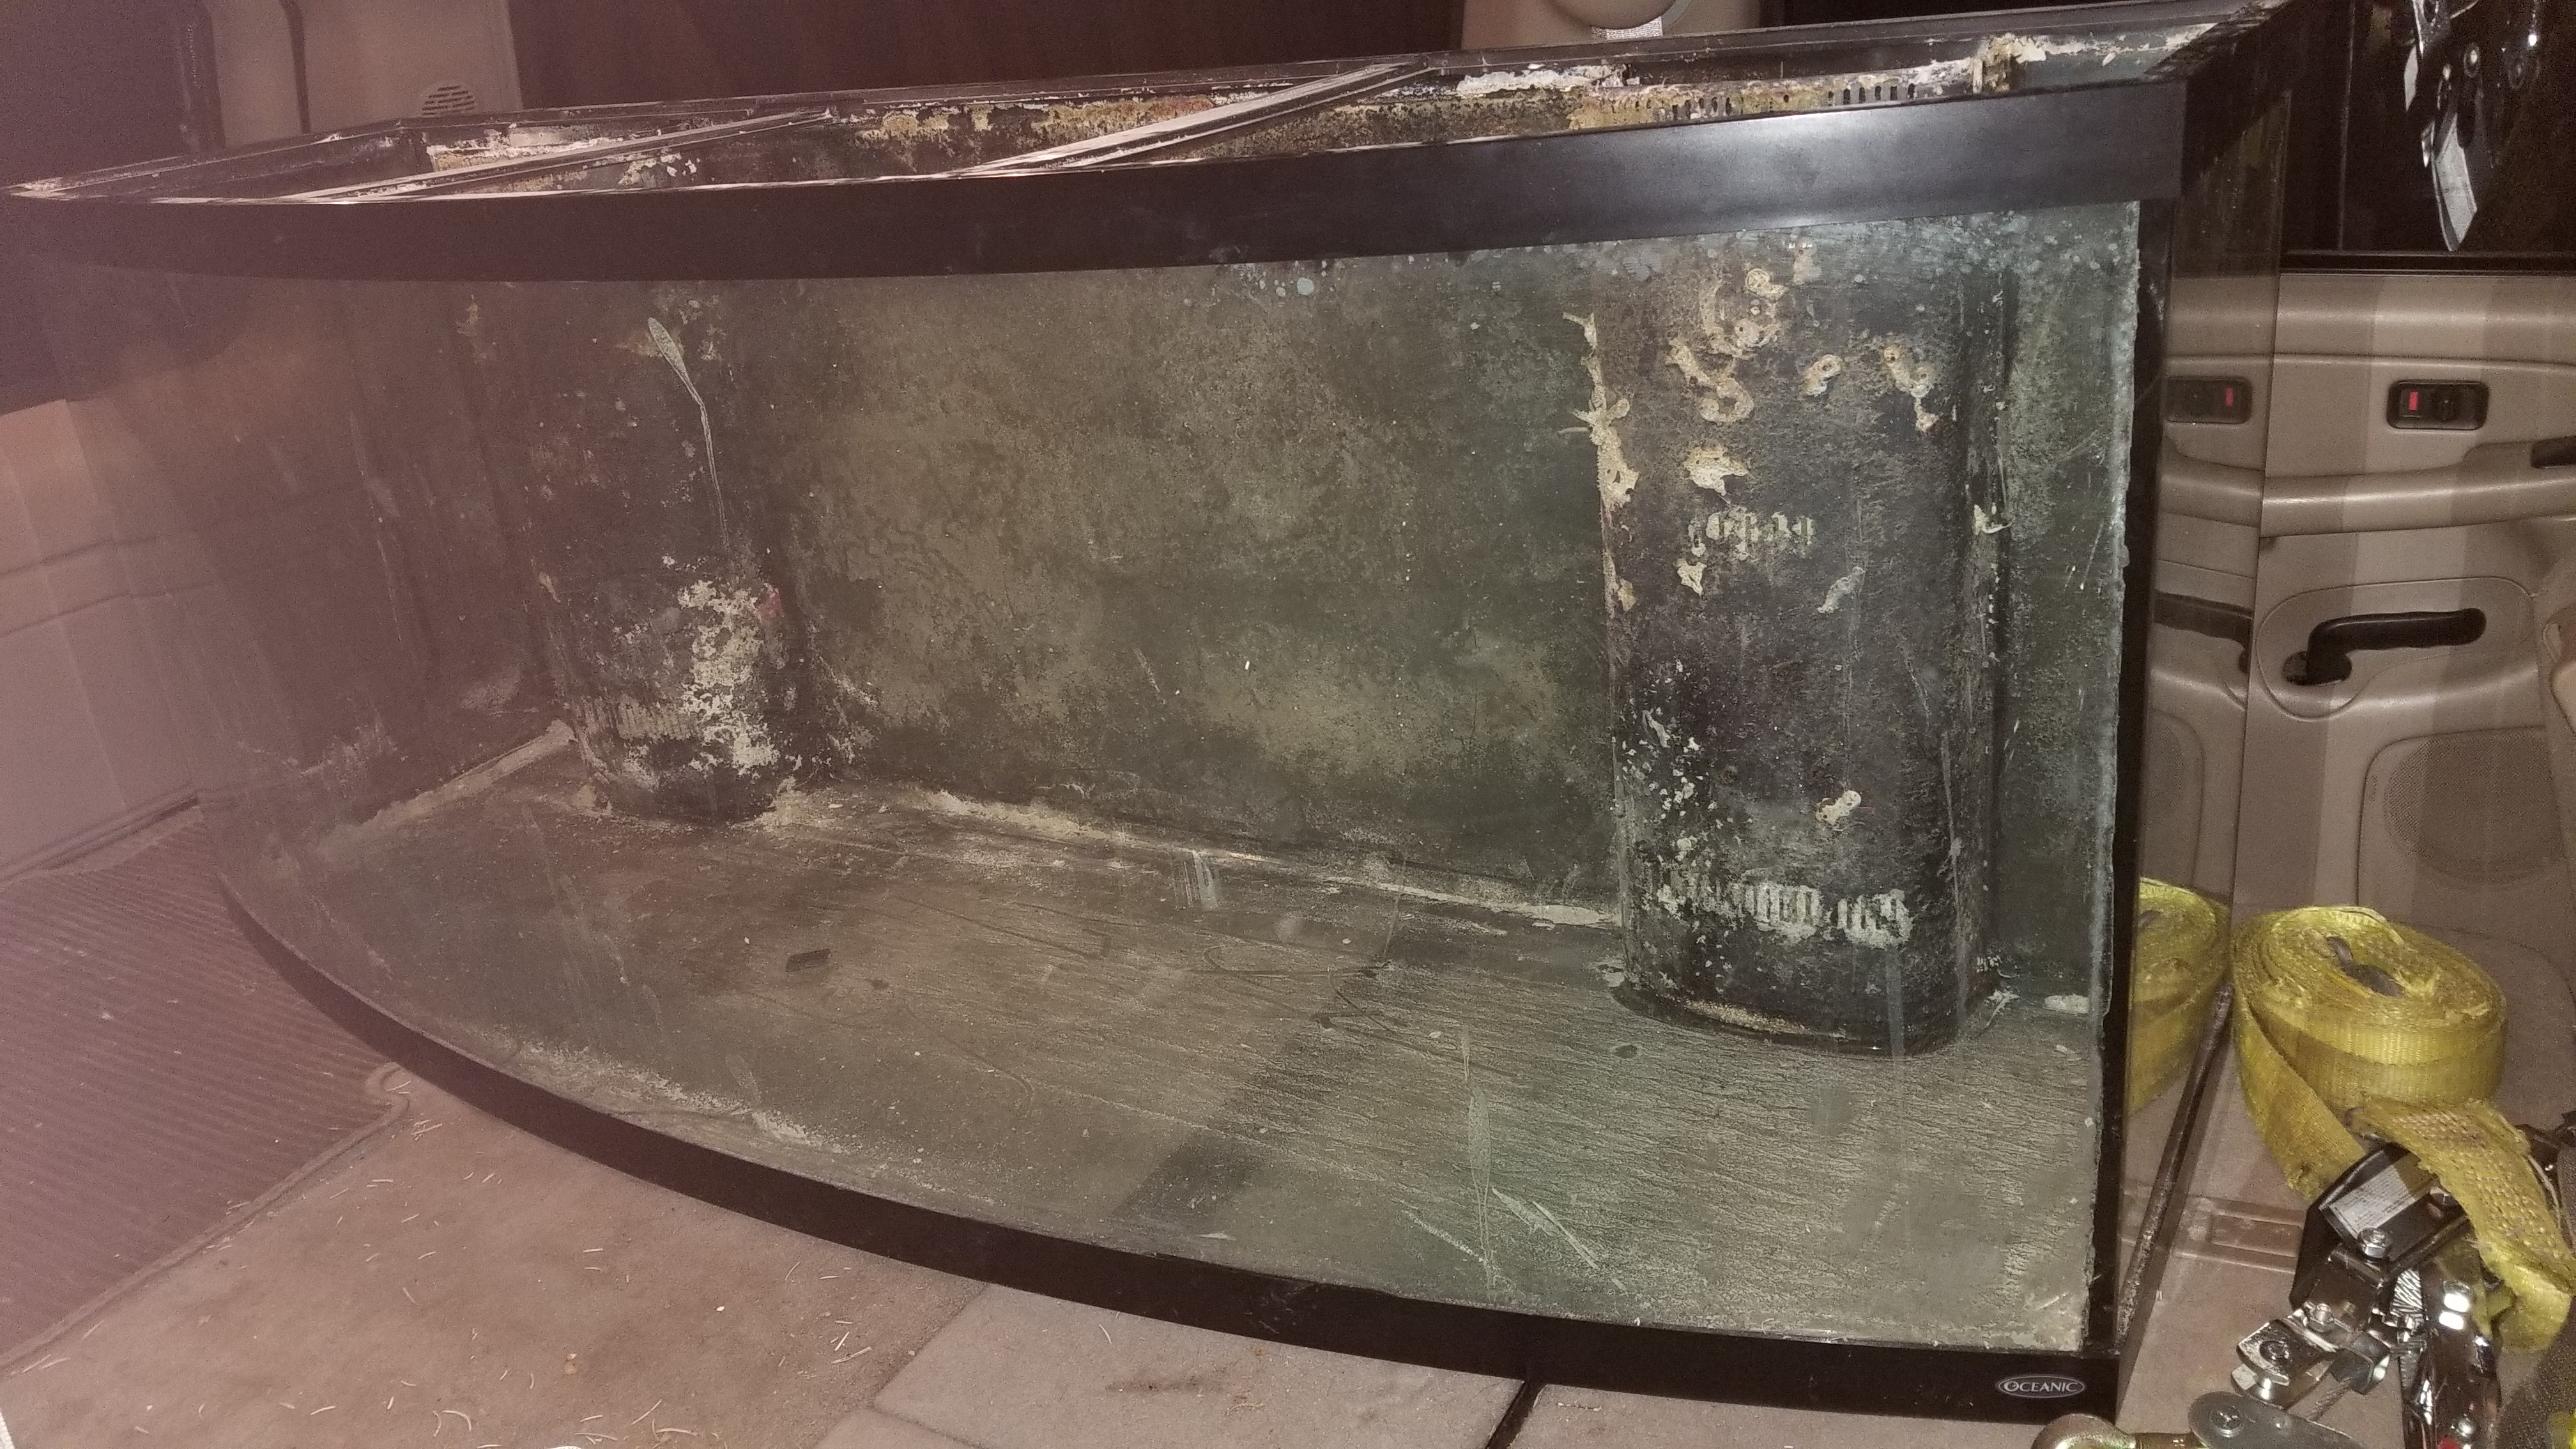
I had been planning on using a 120g RR tank for the past 2 years, and have moved that hoss 3 times! I always wanted larger but weight is an issue and I got one heck of a deal on it. also hadn't come across any large bowfronts I could afford. I have been on Craigslist for the last year searching for deals on all parts to try and save as much as possible.

The room I want to use, is slab on grade, thus making weight less of a concern. So I started looking at other options than the 120g. One of the local forum members hits me up with a possible lead for a tank, AND IT HAPPEND TO BE A BOWFRONT at a great cost too!!! What luck!
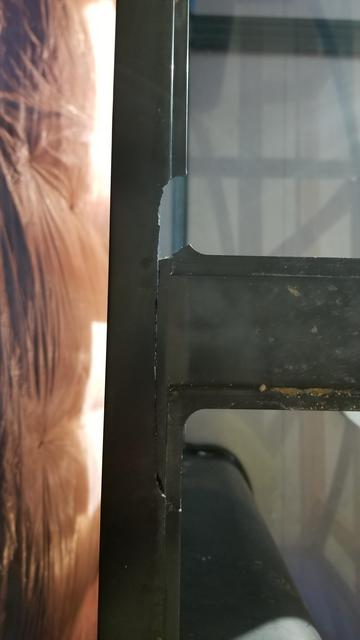
The tank has one broken brace that needs repaired but holds water just fine.

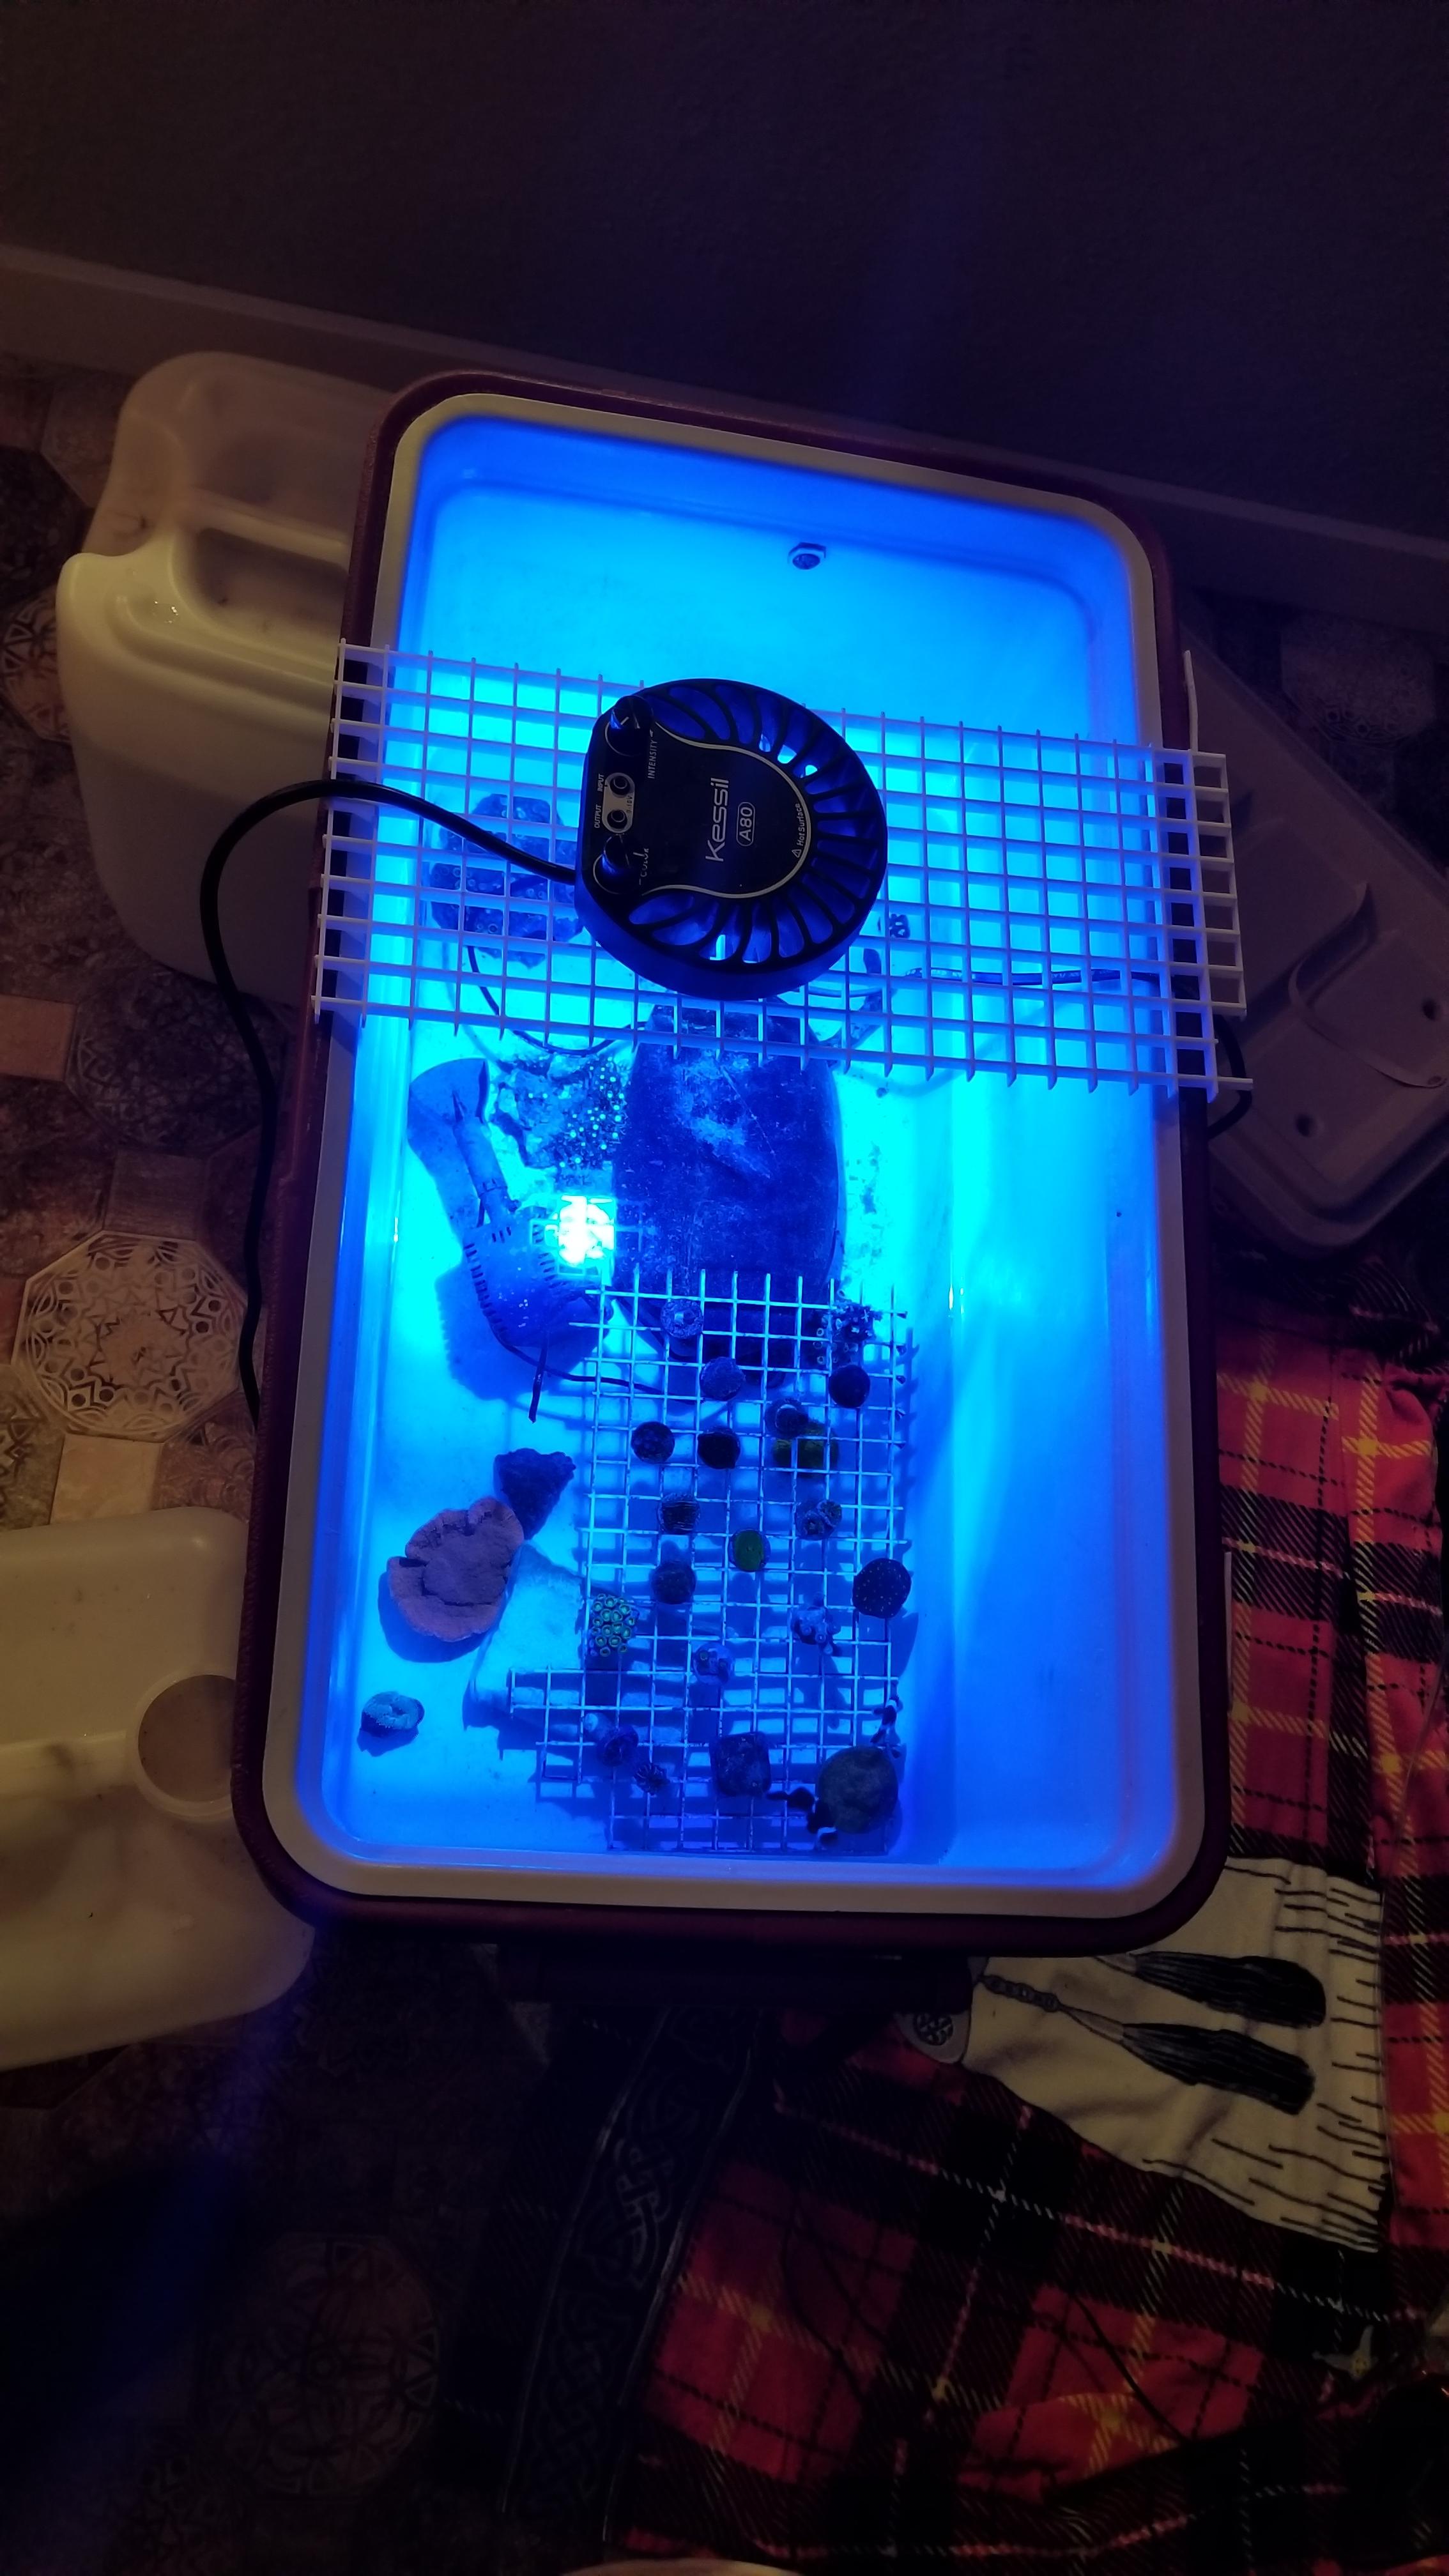
I am upgrading from a 58g tank meaning that almost all of the hardware I have will not work on the new setup, this makes my wallet cry.
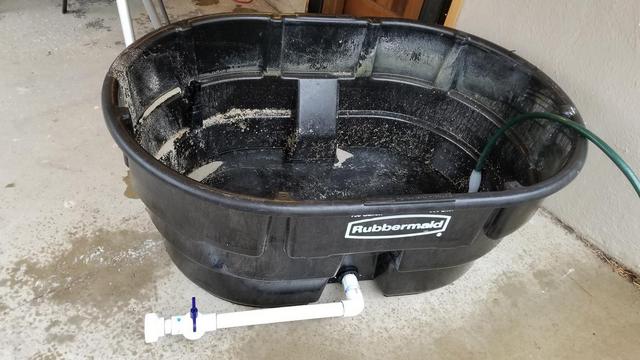
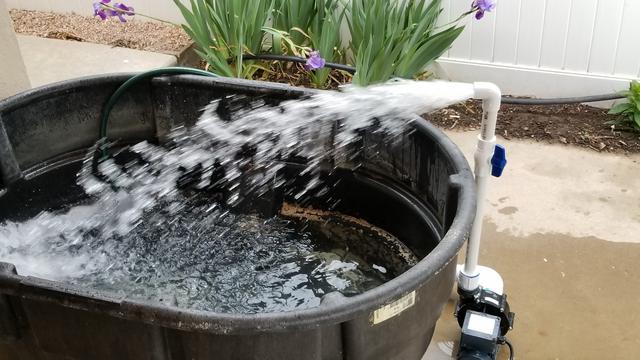
(here it is in "limp mode" after the move just keeping corals alive until the new tank is setup)
hIsZFi7.jpg

had to get them out of the cooler...
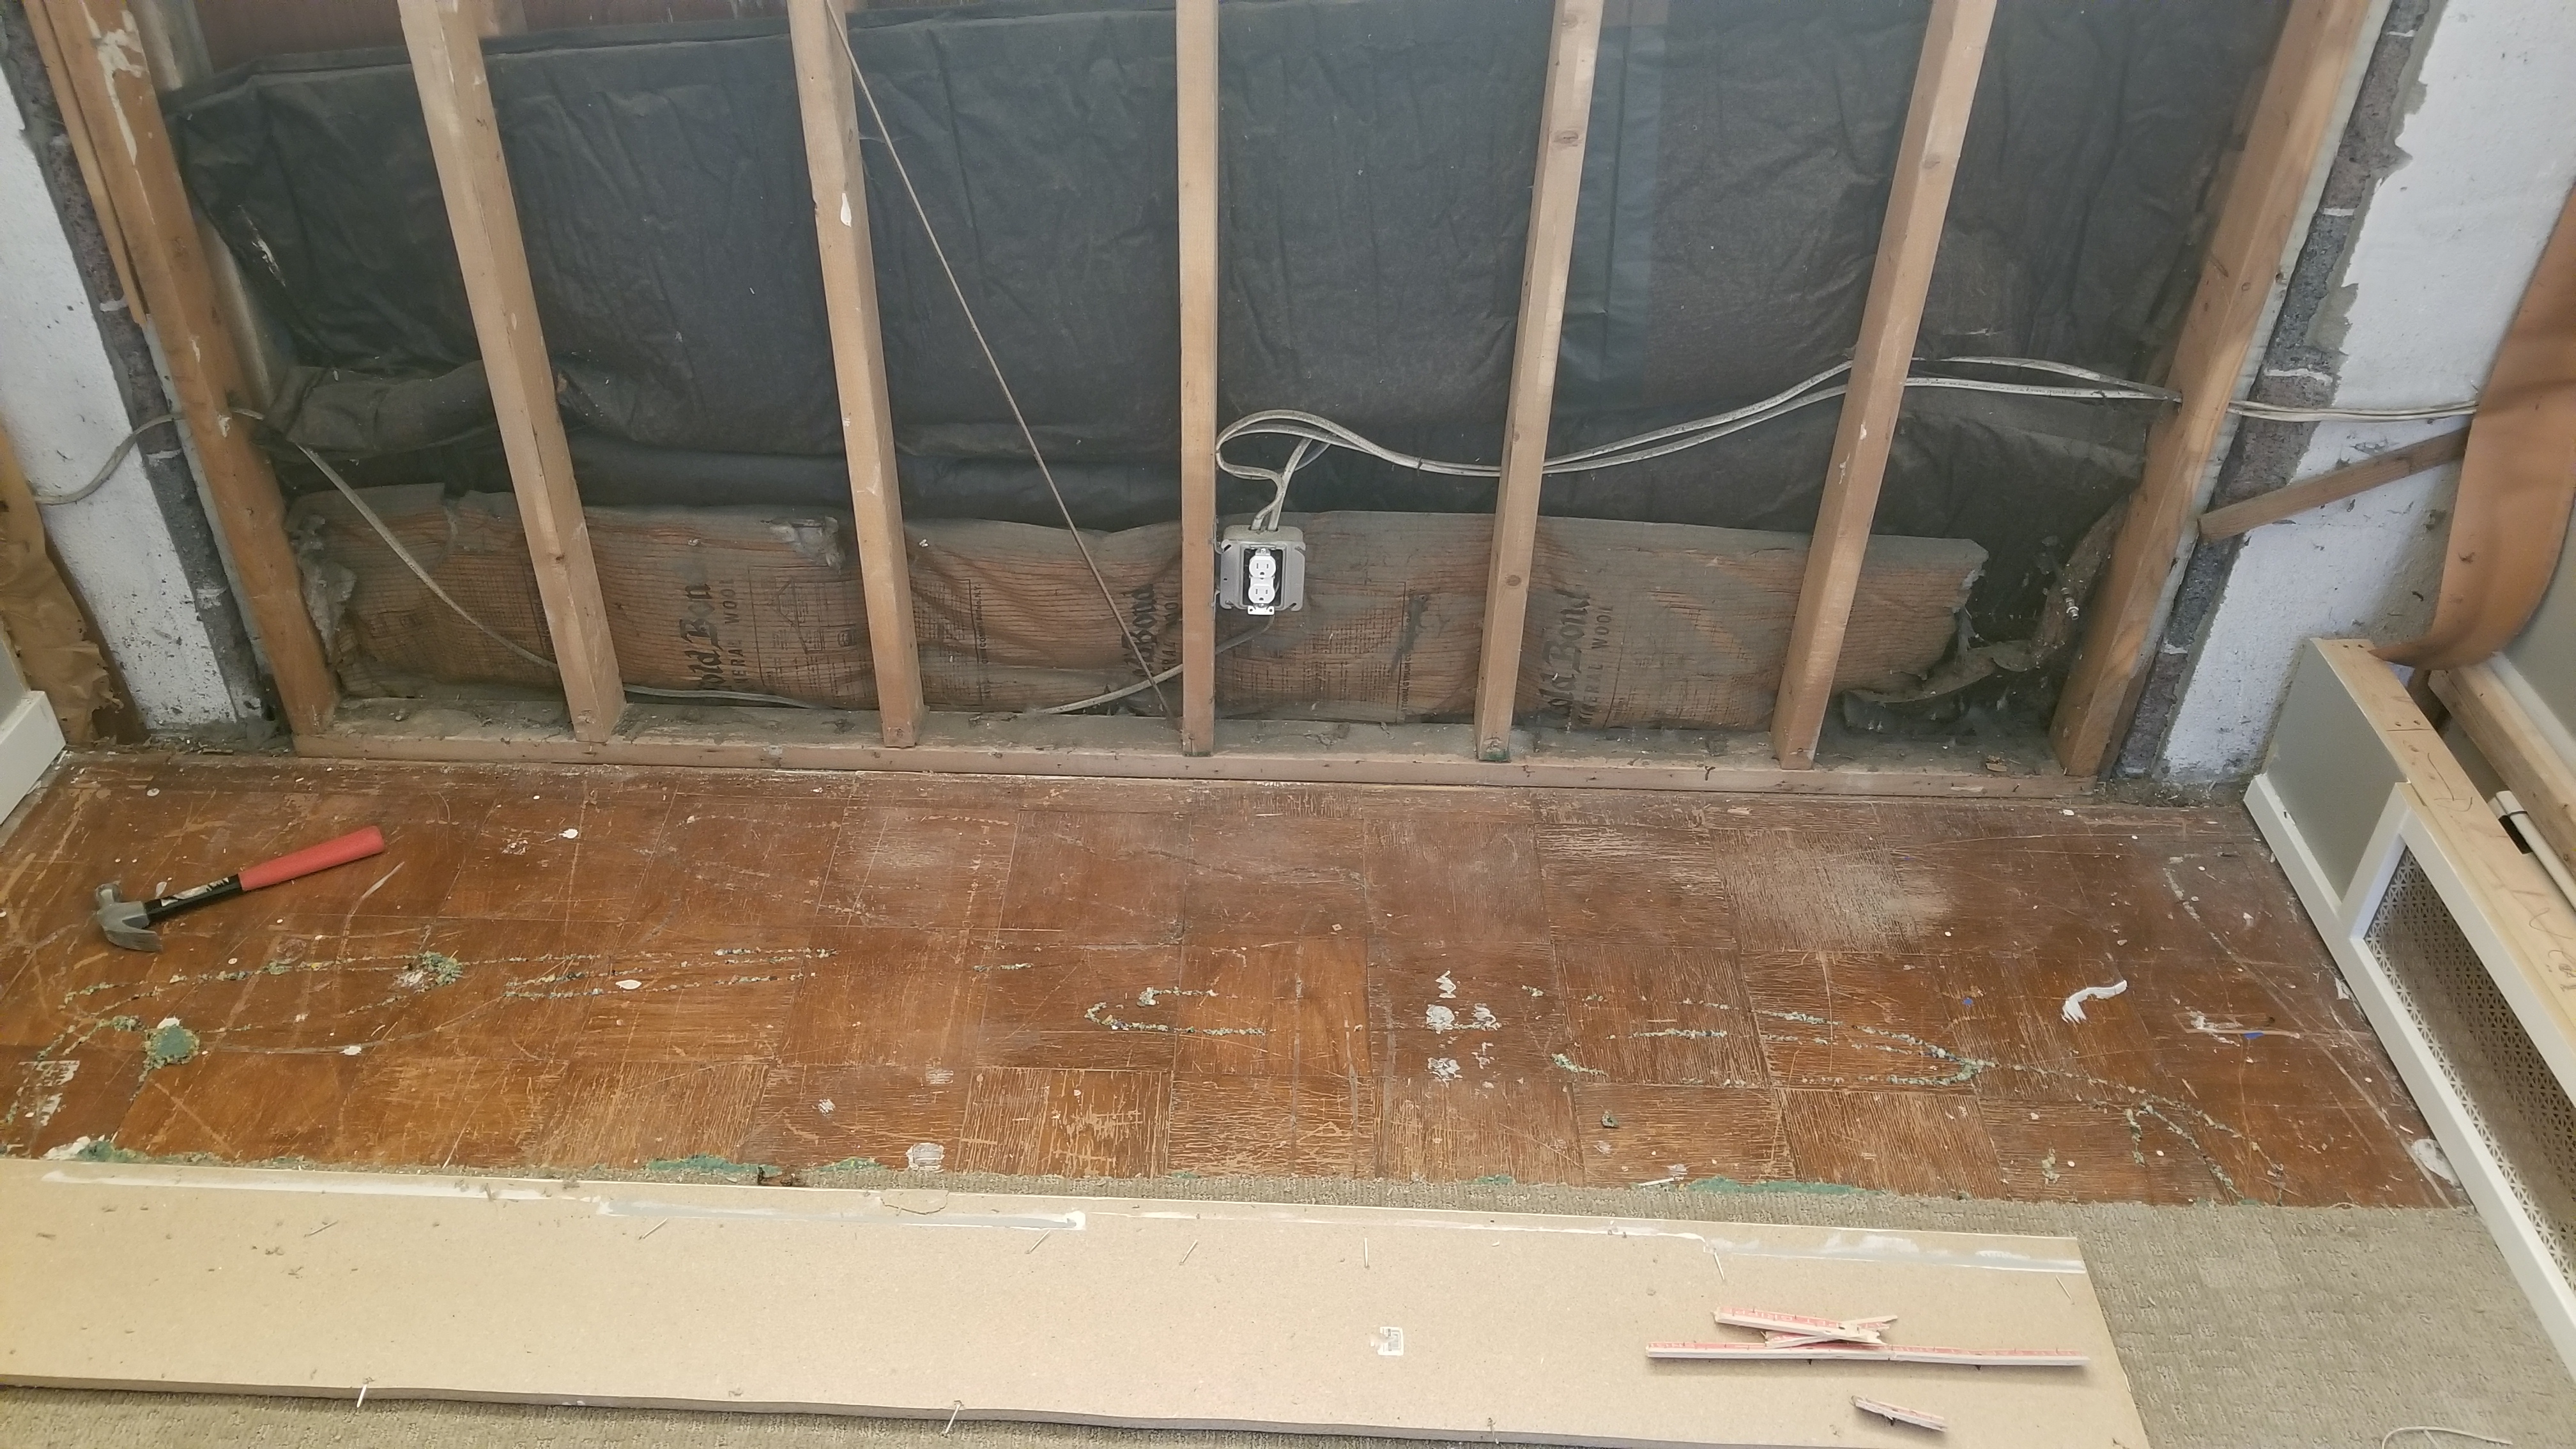
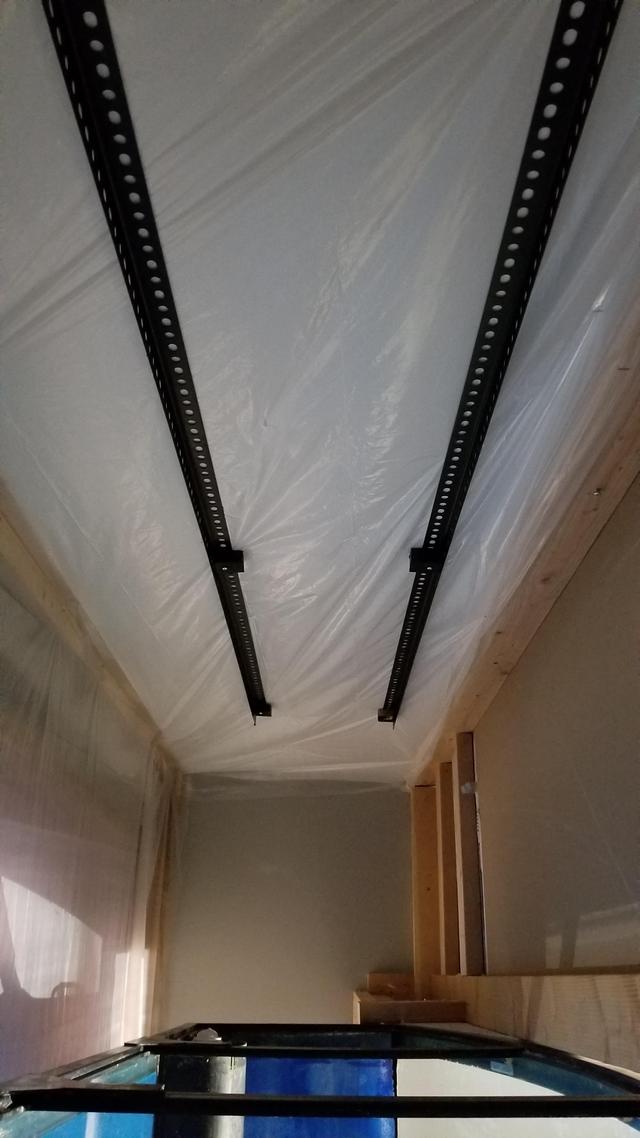
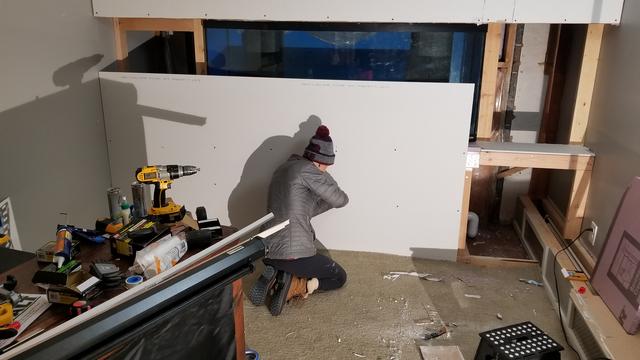
nK4Oqvf.jpg


The Room:
before
uOY0Jmb.jpg


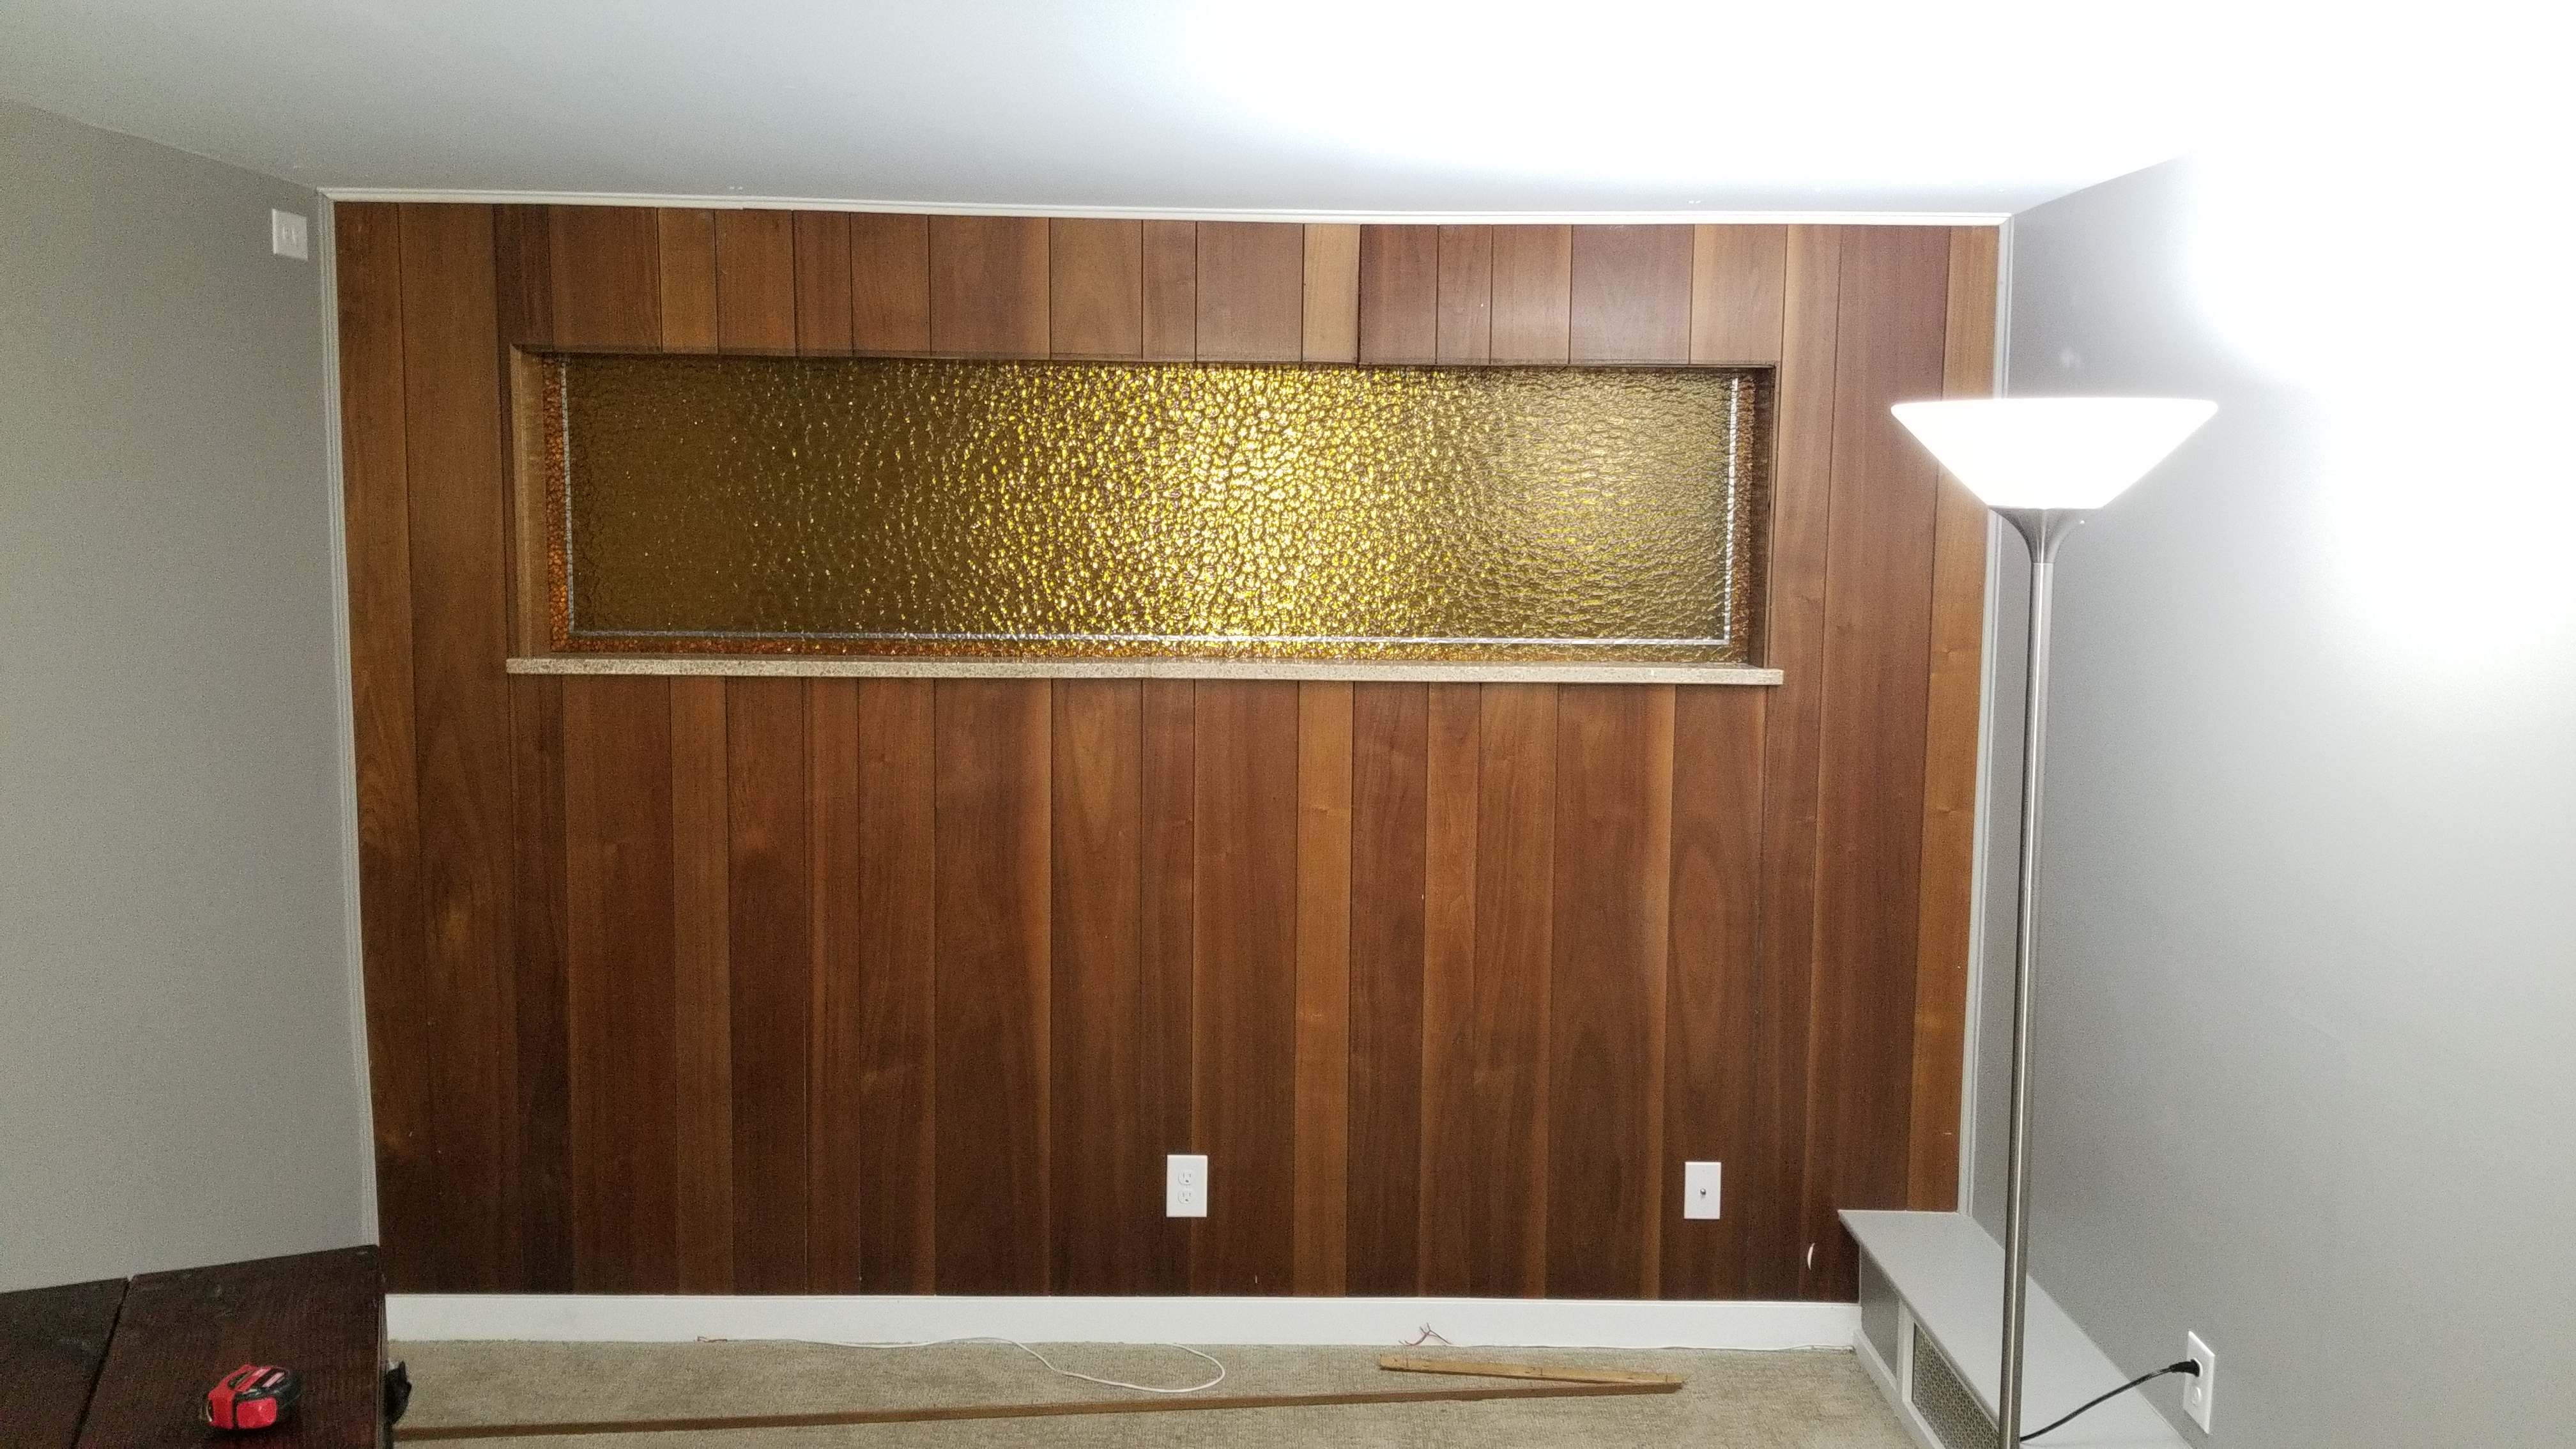
gotta get rid of that 1970s paneling!
0aEyg3W.jpg

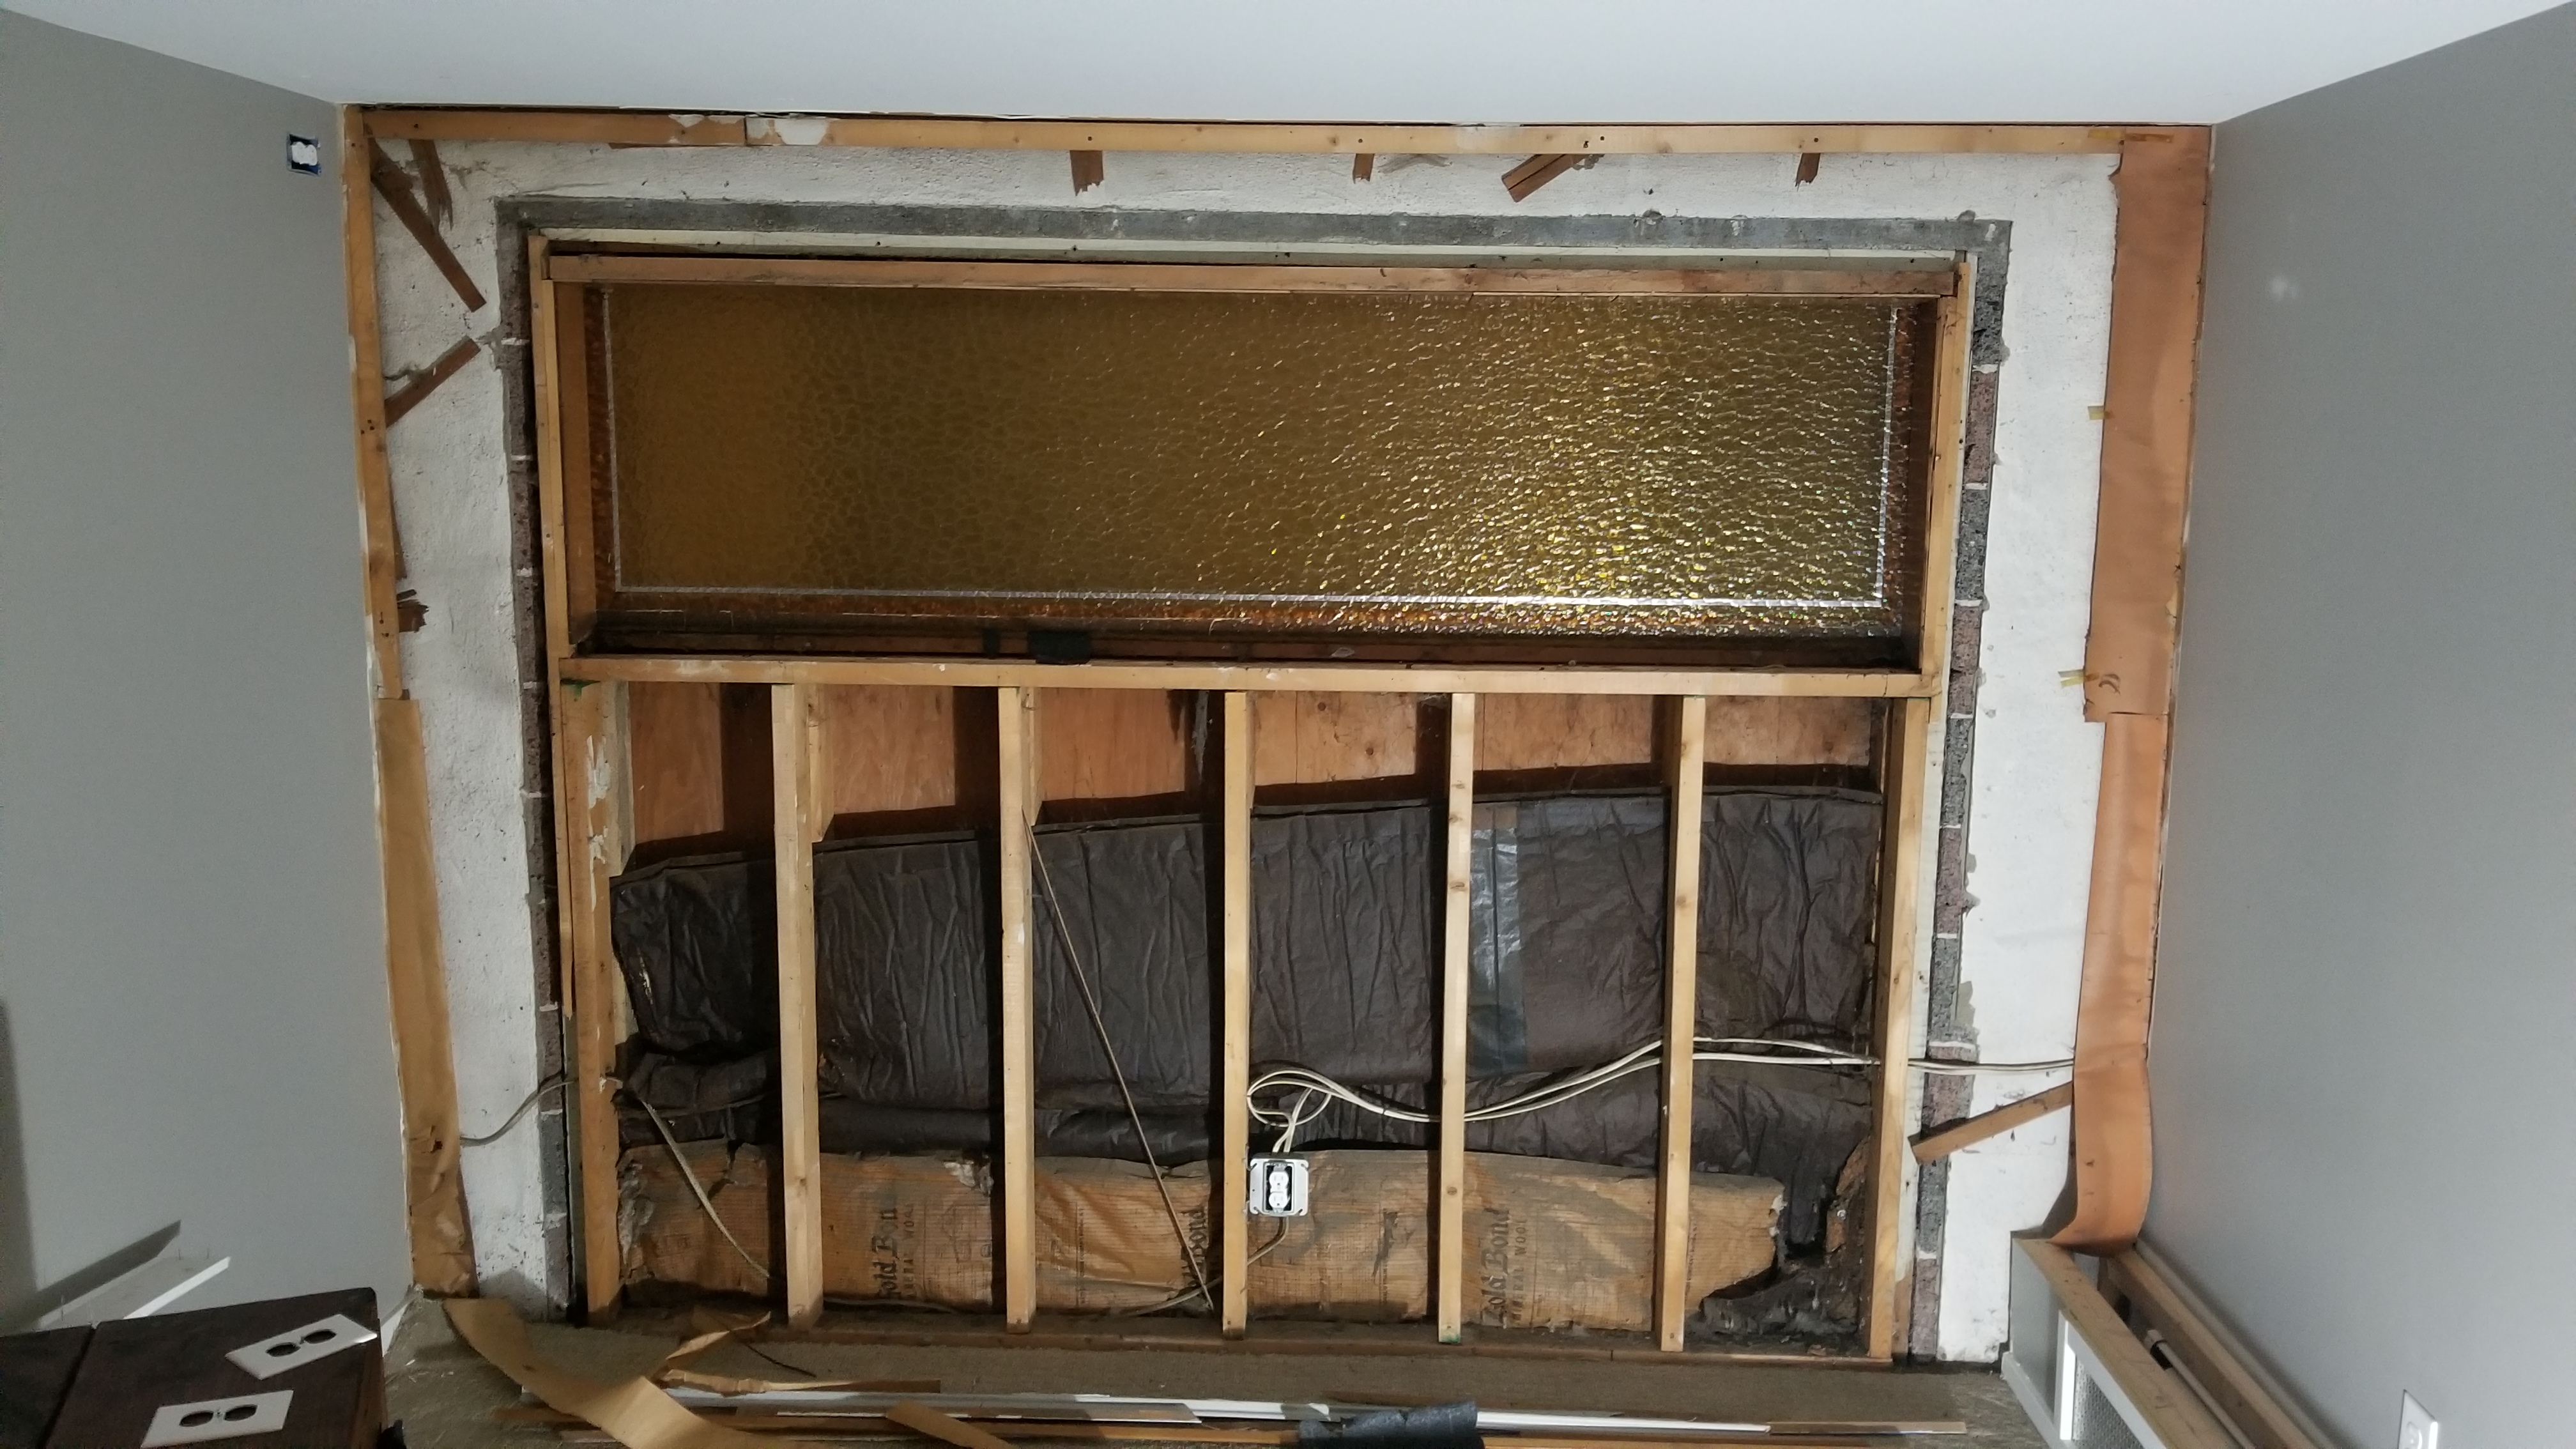
well that is a sad attempt of insulation, that needs to be fixed.
I plan on just blocking off that old window, that way when resale happens I can easily revert the space.
2ZGu5j1.jpg


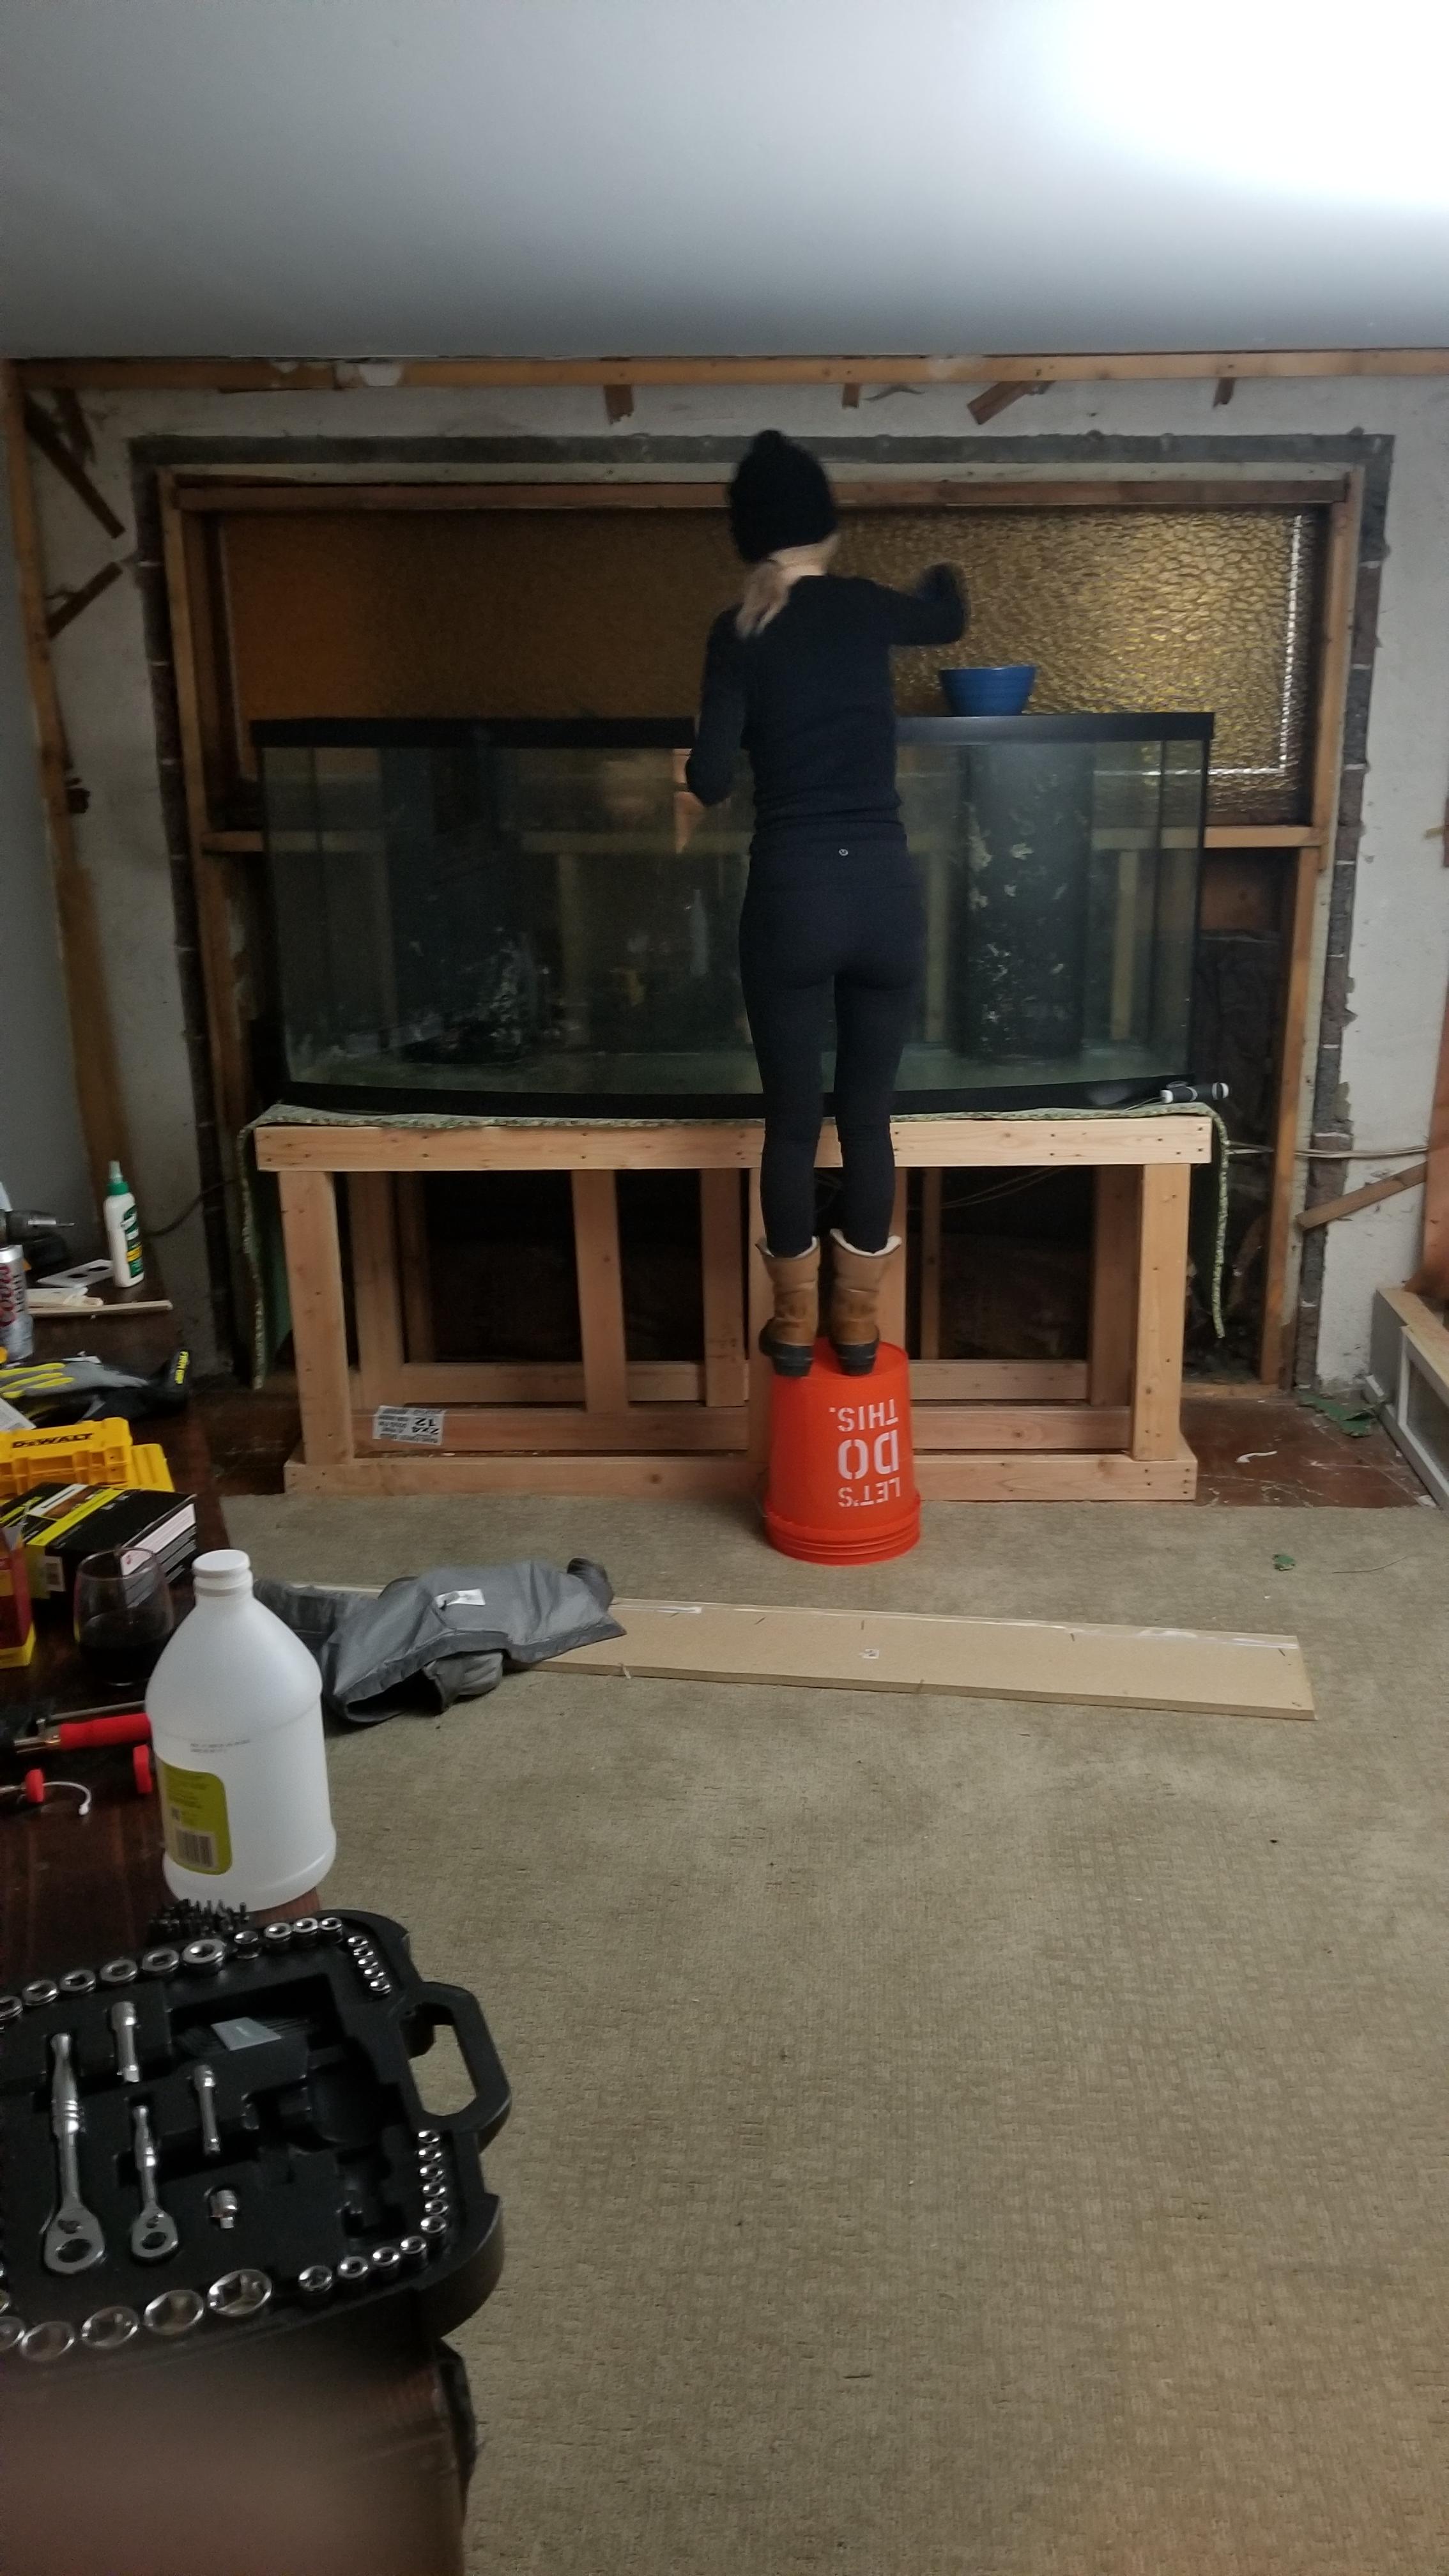
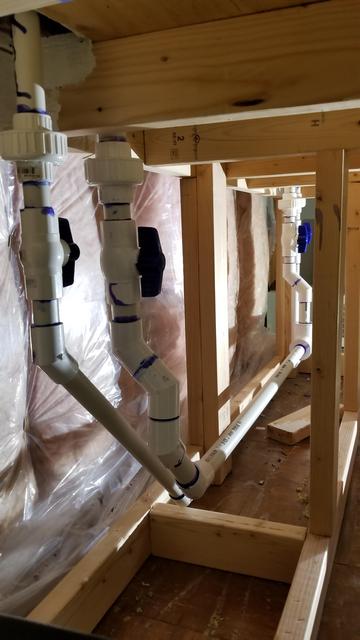
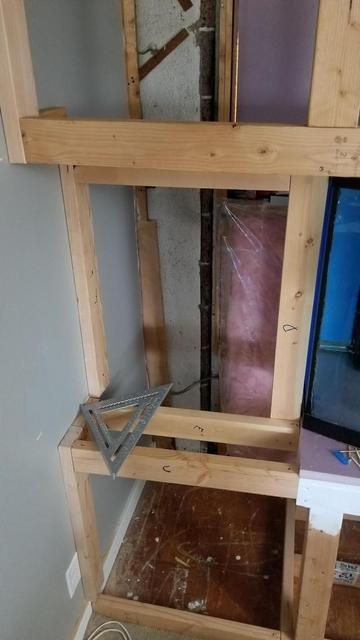
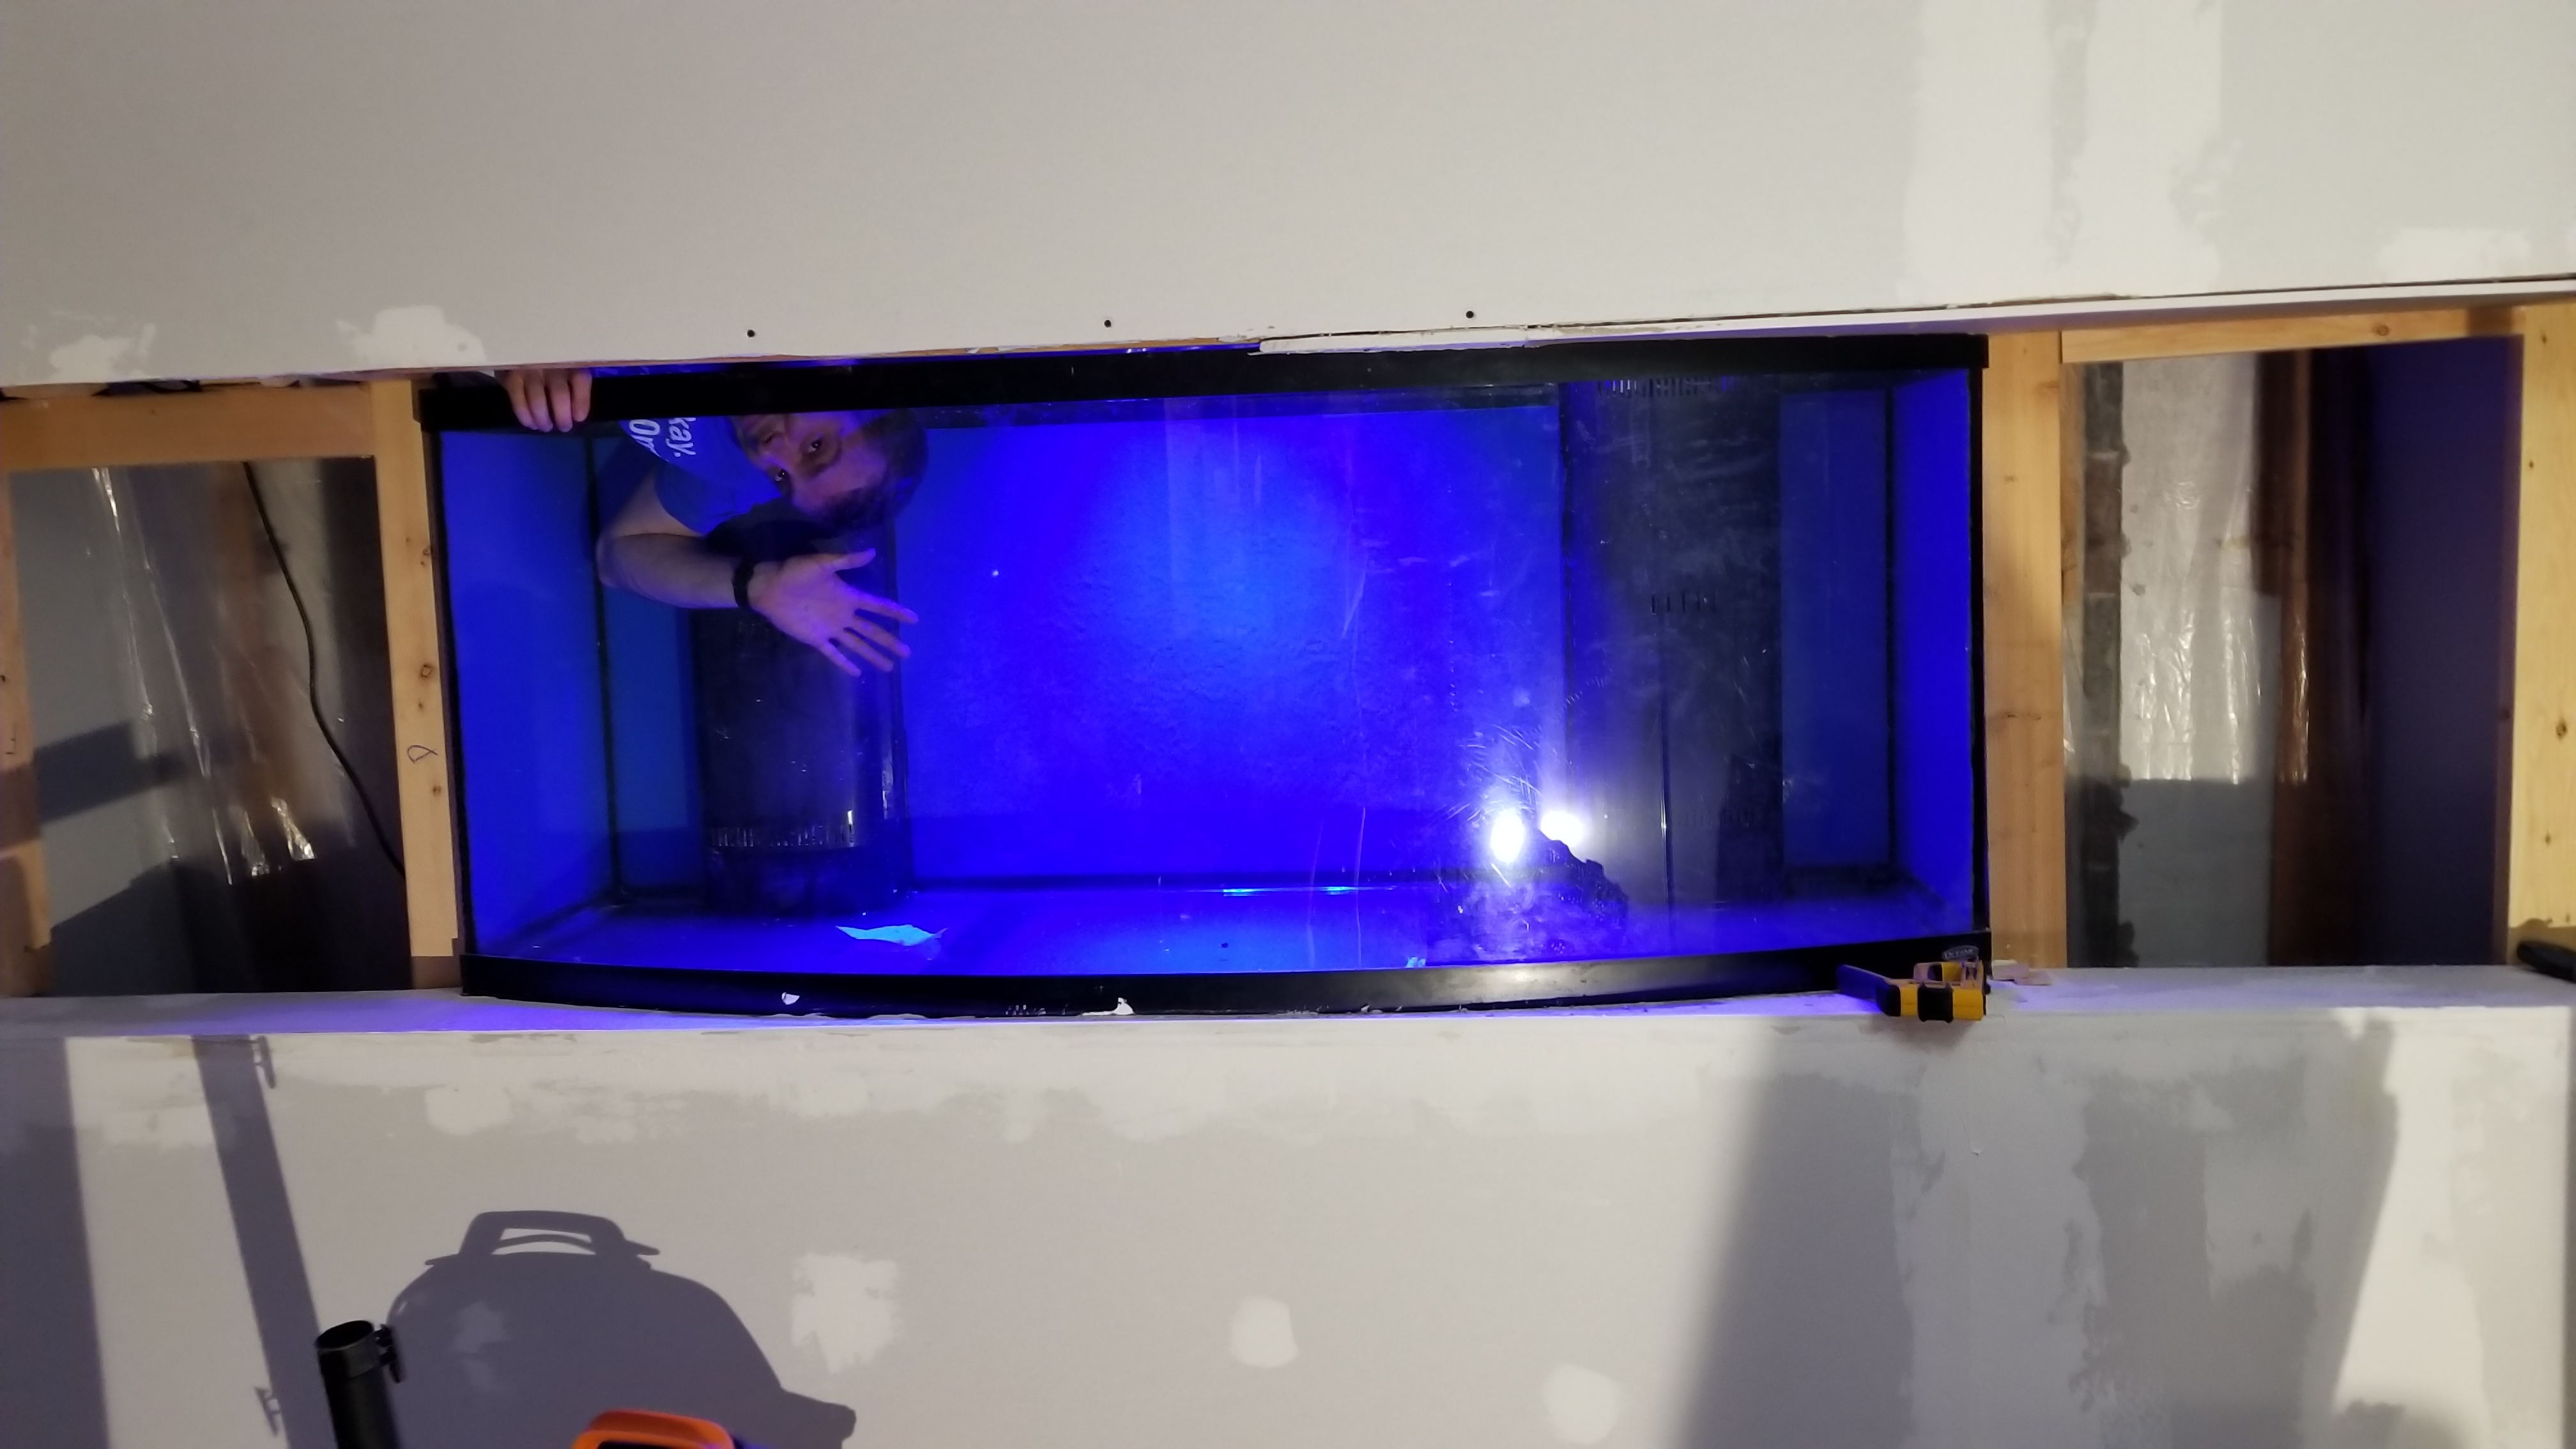
I was borrowing my dads truck and had to get it back to him so I had to move the tank. So my buddy and I put our big boy pants on, and moved that beast into the house onto the stand I built. 2x4 doubled up on the frame and 6 main legs ( I might add 2 more mains this weekend just to be sure)
added a few extra single braces for good measure

5fN4Vv3.jpg


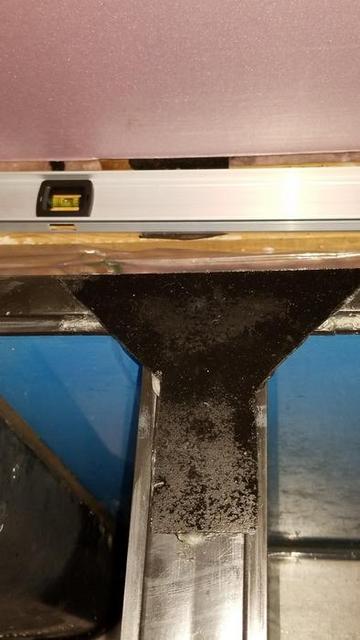
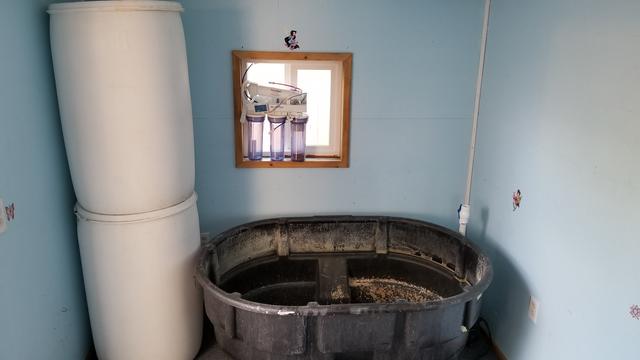
The Fiancée got to cleaning all of the encrusted duster skeletons and coralline algae off. She could go swimming in this!
EgsOqdm.jpg


Next Step: I am extremely wary of any inconsistent force applied to the bottom of the tank. I don't want a pressure point to cause cracks or cloud the bowed glass, so I will be leveling MDF board onto the stand with mortar or bondo (better chemical resistance). Then I will seal the entire stand.
 

Mastiffsrule

Where ever you go, there you are, so be nice 2 you
View Badges
Joined
Feb 10, 2019
Messages
8,440
Reaction score
33,571
Location
Charlotte
Rating - 0%
0   0   0
Looks like a good start.

I think this should get set up as a build thread so we can watch your progress. Total jealous of the build in. And the fiancé helping, my wife would have ripped apart the stand just to get a 2x4 to hit me with.

Welcome to the forum , keep us updated on the progress
 
OP
OP
Rag Gnar

Rag Gnar

Community Member
View Badges
Joined
Feb 20, 2019
Messages
73
Reaction score
109
Rating - 0%
0   0   0
Whoops I thought this was for anything 180+ related.
Mods move if I messed this up please.

@Mastiffsrule You are asking the wrong questions, was my fiancee there? Yes!
Supportive? Questionable
I love her to death but TLC is not her strongest attribute, I swear I saved that glass once every 5 minutes from an "oops."
I am very lucky to have her be a part of this hobby no matter what she breaks. I am sure my first hippo tang was asking what the heck I was doing haha
 
OP
OP
Rag Gnar

Rag Gnar

Community Member
View Badges
Joined
Feb 20, 2019
Messages
73
Reaction score
109
Rating - 0%
0   0   0
per usual we are way behind updating and working on the build. New position at work, springtime house prep, blah blah blah......

Insulated the wall and the old ineffective window
dEE3mp6b.jpg


Seeing that the tank came pre drilled with only 2 holes in each over flow we went with duroso stand pipes and followed their guide (DIY Duroso)

KWGKcVG.jpg


It is much cheaper to have a siphon do the work than to buy another pump so we were contemplating having a hang-on overflow type "box" in each overflow plumbed to the 2" drain for emergencies(or a single larger diameter overhang,) plus having a float "cut-off" switch wired to the main return pump incase one drain clogs. Switches can be immobilized with corrosion/salt creep so we need the redundancy.
Is this paranoia?..... yes


After 24 hours of no leaking through the standpipes or bulkheads we finished assembling the rest of the plumbing underneath.
I have both 1" drains feeding into a 2" main drain to try and reduce chances of clogs (overkill). Also to reduce stress on the return pump, and our abundance of 1" pipe, the returns are 1" then Tee off and up at 3/4"
VkAY3sG.jpg

W4J2KYH.jpg


the rest of the plumbing will exit from the wall behind the insulation, span 3 feet into the garage/shed fish room.

Seeing that I cannot find a new complete plastic tank brace, Our next task is to fix the broken tank strap.
We used epoxy the fuse the old pieces together plus added an acrylic gusset on both braces (broken and non broken), then we might make a brace over both out of aluminum.

here is the before damage ( I have the "missing" piece to epoxy in)
nCHieew.jpg


After
lightly painted the top, prepped and scored both surfaces, alcohol cleaned, glued and clamped.

ifgOJGV.jpg


We were gifted a 150g Rubbermaid tub for our "sump." It wasn't what we had in mind, but free will get the job done. Only had to add plumbing! (then 24h leak test)

jGfUzaF.jpg


Plumbed it to the Reeflo Snapper I was "loaned indefinitely" (HUGE shoutout to our local Marine Aquarium Society member for the hookup) Needed to make it as compact as possible, so we "tucked" the pump right next to the sump.

Zocs0kL.jpg


On the inside of the casa, finished framing the wall for the face of the tank. To add to the "wow" factor of the Bow front, we decided to recess the tank in the wall so that the front lip of the bow is flush with the main wall, and the rest is recessed up to where the glass begins to bow. This look will widen the tank/room and also allow the viewer to approach perpendicular to any part of the curve.

kQw6qr0.jpg
 
Last edited:

Dr. Dendrostein

Marine fish monthly
View Badges
Joined
Nov 8, 2017
Messages
9,581
Reaction score
20,792
Location
Fullerton, California
Rating - 0%
0   0   0
per usual we are way behind updating and working on the build. New position at work, springtime house prep, blah blah blah......

Insulated the wall and the old ineffective window
dEE3mp6b.jpg


Seeing that the tank came pre drilled with only 2 holes in each over flow we went with duroso stand pipes and followed their guide (DIY Duroso)

KWGKcVG.jpg


It is much cheaper to have a siphon do the work than to buy another pump so we were contemplating having a hang-on overflow type "box" in each overflow plumbed to the 2" drain for emergencies(or a single larger diameter overhang,) plus having a float "cut-off" switch wired to the main return pump incase one drain clogs. Switches can be immobilized with corrosion/salt creep so we need the redundancy.
Is this paranoia?..... yes


After 24 hours of no leaking through the standpipes or bulkheads we finished assembling the rest of the plumbing underneath.
I have both 1" drains feeding into a 2" main drain to try and reduce chances of clogs (overkill). Also to reduce stress on the return pump, and our abundance of 1" pipe, the returns are 1" then Tee off and up at 3/4"
VkAY3sG.jpg

W4J2KYH.jpg


the rest of the plumbing will exit from the wall behind the insulation, span 3 feet into the garage/shed fish room.

Seeing that I cannot find a new complete plastic tank brace, Our next task is to fix the broken tank strap.
We used epoxy the fuse the old pieces together plus added an acrylic gusset on both braces (broken and non broken), then we might make a brace over both out of aluminum.

here is the before damage ( I have the "missing" piece to epoxy in)
nCHieew.jpg


After
lightly painted the top, prepped and scored both surfaces, alcohol cleaned, glued and clamped.

ifgOJGV.jpg


We were gifted a 150g Rubbermaid tub for our "sump." It wasn't what we had in mind, but free will get the job done. Only had to add plumbing! (then 24h leak test)

jGfUzaF.jpg


Plumbed it to the Reeflo Snapper I was "loaned indefinitely" (HUGE shoutout to our local Marine Aquarium Society member for the hookup) Needed to make it as compact as possible, so we "tucked" the pump right next to the sump.

Zocs0kL.jpg
Labor of love, thanks for sharing, comrade. Keep us posted.
 
OP
OP
Rag Gnar

Rag Gnar

Community Member
View Badges
Joined
Feb 20, 2019
Messages
73
Reaction score
109
Rating - 0%
0   0   0
Picked up 2 food grade 55g drums for $10!
3elua1F.jpg


mocked up potential layout in fish shed. Stacking the barrels gives us very little space to get access to salt bin, so we might mount them side by side above the sump.

WtA1PTl.jpg


Inside the house:
we lined the inside of the tank area with painters tarp in a "rather creative" attempt to "water resistant" the area from humidity, spills, etc etc. (pic is room only half "sealed")
Painted angle Iron and mounted it above the tank for Lighting mounts
VFDLrTJ.jpg


Also started the drywall part of the project.
Had to bring in the big muscles to help get these sheets mounted (Her first drywall project!)

oFlln2n.jpg


had a few oops and "aha!" moments but overall it went well. "Bowed fronts" are annoying ... haha
We were too excited and had to mount our sole XR30w to see how it looked. (yes the sides are the access points, but you can stand on the stand "behind" the tank to reach all parts of it.)
e4XoRQt.jpg


with the frame skinned and first coat of mud (goosebumps!)
Tb16fEM.jpg


Very excited with the whole project and it finally starting to look like a normal room again.
(3rd coat of mud, light sanding, but haven't done the top coat and 220 grit yet)
OiK2gwX.jpg
 
OP
OP
Rag Gnar

Rag Gnar

Community Member
View Badges
Joined
Feb 20, 2019
Messages
73
Reaction score
109
Rating - 0%
0   0   0
So we finished all 3 coats, plus 110 grit sanding, followed by top coat, and a light 220 grit sanding.
J8RBBYp.jpg

Sealed the joints where the new wall meets the old wall with DAP extreme flex, so no cracking of the paint will occur and then spent an absurd amount of time picking out "the right" color. I mean there were hours of photoshopping different colors and textures... better A or B? A or C? What about Z......

Caught the boss in action...
e8YlWs3.jpg


next was the accent lighting
We opted for 3" led slim can lights. offset closer to the "wall" for dramatic effect, wired to a dimmer switch.

SnwXTPI.jpg


Looking awesome while the paint is drying. need to cover the wood access panels, not sure what design/finish we will go with yet, some type of textured wood.

UDLQAgM.jpg


we had a big shipment of PVC parts show up from Supplyhouse.com, the price difference was so drastic in comparison to the big box stores. (a 1" union was 6$ cheaper than at HD/Lowe's, not knocking the stores but if you can plan ahead on your plumbing you can save big bucks)

cF2fkQw.jpg


Next Steps:
build the SW mixing station and manifold/fish room shelves
route RODI line and start making water
acquire an absurd amount of rock/live rock to start cycling
 
OP
OP
Rag Gnar

Rag Gnar

Community Member
View Badges
Joined
Feb 20, 2019
Messages
73
Reaction score
109
Rating - 0%
0   0   0
with the wall painted and touched up, we mounted the dimmer switch for the accent lights. Also decided to put a "cleaner shrimp" to clean the inside of the tank again from any construction debris and mess.
:tearsofjoy:
:tearsofjoy:
:tearsofjoy:

[IMG]


For now we wrapped the access panels in a faux wood until we know what material/look we want.
Also the boss finally got to plan/ finish the room. Very excited how it looks, but sitting next to that empty blue giant is painful to my soul.
[IMG]


have been very slowly working on cleaning/ curing the dead rock we picked up.

got extra help with the planning process
[IMG]


Also feel like we hit the jack pot today on Craigslist!
for a Neptune Apex, all probes (minus a broken PH), power bar, Lunar module, 2 lunar LEDS, and an Apex DOS... $450!
It wasn't really in our budget, but a deal that good couldn't be passed up. and I hope huge Karma goes to the guy who hooked us up!
[IMG]
 

Jon Fishman

Cleveland Ohio, buy/sell local!
View Badges
Joined
Feb 18, 2019
Messages
5,105
Reaction score
8,690
Rating - 0%
0   0   0
Following.

I couldn’t “feasibly” build-in a tank and have access etc. Love the clean look. Nice looking room all around. Congratulations on the new house!
 
OP
OP
Rag Gnar

Rag Gnar

Community Member
View Badges
Joined
Feb 20, 2019
Messages
73
Reaction score
109
Rating - 0%
0   0   0
Following.

I couldn’t “feasibly” build-in a tank and have access etc. Love the clean look. Nice looking room all around. Congratulations on the new house!
access is tight, but I had to do it!
Thanks, She did most/all of the room decorating haha
 
OP
OP
Rag Gnar

Rag Gnar

Community Member
View Badges
Joined
Feb 20, 2019
Messages
73
Reaction score
109
Rating - 0%
0   0   0
The work put into the in-wall setup looks great. Very nice build.
Thank you, the recess was quite annoying in terms of just adding so much more time to all steps of the process, but with the bow of the tank it had to be done!
 

Mastiffsrule

Where ever you go, there you are, so be nice 2 you
View Badges
Joined
Feb 10, 2019
Messages
8,440
Reaction score
33,571
Location
Charlotte
Rating - 0%
0   0   0
One sick build. Really nice. I don’t think the dog is going to be Reef safe though.
 
OP
OP
Rag Gnar

Rag Gnar

Community Member
View Badges
Joined
Feb 20, 2019
Messages
73
Reaction score
109
Rating - 0%
0   0   0
We had a much longer battle setting up the RODI unit than we anticipated.
Originally paid $75 for the unit
my own DIY "water-saver"($13) (I highly recommend everyone do this it is so cheap and easy. part link)
brand new RO membranes ($20 ea)
DIY 2nd DI resin chamber ($16) ( Part link )
parts and hose ($7)
Total $151
[IMG]


The final product
[IMG]

reading 000 TDS!
Now we need to get to mixing salt.
 
OP
OP
Rag Gnar

Rag Gnar

Community Member
View Badges
Joined
Feb 20, 2019
Messages
73
Reaction score
109
Rating - 0%
0   0   0
had to make some "Hose modifications" to route the return line and drain from tank to the "fish shed"
[IMG]


the span from wall to wall was 37" so insulating wont be terribly difficult for CO winter.

Next we started to assemble the stand for the mixing station. (ended up doubling the front left support)
[IMG]

I am not sure if it was the fumes from the glue, or the heat. But I didnt take any pictures while I assembled the mixing station or the manifold
:(


Fiancee also assembled the storage rack and started to organize the large amount of crap we have which REALLY needed to happen.

[IMG]


We still need to paint and seal the wooden stand, also the mixing station "drain" is dry plumbed to get the much needed water change on the cycling rock.

We had to rebuild 4 different pumps due to leaking problems, 1 snapper was a real PITA with leaks but finally got it to seal. So now We have one backup in case of an emergency.
 
OP
OP
Rag Gnar

Rag Gnar

Community Member
View Badges
Joined
Feb 20, 2019
Messages
73
Reaction score
109
Rating - 0%
0   0   0
LOOOOOOOOONG overdue update:

we drank ourselves an adult beverage and started to aquascape!
I feel this is the most pressure put on us for the build, you don't want it to look like crap, but also you need to have the far-sighted ability to know how it will change when covered with coral. (we read this series several times Aesthetics of Aquascaping)

Also we had to assemble in the shed (since this was all live rock) and then run it into the house and get it in the tank. Working with dry rock is 1billion times easier!

Dirty work
[IMG]


first piece built, and one proud mama
[IMG]


in the water (tape was rule of thirds markers, when viewed straight on)
[IMG]


this was the biggest piece to go in as a single unit, there was just a small vision, and then we mainly let the rock build itself. If you are "unsure" of a piece keep trying others as I feel they really build themselves.

here is the 2nd piece
[IMG]


a look from the front. Really happy with how it is turning out
[IMG]


According to the golden ratio (5/3) 43" of the tank needs to be one piece(5), and then 28" is the other (3). Furthermore, the height of the big left structure is 20" therefore the next structure cannot be above 12" to meet the rule.

We wanted an arch, but also had to work with a piece that had a large live (recovering) coral, this was the worst. Had to build from the sky down, as wanted to keep the coral in water as long as possible, not being rattled by drills, and me cursing at it and many other things....
[IMG]


We had to bring that one in 2 pieces, really trying to play the depth of the tank and not just make a wall of rock, also we very much went with the "less is more" and with the large volume of rock still in the sump for filtration. Due to having a bow front you can see so much of the tank, we built to have a different experience from every angle. straight on you cannot see the giant shelf, but from a side view there it is!

[IMG]


Always need to remember refraction when building out of the water, this arch came out way better than the first!
[IMG]
 
OP
OP
Rag Gnar

Rag Gnar

Community Member
View Badges
Joined
Feb 20, 2019
Messages
73
Reaction score
109
Rating - 0%
0   0   0
We picked up an absolute MONSTER of a RBTA , the rock it is on weighs over 40 lbs but fits the shape of the aquascape perfectly!
It adds some serious wow factor to the tank, also grabbed a beautiful brain coral that makes the tank look like there is some life in it!
What're your thoughts?
[IMG]
 

Going off the ledge: Would you be interested in a drop off aquarium?

  • I currently have a drop off style aquarium

    Votes: 0 0.0%
  • I don’t currently have a drop off style aquarium, but I have in the past.

    Votes: 1 2.0%
  • I haven’t had a drop off style aquarium, but I plan to in the future.

    Votes: 6 12.0%
  • I am interested in a drop off style aquarium, but have no plans to add one in the future.

    Votes: 21 42.0%
  • I am not interested in a drop off style aquarium.

    Votes: 20 40.0%
  • Other.

    Votes: 2 4.0%
Back
Top