Navigation
Install the app
How to install the app on iOS
Follow along with the video below to see how to install our site as a web app on your home screen.
Note: This feature may not be available in some browsers.
More options
You are using an out of date browser. It may not display this or other websites correctly.
You should upgrade or use an alternative browser.
You should upgrade or use an alternative browser.
Biocube 32 with sump - skip cycle?
- Build Thread
- Thread starter nickng
- Start date
- Tagged users None


Not hard at all. Get a sharp razor blade/edge or scalpel and slowly cut around the silicone. Try to keep away from the glass and as close as possible to the edges of the plastic back-wall. And some parts it’s easy to peel off silicone from the plastic overflow because silicone doesn’t adhere that well to plastics.Looks great. Was it easy removing the overflow
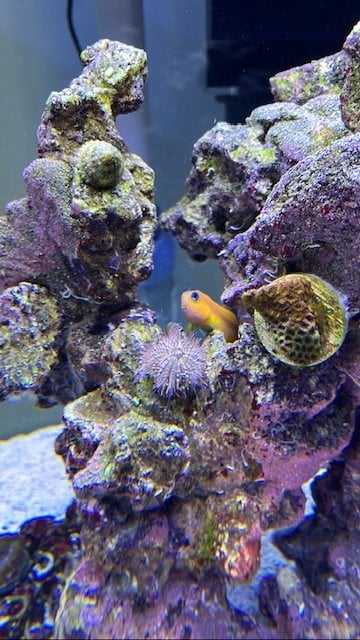
Also using a Fluval nano light for the refugium. Initially tried a small golf ball sized red ogo. The red ogo turned pale and started decomposing, replaced it with chaeto and put some rubble rock and pods are living in it and hopefully multiplying. Not sure why the red ogo did not survive. Plan is to rotate the rubble rock between DT and refugium as a source of copepods.
BTW the water flow in the nano cube refugium is very well designed, the flow tumbles/rotates the chaeto and never lets it settle at the bottom.
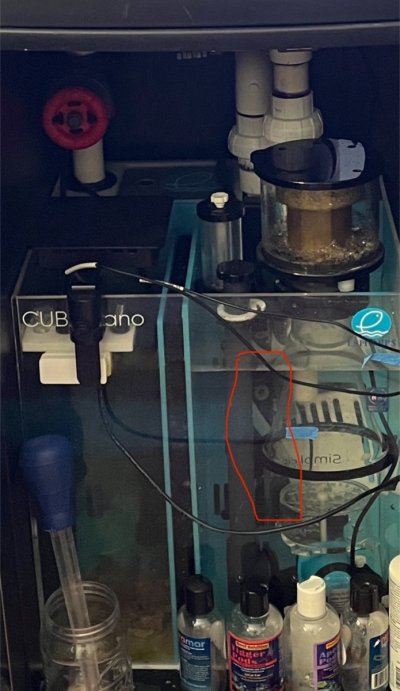
In the skimmer section of the sump I added the coralife 5W nano UV. Water pumped thru the UV with a small pump taken from the original biocube nano skimmer. Placed UV such that the outflow from UV is directed to the return pump chamber.
Will take better pics if anyone is interested.
BTW the water flow in the nano cube refugium is very well designed, the flow tumbles/rotates the chaeto and never lets it settle at the bottom.
In the skimmer section of the sump I added the coralife 5W nano UV. Water pumped thru the UV with a small pump taken from the original biocube nano skimmer. Placed UV such that the outflow from UV is directed to the return pump chamber.
Will take better pics if anyone is interested.
Attachments

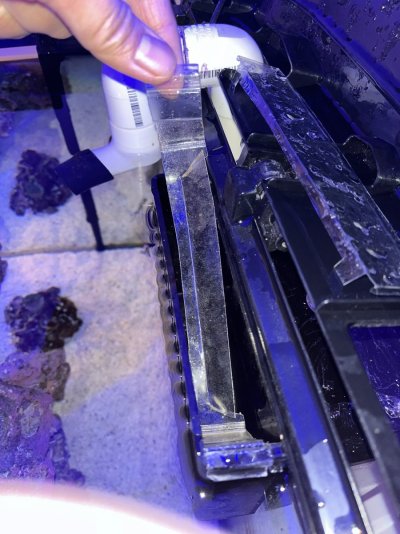
Some steps I took to completely silence the overflow. Added a plastic cross-guard in the overflow to stop vortex developing above the drain hole at high flow rates. Without the cross shape guard, a noisy vortex develops at high flow rates and the drain pipe becomes noisy due to air being sucked in and going into the sump as bubbles.
This solves the biggest source of noise.


This solves the biggest source of noise.
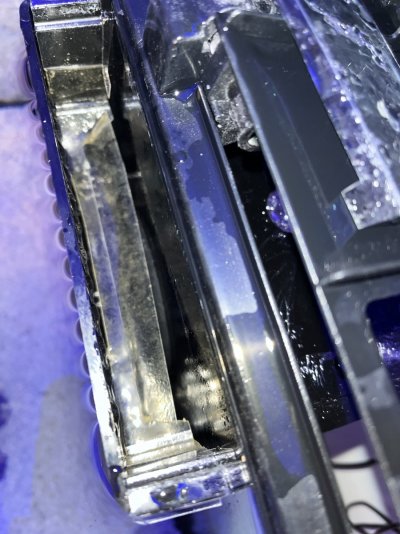
The second source of noise comes from the in tank overflow. It’s caused by the water cascading through the weir combs and caused by strong surface water movement when using a strong flow maker or strong return pump. The water splashing as it flows through the weir also causes some bubbles that create noise.
To fix this I made a water catch that attaches inside the in tank overflow box just behind the weir comb. It’s very effective and has no impact on flow rates.
Finally I made a cover for the in-tank overflow box. These two additional modifications totally silences the overflow at all flow rates.
Will post a picture of the water catch and cover tomorrow, it’s late and too dark now
Nice build! Jealous of the forethought to do the sump!

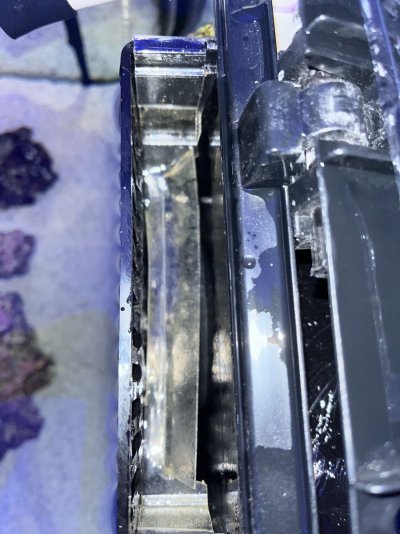
And here are some pics of the cover that fits on top of the overflow box. “McGyver ”-ed the overflow cover after seeing a very active Astrea climbing up the overflow wall and nearly falling inside. Fits snug and actually helps hold the splash guard in place.


Hi Nick, I joined the site to join this thread so thanks for making it! I am thinking of removing the AIO wall in my biocube 32, as well. Could you please tell me what those vertical black lines on the glass are? they seem to be where the wall used to be.
Some people express concern that the filter wall provides structural support. Having done the removal- do you think that's probable at all?
I am thinking of going with just a canister filter (407) that clips on to the tank as opposed to drilling it.
Thanks so much for making this thread!
Some people express concern that the filter wall provides structural support. Having done the removal- do you think that's probable at all?
I am thinking of going with just a canister filter (407) that clips on to the tank as opposed to drilling it.
Thanks so much for making this thread!
The vertical black lines are the external silicone where the black plastic cover on the outside sticks to the tank. The internal filter wall provides no structural support. Safe to remove.Hi Nick, I joined the site to join this thread so thanks for making it! I am thinking of removing the AIO wall in my biocube 32, as well. Could you please tell me what those vertical black lines on the glass are? they seem to be where the wall used to be.
Some people express concern that the filter wall provides structural support. Having done the removal- do you think that's probable at all?
I am thinking of going with just a canister filter (407) that clips on to the tank as opposed to drilling it.
Thanks so much for making this thread!
It’s the silicone and the plastic edge attaching this external plastic wall part. Some people removed it successfully. I didn’t bother because my goal is simply to increase swimming space for my fishes.
The important structural parts are the top and bottom plastic rim

The important structural parts are the top and bottom plastic rim
Fluval 407 canister? I did some research on canisters, it will work for saltwater tanks. Seems like the oase canisters with the pull out prefilter is easier to maintain. With saltwater aquariums the filter has to be changed every 3 to 7 days. Incredible how dirty it gets compared to freshwater.Hi Nick, I joined the site to join this thread so thanks for making it! I am thinking of removing the AIO wall in my biocube 32, as well. Could you please tell me what those vertical black lines on the glass are? they seem to be where the wall used to be.
Some people express concern that the filter wall provides structural support. Having done the removal- do you think that's probable at all?
I am thinking of going with just a canister filter (407) that clips on to the tank as opposed to drilling it.
Thanks so much for making this thread!


Hi Nick,
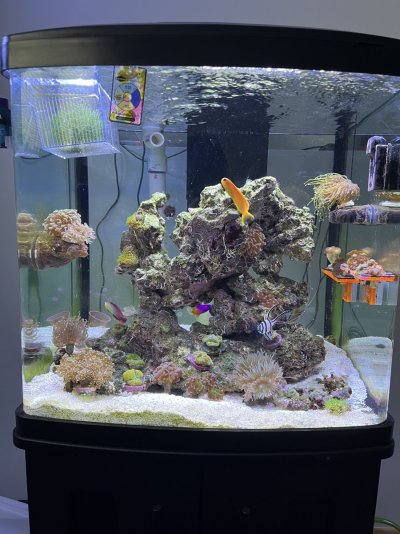
Checking back in. Thanks for this thread. I went ahead and removed the back wall. The tank looks great now. But I think I have to go full out and do the sump like you did. Which means another tank breakdown so soon again. I just really need a skimmer, and every hang on back skimmer makes so many vibrations in the tank that I don't consider them worth it. I just imagine that the tank would be miserable for a fish with that kind of noise in the water all the time.
I am very nervous to drill glass for the first time. I am probably going to go with a bean animal setup. the only problem is that all the overflow boxes with 3 pipes require two holes drilled pretty close together. That's a serious pucker factor. Any words of advice?
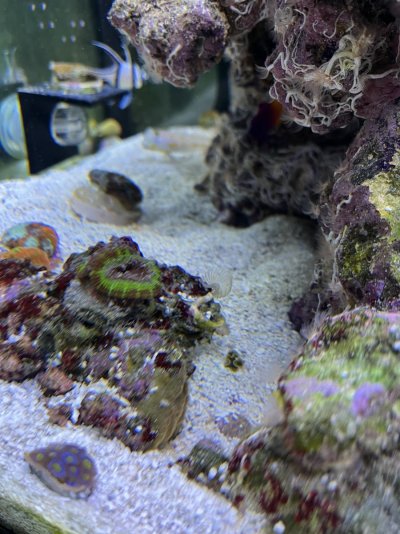
Thanks again! I'll post some pictures of my tank if you want. I have a 100% locally-collected tank of various blenny species and other interesting fish. right now I have 2 crested blennies (a breeding pair), striped blennies (another breeding pair), and 4 feather blennies that haven't paired up yet. Also I have a planehead filefish and a few pipefish. I don't think I'll be able to keep the pipefish because they are going to end up in the sump all the time after this mod.
Checking back in. Thanks for this thread. I went ahead and removed the back wall. The tank looks great now. But I think I have to go full out and do the sump like you did. Which means another tank breakdown so soon again. I just really need a skimmer, and every hang on back skimmer makes so many vibrations in the tank that I don't consider them worth it. I just imagine that the tank would be miserable for a fish with that kind of noise in the water all the time.
I am very nervous to drill glass for the first time. I am probably going to go with a bean animal setup. the only problem is that all the overflow boxes with 3 pipes require two holes drilled pretty close together. That's a serious pucker factor. Any words of advice?
Thanks again! I'll post some pictures of my tank if you want. I have a 100% locally-collected tank of various blenny species and other interesting fish. right now I have 2 crested blennies (a breeding pair), striped blennies (another breeding pair), and 4 feather blennies that haven't paired up yet. Also I have a planehead filefish and a few pipefish. I don't think I'll be able to keep the pipefish because they are going to end up in the sump all the time after this mod.
I haven’t tried drilling 2 holes because I didn’t think I will ever need a flow rate greater than 600gph. That’s already 20x turn over. To get a really nice hole drilled on the glass. Go slow with the drill ie light pressure and keep water pouring on the drilling surface. Also put a piece of soft wood at the opposite surface of the glass where you are drilling so that as you cut thru the glass it will not end up with a rough edge as the drill pushes thru the glass.Hi Nick,
Checking back in. Thanks for this thread. I went ahead and removed the back wall. The tank looks great now. But I think I have to go full out and do the sump like you did. Which means another tank breakdown so soon again. I just really need a skimmer, and every hang on back skimmer makes so many vibrations in the tank that I don't consider them worth it. I just imagine that the tank would be miserable for a fish with that kind of noise in the water all the time.
I am very nervous to drill glass for the first time. I am probably going to go with a bean animal setup. the only problem is that all the overflow boxes with 3 pipes require two holes drilled pretty close together. That's a serious pucker factor. Any words of advice?
Thanks again! I'll post some pictures of my tank if you want. I have a 100% locally-collected tank of various blenny species and other interesting fish. right now I have 2 crested blennies (a breeding pair), striped blennies (another breeding pair), and 4 feather blennies that haven't paired up yet. Also I have a planehead filefish and a few pipefish. I don't think I'll be able to keep the pipefish because they are going to end up in the sump all the time after this mod.