Kevan's Reef Adventures Cubed

OP
OP
kevantheman35

kevantheman35

Active Member
View Badges
Joined
Feb 9, 2010
Messages
463
Reaction score
88
Location
indiana
Rating - 0%
0   0   0
Don't know if I missed it earlier on but have you decided between the metal halide or led yet? If not you have my vote for the halide. Was going to use the 2x250w halides I have leftover for my 60 cube build but decided on an 8x24w T5 for efficiency purposes.
Yea I am going to be using the 250w halide. You were going to be using 2? I thought I was over kill with the 1 lol. I always wondered if the halides were one of the causes I was having with algae issues in my previous tank even when changing bulbs which is why I was hesitant but looking back now I'm sure it wasn't the issue. If I was to get a new fixture I would definitely go with a 6 or 8 bulb T5 great choice.
 
Last edited:

rockskimmerflow

Well-Known Member
View Badges
Joined
Aug 21, 2013
Messages
620
Reaction score
632
Location
Socal
Rating - 0%
0   0   0
Sweet. Glad to hear you're going with the metal halide. I'm sure your algae was loving the light from the halides in your old setups but I highly doubt that was the cause of its growth - usually waterborne or rockbound nutrients are the issue. I like a ton of light on my tanks, but going from the 2x250w and 2x39w I had on my old 50g display (2 years with that much halide and no algae issues luckily) to a 8x24w t5 will be nice for my power bill. Although, I'm sure I'll end up throwing the halides on some other setup soon enough.

I find that leds can really color up certain corals, but in a brand new setup when nutrient levels and chemical parameters are still stabilizing and corals are settling in they tend to do more harm then good. In my experience T5 especially and also halide provide a more diffuse, 'gentle' light to corals that are potentially stressed by environment changes than do the laser like emitters in led systems.

Looking forward to seeing your cube up and running soon. Are you going to use the phoenix bulb in that fixture? One of my favorites - great intensity and really crisp blue/white depending on ballast.
 

ravenjred

Community Member
View Badges
Joined
Nov 19, 2014
Messages
50
Reaction score
0
Location
Long Island, NY
Rating - 0%
0   0   0
Nice build

That is an awesome build. I am in the process of cutting my 2x4's to build my stand for my 60 cube and will start a thread in the next day or 2. I have a question. I noticed you put the legs between the frames. I was going to put them on the inside corners. Is the stand as sturdy or sturdier if you put them between the top and bottom frames? I was going to use 3/4" plywood on top also and then finish with oak and molding. Another question before I start this thing. I want to do it right and you have way more experience than me. Your frame will obviously support the tank. Do I need to have 2x4's along each edge where the tank is going to sit to support the edges of the tank or just 2 in the middle like you have? Thanks for any input.
Ed
 
OP
OP
kevantheman35

kevantheman35

Active Member
View Badges
Joined
Feb 9, 2010
Messages
463
Reaction score
88
Location
indiana
Rating - 0%
0   0   0
That is an awesome build. I am in the process of cutting my 2x4's to build my stand for my 60 cube and will start a thread in the next day or 2. I have a question. I noticed you put the legs between the frames. I was going to put them on the inside corners. Is the stand as sturdy or sturdier if you put them between the top and bottom frames? I was going to use 3/4" plywood on top also and then finish with oak and molding. Another question before I start this thing. I want to do it right and you have way more experience than me. Your frame will obviously support the tank. Do I need to have 2x4's along each edge where the tank is going to sit to support the edges of the tank or just 2 in the middle like you have? Thanks for any input.
Ed
I like to have the legs between the two frame that way all the weight is distributed straight down to the bottom frame and then to the floor. If the legs are on the inside I feel like the Weight wouldn't be distributed into the bottom frame but straight into the floor. I'm definitely no engineer though and I've seen people do it both ways and also seen people have both at the same time which is an option. Having the legs inside will give you a little less room inside the cabinet as well. I am also going to attach a sheet of plywood on the back of the stand inside of using solid wood framing since you won't see it and it will add more stability.

If your putting plywood on top having a couple braces on the top frame like I have will be plenty. The weight won't be pushing down on any one spot but distributed evenly on both braces and the frame.

Can't wait to check out your build Goodluck with everything. I am picking up some 3/4 thick by 5 1/2 wide poplar to do the framing hopefully tomorrow then finishing with molding and painting gloss white. Check out appliance epoxy paint for the inside stand paint it looks great from what I've seen.
 
OP
OP
kevantheman35

kevantheman35

Active Member
View Badges
Joined
Feb 9, 2010
Messages
463
Reaction score
88
Location
indiana
Rating - 0%
0   0   0
Sweet. Glad to hear you're going with the metal halide. I'm sure your algae was loving the light from the halides in your old setups but I highly doubt that was the cause of its growth - usually waterborne or rockbound nutrients are the issue. I like a ton of light on my tanks, but going from the 2x250w and 2x39w I had on my old 50g display (2 years with that much halide and no algae issues luckily) to a 8x24w t5 will be nice for my power bill. Although, I'm sure I'll end up throwing the halides on some other setup soon enough.

I find that leds can really color up certain corals, but in a brand new setup when nutrient levels and chemical parameters are still stabilizing and corals are settling in they tend to do more harm then good. In my experience T5 especially and also halide provide a more diffuse, 'gentle' light to corals that are potentially stressed by environment changes than do the laser like emitters in led systems.

Looking forward to seeing your cube up and running soon. Are you going to use the phoenix bulb in that fixture? One of my favorites - great intensity and really crisp blue/white depending on ballast.
Yea I've always used Phoenix definitely the best double ended bulb I've seen. Especially along with my royal blue cree supplemental lights I made a few years back. The only bulb I've seen that I liked better was the radium but only comes in mogul dang it.
 

ravenjred

Community Member
View Badges
Joined
Nov 19, 2014
Messages
50
Reaction score
0
Location
Long Island, NY
Rating - 0%
0   0   0
Thanks. Just curious, what size and length of screws did you use to attach the legs? I see you used pocket holes. I am going to use those as well.

I'm not sure if I'm going to use poplar or oak on the outside yet.


I like to have the legs between the two frame that way all the weight is distributed straight down to the bottom frame and then to the floor. If the legs are on the inside I feel like the Weight wouldn't be distributed into the bottom frame but straight into the floor. I'm definitely no engineer though and I've seen people do it both ways and also seen people have both at the same time which is an option. Having the legs inside will give you a little less room inside the cabinet as well. I am also going to attach a sheet of plywood on the back of the stand inside of using solid wood framing since you won't see it and it will add more stability.

If your putting plywood on top having a couple braces on the top frame like I have will be plenty. The weight won't be pushing down on any one spot but distributed evenly on both braces and the frame.

Can't wait to check out your build Goodluck with everything. I am picking up some 3/4 thick by 5 1/2 wide poplar to do the framing hopefully tomorrow then finishing with molding and painting gloss white. Check out appliance epoxy paint for the inside stand paint it looks great from what I've seen.
 
OP
OP
kevantheman35

kevantheman35

Active Member
View Badges
Joined
Feb 9, 2010
Messages
463
Reaction score
88
Location
indiana
Rating - 0%
0   0   0
Thanks. Just curious, what size and length of screws did you use to attach the legs? I see you used pocket holes. I am going to use those as well.

I'm not sure if I'm going to use poplar or oak on the outside yet.

I used 2 1/2'' coarse thread kreg screws made specificly for pocket holes. This is the length recommended by them for 2x4's.


My previous stand I did in oak. The only reason I chose poplar this time is because I want to paint it white. Here is some photos from my previous cabinet that might give you some ideas. I made it to have removable sides using neodymium magnets and also a marble top while I siliconed all around to make water tight.


OP
OP
kevantheman35

kevantheman35

Active Member
View Badges
Joined
Feb 9, 2010
Messages
463
Reaction score
88
Location
indiana
Rating - 0%
0   0   0
So for the doors on this stand I am thinking of doing frosted glass. I was going to do frosted acrylic but looks like that is around 90 bucks a sheet and I would need 3 sheets :scared: I want to do a design on the front door panel in the frosted glass similar to how they did the door in the pic below. I want to buy a decal similar to the octopus in the pic below stick it on the glass and then spray frosted glass paint over the window. Has anyone done anything similar to this with success? definitely new to me. If anyone knows of an interesting decal to use for this that is small enough to be used please post a link.


ravenjred

Community Member
View Badges
Joined
Nov 19, 2014
Messages
50
Reaction score
0
Location
Long Island, NY
Rating - 0%
0   0   0
Wow! That stand is really nice. Thanks for your input. I will start a thread as soon as I start the stand. Thanks again.
 
OP
OP
kevantheman35

kevantheman35

Active Member
View Badges
Joined
Feb 9, 2010
Messages
463
Reaction score
88
Location
indiana
Rating - 0%
0   0   0
Update on stand

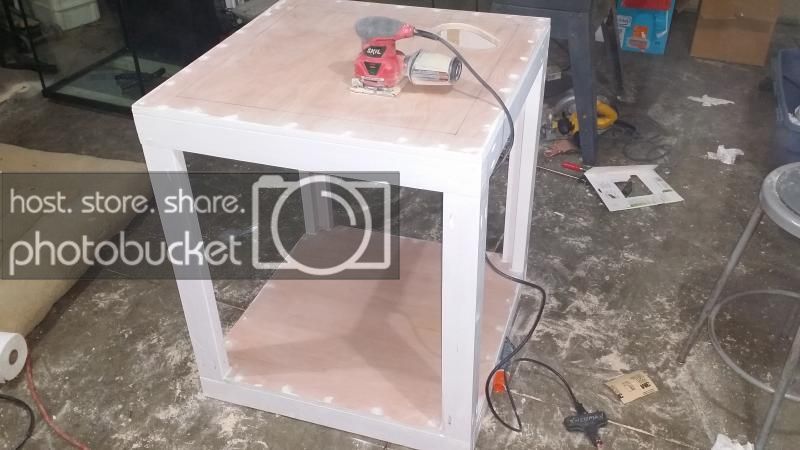
Filled all the screws, cut hole for plumbing and sanded everything nice and smooth


Got the plywood back on


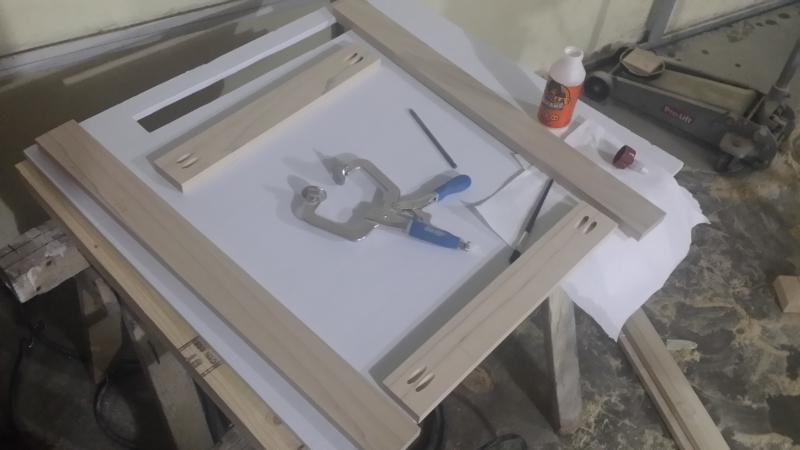
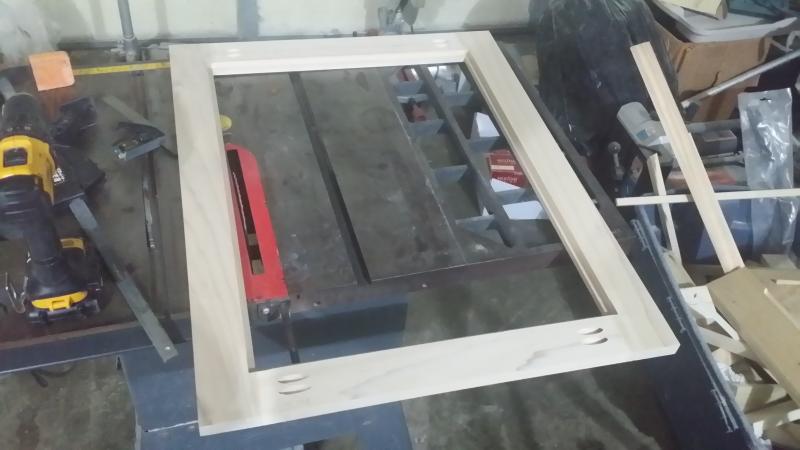
Made frames using pocket holes like so


Attached using wood glue and screws where the molding is going to cover so none will be seen


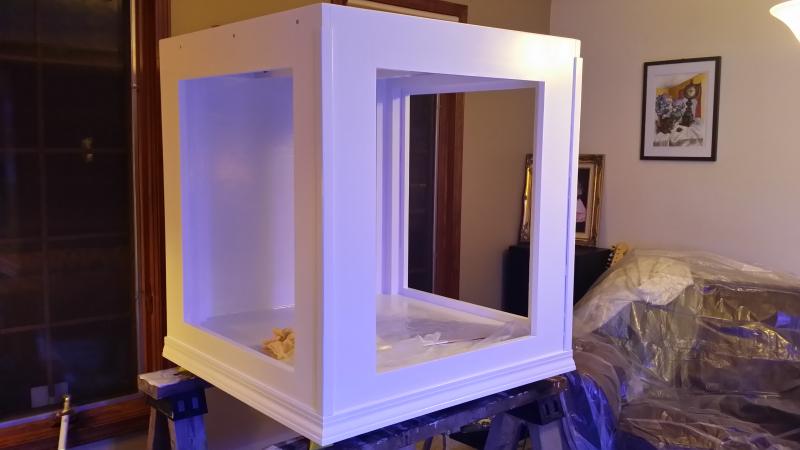
All 3 frames attached. You can see I have a ton of room for a cube stand even with my 20x18x16 sump. the internal space is almost exactly 30x30.


Thats where I'm at as of now. Next up getting the top framing done and trimming it out with crown and base molding.
 
Last edited:
Wags

Active Member
View Badges
Joined
Oct 3, 2014
Messages
149
Reaction score
0
Location
United States
Rating - 0%
0   0   0
Wow looks great! think the octopus will add a cool visual element. Couldn't view that last few photos.
 
OP
OP
kevantheman35

kevantheman35

Active Member
View Badges
Joined
Feb 9, 2010
Messages
463
Reaction score
88
Location
indiana
Rating - 0%
0   0   0
Wow looks great! think the octopus will add a cool visual element. Couldn't view that last few photos.
Thanks man. fixed the images sorry. Thinking about maybe doing a shark outline or something insted of the octopus. Its hard to find something that will work thats also the right size
 

Wags

Active Member
View Badges
Joined
Oct 3, 2014
Messages
149
Reaction score
0
Location
United States
Rating - 0%
0   0   0
That would be awesome. Could you possible print out a large shark on paper and cut it out? would only be 8x11 inches but could do that with some other stuff? Let me know what you end up doing this is a really cool idea. Make me really want to build a stand now!
 
OP
OP
kevantheman35

kevantheman35

Active Member
View Badges
Joined
Feb 9, 2010
Messages
463
Reaction score
88
Location
indiana
Rating - 0%
0   0   0
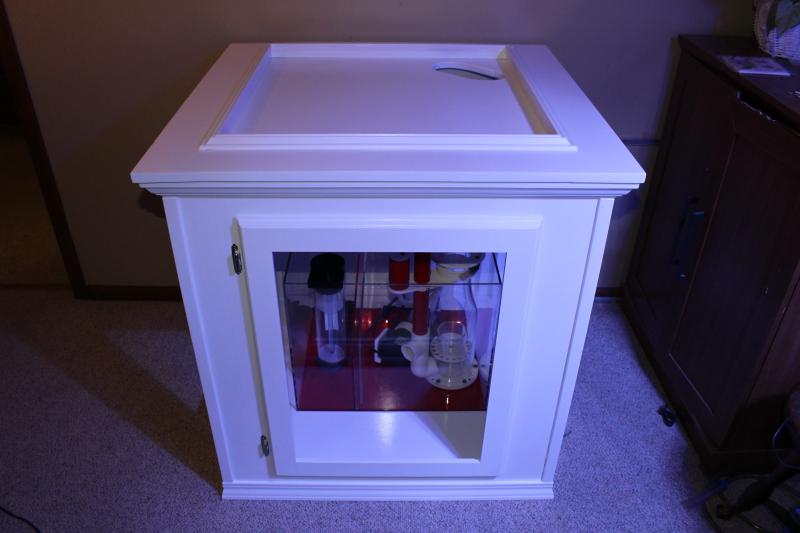
Got the top framed today and all the molding on. decided to make the top and crown moulding all one piece and removable so that the stand can easily fit through any doorways. It just slips over the tank and sits there very solid. I think it turned out decent.


OP
OP
kevantheman35

kevantheman35

Active Member
View Badges
Joined
Feb 9, 2010
Messages
463
Reaction score
88
Location
indiana
Rating - 0%
0   0   0
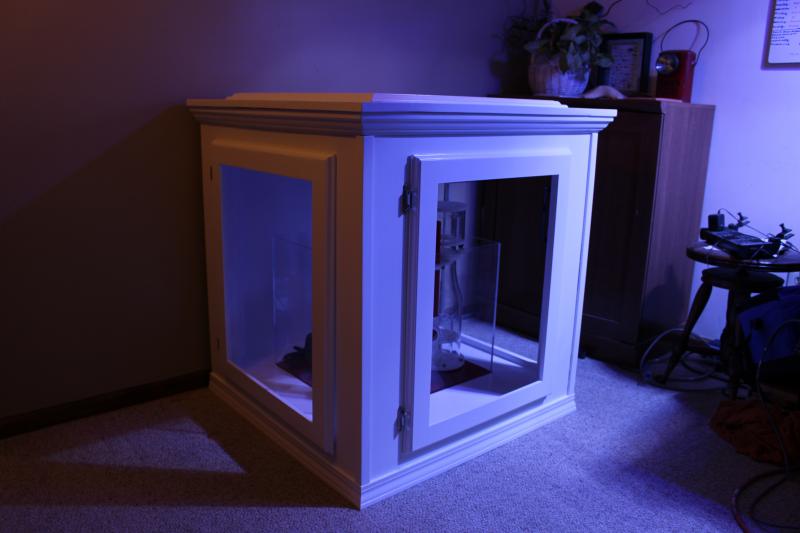
Cabinet complete!

Big update!

Got the stand trimmed out with corner and base moulding


Built 3 doors for the sides of the cabinet using pocket holes and a router to profile.


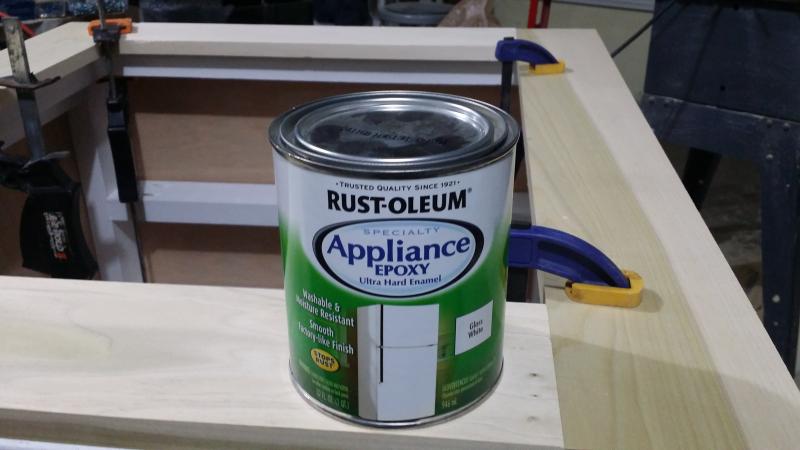
Primed and Painted the inside of the cabinet using 2 coats of Appliance Epoxy For a hard easy to clean surface. Its almost like a dry erase board.


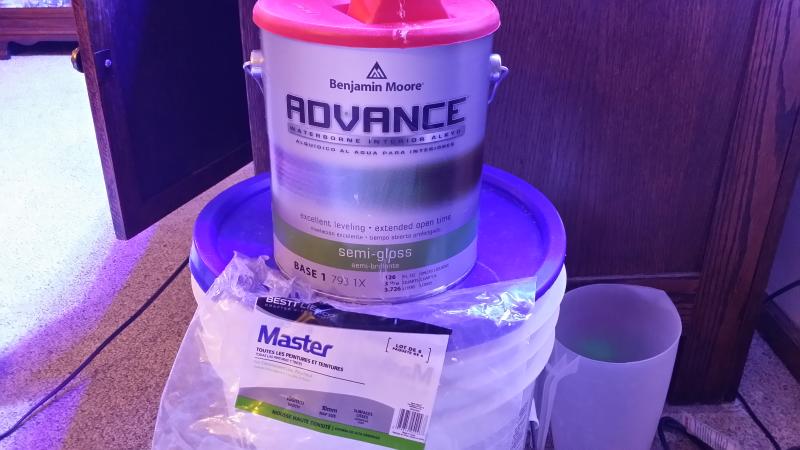
I sanded everything down with 120grit then 150grit using an orbital sander and then sanded the top with 220grit by hand to make sure it was as smooth as possible. I primed the cabinet and doors with zinzer 123 waterbased primer using a high density foam roller, and sanding with 150grit after each coat. I then painted with 2 coats of Benjamin Moore Advanced water based alkyd. All I can say is this paint is awesome. It spreads out very smooth like an oil based paint but is water clean up and has no smell like a water based paint. Expensive but worth it. The color I used is called "natural ivory". Again I used a high density foam roller and sanded lightly with 220 grit after the first coat. I really like how the paint job came out, but its hard to capture in a photo.


SeahorseKeeper

Where's the mysis?
View Badges
Joined
May 27, 2012
Messages
12,799
Reaction score
3,962
Location
Nags Head
Rating - 0%
0   0   0
Looks great!! :)
 
OP
OP
kevantheman35

kevantheman35

Active Member
View Badges
Joined
Feb 9, 2010
Messages
463
Reaction score
88
Location
indiana
Rating - 0%
0   0   0
Finished Cabinet

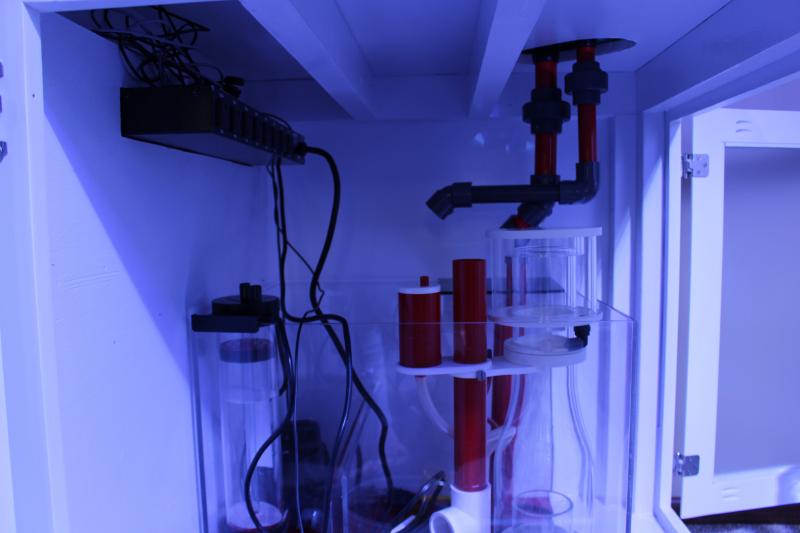
Here it is 99% finished. Just need to add the frosted glass panels to the doors and the electrical panel to the inside of the left door. I'm very happy with how it turned out, it just took much more time and money than I had planned as always.


OP
OP
kevantheman35

kevantheman35

Active Member
View Badges
Joined
Feb 9, 2010
Messages
463
Reaction score
88
Location
indiana
Rating - 0%
0   0   0
Stand finished and plumbing started

I guess it's time for an update. I finished my stand finally and am really happy with how it came out. If anyone is interested in building a similar stand there is an article in the February 2015 Reef Edition magazine showing the build in full detail. DIY: Building an Aquarium Cabinet - REEFEDITION. I am now trying to figure out my plumbing. There will be a manifold running my reactors ect however I think I will have to run it off of its own pump considering how small my return pump section of the sump it. the biggest pump I could fit in there was the sicce 3.0 (714gph). This gives me around 450pgh to the tank by itself I believe not leaving me much room to divert to a manifold. If anyone has any input on this please let me know..


rockskimmerflow

Well-Known Member
View Badges
Joined
Aug 21, 2013
Messages
620
Reaction score
632
Location
Socal
Rating - 0%
0   0   0
The stand turned out amazing man! A fine piece of craftsmanship. As far as your return pump situation goes, the eheim compact plus 5000 pushes over 1000 gph and could easily handle being split off of a manifold to run reactors. It's also quite small and should definitely fit your return chamber. If you're already are set on using the sicce you'll probably need a maxijet or other small reactor type pump to get more fine control of your media flow rates without harming the tank turnover. That said, I've had no issues running setups with 2-4 times turnover per hour so you may not need to worry too much if you end diverting a decent portion of the sicce's output.
 
OP
OP
kevantheman35

kevantheman35

Active Member
View Badges
Joined
Feb 9, 2010
Messages
463
Reaction score
88
Location
indiana
Rating - 0%
0   0   0
well I sure wish I saw that model when searching it looks like it might just squeeze jn the chamber. I already have the sicce I picked it up cheap on black friday. I wish I could figure out what kind of flow im working with, with and without the manifold before plumbing. Ive tried using some flow calculators but its kind of hard to judge
 

Form or function: Do you consider your rock work to be art or the platform for your coral?

  • Primarily art focused.

    Votes: 12 7.5%
  • Primarily a platform for coral.

    Votes: 30 18.9%
  • A bit of each - both art and a platform.

    Votes: 105 66.0%
  • Neither.

    Votes: 7 4.4%
  • Other.

    Votes: 5 3.1%
Back
Top