RIP JBJ28. Buildthread for redsea reefer 350

duckman

Community Member
View Badges
Joined
May 2, 2023
Messages
55
Reaction score
27
Location
Los angeles
Rating - 100%
2   0   0
So my 12 year old JBJ 28 AIO finally died. It was a freshwater tank initially that i rebooted to a reef tank last year. The seam failed and i found myself with a slow leak.

So… wife not too happy about the need to replace the tank and more time into a hobby that she doesnt like. However, i have too much livestock in it already so every coral went into a 20gal emergency tank from petco until i figure out what to do

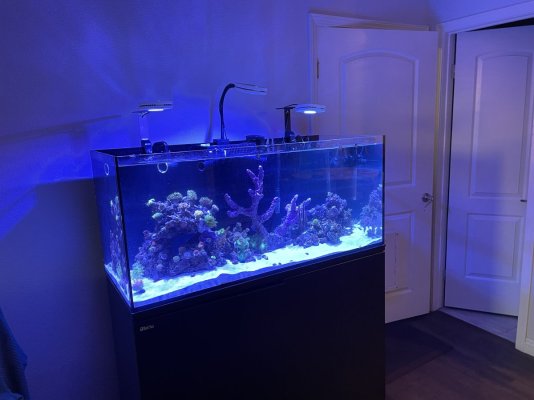
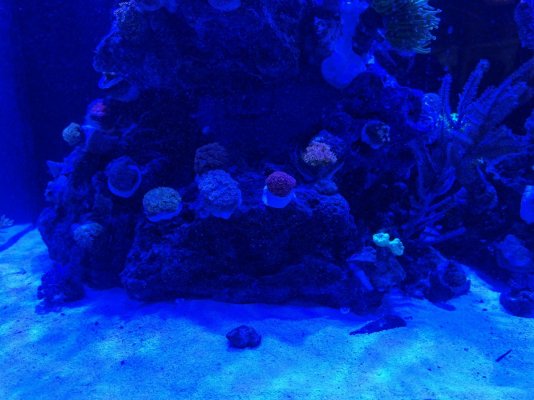
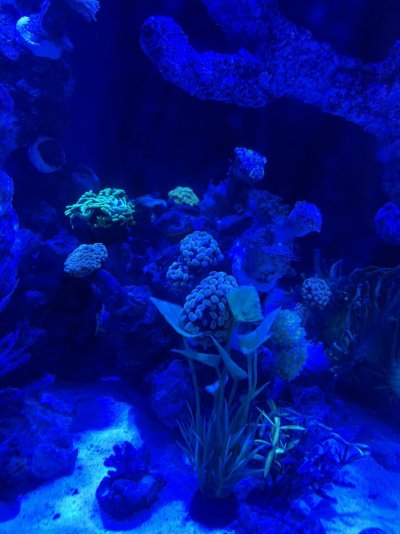
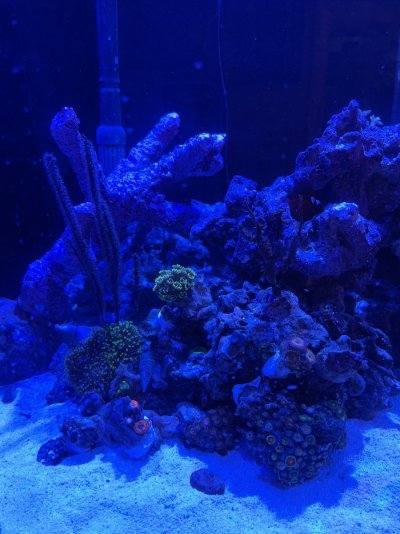
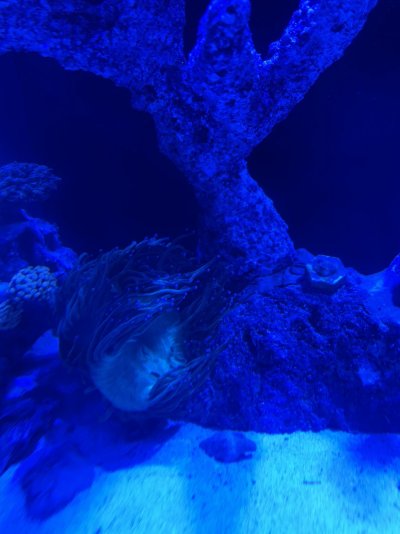
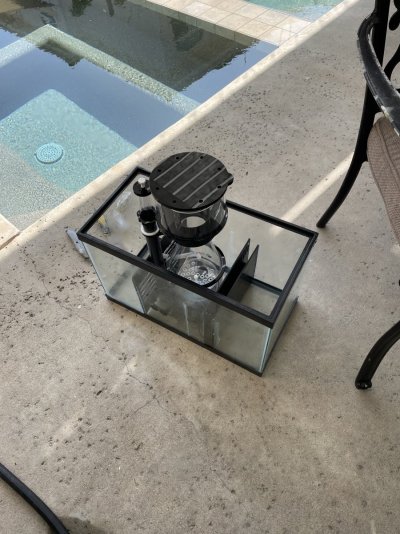
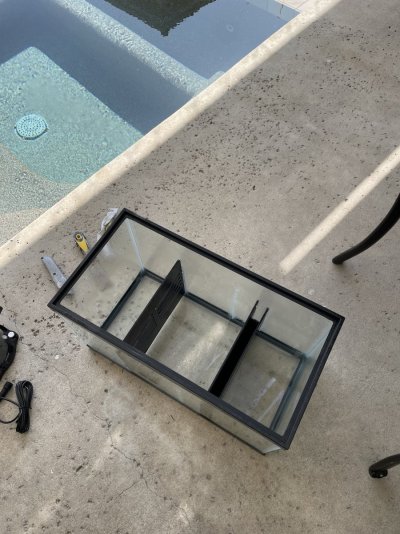
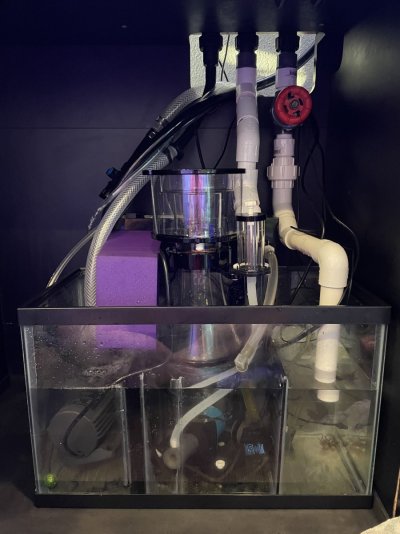
Here is a picture of my old jbj tank

IMG_8639.jpeg
 
OP
OP
D

duckman

Community Member
View Badges
Joined
May 2, 2023
Messages
55
Reaction score
27
Location
Los angeles
Rating - 100%
2   0   0
Was hoping to find a quick used tank from a tank breakdown locally so i could turn around fast…. Found a redsea reefer 250 on facebook marketplace for 900 bucks still holding water with all equipment Sounded like a great deal, i could pickup and clean & fill in a day then transfer. So i thought until the guy ghosted me. Wasted about a week waiting for him to respond…. O well, it was a good deal, right size, comes with sump equipment (which i dont have, coming from an AIO). Just not meant to be.

After scouring socalireef’s website for a good while digging through old posts, found what looked like a decent shape red sea reefer 350. Its a bit bigger than i wanted but its available. Was able to negotiate it down to $450 since it doesnt have a sump. The stand is in ok shape since it was stored outside for a bit of time but its serviceable.

Unfortunately, the tank was bigger than i imagined. Getting it into my suv took an act of God. We had to angle it and push the chair all the way forward. My knee was literally wedged against the seat and dash for an hour ride home in Los angeles traffic. Not fun at all. Making me doubt my wisdom in going for bigger tank.

Got home without killing my knee. Now the next step, getting it out of the car is a problem. It didnt feel that heavy when the seller helped me but it was definitely too heavy for wife to help. So, got to call my friend for help the next day and it was definitely a beast to move.

I know going big has its advantages in this hobby but i actually think that smaller is actually better now.
 

Attachments

  • IMG_8764.jpeg
    IMG_8764.jpeg
    194.7 KB · Views: 37
OP
OP
D

duckman

Community Member
View Badges
Joined
May 2, 2023
Messages
55
Reaction score
27
Location
Los angeles
Rating - 100%
2   0   0
Next came cleaning the tank and stand. So many spider webs and dirt on the stand! Why did i go with a tank in storage? O and the amount of dirt in the tank!

Finally, the stand and glass are free of dirt! That took another two days in between work. So much for a quick turnover
 

Attachments

  • IMG_8767.jpeg
    IMG_8767.jpeg
    91.4 KB · Views: 37
OP
OP
D

duckman

Community Member
View Badges
Joined
May 2, 2023
Messages
55
Reaction score
27
Location
Los angeles
Rating - 100%
2   0   0
Next step. Water test. The moment of truth.

It holds water! No leaks. Thank goodness. Would have been a huge waste if time and effort if it leaked.
 

Attachments

  • IMG_8829.jpeg
    IMG_8829.jpeg
    147.7 KB · Views: 44
OP
OP
D

duckman

Community Member
View Badges
Joined
May 2, 2023
Messages
55
Reaction score
27
Location
Los angeles
Rating - 100%
2   0   0
After holding the water test for two days. No leaks so was going to drain the water and disinfect with bleach. Also plugged the plumbing on overflow and checked the leak test there during the disinfection with bleach.

Had too much time on my hand with this 4 day process so started reading more on reef2reef because i have to figure out a sump solution. Turns out reading more info freaks me out because i started reading about the red sea reefer seam problems. O my god, it didnt dawn on me that the front seam is unsupported. Sure enough i took one look at the stand and the way the tank cantilevered over it, wow, who made that design decision on the stand? The front seam and front glass is completed unsupported. I am no structural engineer but i have built enough shelves to know that is a bad idea. More than 800 lb on silicone seam alone over 4 ft. I am surprised not more tank failure seen.

So back to the drawing board. I drained the tank. Rinsed it after bleach and dried it for a few days. I used the time to build a top for the top of the stand. Took 3/4 inch project board from lowe’s cut to size to support the entire tank including tbe cantilevered front glass and cut a hole for the overflow plumbing. Waterproof with polyurethane x 4 layers and sand in between. Then spray paint black. (See pic below).

Also ordered an yoga mat as a leveling mat and cut to size as well.

Took an extra day off to dry the paint, then again called my friend so i took take the tank off. Then up goes the top when i realized that leveling mat red reef comes with is glued on. Wasnt expecting that. I didnt want to keep my friend waiting to rip it off so i made the decision to just position the new top on the leveling mat. Problem is i wanted to screw the board on the top of the stand but with the leveling mat in between there will be gaps. I decided to revisit this once the tank is filled and the weight settles the leveling mat and board and stand. Will screw it in then as the boards should stay together with friction and weight alone. See pic below for the extra support from the side
 

Attachments

  • IMG_8810.jpeg
    IMG_8810.jpeg
    486.2 KB · Views: 39
  • IMG_0287.jpeg
    IMG_0287.jpeg
    173.7 KB · Views: 40
OP
OP
D

duckman

Community Member
View Badges
Joined
May 2, 2023
Messages
55
Reaction score
27
Location
Los angeles
Rating - 100%
2   0   0
Next step after the detour in cabinet making. Still need to settle the issue of the sump. While i was figuring out the solution i did fill the tank with salt water and the sand from my old tank. Filled 3/4 of the tank over 3 days. Note to self, 50 gallons of salt water is a lot to mix with 5 gal buckets and small RODI unit. Bigger tank, bigger problems….

Now, on to the sump. Custom sumps are more expensive than the cost of my used DT. So after looking around, decided on the 12 dollars 10g aqueon tank. Got a baffle kit off amazon for 25 bucks. So 37 bucks for a 3 chamber sump plus some some leftover aquarium silicone, it looks to be ready to go.
 

Attachments

  • IMG_8832.jpeg
    IMG_8832.jpeg
    150.8 KB · Views: 47
OP
OP
D

duckman

Community Member
View Badges
Joined
May 2, 2023
Messages
55
Reaction score
27
Location
Los angeles
Rating - 100%
2   0   0
So a quick lifestock check for me. Unfortunately during the initial transfer from JBJ to the aqueon 20 gal, i lost my aquasd rainbow milli and birdsnest (to be expected since the life support for the 20gal is literally a HOB tidal 35 filter. My elegance also straight up murdered my linkia starfish due to the cramp space. Wife almost killed me because its her favorite. These were the immediate casualties within the first week.

Since the tank is holding water now and almost ready to go as soon as the sand settles, i pulled out every coral so i could check. Looks like i lost 1 goni, 2 euphyllias.

I made the decision to transfer immediately even the sump and plumbing arent where i want it. (I still need to fit the skimmer and 3d print some brackets for the filter cups. Also need to convert overflow plumbing to us 1” dimension and gate valve).

So yesterday, i spent the entire morning transferring and aquascaping my tank. But for the most part the tank transfer is done.
 

Attachments

  • IMG_8835.jpeg
    IMG_8835.jpeg
    135.1 KB · Views: 39
OP
OP
D

duckman

Community Member
View Badges
Joined
May 2, 2023
Messages
55
Reaction score
27
Location
Los angeles
Rating - 100%
2   0   0
Going to take a break until the rest of the equipment and plumbing arrives before redoing the sump. Also have to do some quality of life upgrades such as cabinet lights and magnetic latch for the cabinet door. Also need to position my hob refugium in the sump properly.

In the meantime, here are some close ups of my tanks.
 

Attachments

  • image.jpg
    image.jpg
    155.8 KB · Views: 39
  • image.jpg
    image.jpg
    190.3 KB · Views: 32
  • image.jpg
    image.jpg
    151.5 KB · Views: 32
  • image.jpg
    image.jpg
    208.6 KB · Views: 28
  • image.jpg
    image.jpg
    134.1 KB · Views: 30

temphermitcrab

Community Member
View Badges
Joined
Apr 18, 2023
Messages
25
Reaction score
36
Location
Los Angeles
Rating - 0%
0   0   0
I'm currently upgrading from a 10 year old JBJ 28 to a Red Sea 425. The JBJ is essentially on life support until the new tank is ready. Keeping the JBJ going with the old equipment (I don't want to upgrade at this point) is hard.

We are about a month away from transferring our corals. I've been enjoying plucking mini Serpent Stars out of the JBJ and throwing them in the bigger tank.
 

Gumbies R Us

Another Fish in the Sea
View Badges
Joined
Nov 10, 2022
Messages
9,951
Reaction score
19,195
Location
North Georgia
Rating - 0%
0   0   0
Going to take a break until the rest of the equipment and plumbing arrives before redoing the sump. Also have to do some quality of life upgrades such as cabinet lights and magnetic latch for the cabinet door. Also need to position my hob refugium in the sump properly.

In the meantime, here are some close ups of my tanks.
They look great! love the coral in them
 
OP
OP
D

duckman

Community Member
View Badges
Joined
May 2, 2023
Messages
55
Reaction score
27
Location
Los angeles
Rating - 100%
2   0   0
All righty. Time to revamp the sump again. Since i had a time constraint to move the corals last time, i just quickly did a sump out of 10 gal aqueon petco tank with a cheap baffle kit from amazon. After running the tank for about a week… well it could be better. I definitely made some mistakes building the sump.

So off to corrective actions. First i made the second compartment too small. My simplicity 240 skimmer arrived and it wont fit in the second chamber. So time to cut the silicone and start again.

But first i got to drain the sump. First problem i noticed with the reefer design, there is no siphon break for the return line. So with all the pumps off my 10 gal is just filling to the brim. I guess i could fix with a check valve on the flexible portion of the pipes but a quick and dirty solution is just drill a hole in the return nozzle above the waterline to create a siphon break. Given the return nozzle and loc lines are all 3d printed by me, i dont feel bad drilling it. See pic below

The siphon break definitely work. The sump doesnt back fill after all pumps are stopped now. I guess at some point i will get a check valve for redundancy. I’m off to drain the sump now.
 
OP
OP
D

duckman

Community Member
View Badges
Joined
May 2, 2023
Messages
55
Reaction score
27
Location
Los angeles
Rating - 100%
2   0   0
I have definitely read all the posts about the seams. I am hoping that the reinforced support i made for the front glass would at least decreased the chance of failure.

Anyways back to the sump remodeling. I cut the baffle for the second chamber and moved the baffle and resilicone. Just barely fits the skimmer.

Got to wait a day or two for this to dry.
 

Attachments

  • IMG_8924.jpeg
    IMG_8924.jpeg
    272.8 KB · Views: 27
  • IMG_8923.jpeg
    IMG_8923.jpeg
    262 KB · Views: 27
OP
OP
D

duckman

Community Member
View Badges
Joined
May 2, 2023
Messages
55
Reaction score
27
Location
Los angeles
Rating - 100%
2   0   0
Time to upgrade the plumbing for the sump. I have to redo the default red sea plumbing anyways. Since the 10 gal sump is essentially too small to have a refugium, i decided to repurpose my HOB refugium from the jbj nano. What this means is i have to push the plumbing forward because the sump will be pushed forward a bit. I had previously planned to upgrade to a proper gate valve anyways so i have have the kit.

I bought the red sea part 42221 which allows connection to the overflow pipe. Also bought a 1” to 32mm adaptor from flexpvc.com below


The hose barb fitting part just twists off. Then i use pvc/abs transition pipe glue to join them together. The rest of the fittings can be glued with pvc primer and glue.

I was originally trying to get by with just 45 degree fittings and union, but the clearance and plumbing just wont look clean enough. Got to go back to lowe’s for some 90 degree corner fitting.
 

Attachments

  • IMG_8932.jpeg
    IMG_8932.jpeg
    357.1 KB · Views: 23
  • IMG_8930.jpeg
    IMG_8930.jpeg
    266.6 KB · Views: 27
  • IMG_8934.jpeg
    IMG_8934.jpeg
    205 KB · Views: 25
OP
OP
D

duckman

Community Member
View Badges
Joined
May 2, 2023
Messages
55
Reaction score
27
Location
Los angeles
Rating - 100%
2   0   0
Finally finished the sump plumbing. Its not going to win any beauty contest but it works so far. Actually found a small leak in the hang on back refugium and have to tighten the plumbing. Because of the hang on back refugium (second hand cpr refugium), there is some splashing into the third return pump chamber. I printed a 3d printed splash guard for the waterfall. I am concerned about micro bubbles but it seems to be ok so far.

I have to work on the first chamber next. I could 3d print something to hold filter floss or filter socks but i guess it will depend on what my water testing shows. On my previous nano tank i actually ran without any mechanical filtering or skimmer (at least when there is no fish in it). I do have a canister filter connected which i am not using as a filter. I am mainly using it as additional carbon reactor and also to plumb the uv.

Next up would probably be quality of life upgrades. The magnetic latch was broken for the cabinet door. The redsea replacement part is actually ridiculous in price. I ended up getting a cheap amazon cabinet magnetic latch. Turns out if u shove a 2x3 behind that front top trim piece, it gives u the perfect support to attach any magnetic latch because its leveled to that front trim piece.

LED light for the cabinet will be next. After that would be shelving and organizational stuff for the right side of the cabinet.

From the functional/operational standpoint, i think the tank is done and operational. I have essentially finalized all the corals in it. But because i added additional cuc, corals and inverts this last week, i am going to officially leave it fallow for the next 76 days before adding fish. I had velvet issues with my JBJ nano and was in process of fallowing it when the tanked leaked.
 

Attachments

  • IMG_0303.jpeg
    IMG_0303.jpeg
    163.1 KB · Views: 28
OP
OP
D

duckman

Community Member
View Badges
Joined
May 2, 2023
Messages
55
Reaction score
27
Location
Los angeles
Rating - 100%
2   0   0
Some updates since the basics and functional parts of the tanks are done now.

Here are some pics.

Current livestocks:
Inverts:
Cerith snails
Trochus snails
Tiger conchs
Bumblebee snails
Skunk Cleaner shrimp
One hitch hiking micro bristle star
One blue linkia star

Corals:
Softies:
Ricordia mushrooms
Donkey kong Yuma mushroom
Aussie deadpool disco
BlueMan disco
Pulsing xenia
Ruby red xenia
Firework cloves
Carnation corals (i feed daily)
Purple gorgonians
various zoas/palys

LPS:

Various goni’s

Torches:
UC v3
NY knicks
Banana torch
Indo gold
Dragon soul
Cotton candy torch
Kryptonite torch
24k torch
Cc21 torch

Hammers:
Orange
Indo gold
Splatter green/purple
Kryptonite

Peach tip frogspawn
Wolverine favias
Green aussie ellegance
Gold tip aussie ellegance
Various cyphaestria
Space invader pectinia

SPS:
Juicyfruit monti
Green stylo
Green birdsnest
Darth Maul poritrs
Orange phoenix monti
Pink dragon monti
Tropic island monti
Pikachu acro IMG_8940.jpeg IMG_8941.jpeg IMG_8942.jpeg IMG_8943.jpeg IMG_8944.jpeg
 
Last edited:

Reefing threads: Do you wear gear from reef brands?

  • I wear reef gear everywhere.

    Votes: 43 16.0%
  • I wear reef gear primarily at fish events and my LFS.

    Votes: 17 6.3%
  • I wear reef gear primarily for water changes and tank maintenance.

    Votes: 1 0.4%
  • I wear reef gear primarily to relax where I live.

    Votes: 33 12.3%
  • I don’t wear gear from reef brands.

    Votes: 155 57.8%
  • Other.

    Votes: 19 7.1%
Back
Top