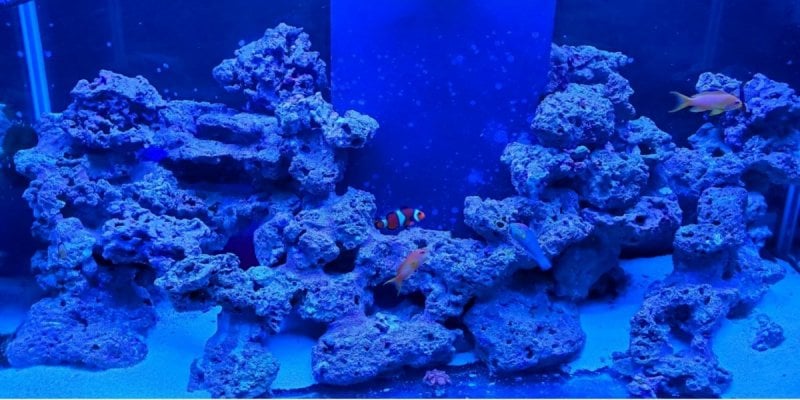
HI everyone. My name is John. I’m ReefGeezer on R2R. Here’s a picture of my 90 Gallon “Someday to be Reef” tank at about one year old. I had done some scrubbing of algae and Cyanobacteria for the picture, so it shows a little better than its actual state.
I started this tank with dry rock and a small amount of live rock using bottled bacteria and some ammonium chloride. It was running ok now, but at the time this picture was taken I was far from happy with it. I was not getting much Coralline growth even though everything seemed to in order. I battled hair algae and Cyanobacteria. The height of the ugly phase was awful. I had phases of red slime algae, red turf algae, hair algae, and a really, really bad outbreak of Calothrix. Did I mention the Calothrix? That stuff sucks!
I did all the things that we hobbyists do to battle the pests encountered in what I accepted as the mandatory ugly phase to include carbon dosing, Chemi-Clean, Fluconazole, Hydrogen Peroxide, and even Vibrant. Each of those activities made the conditions better for a while. In all cases though, the same pest returned or another took its place.
I was frustrated and decided to rethink my approach. I decided I couldn’t do any worse, so set out to change the operating method of my system. I did some studying. I won’t bore you with all the stuff I read. A simple search on Reer2Reef provided references and links to all the information I needed. I learned about all the nutrients, in all of their forms, that need to be managed. I researched the ways those nutrients were processed in successful reef tanks.
While I won’t claim to understand all the details, I found that multiple nutrient processing pathways exist in a properly operating system. I also figured out that: 1) I hadn’t really established all the pathways needed; and 2) I was really screwing up the few pathways I had established. I also came to understand that all those products claiming to solve my problems simply hid them for a short time. Worse yet, they slowed or stopped some of the needed nutrient processing pathways by limiting substances they require to function. Besides hurting my own system, I had recommended some of these same products to other members here at R2R. I regret that now. This article is, at least in part, my apology to the community.
So, I developed a plan to improve my system based on what I had learned. I replaced my old two-bay Berlin Method sump and oversized skimmer to start the implementation of my plan. I replaced that sump with a three bay model that had a decent sized refugium in the center. I also bought a smaller, more appropriately sized skimmer.
Over the next month, I added a little more live base rock to the DT; added some live rock rubble from two different suppliers; a couple batches of copepods; a small clean-up crew to the refugium; and created a refugium in the overflow weir. I also started feeding live phytoplankton and greatly increased feeding of everything else. This was all in an effort to provide the system with diverse nutrient processing pathways and provide the nutrient input required to maintain them.
I also stopped adding products to the tank to battle pest algae and bacteria that were still popping up. These actions did not yield immediate success. In fact, they resulted in a more pest algae and bacteria showing up. I stuck with the plan though. I began an aggressive routine of physically removing pest algae and bacteria rather than trying to starve, poison, or oxidize them.
Things are moving along nicely now. I’m still getting a little hair algae and spots of Cyanobacteria, but it is getting easier to control every day. Coraline is now growing rapidly. The fish look much more full-bodied, and the few corals I have are doing well. I’m now at a place where I feel good about beginning to add more fish and corals again. I think my “Someday to be” Reef Tank may now be my “Soon to be” Reef Tank. Here’s the tank today… without scrubbing prior to the picture… and the corals that are getting acclimated. The fish are still there. They decided not to be photogenic for some reason.
During this process, I started to think about how I would have set-up the tank differently if I knew then what I know now. I wondered if months and months of ugliness was really required to develop a successful reef tank. I came to the conclusion that the ugly phase could have been avoided, at least to a great extent, if I had focused on proactively developing the required nutrient processing pathways and the nutrient input needed from day one. To that end, I planned out my next build. Included in this build is my plan for developing mature nutrient pathways and food webs. I thought I might pass that part of the plan along in the form of this article. I’m not proposing this as the only method to solve that issue, and stipulate that there is some speculation involved, but I hope some will find it useful.
Theory of Operation
The process for creating nutrient pathways is based on a holistic view of food (nutrient) input and nutrient processing pathways as the basis for building a system and bringing it to maturity as quickly as possible. It attempts to provide an environment where the processes can occur without limitation. The process views any nutrient level above zero as sufficient. The rational for this determination is simple… The system’s organisms and biological processes would use the nutrients until at least one of those nutrients was no longer detectible if there wasn’t enough input to meet their needs.
The goal is to create an environment where nutrients are used and reused, or bound and exported to the point that they are never elevated to levels that might promote major outbreaks of pest organisms like Cyanobacteria and hair algae. Finally, it will provide food and nutrients required for coral health.
THE PROCESS
The information is not intended to be step by step instructions. It is more an order of tasks to be performed. Information I think is important or that provides insight are included.
The process is broken up into “Steps”:
The basic building block of the system, Live Rock, is prepared in Step 1;
The prepared Live Rock and other life is added to the display tank is Step 2;
Basic inorganic nutrient levels are established in Step 3;
Nutrient pathways and the food web are expanded in Step 4; and
The system is finished being stocked and managed to maturity in Step 5.
Waiting periods and timelines are not used. Once the live rock is prepared, the entire process can be accomplished as rapidly as the tasks can be performed and the milestones reached. Remember though… NOTHING GOOD HAPPENS QUICKLY IN A REEF TANK.
Nutrient Pathways
The process is predicated on my limited understanding of how nutrients are produced, reduced, bound, used, and recycled, and how different organisms use varying forms of these nutrients in a mature system.
This Chart attempts to provide a simplified map of the pathways. Notice that the pathways are intertwined. This is the important observation. I believe that if we artificially limit one pathway, we limit the function of the others.
STEP 1: PREPARATION
Set up a vat large enough to hold all the live rock you intend to use. Something like a Tupperware tub or a hard plastic Kiddie Pool works great. The purpose is simply to hold enough water to contain the Live Rock you will order. Install powerheads or wavemakers and possibly a heater in the vat. Add RODI water and mix artificial seawater to about 35 ppt or 1.025.
Order and prepare Live Rock. The majority of the cool looking life on “premium” live rock like colonial corals, sponges, bivalves, gorgonians, and tube worms will probably not survive the following preparation process. Small populations of these might remain but most will simply add to the waste produced. The life that is likely to survive and is most important to your future reef tank are coralline algae, bacteria, small invertebrates and crustations, and arthropods and copepods. Populations of that life are present on less expensive “base” live rock. That is what I would order in this phase.
For this process, the “live rock” desired is cultured in the ocean, not a tank. The diversity of life in ocean cultivated live rock in an important characteristic not available from rock cultivated in a tank.
The bacteria mentioned above are more than just the nitrifying and denitrifying bacterial commonly said to be required to cycle a system. While the rock will certainly contain these bacteria, it will also contain a host of bacteria that will help form the basis of the food web and help control nutrients other than just the nitrogen compounds.
This step starts the process of preparing live rock for your system. The surviving life will provide great diversity to your future tank. This part of the process lets the die-off process occur before the rock is placed in your tank while letting the life that survives get a better foothold.
Order enough rock to fill about one-third of the display tank’s volume. It is not about weight; it is about volume. Lighter, more porous rock is better. More is better. Err on the side of too much rock. If you don’t want all of the rock in the display tank, you can put the extra rock in the refugium. Multiple sources are better because it may provide more diversity.
When rock arrives: 1) Pull off plants and Gorgonians if possible; 2) Rinse in salt water; and 3) Place rock in the prepared vat. Change water after 24-72 hours as needed. There may some rapid die off that will foul the water quickly in the first few days depending on the type and quality of the rock used. Leave in warm dark vat until die off of life in the rock is complete. Doing some partial water changes along the way can also help.
Bound phosphate in live rock was not a risk factor in the past. Now that the rock is not harvested from the reef, it could be. If the phosphate bound to the rock is high enough it will leach into the display tank later, raise the level higher than our target, and possibly cause blooms of pest organisms later in the process. Leaching phosphates should be tested for and addressed during the preparation process.
Test the water the rock is being prepared in for phosphate. If it is above .1 ppm perform treat the rock with a lanthanum chloride solution until phosphate levels drop to below .05 ppm and does not rise after several days.
MILESTONE 1: Preparation is complete when the water remains clear, ammonia stays at zero, and phosphates do not rise above target levels after several days.
The next weeks are used to establish some life in the reef. This is the start of the life cycle of the tank. From here, the tank will be progressing toward maturity.
STEP 2: START LIFE CYCLE
Aquascape the display tank with prepared Live Rock. The prepared live rock is the first strategic addition of life. It harbors organisms that are net nutrient users and also provides a source to populate the system with nitrifying and denitrifying bacteria.
DO NOT RUSH THE ROCK. It is the basic building block for the biological processes needed for a successful reef tank.
Ensure the tank is ready to support the new life. Stack & secure the Live Rock in the display tank to aquascape to your liking. Large chunks of live rock not used in the display tank can be placed in the sump’s refugium area.
If Durso or other types of overflow plumbing are used, there may be lot of space at the bottom of the overflow weir(s) that can serve a part of the refugium in this system. Drop some live rock rubble in the bottom of them and cover them to block light. Don’t add a lot of rock, just enough to seed the overflow area. This creates more cryptic zones where nutrient users like tube worms and sponges will grow.
Start the skimmer. Starting the skimmer at this point helps manage any excess organics that might otherwise build up from the newly added rock.
A word about the skimmer in this process: As the balance of nutrient users and producers change, the need for skimming changes. Skimmers work by removing SOME organics from the water column. When the balance is tilted toward nutrient users, more organics need to be available so less skimming is needed. If the balance is tilted the other way, there will be an excess of organics in the water column and more skimming is needed. In this process, the skimmer is not the primary provision for managing dissolved organic compounds. It provides some export to establish an addition nutrient pathway. Don’t use oversized, super-efficient models. They will limit organics too much. A properly sized, modestly priced, internal needle wheel skimmer will work better for this process.
Turn on the lights. Set intensity level just high enough to encourage Coralline Algae growth in the display tank.
Diatoms: It would not be unexpected for diatoms to pop up around this time period.
Add some Pajama Cardinals (or similar). The live rock in the system will support a fair number of nutrient producers if added at this step. However, let’s keep it reasonable. The goal here is to provide some ammonia but not to provide so much that nitrates start to rise too quickly.
Feed frozen Brine Shrimp very lightly only once per day. This provides a controlled input of ammonia to feed organisms in the live rock and spur more bacteria growth. Increase feeding after about a week
Start adding Clean-up Crews. The clean-up crew manages algae and detritus, and preys of pests that might otherwise cause problems if allowed to get a foothold. Stocking them now will help ensure that doesn’t happen. They also add a little ammonia input. Diversity is the key. Add a few of each rather than a lot of some. Everyone has their favorites.
MILESTONE 2: At this point, we have established the basic building blocks of the nutrient pathways and started some nutrient input. There is live rock in the display tank, refugium, and overflow weirs, the skimmer is running, lights are on, and there are fish and clean-up crews in the system.
STEP 3: ESTABLISH BASE NUTRIENT LEVELS
If the prior steps have been performed correctly, nitrate and phosphate will probably not be detectible. Adding these stock solutions provides necessary inorganic nutrients for the organisms we are trying to establish, and for other processes to occur, until the tank’s inhabitants can do so.
The presence of a detectable level of nitrate and phosphate ensures that the processes we are trying to establish are not limited because they are too low. Nitrite levels should be above 0 to about 5 ppm. Add Sodium Nitrate stock solution to bring nitrate to a detectible level. Phosphate levels should be above 0 to about .05 ppm. Add Trisodium Phosphate stock solution to bring phosphate to a detectable level.
Add nitrate and phosphate stock solutions a little at a time and wait at an hour before retesting. Try to keep nitrate higher in relation to phosphate because of the difference in the system’s use of them. If nutrient levels are elevated above the maximum target level, simply note it and continue. Additional provisions will be added later will help control these levels.
Begin weekly nitrate and phosphate testing. Adding the above solutions when required is only a tool for managing these levels. The goal is to establish a balance of nutrient producers, nutrient users, and nutrient input so that they don’t have to be added without driving nutrients high enough to cause problems. If you have to add nutrients using the stock solutions it is time to feed more and/or add more nutrient producers. If nutrients levels are rising or already higher than desired, add more nutrient users and/or reduce feeding.
Cyanobacteria, sheet algae, hair algae, and etc.: It is about time for small amounts of various pest bacteria and algae to start making an appearance. The clean-up crew will help, but will not likely be enough to keep at least some of these pesky organisms from getting a foothold.
This is where things often go wrong. We start to see small outbreaks of these pest organisms. I our panic, we start adding all sorts of filter media and magic elixirs that are advertised to stop the growth of these pests. This action interrupts the nutrient pathways and slows or even stops the progress of the system. This unintentionally gives the pests more opportunity to grow. We try something else to stop the organisms’ progress and things get worse. The cycle continues and the tank starts to fail.
Vigilance and elbow grease should be the only things required to keep pest organisms from getting out of hand when the system is young. Quickly dispatch pests with stiff brushes, a little vacuuming, and slowing growth by temporarily reducing light. A toothbrush, one made for dentures, a set of stiff bristled bottle brushes, a Turkey Baster, and a small siphon type vacuum will be your best friends in this phase.
Add More Life. This step adds more nutrient users in preparation for the nutrient producers soon to be added.
Add some “Premium Live Rock”. Now that the system can support it, adding live rock with most of its accompanying life is an excellent way to increase diversity. Don’t forget to put some in the refugium and rubble in the overflow weirs. This time, don’t prepare the rock. Simply pull of plants and debris and rinse with salt water. Place the rock directly in the display tank, refugium, and in the overflow weirs.
Add some soft corals like Toadstools, Leathers, and Zoanthids in the display tank all at once. These are nutrient reducing organisms. They can be added all at once. Have a ball!
Add more fish and increase feeding. These are nutrient producing organisms. At this point, try to add fish that that also serve to eat algae, detritus, or corals pests.
MILESTONE 3: Fish and corals are doing well in the display tank; Refugiums and Overflow Weirs have live rock rubble in them; and Nitrates and Phosphate levels are roughly in target range.
STEP 4 EXPAND FOOD WEB and NUTRIENT PATHWAYS
Establishing a sustainable food web and increasing nutrient pathways in the system is very important to its maturity process. We have established some of the basic building blocks. Now we need to add a little more diversity to close the loop.
Add more life to the Refugium. Note: The Refugium is “Cryptic”. No lighting is necessary. Sponges, tube worms, and other Cryptic life perform the function of binding and re-mineralizing nutrients. Phytoplankton performs the nutrient binding function that Cheatomorphia or other macroalgaes might normally perform in a lighted refugium.
Phytoplankton was chosen over Cheatomorphia for three reasons: 1) It binds inorganic nitrate and phosphate; 2) It also serves as a food source for organisms in nutrient processing pathways; and 3) It does not have to be physically harvested to perform export functions.
Adding Cheatomorphia and a full spectrum over the rock in the Refugium could provide another nutrient processing pathway.
Add live Copepods and Arthropods to the Refugium. This will establish a more diverse colony of copepods that serve multiple purposes. They munch on microalgae and detritus; are a thread in the food web; and mineralize organic nutrients.
Start adding Live Phytoplankton. This performs two functions. It feeds copepods, clams and some corals; and binds inorganic nitrate and phosphate for export or binding in other organisms’ tissues.
CAUTION: Whether culturing live phytoplankton or purchasing it, start with small amounts and ramp the amount added to the tank slowly. Quantities required depend on phytoplankton density and users in the system.
Add more corals and a clam if tests are in range. Add more soft corals, LPS, or possibly an easy to keep SPS coral to add more nutrient users and check the system to see if it will support more sensitive corals. Clams are a great addition. They can filter fine particulate organic matter and help balance nutrients.
MILESTONE 4: The tank is now well established. It already has a fish population and quite a few corals. It is stable, but still somewhat immature. It still needs a lot of input from you. You are testing weekly for nitrate and phosphate, and dosing iron, phytoplankton, and possibly potassium nitrate and trisodium phosphate - stock solutions. Nitrate and phosphate are being maintained in range. Coralline algae growth is visible and pest algae, while possibly still present, is not a struggle to keep in check. You are likely cleaning the glass every few days.
At this point, the game changes. Now we are stocking the reef in a way that maintains the balance of net nutrient users and producers and nutrient input. Always consider adding groups of corals and other net nutrient users and allow them to get established prior to adding new fish. All this must be done while managing water chemistry to meet the increased demand.
STEP 5: STOCK and MANAGE the SYSTEM
Increase fish feeding. Heavy feeding is a key to maintaining this system. The intent of feeding fish heavily is to increase ammonia and dissolved organic carbon production required to satisfy the needs of the organisms in the system. Now it is time to start feeding a host of frozen foods. The goal is to ensure that fish have enough food to dampen aggression and to increase organic input for the net nutrient users
Add more life. This process is repeated until the tank is stocked to your liking. Nutrient users or nutrient producers are also added to adjust nutrient testing trends. Feeding is increased accordingly.
Add a group of corals, clams, etc. (Net Nutrient Users) all at once. Add more sensitive SPS Coral Frags when tank becomes stable enough. Stability of salinity, temperature, alkalinity, flow, and light are critical for some SPS corals.
Add some more fish (Net Nutrient Producers). Add on a steady basis. The goal is stock the system heavily. Add in small increments depending on size. Add maybe one bigger fish or a few smaller ones
MILESTONE 5: There are a lot of fish, corals, clams, and clean-up crew members in the tank; corals are starting to grow rapidly; pest organisms are almost nonexistent; cleaning the glass is not a big job; inorganic nitrate and phosphate are stable at low but detectible levels; and Coralline is growing and thickly coating surfaces. You are dosing iron, phytoplankton, and very little if any sodium nitrate or trisodium phosphate stock solutions. Copepods, tube worms, sponges, and other life is evident in the display tank, refugium, and overflow weirs.
At this point, I think we can consider the system to be mature. Congratulations. Now you just need to add those fish and introduce the corals to make the reef pop… and continue to manage the nutrient pathways and nutrient input to ensure everything continues to thrive.