Where to put plywood bottom on DIY stand?

  • Thread starter Thread starter Gopi
  • Start date Start date
  • Tagged users Tagged users None

Where to put the plywood bottom for DIY Stand?

  • On the outside of frame

    Votes: 4 57.1%
  • On the inside of frame

    Votes: 3 42.9%

  • Total voters
    7

Gopi

Active Member
View Badges
Joined
Nov 19, 2014
Messages
419
Reaction score
85
Location
Raleigh
Rating - 0%
0   0   0
I'm about to head back out the garage to screw my stand frames together. (one is 50x20x31 and other is 30x24x30) I'll get to a standstill when it comes to the skin. I'll be placing plywood over the top of both stands, but would also like it on the bottom and can't really decide which way to go. I'll do both stands the same way.


Option 1: Cut out a rectangle, place on the outside.
-Pros: As a 'I've never built something this big out of wood before' person, this would be the easiest thing for me to do. I would then also have a 'trough' on the inside to catch the inevitable spill.

-Cons: The trough would be 17' wide making me re-think my sump plans for the larger thank for a 3rd time and bringing mockery from my husband because I keep changing those plans. (Decided the 55 sump would be too long, no side access. 40B would be nice and Petco $1/gal sale is ON!) I'd have to put felt or something along the entire area of the bottom to prevent from scratching our new floors (installed next week!)

Option 2: Place on inside of the stand.
-Pros: I'd have more width to work with for the sump. I'd be able to put a 40B down for a sump for the larger tank and still have plenty of room for ATO reservoir etc. Less felt needed for anti-floor scratching.
-Cons: No trough to catch spills. The cuts will be more difficult for me. I'm not sure how to actually install...before attaching the top frame? After attaching the top frame? Most of what I've seen seems to be after the top frame and bracing in installed...how does that work?!
 
Last edited:

Are you talking about putting the plywood like this?
ImageUploadedByTapatalk1419791740.365481.jpg
 
stand

I am putting together a 75g. I decided to put the plywood on the bottom so I have a trough to catch spills and sloshes. Going to line it with the stuff they line shower pans with. I made my stand 24" deep so my plumbing can go straight through the stand and stand can be against the wall. I also did this so that if/when I feel the need to upgrade i can go to a 48x24 footprint and keep the same stand if I want to. The stand is a little over 36" tall which i did for better viewing and to fit skimmer with no problem. I made my sump from a 30 (excuse sloppy silicone job) went this way so i would have some room in front and on the end. Didn't think i would gain much by going 40b but real estate inside stand may become a premium just by looking at others pics. I may end up building a matching chest to sit beside stand for ato, haven't decided yet. If I do, it will be built so i can use it as step stool.
 

Attachments

  • 20141228_121625.jpg
    20141228_121625.jpg
    87.1 KB · Views: 279
  • 20141228_121656.jpg
    20141228_121656.jpg
    87.5 KB · Views: 267
Yes to EZMac. I'm torn between something like that and what thunderfan did. My width is stuck at 20 because of the room it's in, a 24 wide tank would just be too tight. Here's where I'm at now:
14197921840552031163831.jpg


I can't move forward on that one,I cut my leg supports an inch too long and I returned the saw to my neighbor so I have to wait... Guess I'll get started on screwing the smaller stand together.
 
I actually like what Thunderfan did compared to mine. Mine is built like it is because I bought my tank used and just replaced some of the old wood pieces that did look so good. My next build I'll be putting the wood under the stand.
 
Your boards that you are going to screw your supports to need to have a 3/4" gap on the top and bottom. If they touch the top and the floor they create a load point instead of spreading it out. I think I wish I would have turned my boards like yours. I may change it before I skin it. What are you going to use to skin yours? I'm going to use Baltic birch plywood, the adhesives they use on it are outdoor rated and all layers are made from equal thickness birch so you can sand the edge and stain it and it gives a neat looking edge.
 
I haven't decided on a final skin yet...much to Hubby's dismay. (He's not helping me build so I don't why he's upset my plans keep changing?)

So the area between my frames is 24 inches, I'd cut my boards to 25. (Because that's what I had before accounting for plywood in overall height). Are you saying that rather than cut them to 24 to fit snuggly, they should be 22.5?

Or upon reading that again, I need to trim my inside guides somehow? I really don't want to take these totally apart, just finished the smaller frame when I ran out of screws
 
Last edited:
The upright 2x4s you have in there now go from the floor to the top of your top frame. There should be a 3/4 gap at the top and bottom. If you look at the very bottom corner of my stand you will see a gap between my bottom plywood and the inside vertical 2x4s. When you add the boards between the top and bottom frames the weight is distributed between the top and bottom frames by those 2x4s. The one you have in now is not supposed to be for any support at all just something to screw the other ones to. If it goes from top to bottom than this one board in each corner will bear the weight.

My wife is the same way. I change my mind many times. I think she may finally be learning that when I am talking to her about something I want to do I am not really looking for much advice or input. I think I am just saying it so I can hear it out loud for myself.
 
Last edited:
Hmmm, Ok. The tutorial I was using had them going the full length. Do you have a good idea about how to fix without undoing everything? Maybe use the saws-all? Or would it be OK to undo it and just trim the one end of the board and reuse the holes on the other end...? I'm not allowed to use 'power tools with blades' when I'm home alone so I have to wait for someone to decide to come home...
 
You could use a Sawzall or if you have a harbor freight you can pick up one of those versa saws. This stand design is from a guy on reef central I think. I read all the way through his thread and this came up in the discussions. He explained it the way I just did and it made sense to me. You may never have any issue and I think a bunch of people have done it that way. For me I have a crawl space under my house so I didn't want the load on points. I wanted it more distributed across the bottom. I don't think the gap has to be 3/4 either just so it's not touching.
 
Gotcha. Looks like I'll have time before I can saw so I can take it back apart. Also will get another box of screw and a can of Kilz. But which kind of kilz to seal? I'll be painting black eventually.
 
I use screws for building decks because they are coated and made to be in the elements so i figured that would stop the possibility of corrosion.

I don't think kills is a sealer but is a primer. I'm going to coat the inside with the sealer/paint used for decks. Or I may paint it with Henry white roof coating. Anyway I do it the inside will be white for sure.
 
I've almost got the smaller stand done (6 screws to go!) and I'm close on the larger. I trimmed all the pieces by 1 inch, cut a nice 1/2 inch spacer and then managed to not use it...used a 3/4 piece so at least I've got that gap but will have re-cut the supports for the big stand. I ended up using the ones I had on the smaller stand and will have to trim down the 27inch ones to fit. At least I didn't end up wasting any wood! I'm also using deck screws for the same reason.

Does the wood need to be sealed before painting? That was my only reason...there were so many types of Kilz, I couldn't decide what I wanted/should get.
 
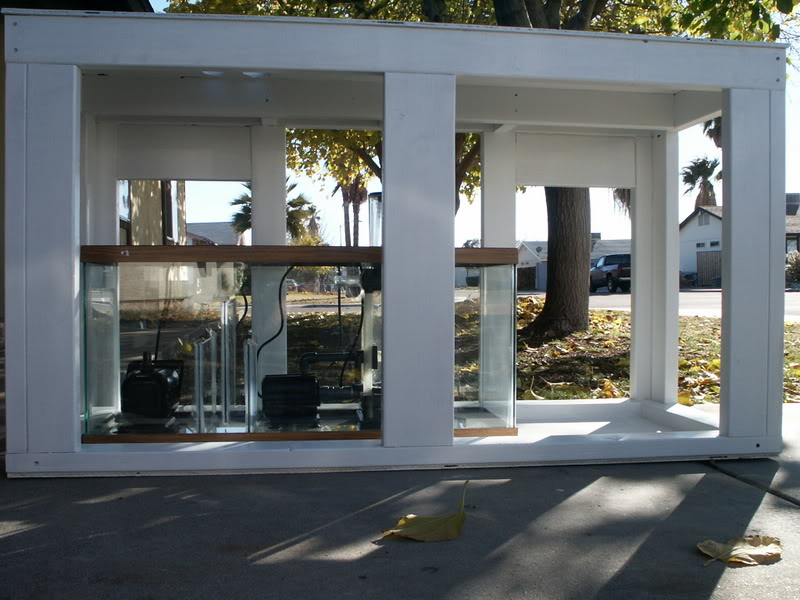
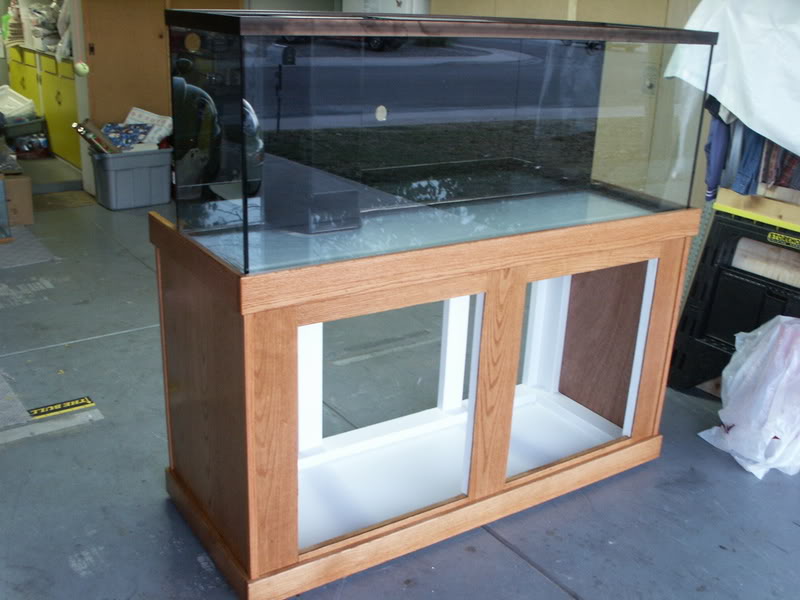
Mine is similar to Thunderfans and I sealed it inside with silicone caulking then epoxy painted the entire stand so it holds water in case of a minor leak or spill. I know it works as I had an old ebay calcium reactor that the O ring leaked on for two days before I caught it!

painted5.jpg
 
The upright 2x4s you have in there now go from the floor to the top of your top frame. There should be a 3/4 gap at the top and bottom. If you look at the very bottom corner of my stand you will see a gap between my bottom plywood and the inside vertical 2x4s. When you add the boards between the top and bottom frames the weight is distributed between the top and bottom frames by those 2x4s. The one you have in now is not supposed to be for any support at all just something to screw the other ones to. If it goes from top to bottom than this one board in each corner will bear the weight.

My wife is the same way. I change my mind many times. I think she may finally be learning that when I am talking to her about something I want to do I am not really looking for much advice or input. I think I am just saying it so I can hear it out loud for myself.

I am a mechanical engineer and have been framing houses for 40 years. What you are saying about gapping the verticals is a bunch of hooey.
 
I am a mechanical engineer and have been framing houses for 40 years. What you are saying about gapping the verticals is a bunch of hooey.

He was saying to gap the interior verticals so they do not take load based on the picture. The main verticals are not gapped. I think the idea is that you want your top and bottom frames to support the load, with the verticals transferring it from top to bottom.

I don't think there is a huge need for it, as long as there is some gap it would be fine. You just want the load going through solid members, not potentially transferring load through the screws.
 
I know engineers and I know framers as I am in the construction industry also. I have never known an engineer that would claim to be a framer. The info I got was from another forum and was by another engineer so who is right? I don't know but, I just go with what makes sense to me. As I said there probably wouldn't be an issue, I'm not here to have a debate, I was just giving information on the way it was designed.
AZDesertRat what kind of epoxy paint did you use? Is it like what you use on garage floors? Also, how did you attach the supports to the top and bottom frame? I would like to get rid of that inside piece a 2x4 doesn't sound like it will take up much room but it does in a tight space. Are those 2x2s on the bottom?
 
AZDesertRat, I like the idea of caulking. Did you use plain silicone caulking? I'm not sure I have any left so I'll probably have to go buy a tube. Would ones with antimold/mildew be good/useful for this application?

After much mockery from the hubby, he ended up getting sucked in and helped out towards the end. I think he was gauging my seriousness in building these. The frames are set and the plywood tops and bottoms are cut. Both will go on the outside of the frames. He cut the larger pieces for me because I have wingspan issues being short... It was close to midnight and I was tired, so now to just screw those in place and figure out the skin. (The video that said this took only 35 minutes tops: LIES. All LIES.)

It looks like a 40B would take up most of the middle stand space so I'm thinking a 30 would suffice. (I don't run reactors and such.)

Next up: trying to skin. I'm torn between attempting doors and just removing the full panel on the front and 1 side. Other side I think I'd like to build in shelves somehow. I'll probably do panel removal for access, but it will have to be lightweight so I can do that daily. But, I have to decide soon because I'll lose truck access after Sunday when hubby goes back on the road for 3 weeks.
 
I am torn about the doors or panel as well. If I do a panel it will most likely be held on by magnets from here Applied Magnets & WindMax Wind Turbines. or hidden magnetic latches. Doors would be locked by hidden mag locks because I have very curious 2 and 5 year old granddaughters running around often and I could just see them trying to help me.
 
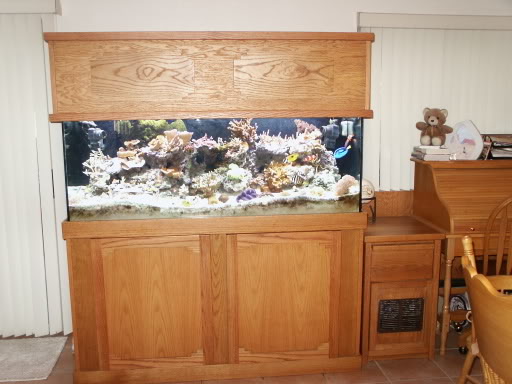
Its been 0ver 11 years now but I think it was just a gallon of bright white epoxy enamel, probably similar to the garage floor paint. Everything is glued and screwed with drilled and countersunk galvanized deck screws and exterior grade wood glue clamped until dry so it stayed true and had no racking or out of square. The bottoms are 2x4's laid on their sides to allow maximum room to get the sump, skimmer, CO2 and reactors in and out. The two horizontal 2x6 pieces in each back corner are places for outlet strips and my RKL PC4 strips and modules to mount to so they are up high and not a drip hazard. They also added lateral support to lessen any side to side movement.

stained5.jpg


6-1023.jpg
 

TOP 10 Trending Threads

WHAT DO YOU USUALLY CHECK FIRST WHEN YOU LOOK AT YOUR REEF?

  • A particular fish I enjoy watching

    Votes: 0 0.0%
  • The fish population—making sure everyone is accounted for

    Votes: 6 18.2%
  • Coral extension, color, or growth

    Votes: 14 42.4%
  • Recent additions or other changes

    Votes: 4 12.1%
  • Water clarity or the surface

    Votes: 0 0.0%
  • Equipment and water movement

    Votes: 1 3.0%
  • Signs of algae, pests, or trouble

    Votes: 2 6.1%
  • I just enjoy the whole scene

    Votes: 4 12.1%
  • Other (Post in the comments)

    Votes: 2 6.1%
Back
Top
Home
Post thread…
Market
What's new