

280 Gallon Mixed Reef, Build Journey

hkinkade

Community Member
View Badges
Joined
Sep 5, 2024
Messages
54
Reaction score
25
Location
Arroyo Grande, California
What state or country do you live in
California
Rating - 0%
0   0   0
Let me introduce myself. I’ve had a long history with aquariums, but for the past 30 years, I’ve been dry. Now, it’s time for my dream tank. As a kid, I had four tanks, raising Guppies and Mollies, and I traded fry at my LFS for Sword Tails or a Kuhli Loache. I was fascinated by saltwater aquariums that I saw and wanted one.

Other hobbies and college took over, but in the mid-eighties, after college, I got my first saltwater tank. It graced our new townhouse, and I was becoming lured to reef tanks. Back then, it was all about wet/dry filters, VHO’s, and macro algae. The Berlin method was just emerging. It was exciting.

Then came kids, which explains my long break from aquariums.

During those years, I planned and began building my reef tank for a new home. Woodworking is another hobby, and I began to create and build a shaker-style, book-matched curly cherry cabinet, floor to ceiling, dividing two rooms. It was going to be epic. We sold that house, but the cabinet came with us, it would fit in the next one . . . then we retired and built a custom home, with the perfect spot for “the tank.”

That brings us to today. As I finalized the design to integrate the tank into our new home, it became clear the original design wouldn’t work in our “third” home. I still feel the sting of not finishing the cabinet, now 80% complete in my new shop, but it was the right decision. The tank and cabinet I dreamed of would not become a reality, after beginning its contrstruction 30 years ago and moving it three times along the way. Well you can only image the family jokes about Howard's fish tank, all in good fun.

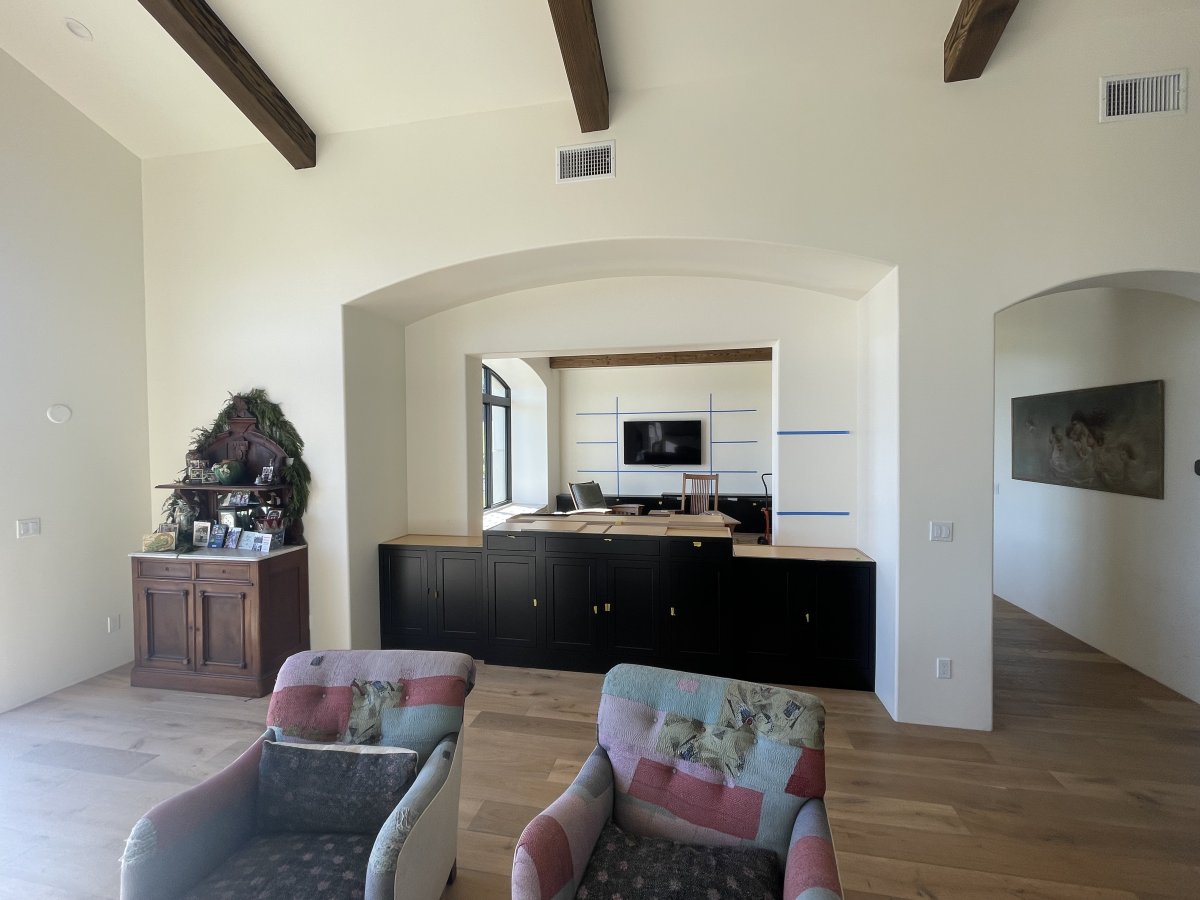
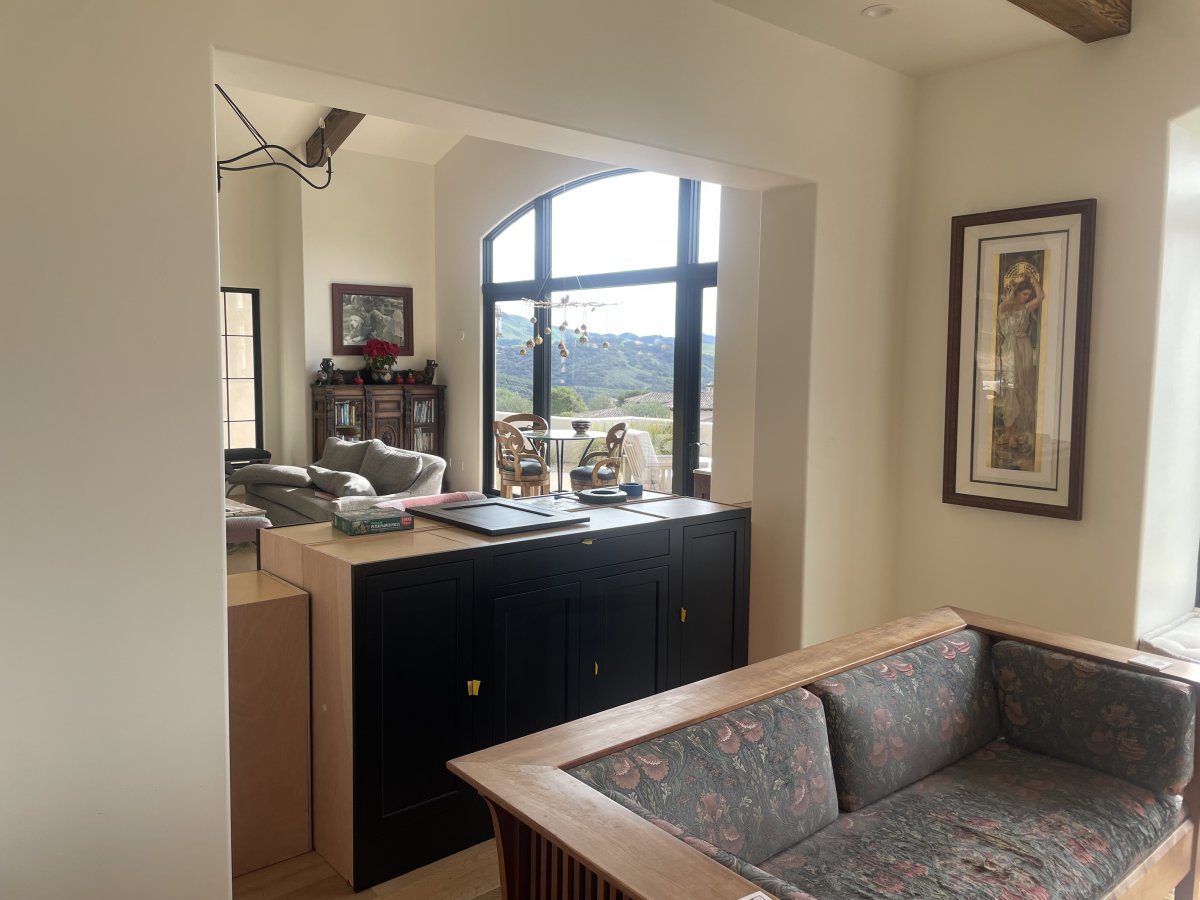
In recent months, I’ve designed the perfect aquarium for our home. No more moves in this story. The design is complete, and the cabinets have arrived, ready for my dream tank.

Below are renderings of the tank/cabinet and sump room (in the garage), as well as current photos. Though I’ve stayed connected to the hobby through books, forums, and more for the past 30+ years, this leaves me with only book smarts. I welcome all suggestions and opinions on my choices as I pursue my vision for a great mixed reef aquarium.

The build journey starts here:

Great Room View (render):
Screenshot 2026-01-21 at 10.10.43 AM.png


Den (render):

Screenshot 2026-01-21 at 10.16.04 AM.png


Sump Room, Garage (render):

Screenshot 2026-01-21 at 10.06.48 AM.png


Cabinets, Great Room:

IMG_5559.jpeg


Den Cabinets:

IMG_5790.jpeg
IMG_5560.jpeg
 
WOW!! Very well thought out and planned. I look forward to seeing this build progress!
 
Big day today.

Pulled my Loch Ness Monster of plumbing through my underground conduit. The total run was 40', underground. The bundle included two 1 1/2" flex PVC lines (fed by two supply pumps for redundancy, Varios 6), one 2" gravity drain line, 1" corrugated low voltage conduit. Total length of plumbing, 50'. The supply and drain lines are insulated, as it's a long run underground and need to manage heat loss.
IMG_5846.jpeg
IMG_5847.jpeg
IMG_5850.jpeg
 
Last edited:
Looking forward to seeing this one through! I'm into woodworking too, though not as experienced as you yet. I really like those inset doors on your stand! Great work
 
Following along!
 
Following along!
Well I did designed these cabinets, but had them made. They match the rest of the cabinets in our home. The tank cabinets I originally designed, and had 80+% complete, will be dismantled when I get the nerve too. They were also shaker style like those shown here, but in cherry with booked matched quilted cherry panels. Brings tear to my eyes not to complete that project, but it was the right decision.

There will be lots of other items I design and manufacture (Fleece roller, protein skimmer . . . ). It should be fun.
 
Some small progress lately.

Tested plumbing from garage (sump room) to tank stand (approximately 50' run). Currently I'm only able to validate one of two supply legs, as I need to purchase a second Varios 6 pump. The flow through one leg of my return circuit was right at my predicted flow rate (680-720GPH). Gravity return through the 2" line worked well, but that will be completely validated when I have both supply legs flowing. Here's a few snap shots of the test setup, crude but it works. You may also notice the overflow return box, that's my custom design / 3d printed. I did a custom return to minimize it's visual impact in the tank.
IMG_5976.jpeg
IMG_5977.jpeg
IMG_5976.jpeg
IMG_5977.jpeg
IMG_5982.jpeg
IMG_5976.jpeg
IMG_5331.jpeg
 
I have confirmed the two supply loops work as designed. Total flow between the two Varios 6 pumps is 1400-1500gph. All is good on the supply side.

The initial combed weir is a little bit too small. It ran close to predictions though. The second generation weir is round with a little bit more flow area. It also flows into a 360 deg bell mouth drain section. This will minimize the potential noise at the throat of the weir and works as expected. Vortex does develop, which I can calm down with flow straighteners. At max flow the weir is doing ok, but I will likely increase the size a little bit further. The weir is 3D printed from PETG. Comb teeth are Titanium.

IMG_6051.jpeg


The drain is a little more challenging, I was expecting that. My sump is about 45 feet away in the garage and thus piping needs to flow from tank, underground, then back up to the sump. All of my supply, drain, and conduit runs through a 6" conduit underground. With this underground run it creates some unique design challenges. I wanted only one drain line. Typical drain options Herbie and Bean Animal require two runs. This I felt was going to be risky. The second run of these drain systems flow little to no flow and the underground run would likely become very stagnant. I was uncomfortable with a stagnant line and issues with dormant biological regions. So I opted for a Durso type drain.

My first attempt was marginally successful. A true Durso drain relies on an air core to break any siphon effects. If the line siphons the flow becomes unsteady and the unstable flow results in gurgling etc. My return line from the overflow box is 2" and was designed to have a true air core relying on the Coanda effect. All of that worked reasonably well, yet even with the baffle in the overflow box it was difficult keeping the turbulence from breaking up true durso behavior. The design is further challenged by my desire to have the system being able to be relatively silent across a wide flow range, 200-1500GPH.

IMG_6105.jpeg

Now comes for the big design issue. I knew the horizontal underground run could create entrapped air and 'Air Lock', especially at lower flows. Well that certainly became and issue. Despite how I vented the drain air would make its way downstream and into the horizontal run. This resulted in all sorts of issues, the least of which was the noise. The 'burping' got me wet a few times :-/

As much as I wanted to avoid the next design feature, I can't. To prevent air becoming trapped in the horizontal section I will be designing an air separation chamber. It's not a difficult concept to design, yet more clap trap and not fitting with the 'KISS' ideals. Oh well!

Some may be interested in my Overflow Box. Here's some pictures. Some improvements in this design are also forthcoming. More on that and the continued design evolution to come. I should have the parts I need to continue my development next week. Stay tuned.
IMG_6079.jpeg
IMG_6076.jpeg
 
Design work on sump room (garage) is coming along. Only fine tuning now. Let me know what you think. Have I missed anything, do you see any issues. All feedback is more than welcome. There will be an enclosure around the sump area, with quarantine tanks above. The blue pipes are flow meter runs. There's a UV sterilizer (lifeguard ProMax 90W), Filter chamber on left (fleece roller and protein skimmer area), media section, Pump section and finally on the far right a refuge area. Behind the sump is drain locations (yellow push to connects) and manifold for accessories as needed.

The rubbermaid stock tanks are RODI at top, Salt, then Kalkwasser at the bottom.

1777306797756.png

1777306825317.png
1777306867358.png
 
Build is looking great so far! Super impressed with your use of an engine hoist as leverage to pull the conduit lol. This is going to be a high quality build, I can already tell by your 3d renders haha.

Just curious, what made you go with the rubbermaid totes? Are you worried about being able to see visually if they are empty? Or are you planning to have some float valves that will let you know when they need to be refilled?
Vandy, thanks for the kind words. Rubbermaid was a cost effective solution. The tops will have PVC Cnc'd lid/hatches. There will be extensive use of float switches in my supervisory control of the tank. I'm big on monitoring and designing a system that 'fails safe', as much as practically possible. I'm slowly developing my control and monitoring strategy. More on that as time goes on.
 
Very cool build! Definitely following along
 
Vandy, thanks for the kind words. Rubbermaid was a cost effective solution. The tops will have PVC Cnc'd lid/hatches. There will be extensive use of float switches in my supervisory control of the tank. I'm big on monitoring and designing a system that 'fails safe', as much as practically possible. I'm slowly developing my control and monitoring strategy. More on that as time goes on.
Very nice!! Are you going with an off-the-shelf controller? Or making your own?
 
Very nice!! Are you going with an off-the-shelf controller? Or making your own?
Making my own was a thought, yet way too much work. Even though I'm a retired engineer and love DIY, it wasn't in the cards. I was torn between Apex and Hydros. Apex certainly has some programing value, yet I felt the hardware of the Hydros and their controller design architecture fit my values better. I should be able to do some complicated control operations on the hydros, albeit not easily. I certainly wish they would create a 'math module'. I have already come across the desire to control certain functions based on multiple parameters and an associate math relationship. There is a lot of attention to certain ratios of various measurements (e.g. Nitrate/Phosphate), yet no ability to directly control devices based on this or other parameters based on math relationships. Come on Hydros "Coming Soon a Math Module" ;-)

I am however doing a DIY filtration device with my own controller, but you'll have to wait to see that. :-)
I agree, ultimately I went with hydros after playing around with reefpi for a while. Can’t wait to see what you come up with! If you need some inspo, check out my build thread that is a work in progress if you need some inspo. I made my own fleece roller for my specific application.
 

TOP 10 Trending Threads

WHAT’S YOUR MOST MEMORABLE EXPERIENCE WITH A CORAL THAT LOOKED LIKE IT MIGHT NOT MAKE IT?

  • I’ve seen a dramatic comeback. I would have sworn it was a goner

    Votes: 18 43.9%
  • A slow recovery, and it got back to looking healthy

    Votes: 7 17.1%
  • It came back some, but never looked as good as it used to

    Votes: 3 7.3%
  • I tried to save one, but it didn’t make it

    Votes: 7 17.1%
  • Mine is still struggling...no comeback yet

    Votes: 3 7.3%
  • I’ve never had a coral in serious trouble

    Votes: 0 0.0%
  • See, this is why I don’t keep corals

    Votes: 1 2.4%
  • Other (Post in the comments)

    Votes: 2 4.9%
Back
Top
Home
Post thread…
Market
What's new