55 gal w/ 30g sump build [jbj 28 upgrade]

icejam

Active Member
View Badges
Joined
Aug 8, 2018
Messages
243
Reaction score
225
Location
Calgary, AB
Rating - 0%
0   0   0
I have JBJ 28 gallons running for last 10 months. I managed to claim some floor space to upgrade to a larger tank. Unfortunately the space is rather narrow ~ 14" which means custom tank or 12" deep off the shelf - hence 55 gal.

Planned hardware (so far):
- 55 gal DT [48 x 12 x 22]
- 30 gal sump [30 x 12 x 18]
- DIY stand
- Eshopps PF-1000 / 1200 overflow box
- DC variable flow return pump w/ float switch
- 2 Jebao RW-4 powerheads

12in deep aquarium is far from ideal but I think I can make it work. Overflow and plumbing will be installed on the shorter side of the aquarium.
I will be building the sump myself (still working on the final design)

All the live stock will be moved from 28G to 55G. I have extra 40+ lbs of LR sitting in my garage that I will start curing process this weekend.I also have 30+ lbs of man-made LR that has never been in the water so I guess I can just use it as-is without curing?
I haven't decided what to use for light yet - I might DIY something again.

Here are the plans so far:

Screen Shot 2019-05-16 at 14.21.20.png


Screen Shot 2019-05-16 at 14.22.13.png


Screen Shot 2019-05-16 at 14.24.21.png

More to come.
 

Ron Reefman

Lets Go Snorkeling!
View Badges
Joined
Aug 12, 2012
Messages
9,291
Reaction score
20,894
Location
SW Florida
Rating - 0%
0   0   0
Interesting. Please explain the 3 drains. I assume one is an emergency drain. But the other two?

I'm just curious. Not saying there is anything wrong with it.
 
OP
OP
I

icejam

Active Member
View Badges
Joined
Aug 8, 2018
Messages
243
Reaction score
225
Location
Calgary, AB
Rating - 0%
0   0   0
Interesting. Please explain the 3 drains. I assume one is an emergency drain. But the other two?

I'm just curious. Not saying there is anything wrong with it.

Sorry I was a bit lazy with my drawing there so just copied & pasted - 2 drains and 1 return. One drain going through the filter / sock to skimmer [on the left], second one to refugium area. [on the right]. Return pump in the centre.
I think with 2 u-tubes to prevent syphon breakage, 2 drains and float switch on return pump I do not need emergency drain.
 
Last edited:
OP
OP
I

icejam

Active Member
View Badges
Joined
Aug 8, 2018
Messages
243
Reaction score
225
Location
Calgary, AB
Rating - 0%
0   0   0
Started curing the rock - traditional way, no bleach, no vinegar, just power head, heater and SW changed as required.

f212732e4c3c7830047817b207d3cbcf.jpg


And some of this will be used to build a stand:
(unless I can buy something suitable for cheap)

e64d996c73198e2f4c3a9caaf30b0655.jpg
 
OP
OP
I

icejam

Active Member
View Badges
Joined
Aug 8, 2018
Messages
243
Reaction score
225
Location
Calgary, AB
Rating - 0%
0   0   0
Slight change of plans. I found a cheap-ish Aqueon ProFlex Model 2 sump (cost me probably the same as building my own).
Needs some cleaning but otherwise looks awesome :)
So now I need to rethink drain configuration and equipment to be used.


51PVF5T6RJOu0Px4zhJQlA.jpg
 
OP
OP
I

icejam

Active Member
View Badges
Joined
Aug 8, 2018
Messages
243
Reaction score
225
Location
Calgary, AB
Rating - 0%
0   0   0
Found 55 gal aquarium for $40 on Kijiji.
In good condition, some scratches but nothing major.
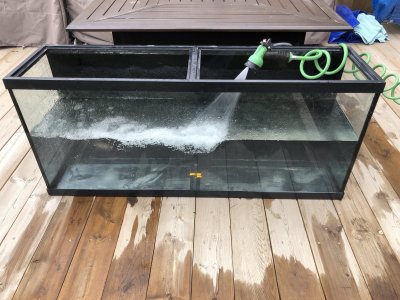
Scrubbed clean with razor blade and vinegar.

mTbpiRu6QPyUVtpkUM5S8w.jpg

Now that I have the aquarium I can start measuring and building the stand.
Work is busy (long hours) so not much will happen until weekend.
 
OP
OP
I

icejam

Active Member
View Badges
Joined
Aug 8, 2018
Messages
243
Reaction score
225
Location
Calgary, AB
Rating - 0%
0   0   0
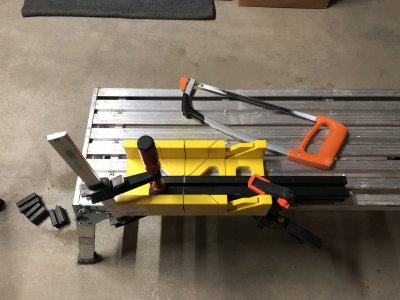
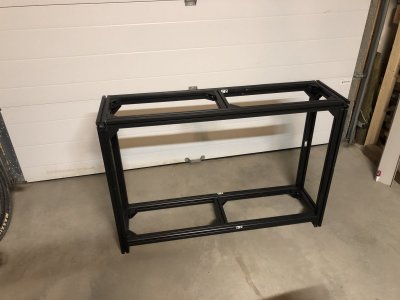
Cutting aluminum sucks... As the circular saw blade for non ferrous metals is almost $80 I decided to cut everything by hand with a hacksaw. Took forever :(
One good tip - change your blades often. And remember - aluminum dust is explosive!
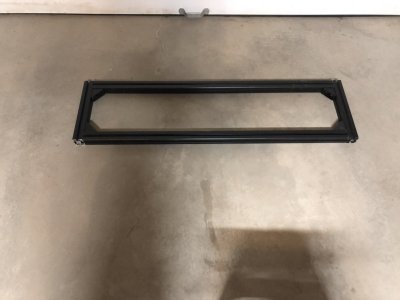
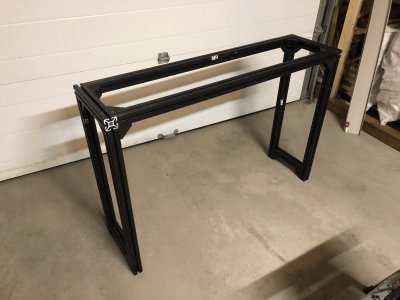
Here are some pictures:

fullsizeoutput_4148.jpeg

rPYcR9eFSdii8Ool9ZEpnA.jpg

kN96bogxTuOImkn53Q2J2A.jpg

PK75CkbGSvWGkqYD%BP1sg.jpg

Plywood goes next and I should be able to place aquarium and add water by Sunday.
 
OP
OP
I

icejam

Active Member
View Badges
Joined
Aug 8, 2018
Messages
243
Reaction score
225
Location
Calgary, AB
Rating - 0%
0   0   0
Sorry for not updating earlier - life happened.

The stand is complete, topped up with some plywood, painted black and held down with some 3M tape.
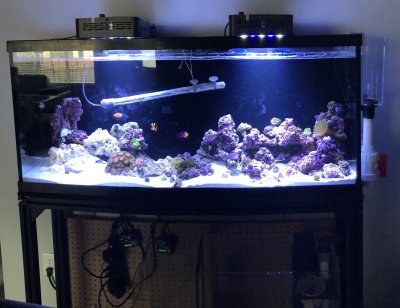
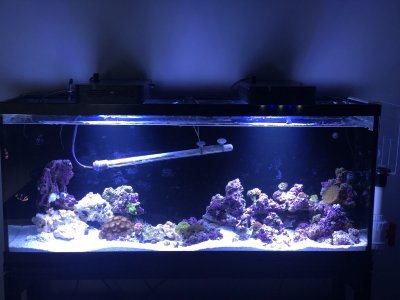
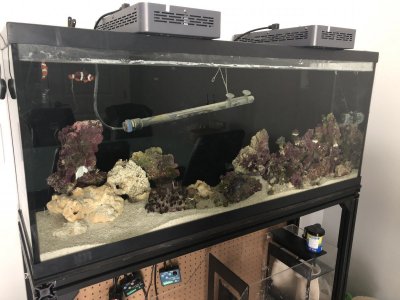
I moved aquarium in place, added cycled LR and let it sit for few days.
Everything went in from the old aquarium last Thursday in one go - no casualties.
First removed LR, gave it rinse in FSW and placed in the new aquarium. Drained half the tank and transferred water to new tank. At that point all fish / inverts were pretty easy to catch.
Sand went in last [I decided to reuse the sand - it was fairly clean and I haven't had any nitrates spike or a mini cycle, so a good call] - caused 'some' cloudiness but that went away in couple of hours. I am slowly adding more sand to cover the whole bottom - about a handful a day so not to cause too much of sandstorms.


fullsizeoutput_415b.jpeg

qmNu7p%UTVCGUm+XxXpxew.jpg

mCivWOJGQl6tgozMeFrfVg.jpg


I am quite happy with aquascaping on the right had side - not too sure if I should build up higher though?
The scape on the left might change.
About 45lbs of LR in total - more to go in the sump.

I am currently running:
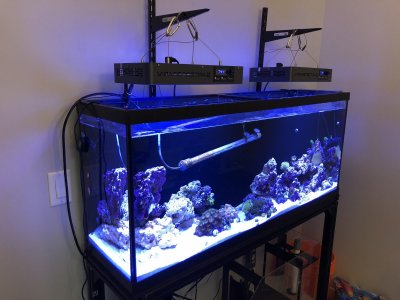
2 Viparspectra LED lights (still need to be mounted) set to 5 / 5 on both channels
2 Jebao SW4 power heads set to random mode
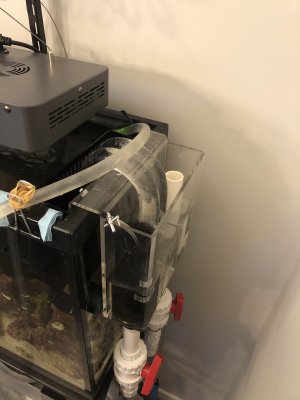
Eshopps PF-1000 overflow box (plumbing finished but not in the pictures)
Temporary 300W heater (to be replaced by 2x 150W in the sump or 3x 100W depending on the length)

My return pump has gone missing in transit so I might need to run couple of MJ pumps for a while, starting today.

I haven't decided on the skimmer yet. I am planning on getting refugium going later on this week and monitor the tank for nutrients so maybe I can run without the skimmer.


Thanks for reading
 
OP
OP
I

icejam

Active Member
View Badges
Joined
Aug 8, 2018
Messages
243
Reaction score
225
Location
Calgary, AB
Rating - 0%
0   0   0
Plumbing mostly complete.
Still waiting for my return pump, fuge light and some miscellaneous items to show up.
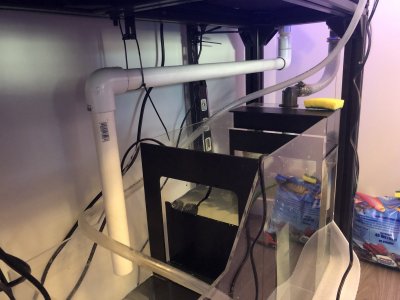
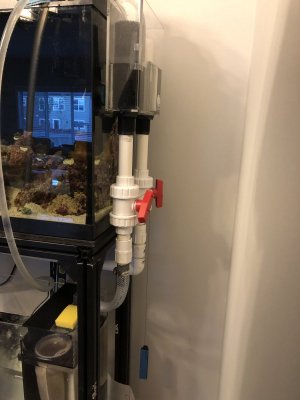
1" PVC / braided flex for drain lines with 2 double union ball valves.
Drain is quiet enough for me with stock Esshops foam filter thingy and a partially closed valve.
ATO plumbed from orange 5 gallon HD bucket - might stay that way as it will be in a cabinet so no need for a fancy container.
I am using MJ1200 for a return pump for now.
Also suspended the light using some shelving parts I had laying around until the canopy is built.


S9VVd3NkQzeuElCQgwliOw.jpg

DUfcCohdRay9wCxWTtdwcA.jpg

oUJih1iHQxWaXzGTlTq64w.jpg

5kxghnkXSwyIXUtQZ9f8JQ.jpg
 
OP
OP
I

icejam

Active Member
View Badges
Joined
Aug 8, 2018
Messages
243
Reaction score
225
Location
Calgary, AB
Rating - 0%
0   0   0
Return pump arrived today. Plumbed it in and cleaned up the sump a bit.
Also added some dry rock to the sump - around 10lbs or so.

I think I will replace ball valve with a gate valve on a main drain line for ease of adjustment and hard plumb return pump with 1" pvc (just need to decide on a return location in DT).

d4bc9ee0f9aff42d8bb52a5de5031645.jpg
 

Tentacled trailblazer in your tank: Have you ever kept a large starfish?

  • I currently have a starfish in my tank.

    Votes: 65 30.5%
  • Not currently, but I have kept a starfish in the past.

    Votes: 59 27.7%
  • I have never kept a starfish, but I hope to in the future.

    Votes: 44 20.7%
  • I have no plans to keep a starfish.

    Votes: 43 20.2%
  • Other.

    Votes: 2 0.9%

New Posts

Back
Top