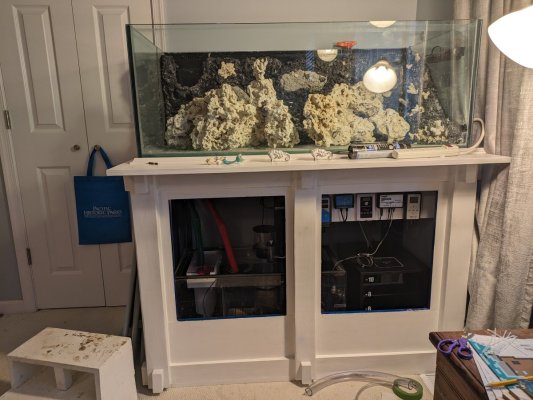
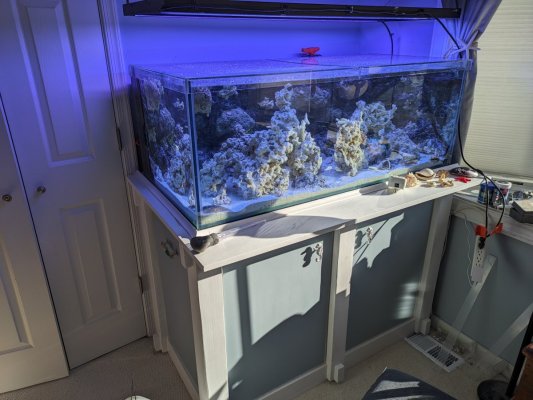
90 gallon tank

JWDV

Community Member
View Badges
Joined
Nov 26, 2023
Messages
27
Reaction score
23
Location
Severna Park, Maryland
Rating - 0%
0   0   0
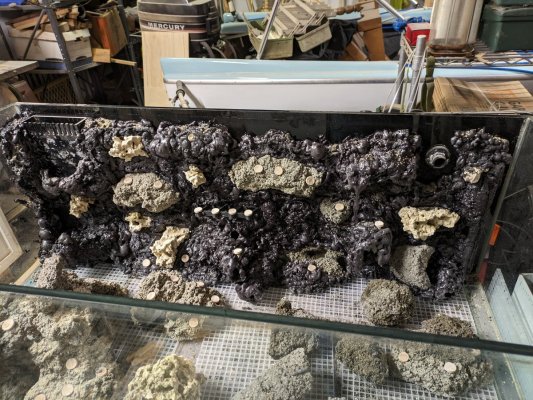
While out purchasing a piece of coral for my 32 gallon the other day I ran across a deal I just couldn't pass up on a 90 gallon rimless tank with a sump and a bunch of other stuff. Thanks Kevin! Went and picked it up today and got it into the garage. The plan is to leave it here for now while I build a custom stand for it to fit in my bedroom.

I also plan on making DIY rock walls for one side and the back. Space is pretty limited and it's cold outside so I will be using the tank itself to "kure" the rock.

Spent a couple of hours cleaning (almost) everything up and staring at it planning out the stand. I couldn't help myself and made a form for the back wall while I was out there. Tomorrow I'll go out and look for the supplies needed to build. I've got a ton of work ahead of me but I'm pretty excited.
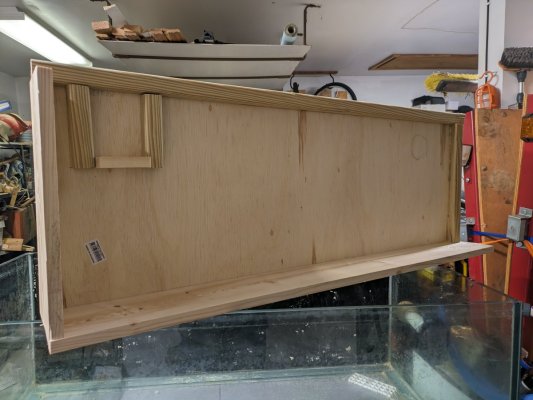
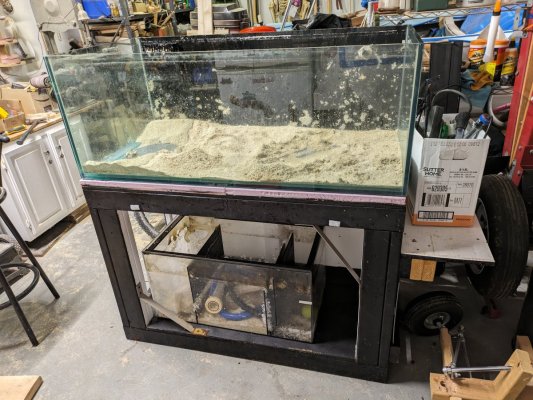
back wall form.jpg new 90 gallon.jpg
 

Cichlid Dad

2500 Club Member
View Badges
Joined
Jul 20, 2022
Messages
3,007
Reaction score
10,415
Location
Auburn
Rating - 0%
0   0   0
Nice find!
While out purchasing a piece of coral for my 32 gallon the other day I ran across a deal I just couldn't pass up on a 90 gallon rimless tank with a sump and a bunch of other stuff. Thanks Kevin! Went and picked it up today and got it into the garage. The plan is to leave it here for now while I build a custom stand for it to fit in my bedroom.

I also plan on making DIY rock walls for one side and the back. Space is pretty limited and it's cold outside so I will be using the tank itself to "kure" the rock.

Spent a couple of hours cleaning (almost) everything up and staring at it planning out the stand. I couldn't help myself and made a form for the back wall while I was out there. Tomorrow I'll go out and look for the supplies needed to build. I've got a ton of work ahead of me but I'm pretty excited.

back wall form.jpg new 90 gallon.jpg
Nice find!
 
OP
OP
J

JWDV

Community Member
View Badges
Joined
Nov 26, 2023
Messages
27
Reaction score
23
Location
Severna Park, Maryland
Rating - 0%
0   0   0
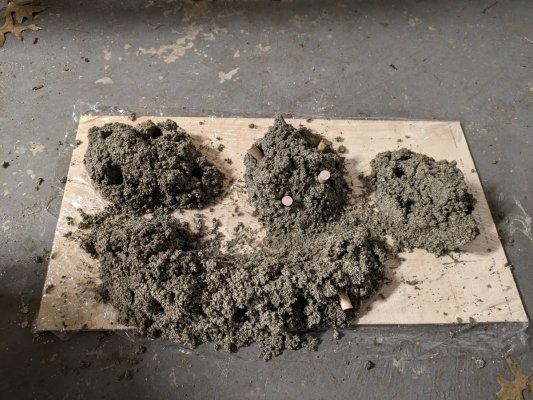
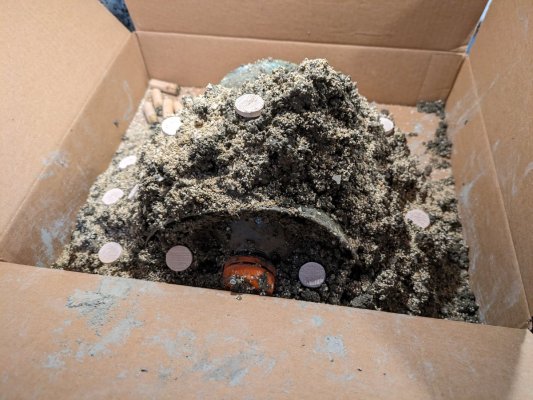
I forgot to buy the salt while I was out today but I decided to try a few smaller rocks before tackling the giant back piece to see how hard it is. I can definitely see why people say to spring for the white cement, these things are plain out ugly. The wood sticking out is half inch dowel pieces I cut up to make spots to stick frags.....someday in the distant future.

first rocks.jpg
 
OP
OP
J

JWDV

Community Member
View Badges
Joined
Nov 26, 2023
Messages
27
Reaction score
23
Location
Severna Park, Maryland
Rating - 0%
0   0   0
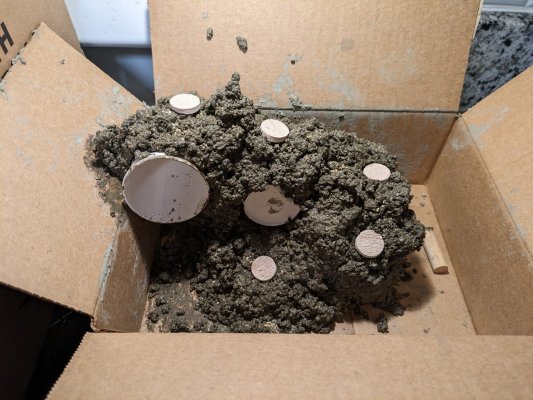
I was hoping to begin working on the back wall today but life had other plans. I haven't received my order of egg crate and pond foam yet so no such luck. Instead I played around with different recipes for the DIY rock to see what works best for me. Will be nice to have that figured out before tackling the whole wall I suppose.

Todays recipe was 2 parts perlite, 1 1/2 parts cement, 1 part sand/crushed coral, and one part rock salt. I'm not sure if it was the proportion change or just me getting used to doing it but tonight seemed to go better than previous tries. I also sprinkled them with sand that I removed (and washed) from the tank when cleaning it out.

2nd rock attempt, 1 of 3.jpg
 

Attachments

  • 2nd rock attempt, 3 of 3.jpg
    2nd rock attempt, 3 of 3.jpg
    263.1 KB · Views: 35
  • 2nd rock attempt, 2 of 3.jpg
    2nd rock attempt, 2 of 3.jpg
    247.5 KB · Views: 35
OP
OP
J

JWDV

Community Member
View Badges
Joined
Nov 26, 2023
Messages
27
Reaction score
23
Location
Severna Park, Maryland
Rating - 0%
0   0   0
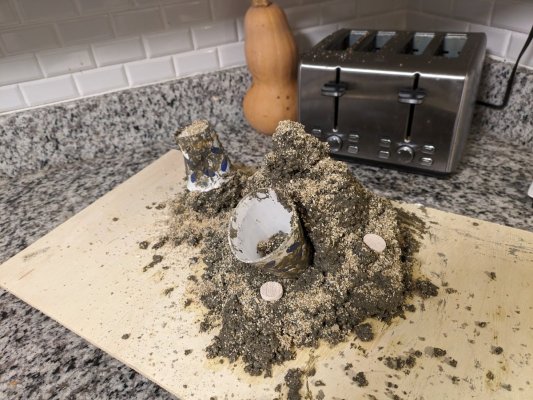
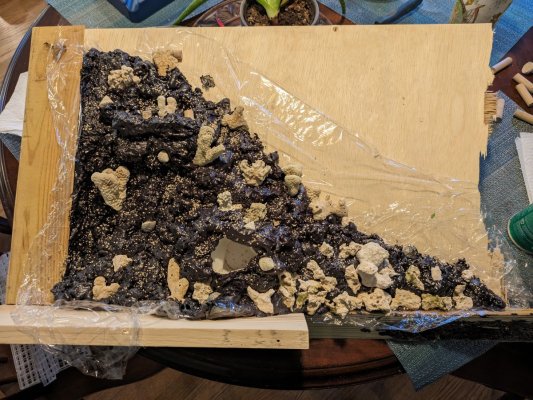
Side wall made. Next step is putting it in the tank and attaching it to the back wall piece. The cling wrap is trying to avoid cutting the wall off the form like I hade to do with the back piece. No idea if it will work but figured it was worth a shot.

edit: The cling wrap made this SO much easier to remove from the form. I can't recommend this step enough.

right side wall.jpg
 
Last edited:

LA4lyfe

Community Member
View Badges
Joined
Jan 11, 2024
Messages
54
Reaction score
144
Location
17109
Rating - 0%
0   0   0
Love the Step By Step Huge inspiration. Thanks also for the details of composition. This is going to be one beautiful Space.
 

Katrina71

Learn, Laugh, Love
View Badges
Joined
Mar 26, 2017
Messages
37,321
Reaction score
210,556
Rating - 100%
1   0   0
Your walls look great! I have a similar project for ours. So far I have not been happy with any of the premade reef adhesives/cement.
 
OP
OP
J

JWDV

Community Member
View Badges
Joined
Nov 26, 2023
Messages
27
Reaction score
23
Location
Severna Park, Maryland
Rating - 0%
0   0   0
Still making slow progress. I got interrupted by a house HVAC failure during the coldest weekend of the year. Definitely put a hurt on the wallet.

I got the two wall pieces put together and am pretty happy with the way it turned out. Will be fun to see it through water with a bunch of stuff growing on it.

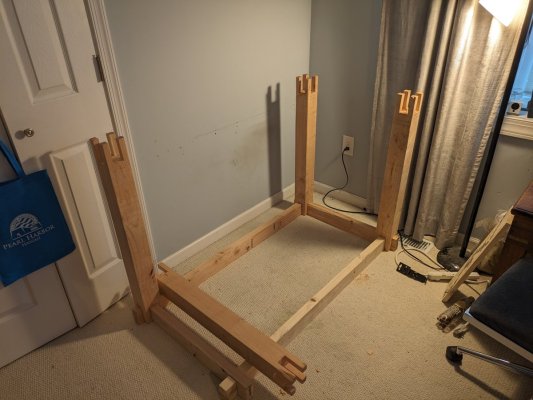
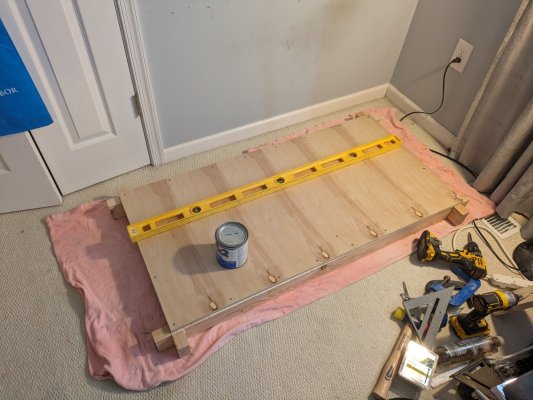
While I wait for my homemade rocks to cure then kure I started working on the stand. The first picture is of a test fitting and checking to see how it fits in its home. The second is a shot of the bottom installed. Next step is to paint it before flipping it back over.

stand begining.jpg stand bottom.jpg
 
OP
OP
J

JWDV

Community Member
View Badges
Joined
Nov 26, 2023
Messages
27
Reaction score
23
Location
Severna Park, Maryland
Rating - 0%
0   0   0
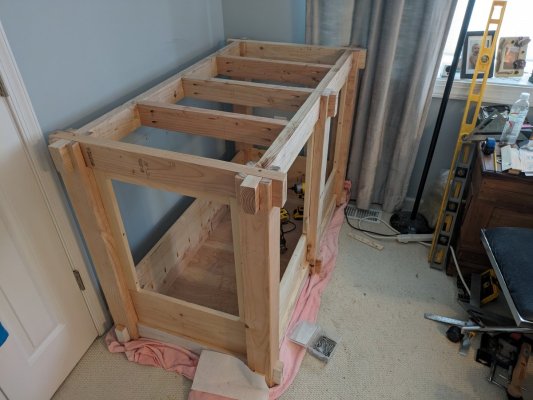
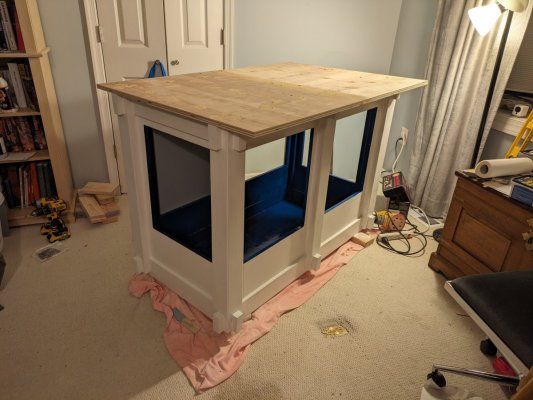
Making pretty good progress on the stand. It's notched 2X4s sitting on/in 4X4 legs, After painting everything I'll make coverings for the open spots that will be attached with magnets to provide easy access to the sump and assorted goodies.

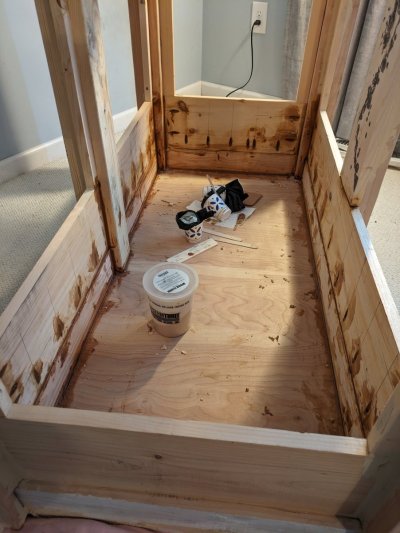
I built the bottom "lip" up to about 10" and am epoxying it and plan on painting it inside with Pond Shield to water proof it in case of accidents or leaks. Trying to decide between black, white or blue for this area.

stand test fit.jpg


epoxy in bottom.jpg
 
OP
OP
J

JWDV

Community Member
View Badges
Joined
Nov 26, 2023
Messages
27
Reaction score
23
Location
Severna Park, Maryland
Rating - 0%
0   0   0
Today I got the top glued and screwed and filled the screw holes with wood putty. Still not positive what I'm going to do with it but leaning towards painting it the same white as the sides. The other options are a glossy black or the same color as the walls in this room.

I started installing a back panel as well tonight but realized (too late) that the screws I was using were too long. At least I only ran two of them through.

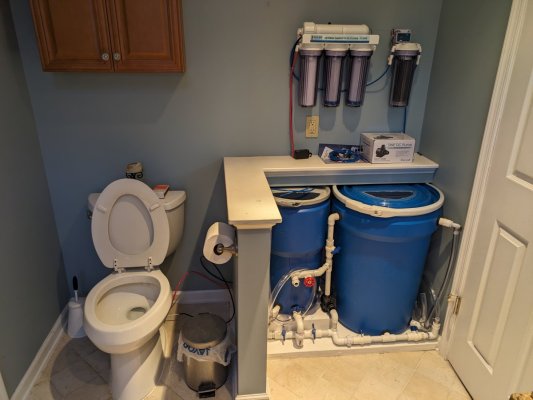
Started piecing together the plumbing for the mixing station as well. Good lord that's a lot of fittings.

stand top install.jpg
 
OP
OP
J

JWDV

Community Member
View Badges
Joined
Nov 26, 2023
Messages
27
Reaction score
23
Location
Severna Park, Maryland
Rating - 0%
0   0   0
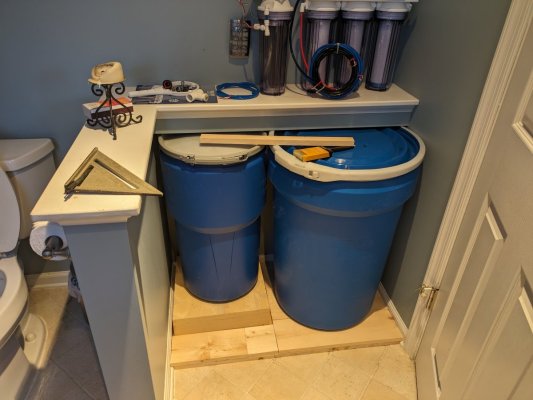
This would have been so much easier with more space. I could have the barrels the same size, wouldn't need to turn valves and make everything super compressed. The reason I can't go any bigger is because of the door frame and shelf that runs against the back wall. The plan is to make very easily removable cover and front "wall" painted to match the bathroom walls. I think I have that pretty well designed out in my head but still need to figure out how to hide the filtering stuff.

The stand is coming along nicely. I attached the three non-removable side panels and have them painted. The stand is upside down so tomorrow I can finish painting the inside with the Pond Shield.

mixing station.jpg
 
OP
OP
J

JWDV

Community Member
View Badges
Joined
Nov 26, 2023
Messages
27
Reaction score
23
Location
Severna Park, Maryland
Rating - 0%
0   0   0
Slowly picking away. I have a cover for the filter on the bathroom wall roughed out waiting for primer and paint as well as the cover to hide the whole mixing system.

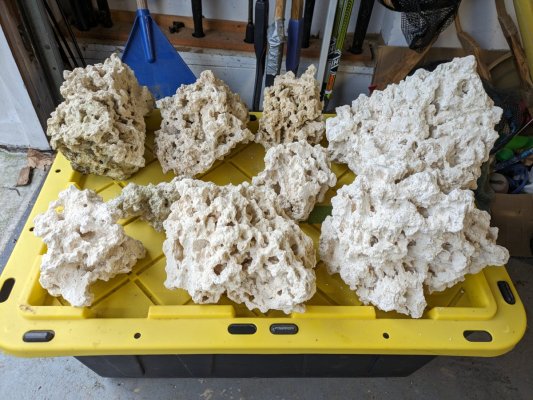
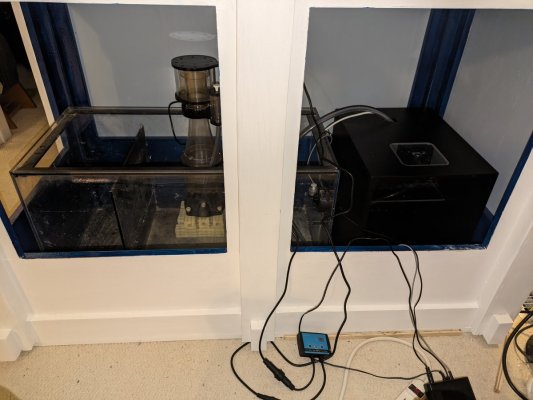
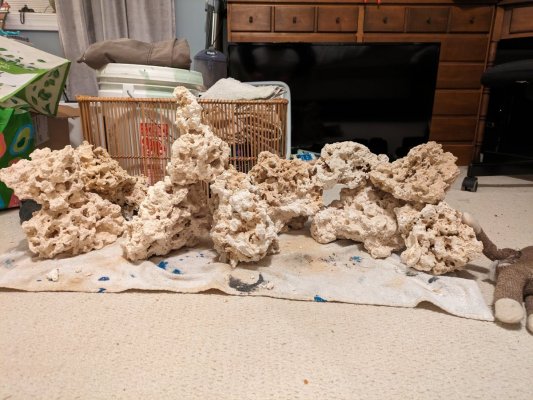
I found some stuff for sale localy and grabbed it today. I got a skimmer, ATO system, freshwater container and some more rock. There is something so satisfying about putting the aquascape together

ato dry fit.jpg aquascape trial 1.jpg
 
OP
OP
J

JWDV

Community Member
View Badges
Joined
Nov 26, 2023
Messages
27
Reaction score
23
Location
Severna Park, Maryland
Rating - 0%
0   0   0
The cycle has begun. Took aprox 80 gallons to fill the display and sump. Its all dry rock so I seeded it with a bottle of Dr Tim's and a couple of bio bricks I've been marinating in my smaller aquarium.

first fill.jpg


time to fill.jpg
 

dschuffert

Well-Known Member
View Badges
Joined
Aug 11, 2022
Messages
541
Reaction score
1,503
Location
USA
Rating - 0%
0   0   0
The cycle has begun. Took aprox 80 gallons to fill the display and sump. Its all dry rock so I seeded it with a bottle of Dr Tim's and a couple of bio bricks I've been marinating in my smaller aquarium.

first fill.jpg


time to fill.jpg
This looks good!
 

Reefing threads: Do you wear gear from reef brands?

  • I wear reef gear everywhere.

    Votes: 20 13.7%
  • I wear reef gear primarily at fish events and my LFS.

    Votes: 10 6.8%
  • I wear reef gear primarily for water changes and tank maintenance.

    Votes: 1 0.7%
  • I wear reef gear primarily to relax where I live.

    Votes: 22 15.1%
  • I don’t wear gear from reef brands.

    Votes: 83 56.8%
  • Other.

    Votes: 10 6.8%
Back
Top