Building a 100g -- my first saltwater tank!

krisjoseph

New Member
View Badges
Joined
Feb 17, 2014
Messages
17
Reaction score
1
Location
Edmonton, Alberta
Rating - 0%
0   0   0
This is a halfway-intro and a halfway-build thread. I feel like it's half an introduction because I've been reading this forum for a couple if months to help figure out what I want to build; and half a build thread because at this point I'm waiting for a quote from my LFS that will include options from mostly-DIY to a full build.

I'm nervous about doing my own plumbing, but am game to try.... it really boils down to the cost of the quotes I get back, and how far I decide to go with the gear.

I'm aiming for 135g total volume, in a 100g tank (48"L x 20"W x 24"H) with a 35g refugium sump. It's going right into the living room (since I spend far too much time, as it is, sitting in the dining room and staring at my freshwater tank), and I have full buy-in from the spouse.

I'm looking to take things slow and easy (which is hard for me!), so I'll document things here as I go!
 

mike007

5000 Club Member
View Badges
Joined
Jan 26, 2013
Messages
7,217
Reaction score
400
Location
WEST TEXAS
Rating - 0%
0   0   0
Sounds like a great plan go slow and don't skimp on equipment. Keep us posted with some pics. Enjoy the build.
 

Reefinny

WYSIWYG
View Badges
Joined
Dec 23, 2013
Messages
1,871
Reaction score
925
Location
Long Island, NY
Rating - 0%
0   0   0
There are some good deals on the forums from people out growing the builds. I myself read and read and bought equipment that I turned around and sold because it ultimately did not get me the set up I wanted. The more I learned and from some trial and error there are still a few things wish I did differently. Good luck with your build.
 

SeahorseKeeper

Where's the mysis?
View Badges
Joined
May 27, 2012
Messages
12,799
Reaction score
3,966
Location
Wandering somewhere in NC
Rating - 0%
0   0   0
Welcome! Good luck with your journey!! Keep us updated!! :)
 
OP
OP
krisjoseph

krisjoseph

New Member
View Badges
Joined
Feb 17, 2014
Messages
17
Reaction score
1
Location
Edmonton, Alberta
Rating - 0%
0   0   0
I got a quote back from my LFS yesterday and after I picked my jaw up off the floor, and spent a few hours wallowing in depression over my dream evaporating due to cost issues, I'm going to go back and see where we can do some trimming.

To be fair, the shop decided to quote the Lexus of aquariums (not quite a Cadillac, since they didn't go so far as to suggest a controller or ATO system): full LED lighting for the tank and fuge; ALL live rock and live sand; and every imaginable bell and whistle including delivery and full in-house setup.

I've asked them to redo the quote based on a few things:
- delivering the pieces and letting me assemble the system myself (I'm a tad nervous about plumbing but with a little guidance I know I can look after it)
- notch down the lighting (do I really need an LED on my fuge?) but try to keep the sweet Razor they quoted for the DT
- lessen the amount of live rock and sand

That last point is one I could use some feedback on. My view is that I can save a good chunk of change by getting mostly base rock and supplementing it with a little live rock. Right now they've quoted 125lb of premium Fiji rock and 160lb of live sand, and I think that's excessive. I'm PERFECTLY comfortable letting the tank cycle for 8 weeks or more, if needed -- so if I have some live rock to help kickstart things, do I really ALSO need 160lb of live sand, or can I just get basic aragonite and let it liven up during the cycle?

BTW, the highlights of the quote are:
- Custom 48"x20"x24" tank (corner Durso overflow; eurostyle bracing)
- custom 30"x16"x"18" refugium
- total system volume 135g
- custom stand (modern style, oak, black finish)
- Maxspect Razor R420R 16K lighting
- Bubble Magus Curve 5 skimmer
- Water Blaster HY7000 pump
- 2 ViaAqua 200W Titanium heaters

Finally, I'm wondering why they didn't suggest any powerheads...? The pump they quote moves 1800gph with 12 ft of head pressure.
 

Reefinny

WYSIWYG
View Badges
Joined
Dec 23, 2013
Messages
1,871
Reaction score
925
Location
Long Island, NY
Rating - 0%
0   0   0
If you are looking to build it yourself (which is not difficult once you get the basics down) There are some alternatives. Although I am not sure about delivery into Canada so you may be better off buying most from your LFS.

As far as the rock - I did a mix. I used 50 pounds of base rock with a mix of nicer show pieces with some nice shelves.

As far as lights thee are some alternatives to the lights - you need to weigh replacement bulbs vs LEDS. I went with Acans - love them and they hook up to my apex. As far as a sump - vey eacy to DYI a sump - I picked up a $40 used 55 gallon and made a VERY good sump when I first started.

Power heads - I suggest YES you want them. Also depending on your final goals as what you want in the tank. I went with Sicce. Very good quality with out going for broke.

There are MANY good deal on used equipment.

You can also look at fishtanksdirect.com for tank. Like I said not sure on the delivery to Canada.

Also - gulfliverock.com has some very nice live rock if your willing to do the cycle
 
OP
OP
krisjoseph

krisjoseph

New Member
View Badges
Joined
Feb 17, 2014
Messages
17
Reaction score
1
Location
Edmonton, Alberta
Rating - 0%
0   0   0
Been a long time since I've updated here!

I worked with my LFS to bring my tank quote down to a budget-friendly level, and put a deposit down on April 9.

At home, I've set up my RO/DI system, got some good-sized pails and a big bin for making water, found some used powerheads and pumps and heaters; spec'd out the home for the tank (in the corner of the living room, safe from sunlight), and started to research inverts and fish and corals. I warned the boss at work that I'd probably take a few days off when everything arrived, so that I would have time to dedicate to plumbing and leak-testing and saltwater-making. I started making RO/DI water and got used to using it in my freshwater tank (aside: I love not having to treat tapwater!) and filled my bins so I'd have some water ready for mixing. I found podcasts and gorged on them. I found books and chewed through them... and eight weeks later, I'm still waiting for my tank.

The bottleneck is the stand, which is being built. Two weeks ago we swung by the LFS and I saw my tank. I touched it and stroked it and asked the nice people why it had nothing to sit on. I gazed at their snails and chromis and zoas and imagined giving them a future-home. A few days ago I called again to check in and was told they're still waiting on word from the carpenter.

I really didn't think it would take two months for this, and the kicker is that I'm going in for surgery next week, on Wednesday. I'm going to be forced to lay still for a few days and will not able to to any lifting or physical work for several weeks afterwards, and DO YOU KNOW WHAT IS GOING TO HAPPEN?

Yeah: the night before I go under the knife, the LFS is going to call me to tell me everything is ready. I'll make them hang on to the live rock until I can get it, but then they're going to bring all the rest of it to my place after I come home from surgery. They're going to put it all in front of me and I won't be able to touch it. It will sit there, silently hissing "prime my PVC! Check me for leaks!", while I stare at it all and the cat plays in it, for weeks.

Because, friends, that's how I and the universe get along.

Sigh :)
 

J062682l

Well-Known Member
View Badges
Joined
Sep 13, 2013
Messages
890
Reaction score
4
Location
Connecticut,USA
Rating - 0%
0   0   0
You can trim on rock by buying pukani, or some BRS reef saver rock. You don't need to buy live rock. And it will help avoid those nasty pests that tag along
 

J062682l

Well-Known Member
View Badges
Joined
Sep 13, 2013
Messages
890
Reaction score
4
Location
Connecticut,USA
Rating - 0%
0   0   0
You can also trim on doing 1/2 live 1/2 not sand , and you can also trim money by searching and doing homework. I just got 2 16 in ocean revive t247 LEDs for my tank
ImageUploadedByREEF2REEF1402111841.192740.jpg

Total price around 400
 
OP
OP
krisjoseph

krisjoseph

New Member
View Badges
Joined
Feb 17, 2014
Messages
17
Reaction score
1
Location
Edmonton, Alberta
Rating - 0%
0   0   0
Arrival and build!

After a VERY long delay due to the sluggishness of the carpenter, my tank and equipment all arrived last Friday, while I was at work. I rushed home after work to get my live rock into a tub of salt water, and set about putting everything together.

From the time I placed my deposit to the time my stand was ready, it took 13 weeks. This is not normal, of course, and my LFS has been very apologetic.... but I sure as hell got to practice patience while I waited. The gap led me to picking up some equipment I didn't get as part of my tank quote: dual Jebao WP-25 wavemakers, a Hydor Smart Level auto-top-off controller, and an Apex controller.

The tank is 100g, at 48" x 20" x 24", and this is more or less its final home -- a central fixture in our living room:

IMG_0624.jpg


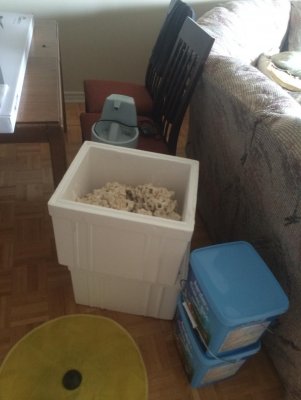
Plumbing pieces, base rock, and 25lb of live rock to help seed the system. The LFS supplied a bunch of pieces, but after I looked at the setup and mapped out my design, I decided to go out and pick up some additional elbows, valves, and several more unions (they supplied ONE):

IMG_0626.jpg


A pic of the sump under the tank, taken while I was starting to think about laying out the plumbing, and while our cat carefully inspected all of his new stuff:

IMG_0629.jpg


While saltwater mixed in my 32G Brute bin, I started the build. The plumbing was top priority, and of great concern because I've never glued PVC before. Thankfully I had done a lot of reading and thinking about the sort of design I wanted, and the bottom line is that I am SO GLAD I insisted on dry-fitting first!

The sump in the cabinet took up more space than I hoped it would, and didn't leave much overhead. In my sketches I thought I had far more room, so as I started cutting pieces and connecting them up, I realized I had to re-evaluate a bit. I also had to assemble and place the skimmer, just to get a sense of how to run pipes around it. That particular adventure had me in stitches due to Bubble Magus' awesome instructions – "If installation correctly, it should appear much bubble when pump start up" and "Every product tested before leave factory, so some water blob may leave on it."

Anyway, I managed to figure the plumbing out with the pieces I had, and even ended up using some lengths of Tigerflex that the LFS supplied, despite initially thinking I wouldn't need them.

Here's a shot of the finished plumbing, taken while filling the system for a leak test. The tee off the return line just goes back into the sump, for now, but will likely be used for expansion later. I put as many unions into the system as I could, and have things rigged so that almost all of the plumbing can come out in sections:

IMG_0643.jpg


By this point we were nearing midnight, but I was SURE we could get the leak test done before turning in for the night, so that I could start with aquascaping in the morning. I really underestimated how long it takes to fill and inspect a tank this size, and really REALLY underestimated how long it would take to drain it again. We MAY have gotten to bed closer to 4AM.... ;)
 

Attachments

  • IMG_0627.jpg
    IMG_0627.jpg
    86.3 KB · Views: 193
OP
OP
krisjoseph

krisjoseph

New Member
View Badges
Joined
Feb 17, 2014
Messages
17
Reaction score
1
Location
Edmonton, Alberta
Rating - 0%
0   0   0
More build...

Before adding saltwater to the tank, we made some other changes to the room: put in a GFCI outlet; set up the Maxspect Razor 16K; put together a mounting board to place the Apex components and other controllers, and added a wire mesh to the top – likely temporary, until the canopy comes, but necessary to prevent an accidental cat drowning. Our cat (a Bengal/Manx cross) LOVES water. This was him during the fill-up phase:

IMG_0658.jpg


After filling the tank and placing live rock, we waited for the water to clear. That lump on top is NOT the cat.... just a weight to keep the screen from buckling up.

IMG_0659.jpg


We made a bunch of adjustments after the first day:

- recut the standpipe (Durso) in the overflow to shorten the distance water was falling (it was trickling loudly over the return pipe)
- shorten the overflow pipes into the filter socks, to reduce back-pressure on the overflow
- Rig up some hooks under the cabinet to "hang" the refugium light. My plumbing didn't account for it very well so we couldn't mount it on the sump
- and because I couldn't resist: Apex fun!! Got my probes in, and hooked up the Apex control cable for the Jebao pumps that I found on eBay. I also had to buy a second power supply for the Jebaos, because the kit came with a controller and ONE power supply (the controller powers the pumps). Since I'm using the Apex and bypassing the controller, I needed to power the pumps individually.
- after realizing how high the evaporation rate was, I decided to get the auto-top-off set up.

After a day, the tank looked like this:

IMG_0662.jpg


Note the chair next to the tank. Before the tank, nobody sat there. Now it's our favorite spot in the apartment -- and there's not even much going on in the tank yet.

A few days later I started water testing, and already noted a bit of ammonia and nitrites in the water. By day five the live rock was coated in diatoms, and as of now (day 7) the bloom is spreading to the base rock and the sand. I added a small lump of chaeto to the refugium today, and realized that it came with a baby blue-legged hermit crab and a couple of small brittle stars. I'm excited about the lil hermit but fear for what will happen when he outgrows his current home, since there are no other shells available.

Tonight, as the tank moved into its moonlight phase, I saw a tiny critter run along the edge of a rock (it was fast, so I didn't get a good look)... and then I spotted a couple of small feather dusters, with fans extended (not a great pic, but the tube on one is very visible):

IMG_0672.jpg


And so here we are! I'm happy about the diatoms, and even happier to start to see some signs of life. If things continue to go well and parameters, perhaps next weekend will be clean-up crew time....?
 

Ingenuity against algae: Do you use DIY methods for controlling nuisance algae?

  • I have used DIY methods for controlling algae.

    Votes: 29 52.7%
  • I use commercial methods for controlling algae, but never DIY methods.

    Votes: 12 21.8%
  • I have not used commercial or DIY methods for controlling algae.

    Votes: 12 21.8%
  • Other.

    Votes: 2 3.6%
Back
Top