David's Mostly DIY Build - 150 gallon Full Reef

drcrook

Active Member
View Badges
Joined
May 11, 2018
Messages
155
Reaction score
86
Rating - 0%
0   0   0
Hey Folks,

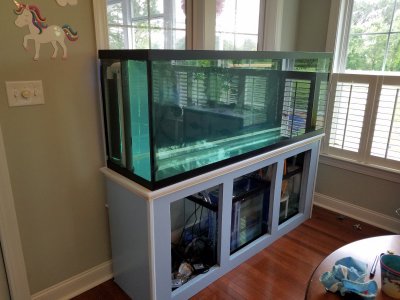
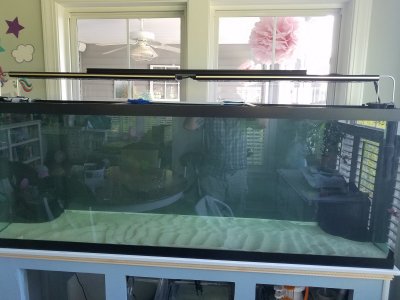
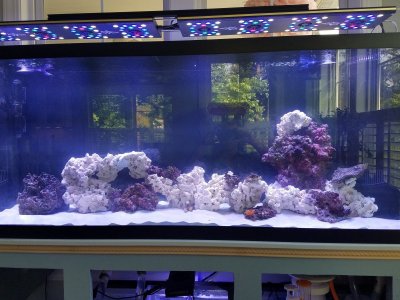
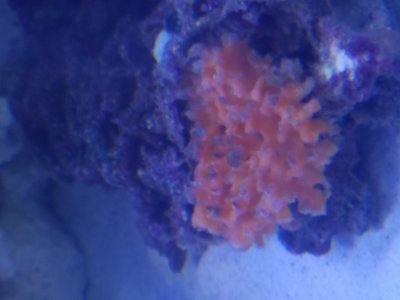
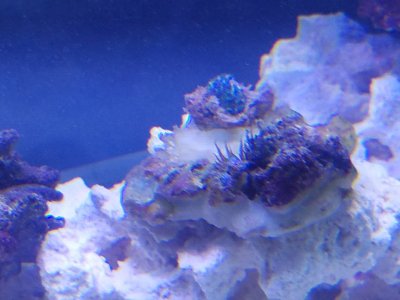
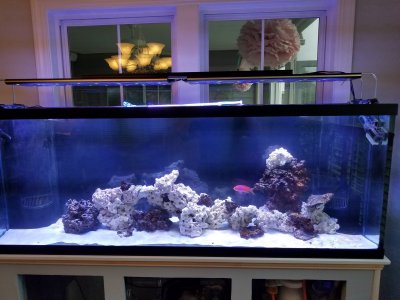
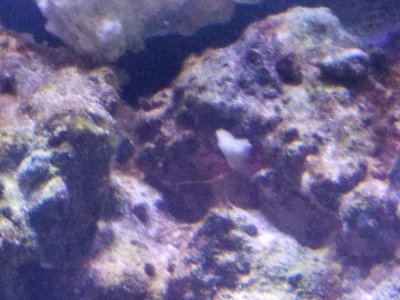
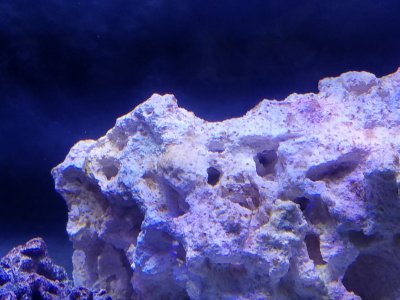
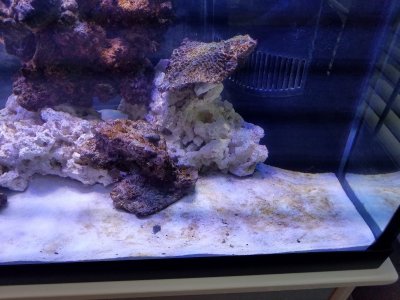
Current State (June 19, 2018) - This image will be updated every month.
upload_2018-6-19_8-47-52.png


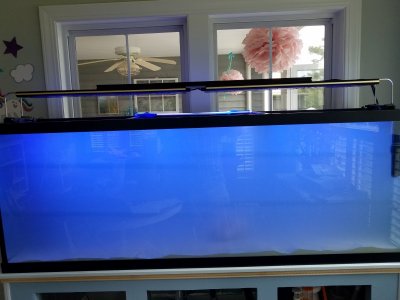
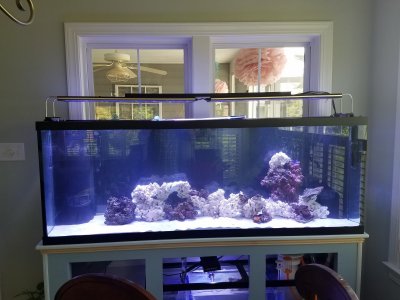
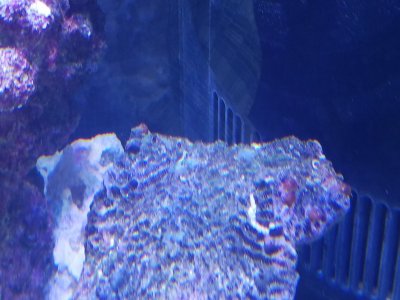
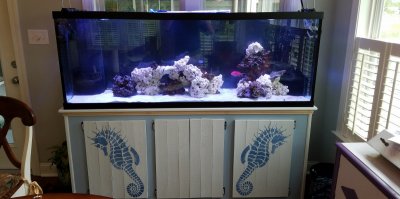
Full Tank w/Cabinet (June 1, 2018)
704842-8dc474c5120ff02c72ddd151b09003ab.jpg


There is a lot of information out there on DIY builds. Getting something semi-cost effective can be challenging. I'm going to document from building the cabinets and sump etc all the way through 2 years of operation. All DIY is using common tools. I don't have laser cutters or cnc's or any of that. I'm also not a wood worker, so no sophisticated stuff. This is all within the reach of an average human being with average skills (and some time). I will mention that being strong is very helpful if those are the tools you are using.

Lets start with the main equipment overviews.
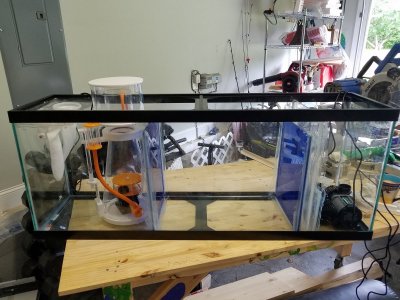
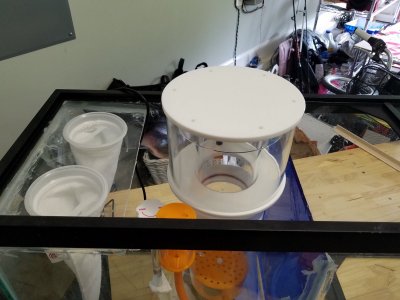
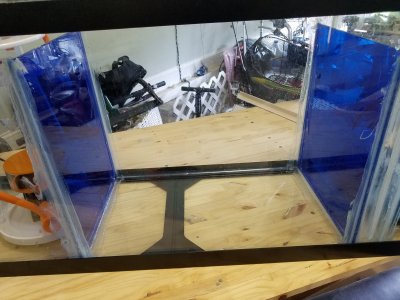
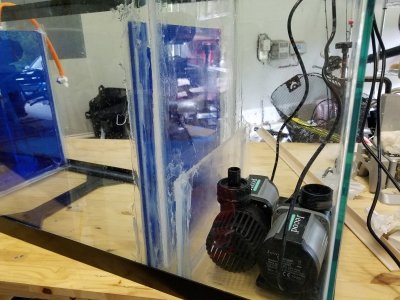
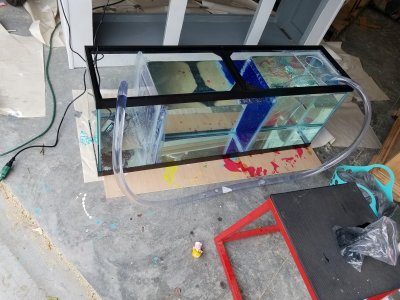
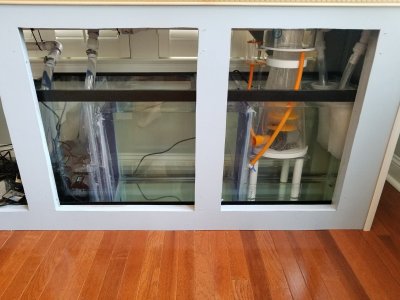
1. Tank - Marineland 72 x 18 x 27 150 gallon reef ready with 2 corner overflows.
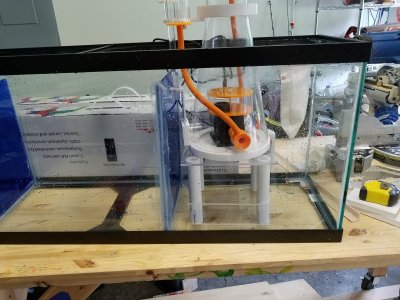
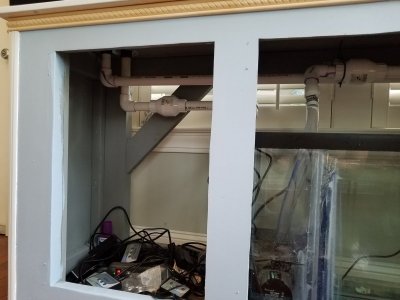
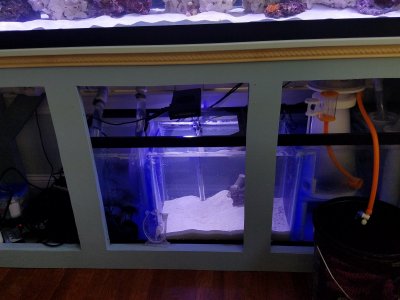
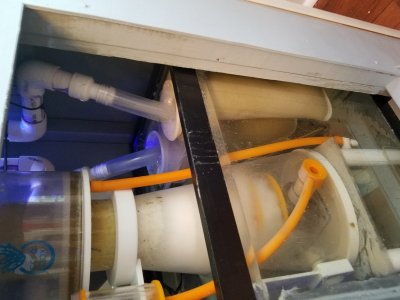
2. Sump - DIY 55 gallon from a 12" wide cheapo tank from Pets Mart
3. Cabinet - DIY - Aesthetic: Beach Chic
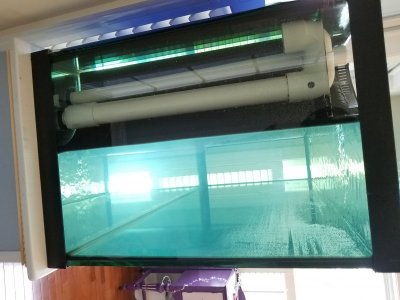
4. Lights - 2 Photon v2 ReefBreeders 2/custom T-Track
5. Pumps - 2 maxspect gyre 230's.

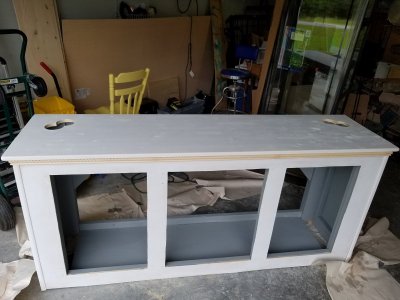
As of today it is in progress. So I'll start with the cabinet since that has been the main focus over the past 2 weeks. The cabinet will be getting its first painting later today as well.

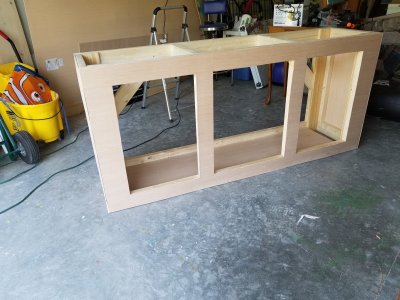
The cabinet is built completely out of 2x4s for the primary supports with standard construction star screws. According to the math it should support some where around 20,000lbs; I figure I'm likely safe with those numbers. The number is reduced to 20,000 due to the long span in the back. I added some 45 degree angle supports to help distribute that middle weight; but I still wanted a large back so I can get the sump in easily. I'll likely put another 2x4 in the middle back after installation just for good measure.

Tools required: Miter Saw, Table Saw, Jig Saw, Power Screw Driver. I only used the table saw to even stuff up; I could have completed this without it. The trim hides the ugly jig saw cuts.

Here is the cabinet with facia board and no doors:
690675-ae465b6786ac2d27ab5398c6a2398cee.jpg

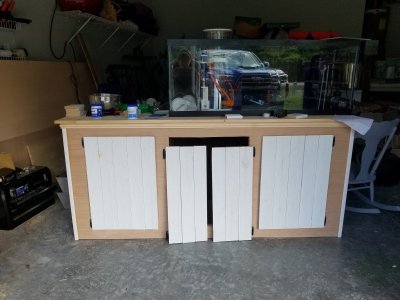
Here is the cabinet with doors.
690677-51395418f375d84da34916347533d246.jpg

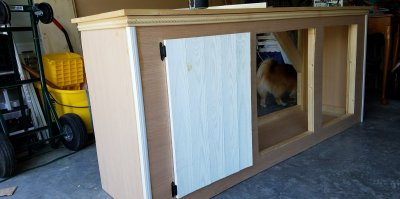
Here is the cabinet with a zoom on the trim and cornering.
690678-287071a46987728822535cc49c0c3b0c.jpg


Cabinet_Unfinished_2.jpg


Cabinet_Unfinished_1.jpg


Cabinet_Unfinished_3.jpg


20180529_163718.jpg
 
Last edited:

revhtree

Owner Administrator
View Badges
Joined
May 8, 2006
Messages
48,047
Reaction score
89,259
Rating - 100%
1   0   0
Looking good!
 
OP
OP
drcrook

drcrook

Active Member
View Badges
Joined
May 11, 2018
Messages
155
Reaction score
86
Rating - 0%
0   0   0
Update: Family coming in to town on Saturday for my daughter's birthday party. My nephews will be there; who are essentially grown men at this point and will be helping move; so nothing like that to force some progress.

@Marc88 I hadn't thought of that, but I will be doing it now :D.

Cabinet is now fully primed and ready for paint. All plumbing has been purchased from lowes.

Sump is now siliconed together as of about 5pm yesterday. I'll give it a water test around 5pm today. I took some pictures of the sump with various items fitted. With each picture I'll give a description and some tips on building. I watched a bunch of videos; but, I still had challenges for this part; probably because I did it a little different and suck with silicone.

Here is the full sump. I decided to go a basic 3 chamber design with a bubble trap right before the return pumps. The first chamber is for filter socks + protein skimmer. I'll probably fit other equipment in there as well should I need to. I can easily fit 2 more pumps under those socks and route flex tubing out of there. The second chamber is a 14.5 gallon refugium. The final chamber is simply for the pumps. Notice that the final baffle is very short. This is approximately where I will have my final waterflow level and should provide about 5 gallons overflow in that single chamber before possibly back flowing into the fuge.

The reason I went with this ordering is to get mechanical filteration, followed by the dissolved filtration, which will remove most of the dissolved nutrients but not all, followed by a large biological filtration which should remove the rest as well as converting those nutrients into food which in the case of micro-fauna will likely go through the pumps or in the case of algae, can hang from clips in the display tank as I need to.

The closest commercially available sump I could find is the trigger Triton44 Sump for $550 without equipment.

Sump total cost - no equipment: $180 ($370 cheaper)
Sump total cost with equipment: $674
  • Base Tank: 55 gallon 12 inch wide from Petsmart - $120
  • Acrylic: $50
  • Silicone: $10
  • Socks: $14
  • Pumps: $200
  • Skimmer: $280

691329-6287edf72c5a1b5709e54ac4391fe349.jpg


The first chamber contains the filter socks and protein skimmer. I read online that a 3 5/8" hole saw would cut a hole which would have the filter socks be flush. That is not true. You should buy a 3 3/4" hole saw. I spent an eternity sanding that piece of acrylic. Also note that the sock holder slants just slightly downward towards the chamber. In case it overflows; that is the direction I want it to overflow in the case of a clog. That acrylic piece is 12" x 6" with 2 3 3/4" holes in it.
691330-ab93460ecef14382abc8ddcabe4f6bb1.jpg


Next up is the Refugium. Everything I can find says that refugiums are the bees knees and I can feed much of my tank with one if I'm smart about what I put in it as well as all the filtration benefits. I wanted to really maximize this space. The baffle between the fuge and the skimmer is 15" tall, while the other is 14.5" tall. This gives me a 14.5" x 21" x 12" fuge or approximately 14.5 gallons. The fuge is essentially the size of a nano aquarium.

I used a miter saw to cut the acrylic with the standard blade that comes with it. This worked very well. I highly suggest safety glasses as hot pieces of acrylic fly every where. There are a few downsides to this though. First, The saw heats up the acrylic and ever so slightly warps the ends. Because I only have a miter saw and not a table saw; I had to do 2 cuts. 1 cut and then flip it to do the other cut. This caused odd warping leading to me having to cut a bit more and having larger gaps than I wanted. This resulted in me drowning the baffles in silicone to compensate.

Also, the tank I got ever so slightly changed dimensions throughout the length of it. The supporting sections where tight; however there are outward bows in the middle sections. So just be cautious. If I were to do it again, I would have the acrylic professionally cut to 1/8" smaller than the size I'm fitting it to. In this case, I'm fitting to a 12" wide tank, I would want 11 7/8" wide pieces.

Silicone is also just a big mess to work with. I used the ge all purpose 1* silicone. Note: you have to cut the tip and then jab something into it to break the metal seal thing, otherwise it will shoot out the back onto your clothes. If you just keep cutting and cutting the end thinking you will break a seal in the tip, then you will be squirting massive globs as you can see in my pictures. I should have practiced on something first and bought extra tubes.

Apply the silicone heavily to both sides of the baffles to really ensure that sticks and then run your finger on it to squeeze that stuff into the gap areas. Then get a big heavy bead on both sides and gently run your finger on that again. I liked being able to look through the glass and seeing where I had air bubbles. I just focused there and squeezed more in there for good measure. These baffles aren't going anywhere (I hope).

691331-5dfb552cfaffa30f42d943b76ec7e3bf.jpg


Next up the bubble trap/return pump area. This is tricky to do, because you don't have enough space between the baffles to get the silicone gun into. I saw a few videos with the paper nozel trick; but I decided to try something else. I just basically covered the whole thing in a big fat layer of silicone and squeezed the panels into that starting from the back and pushing forward to ensure it squeezed and formed a complete layer on the front protruding before the front edges. I then applied more silicone to the back facing and used my fingers to squeeze it between the panel and the glass, and then ran my finger along the edges.

For the baffle hanging from the top, I used a bunch of duct tape to ensure it hung up there and stayed put.

I did the same thing for the last baffle before the pumps.

691333-50151e707d40b1ad946b5ed30bdec2ed.jpg


Ok, so it isn't the prettiest sump in the world. I definitely compensated siliconing knowledge with as much silicone as I could fit in there, but, once it cures; I doubt those panels are going anywhere due to the sheer quantity of silicone I used.

So the sump goes inside the cabinet, so, it doesn't have to be pretty, it just has to work. I think this should provide some stellar filtration as well as providing enough space for me to add additional equipment as I decide to do it. It only takes up about 3/4 of the cabinet, so even more space down there for more stuff should I want to do it.

Sump_1.jpg


Sump_1.jpg


Sump_2.jpg


Sump_3.jpg


Sump_4.jpg


Sump_5.jpg
 
Last edited:
OP
OP
drcrook

drcrook

Active Member
View Badges
Joined
May 11, 2018
Messages
155
Reaction score
86
Rating - 0%
0   0   0
Hey Folks,

So working from home has advantages. We had a storm knock out internet and phones. So that means, work on the tank to ensure it is prepped for this weekend!

So the list accomplished this afternoon:
1. Painted the interior of the cabinet with exterior water proof paint. Thanks @Marc88 I happened to have some left over from painting the decks and just used that.
2. Tested the sump. She's ugly, but she works. She held together flawlessly and I tested her at 1,600 gph (max flow of single dcs 6,000). I intend to run 2 of these at 50%.
3. Received shipment of tank
4. Received shipment of Tank Lighting from ReefBreeders. Just an aside; these guys have awesome support. The owner helped me figure out a mounting system (6' tanks are a bit challenging) and is going to now sell that mounting system as a kit. More details later.
5. Primed the cabinet portions which will receive paint. There will be a multi-tone effect with 2 toned paints and a stain on the rope trim work. We will also stencil in some sea horses on the doors in a third subdued tone from the same pallet.
6. Drilled the Cabinet Top to match the tank's drilling and where it will sit on the top.
7. Built a protein skimmer stand out of left over acrylic and some pvc.

Left to do today: Paint cabinet doors, body and top. Possibly stain trim work.
Left for tomorrow: Stencil the sea horses.

Here are some pictures.

Cabinet primed up except for the trip with interior painted in waterproof exterior grey paint as well as holes drilled with a bit of extra working room.
691595-10cb1b407c9f6c8da69e9828c6948f16.jpg


Testing out the sump. I started with water in the first chamber and just left the hose in there so it would fill up and flow to the next. I kept an eye on it for any leaks. Looks like quantity of silicone and poor skills won; because this thing held up perfect. All images here are at 1,600 gph flow.
691604-a6fcd92f273143275cdaedaf9f21960e.jpg


Another test image. This is from the refugium to the return pump area through the bubble trap:
691605-60d5e27af8b82ede7681d6af2c4a6bde.jpg


And another. This is from the protein skimmer and sock area to the refugium.
691606-aa55a91448d4b3d2040bad2a2411fdcf.jpg


Here is the skimmer stand right after getting it done. Super simple. Acrylic, PVC and some silicone.
691598-a2a3c65409e3931cabda266274c64d90.jpg


And another one of it placed in the tank for reference and water level measuring to ensure it has correct submersion.
691597-5273feb839e89328ca76200e4c631765.jpg


And finally; the tank is here, so I couldn't help but post a picture of it. It is BIG!
691607-eecacaebae74a147253d25236c987fe7.jpg


Primed_Cabinet_1.jpg


Primed_Cabinet_1.jpg


Skimmer_Stand_1.jpg


Skimmer_Stand_2.jpg


Sump_Test_1.jpg


Sump_Test_2.jpg


Sump_test_3.jpg


Tank_1.jpg
 
OP
OP
drcrook

drcrook

Active Member
View Badges
Joined
May 11, 2018
Messages
155
Reaction score
86
Rating - 0%
0   0   0
Hey Folks,

So here is the latest update:

1. Cabinet painting complete except for stenciling of sea horses.
2. Cabinet + Tank moved into house
3. Plumbing complete
4. Sump equipment fitted
5. Completed an 8 hour test of the system. Now running a 24 hour test.

Below are some full images of the tank in the house. The doors are not hung yet as the doors are going to receive stenciling.
694392-6920c71783720bdac75b36186d8fe890.jpg


694393-8a6d0e6f277431c08bfb8115f5b7587f.jpg


Below we can see an install of the left corner overflow
694394-a659c2b6fe2a9ba7a6a0eaf3e5ea4c4a.jpg


Here we can see the sump running through the test:
694391-864248f5427626e58c59e96c8801b413.jpg


Here we can see the plumbing on the left. The wiring will get panels installed inside on the back and left to hang from and zip tied up to keep it clean.
694397-eae82d42d9b9b32ea406e09f325e0edc.jpg


Since this is a DIY thread, I would like to talk a little about plumbing since that was where the main time was spent.
1. Check valves going from your returns into the tank as close to the returns are a god send. I will never do a build without those. The reason is that you have A LOT of water flowing through those pipes and being able to keep about half that water in those pipes is just more water which keeps your sump from overflowing in an off state. My sump overflows do a nearly concerning level, but works great with probably another 5 gallons or so it could still handle.

2. Installing and ensuring the bulkheads for the corner overflows was challenging due to minimal space. Something to be aware of during construction of the cabinet is that a 2x4 is 1.5" wide and then you likely have a 1" guide inside of that on the corners. So when drilling, you have to drill far enough away to not drill into those studs. I built my cabinet frame exactly 72", which meant when it came to drilling, I was very close on a few of my holes and therefor the spacing was tight to really get those screwed down tight enough. What I might do in the future is to install the bulk heads, get them as tight as I can, and then silicone both the top and bottom seals as well as build my cabinet an extra 1.5" wide and 1.5" long so I have an extra 3/4" on either side for drilling bottom overflows.

3. I did not install a ball valve or other flow control valve on the return lines. I have the DCS 6,000, which is a variable power pump; so it already controls flow through its electronic interface, no need for a mechanical one.

4. I've done plumbing a lot (home owner multiple times); so this was pretty straight forward and easy, but I'll put some tips in here. Always use the purple primer + cement. Prime about 1" band on both peices. apply the cement on the male side. When inserting the male side, turn a 1/4 turn one direction and then back. This ensures cement is spread and creates a seal. I also like to wipe the cement around the exterior to enforce a bond.

5. Work you fittings from the flex tubing backwards. So on a return line, I had: barb, pipe, angle, pipe, check, pipe, angle, pipe, bulkhead. I cemented in that order to ensure I had the pipes going exactly where I wanted.

6. I didn't have the space to properly install pipe clamps; so I just installed them on the studs in various areas and used zip ties to support the pipes and kept everything nice and tight.

A few notes about noise levels. If you hear gurgling, that is likely from your drain pipes. That is due to air caught in the pipes and escaping. When I run my returns at 20-30% power I get much louder gurgling. When pushing my returns to 50% power, the gurgling quiets significantly. This is because the overflow is pushing enough pressure where air is no longer able to get into the pipes once it escapes. So you will get some gurgling when turning on; but it will go away after the system gets up to speed. If you speed up your returns, and you reduce that gurgling; realize though that now your lines are filled with water and not air; so your operational water levels will reduce for each step you increase that flow. Between 30% and 50% power (per return line) I had to add about 3 gallons extra water. Just something to be aware of depending on how much space you have when you turn your system off, all of that will come back into your sump.

At this point; the primary build is DONE! Its just a matter of some prettying stuff up; installing doors etc. But we can begin adding sand, aqua-scaping and cycling the tank. I'm open to tips on cycling.

My plan at the moment is to do this:

Day 1:
1. Drain the display tank.
2. Add 1.5" to 2" live sand bed.
3. Aquascape w/dry rock and add
4. Add water
5. Start up whole system
6. Add Salt into refugium area (empty). Use a pvc pipe to stir it up.
7. Add sand bed to refugium
8. Add marine stabilizer
9. put a frozen shrimp in the tank (peeled);
10. Buy a cleaner crew and add them along with like 2 of those blue $7 fish and maybe a $10 fish of some kind.

Day 2:
1. Buy 10# of aquacultured live rock and have it overnighted via airport.
2. Buy Chaeto from local reefer (should have pod population in it)
3. Buy phytoplankton

Day 3:
1. Put 2-3# of live rock in refugium, put rest in display tank in areas focusing on spreading the growth on it throughout the aquascape.

Let system rest for 7 days while checking parameters daily. Consider purchasing a 20 pack of assorted coral frags.

sump_1.jpg


tank_1.jpg


tank_2.jpg


overflow_1.jpg


overflow_2.jpg


overflow_3.jpg


plumbing_left_1.jpg
 
OP
OP
drcrook

drcrook

Active Member
View Badges
Joined
May 11, 2018
Messages
155
Reaction score
86
Rating - 0%
0   0   0
Hey Folks,

Build progress is moving at a nice steady pace; I'm moving the cycling a bit slower than my initial plan.

Here is what is done so far:
1. Added salt and mixed salt directly in the tank with system running.
2. Added sand to refugium & display tank.
3. Added maxspect gyre pumps (pair)
4. Added tank LED lighting & installed 6' tank kit.
5. Added peeled shrimp to help cycle.

So some notes for folks.
1. It is OK to add sand while there is water in it. Even fine sand. Just realize you are introducing extra work and waiting. It is probably best to drain the tank; add the sand and then the water. There is mixed sentiment on how to actually clear the sand. I posted how I solved this here: https://www.reef2reef.com/threads/a...-gravity-very-high.394736/page-2#post-4758333

2. 18" tank with corner overflows is too narrow for maxpsect to sit horizontally; so I've gone for a vertical configuration. I'll have to post the settings I decide to use later. Right now I'm using a lower flow variation because I have nothing in the tank yet.

3. Reef Breeder Photon v2 LEDs went up! They look freaking great. The 6' tank kit is also working flawlessly and keeps things nice and sleek. I ended up doing a totally separate post on this as well which is broken out here: https://www.reef2reef.com/threads/lighting-my-72-x-18-x-27-tank.395248/ . Logan (owner) was super helpful in the process of figuring this out. I got 2 32" lighting units and the 6' tank kit.

4. Test kit for various saltwater parameters should arrive via mail today; so I'll post on how cycling is going. According to the charts I should be nearing my Ammonia peak.

Here are some pictures.

Cloudy tank with LEDs on after letting sand clear a bit.
696075-2dade79a59beb233101716ce82f9185f.jpg


Tank totally cleared out. You can see the shrimp in the bottom left corner.
696076-9514fb50cc77c78bbf353004d55ef1d2.jpg


I'll be needing to order more rock to do some aquascaping (30lbs was not nearly enough) as well as adding a few live rocks from the LFS. I will also be adding Chaeto to the system in a few days from another person in this forum as well as a local reefer which contain various pods in it as well.

Cloudy_Tank_1.jpg


Lights_1.jpg


Lights_Track_1.jpg


Lights_Track_2.jpg


Lights_Track_3.jpg
 
OP
OP
drcrook

drcrook

Active Member
View Badges
Joined
May 11, 2018
Messages
155
Reaction score
86
Rating - 0%
0   0   0
Hey Folks,

So I got in the test kit. I dropped the shrimp into the tank on Tuesday and took him out yesterday and measured my ammonia, nitrite. Both came back in at zero? I did put in 120#s of live sand; so maybe it was really really alive. My ph is a perfect 8.3 with no additives. I did not get a reef test kit; so my magnesium, calcium etc are unknown; but the salt I purchased had a significant of that in it. I purchased Red Sea salt.

So I'm moving ahead with the plan since everything looks good; but I'm going a bit slow. I decided with numbers like that, after work I went and bought some more rock as well as live rock. My LFS ended up having a second location 30 minutes further with several grades of live rock. I bought about 25#s of the premium stuff and 15#s of the middle stuff. There were several pieces with various corals; so I went ahead and ensured I got some of those (not sure it will survive; but I'm paying by weight and getting corals).

I also got two damsels to be my canaries. A blue one and a black one with a spot. I also stocked the refugium with some rocks and copepods.

So here is the tank with some aquascaping
696799-533177598cdf6f59621dbb1e6253cba1.jpg


Here is another image
696800-d3693901148d53129757e2e993fa683b.jpg


I'll have to still go get more rock; because it needs it I think. But for now, its a good start.

Here is the sump
696798-9abb118b5b832bdbbd199d8d685c3790.jpg


And now for the hitchikers. I've already found various snails; pinky nail sized shrimp; starfish including a brittle starfish and aptasia. I also found a few of these which I'm not 100% sure about.

These are zoas; but maybe 2 different species? Are these the palytoxin guys? Think they will survive? They have started extending their polyps more than yesterday; so I'm thinking they should make it.
696801-b6737fc0bce2b75eb340a9d0c6e90c2f.jpg


I've got this one; I have no idea what it is but it is very pretty. I hope it survives.
696802-0f07ee04e99466f55184183b3d55417f.jpg


and another unknown one:
696804-043871bb05562dc509ea1e8ed5b7028d.jpg


And another unknown one; there are some orange ones and blue ones on here.
696805-1e78c04ad858b4197883bb1e94a05a3d.jpg


I've got a few others; but I'll make a whole post on it. I'll also reply with the last one since the forum isn't letting me do it here.

Tank_Sump_1.jpg


Tank_Rocks_1.jpg


Tank_Rocks_2.jpg


coral_3.jpg


coral_2.jpg


coral_5.jpg


coral_4.jpg
 
OP
OP
drcrook

drcrook

Active Member
View Badges
Joined
May 11, 2018
Messages
155
Reaction score
86
Rating - 0%
0   0   0
#reef2reef, #worldwidecorals, #mywwccontest

Trying to win $1000 in corals :D tags added
 
OP
OP
drcrook

drcrook

Active Member
View Badges
Joined
May 11, 2018
Messages
155
Reaction score
86
Rating - 0%
0   0   0
So major updates:

1. Doors stenciled and looking great!
2. Bought a RO/DI machine and beginning to make RO/DI water for the tank now.
3. Second phase of cycle looks like it is starting.
4. Added a Square Anthias, Fixed up the Refugium with more dry rock, chaeto and seeded with Copepods and brine shrimp. Also seeded phytoplankton.

Door Stenciled.
700792-9c47d2c151dc8ab074653caf17b2cdf2.jpg


Overall Tank Currently. You can see the Square Anthias as well. Super cool fish.
700789-07ae499a272c05dca00673ab05cf2374.jpg


The Skimmer is picking up stuff. Also a DIY note here on tuning the skimmer. Mine is in deeper water than it should be to allow me to have space to do stuff with it. If this happens to you; get some scotch tape; cover your air intake holes and poke small holes in that to throttle your air intake. Cheap solution and works awesome.
700788-8f3c0263937b16c558b9996044e8e6bb.jpg


Refugium looking good and going:
700794-8d97a83722e629c9a6c54fc824f5cfd3.jpg


Some tiny white starfish hitchiker. I have A LOT of these things.
700790-9b11aa4fab6699ad95fcb2f4096b6330.jpg

700791-72c530392651ed519eeff70b7acf5e0e.jpg


Now I think we are in the second part of the cycle because I believe I am having a diatom breakout. I don't know if it is diatoms or cyano. All I hear is "wait it out"; so that is my plan. I'm not really sure if I should be worried or not. Currently I'm not concerned.

Rocks getting it:
700795-d2795d387278393123531e2b2b35ee2f.jpg


Sand is really getting it:
700796-cc4d5d3f6bca9573a4faf9cae5e09dc9.jpg


I had been purposely overfeeding to try to get some nutrients in there for the chaeto to start growing and make sure the skimmer works. I've scaled back on that and am now feeding appropriately now.

skimmer_working.jpg


tank_1.jpg


tiny_starfish_1.jpg


tiny_starfish_2.jpg


door_1.jpg


fish_1.jpg


fuge_started.jpg


rocks_1.jpg


sand_outbreak.jpg
 
OP
OP
drcrook

drcrook

Active Member
View Badges
Joined
May 11, 2018
Messages
155
Reaction score
86
Rating - 0%
0   0   0
Lots of work going into the tank. Mostly in tweaking and tuning parameters; the skimmer etc.

1. Doors Attached; Here is an image. Looks Beach Chic to me!
704843-8dc474c5120ff02c72ddd151b09003ab.jpg


2. Lighting I THINK is finally figured out. Below is an image of my schedule as well as anticipated PAR readings. This is for the Photon v2 32" displays from ReefBreeder. I had been doing a lot of guessing and LUX measuring; but that really didn't give me much of an accurate read out. Luckily, Logan from ReefBreeders is active on this forum and posted this link: https://www.dropbox.com/s/0aihu161k5cew61/2018 Photon V2 PAR Estimator.xlsx?dl=0 which helped me determine approximately what my PAR will be with various settings. My lights are 6" above water, not 8"; but close enough.

Most of my structures are at about the 12" depth mark with my floor at about the 23" mark. I have a few structures at 6" mark; but not many. I run an 8 hour peak with a 3 hour ramp up/down on either side and some low light viewing hours.

upload_2018-6-4_11-9-3-png.760873

upload_2018-6-4_11-9-17-png.760874


upload_2018-6-4_11-9-30-png.760875


3. I've ordered a cleanup crew focused on Algae due to algae starting to appear as light fuzz on all surfaces and only having 1 emerald crab, 5 hermit crabs and 1 snail in 180 gallons is not really enough. The new cleanup crew is pretty cool. Live Aquaria has a build your own reef cleaner pack: https://www.liveaquaria.com/product/build_your_own_kit.cfm?id=1
I went with:
  • 12x Hermit Crabs
  • 10 Astaea Turbo Snails
  • 10 Nassarius Snails
  • 5 Cerith Snails
  • 2 Peppermint Shrimp
  • 1 Emerald Crab
  • 1 Banded Coral Shrimp (my wife really wanted it)
  • 2 Fighting Conchs
  • 1 Pincushion Urchin
4. I've added another 20#s of Rocks; but I'll have to post a picture later with that in there.
5. Received Reef Test Kit (Red Sea). All parameters were perfect; until I misread the test (its how much tritant you used; not how much is left) and I over-dosed on KH, CA & MG. I've got a 20% water change scheduled for Wednesday; so do that and the levels will also drop naturally as the Coralline Algae uses it; which is looking much brighter and healthier now. Fish and everything look OK. My hitchiker corals are not doing well; but I did not expect them to survive. The alvepora and blue symposium might make it; but the Zoas are probably a lost cause (too much light).

20180529_163718.jpg
 
OP
OP
drcrook

drcrook

Active Member
View Badges
Joined
May 11, 2018
Messages
155
Reaction score
86
Rating - 0%
0   0   0
Updates:
Lighting Schedule was WAY too bright. I've cut back max values to 30. My natural light also provides significant PAR. That light schedule would have been good in a dark room.

Here is how things are looking now:
upload_2018-6-19_8-42-34.png


Some Blue Sponges Growing:
upload_2018-6-19_8-43-4.png


Corraline is really coming out beautifully:
upload_2018-6-19_8-43-39.png


upload_2018-6-19_8-45-37.png
 

Making aqua concoctions: Have you ever tried the Reef Moonshiner Method?

  • I currently use the moonshiner method.

    Votes: 24 24.5%
  • I don’t currently use the moonshiner method, but I have in the past.

    Votes: 2 2.0%
  • I have not used the moonshiner method.

    Votes: 69 70.4%
  • Other.

    Votes: 3 3.1%
Back
Top