I like big tanks and I cannot lie...

wmhaupfear

Community Member
View Badges
Joined
Apr 12, 2018
Messages
52
Reaction score
133
Rating - 0%
0   0   0
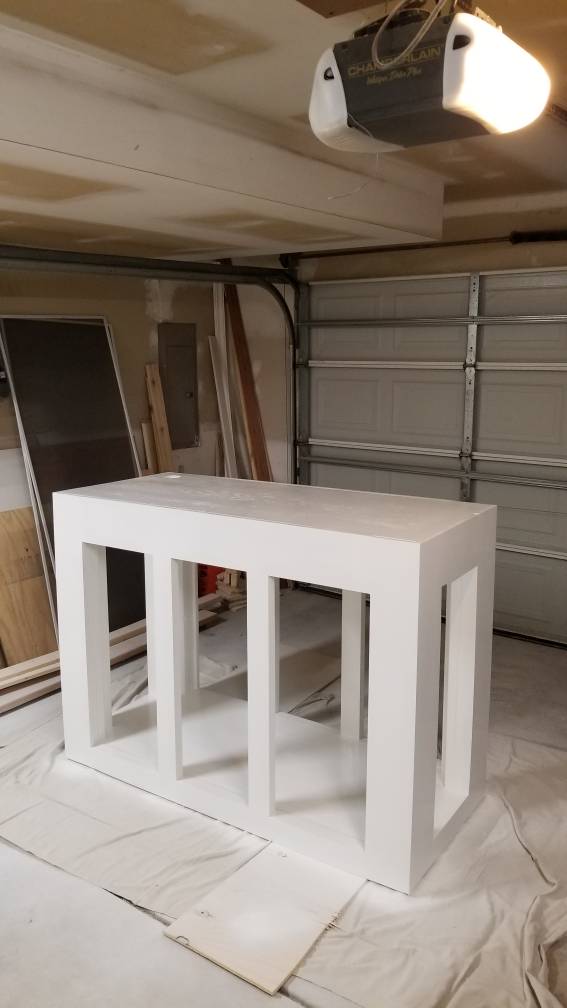
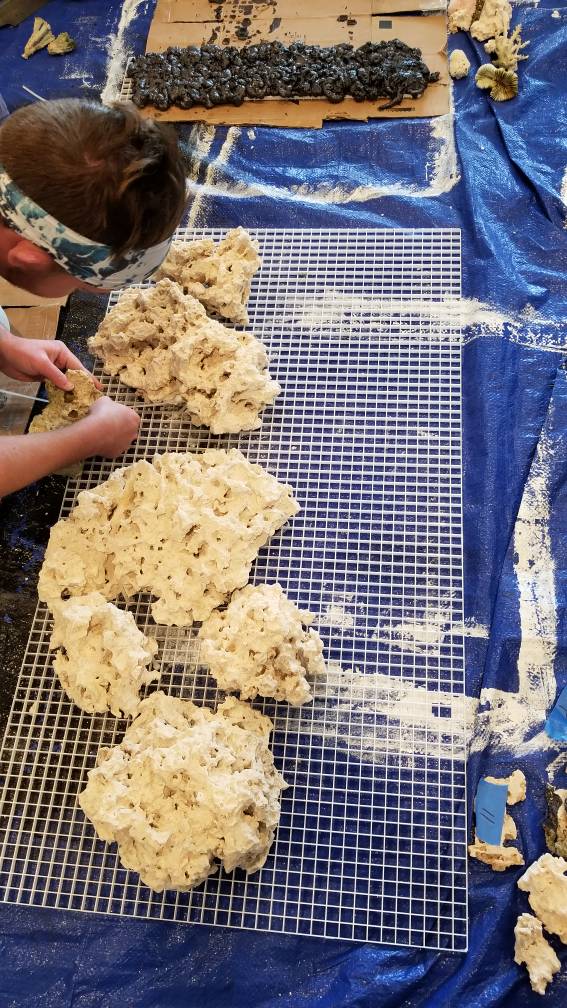
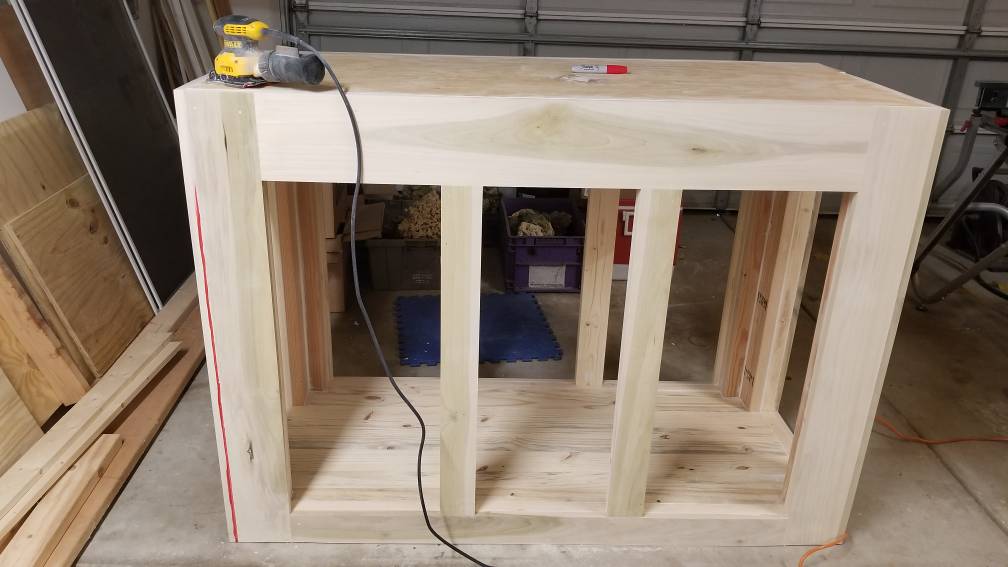
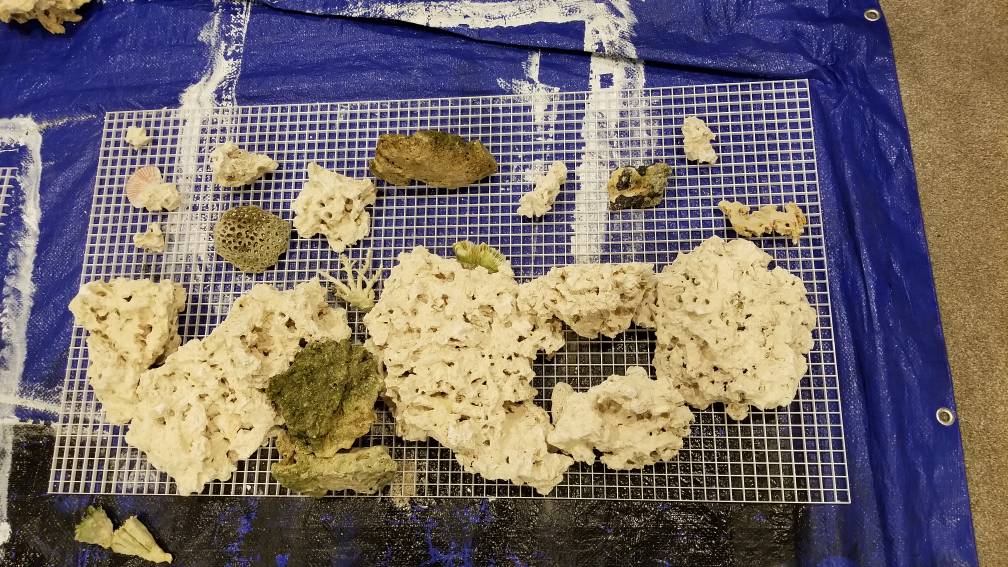
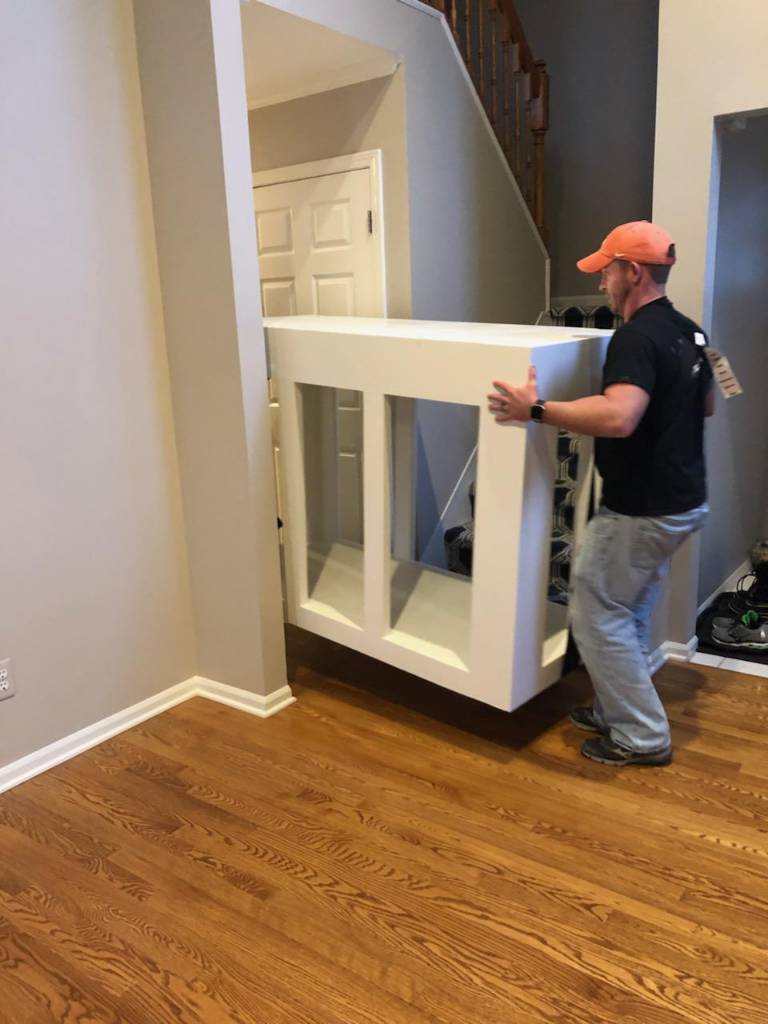
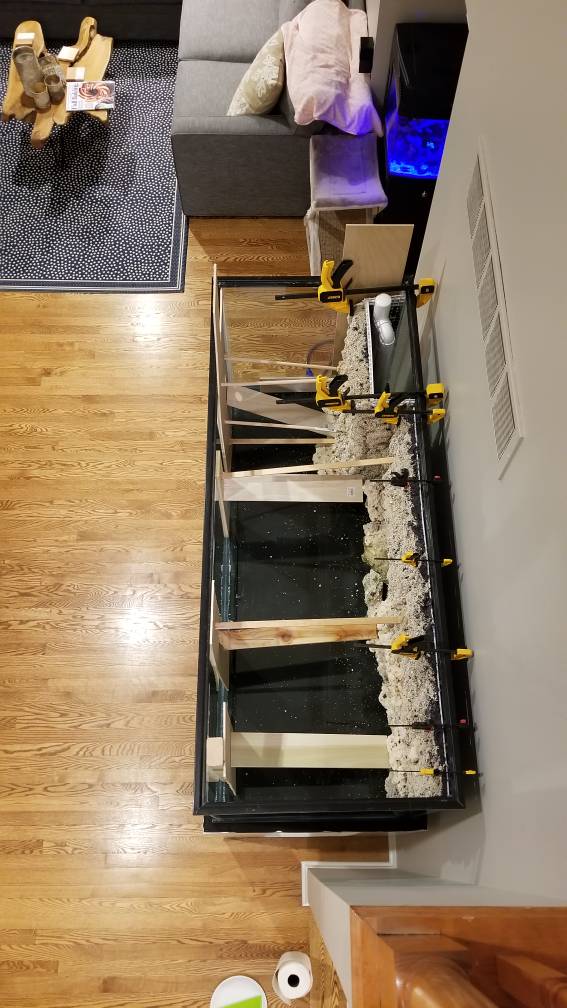
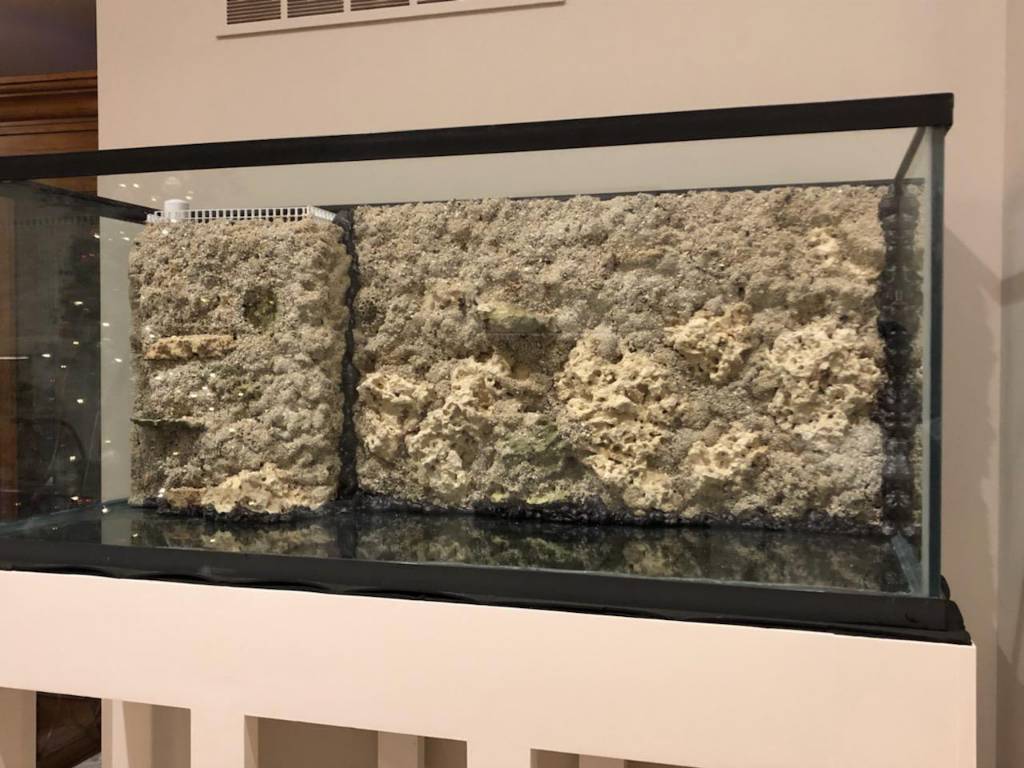
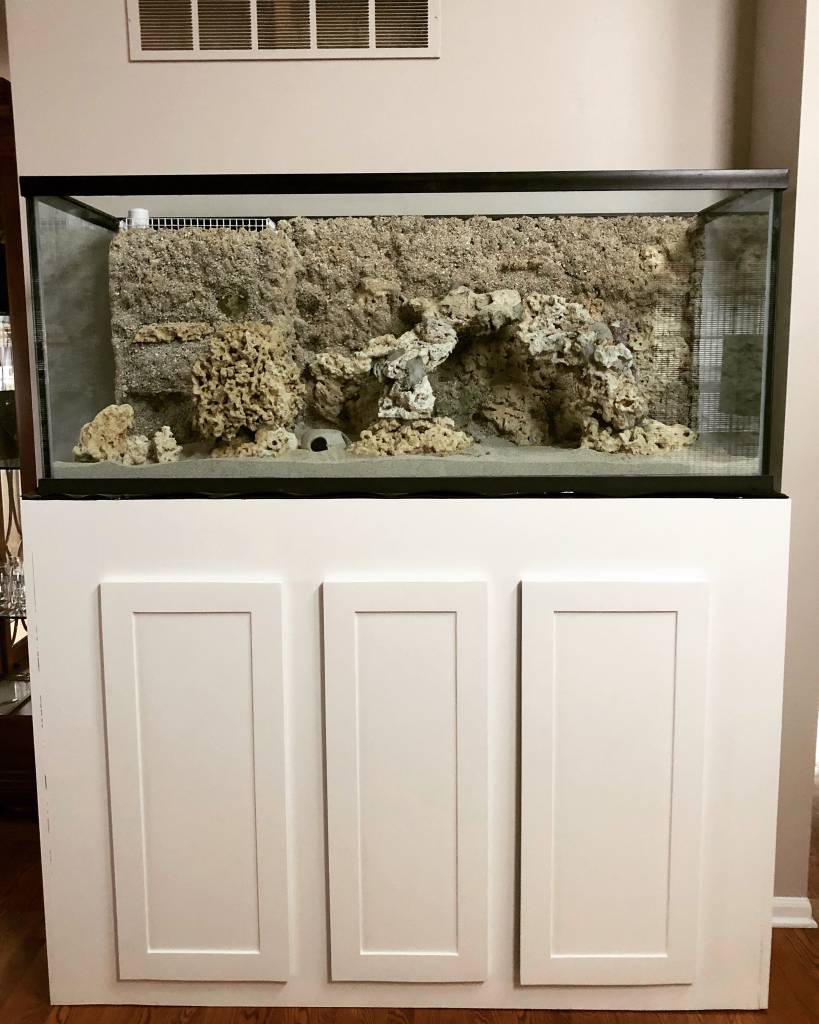
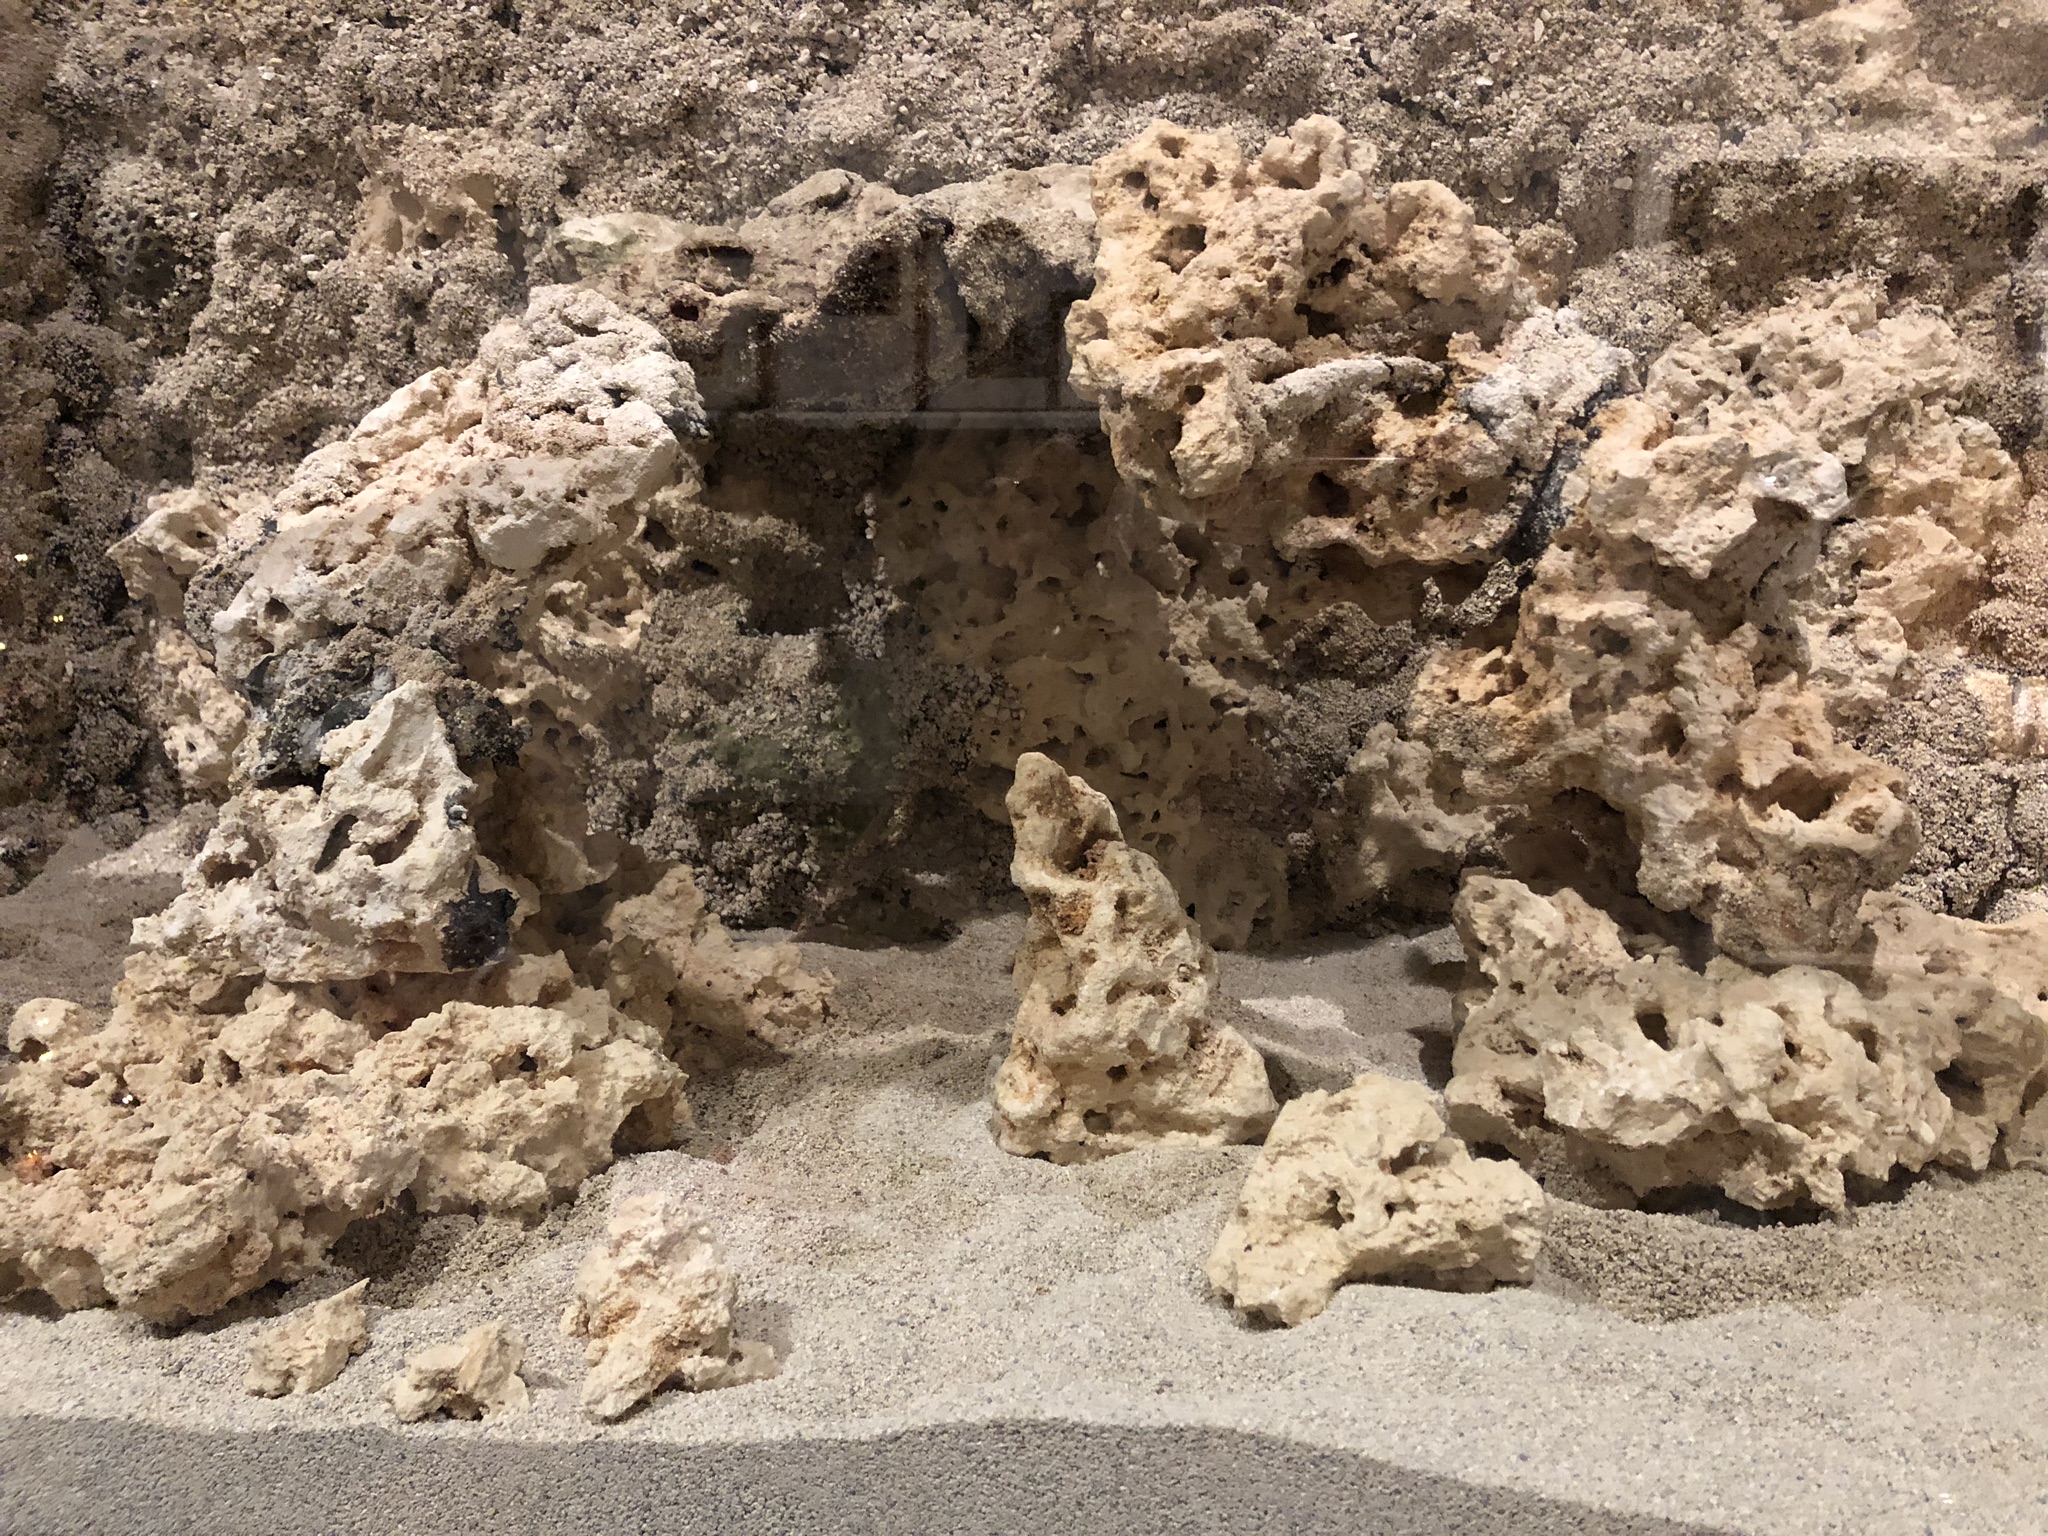
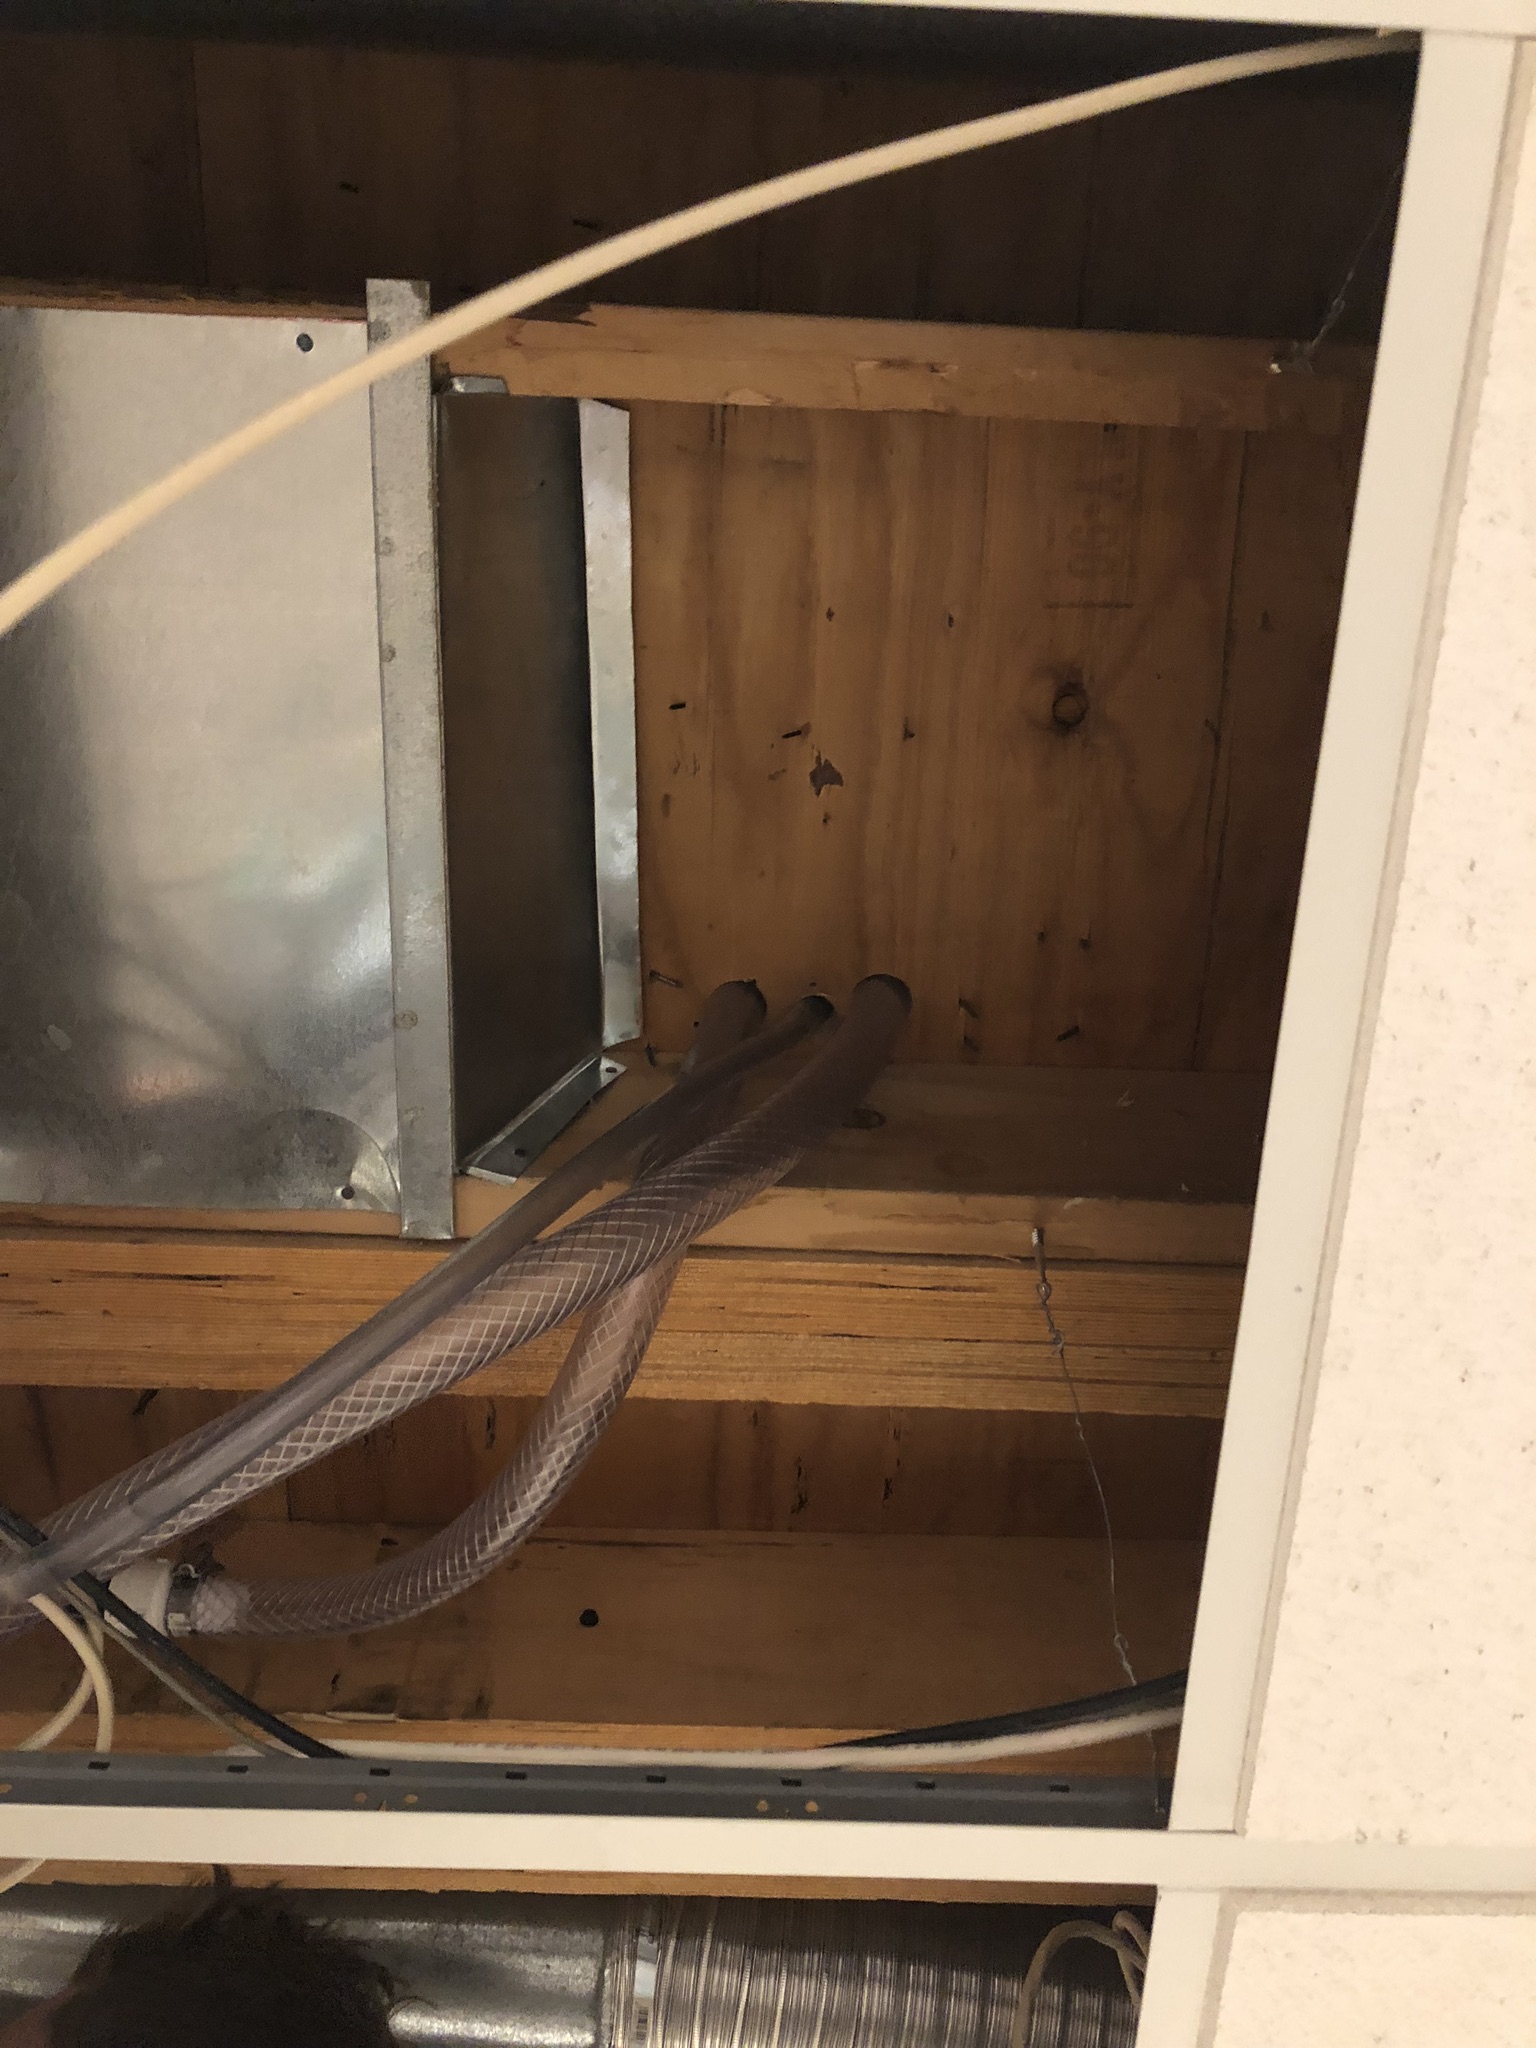
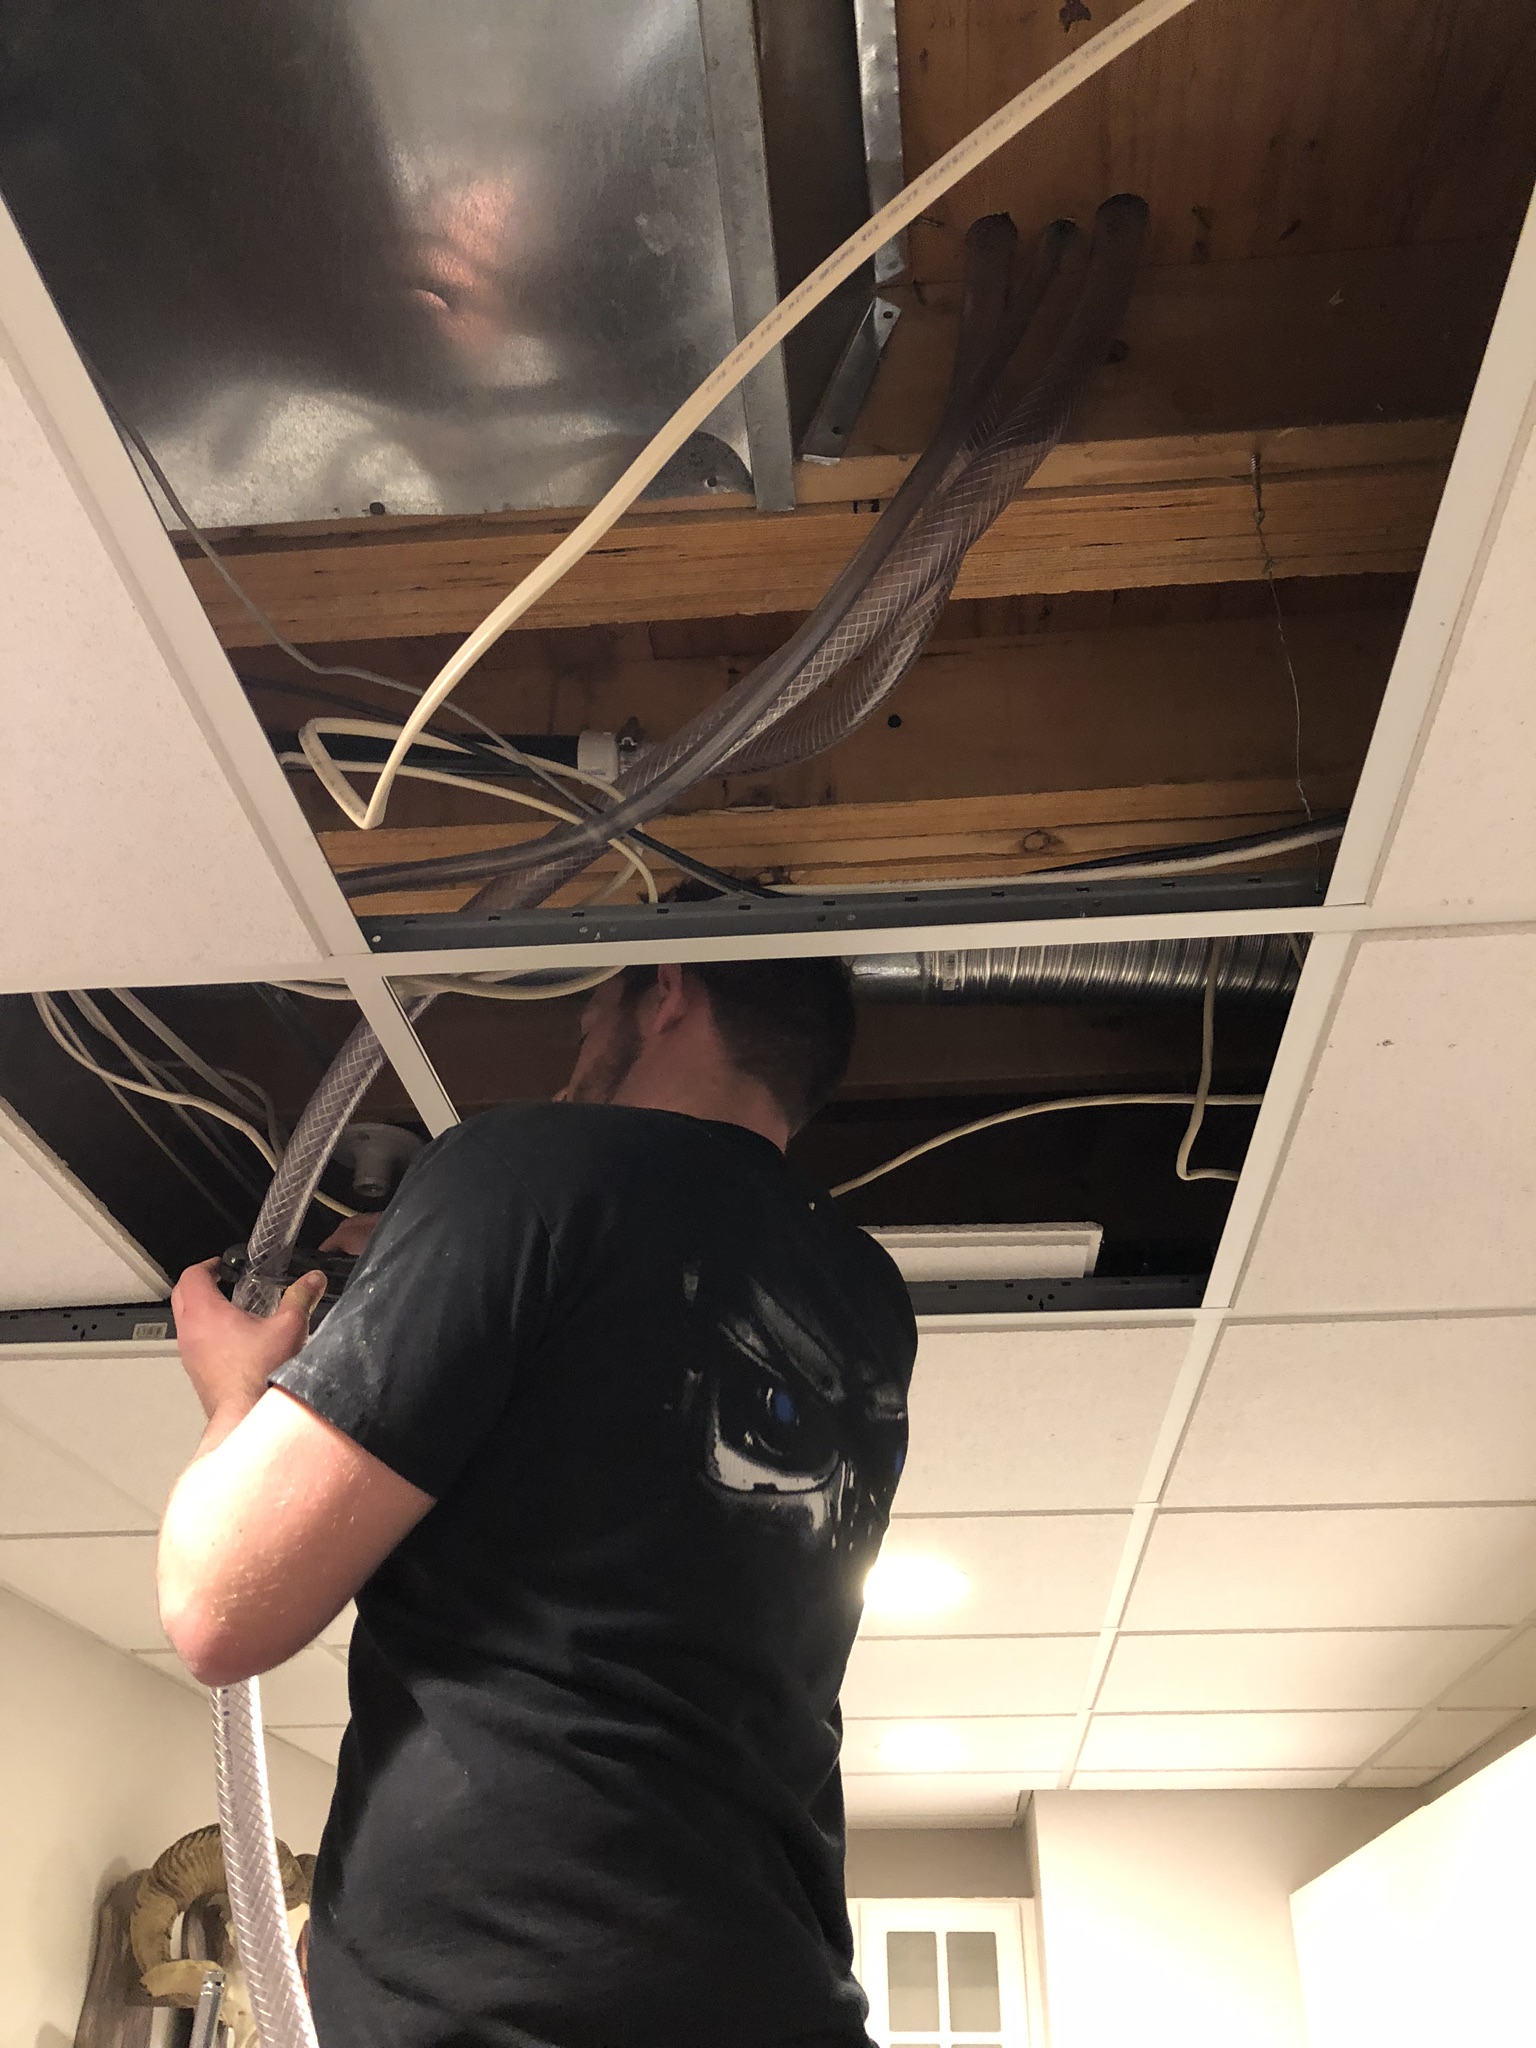
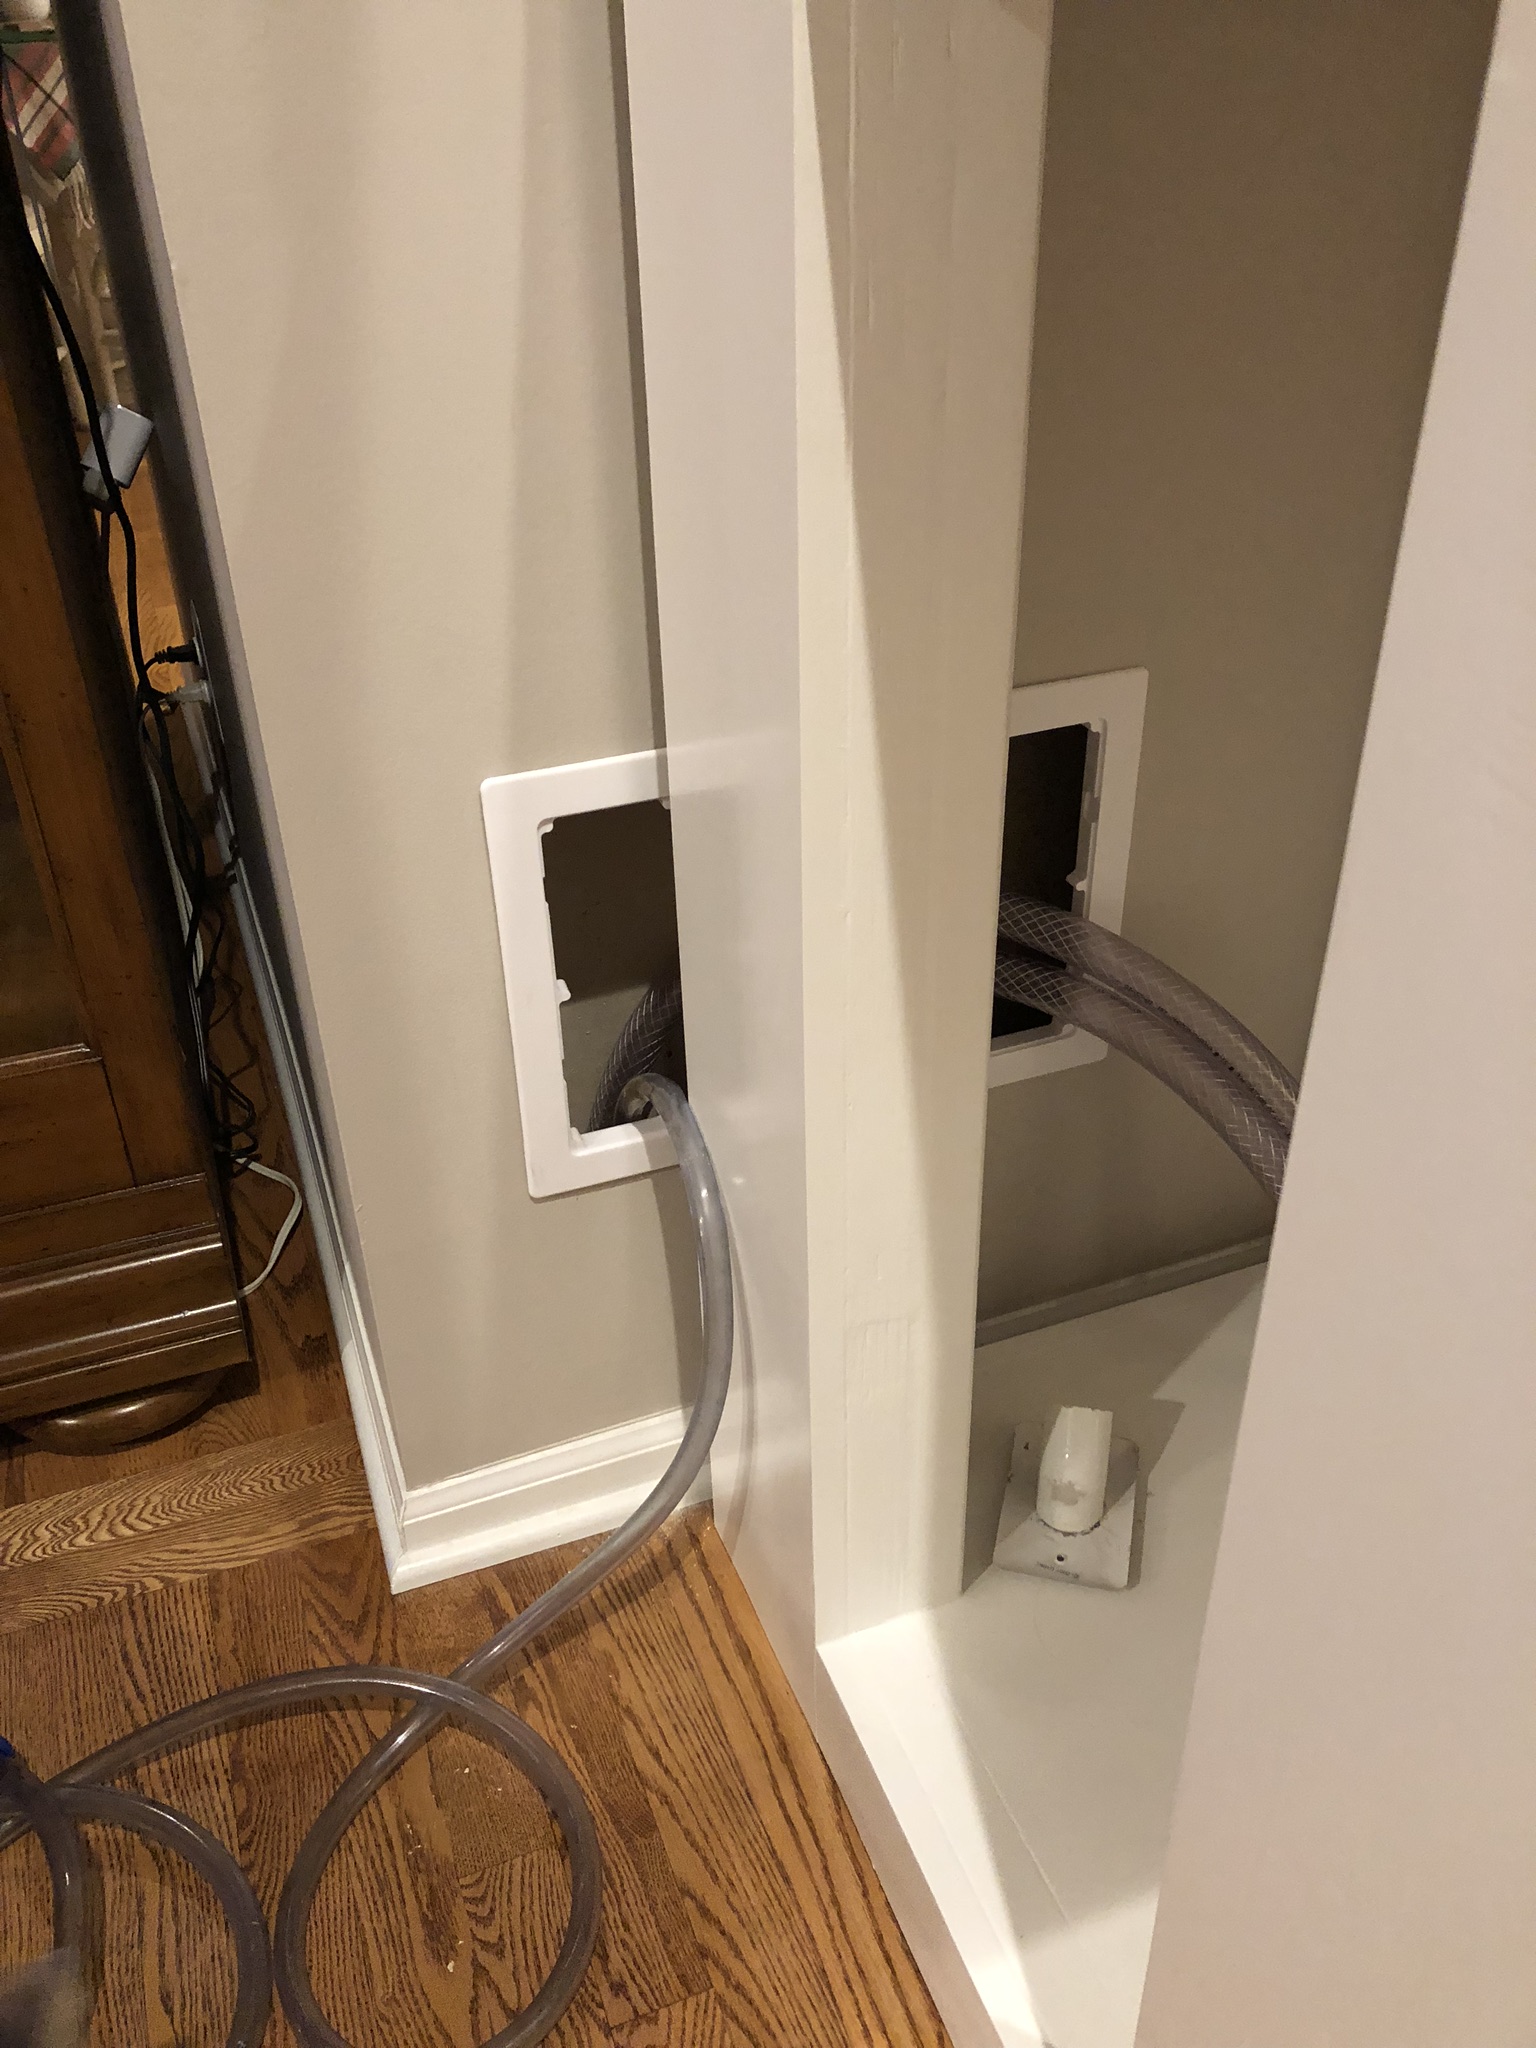
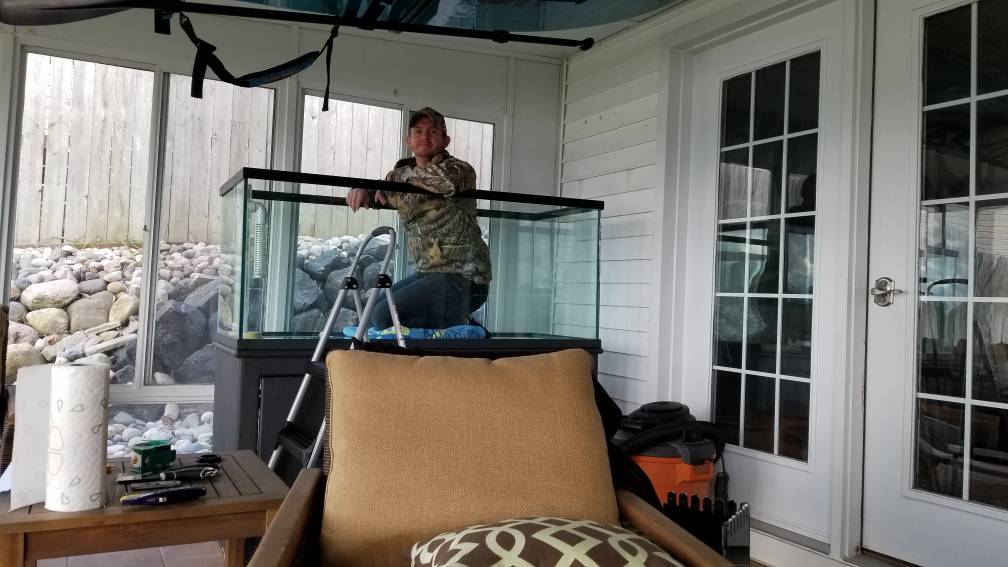
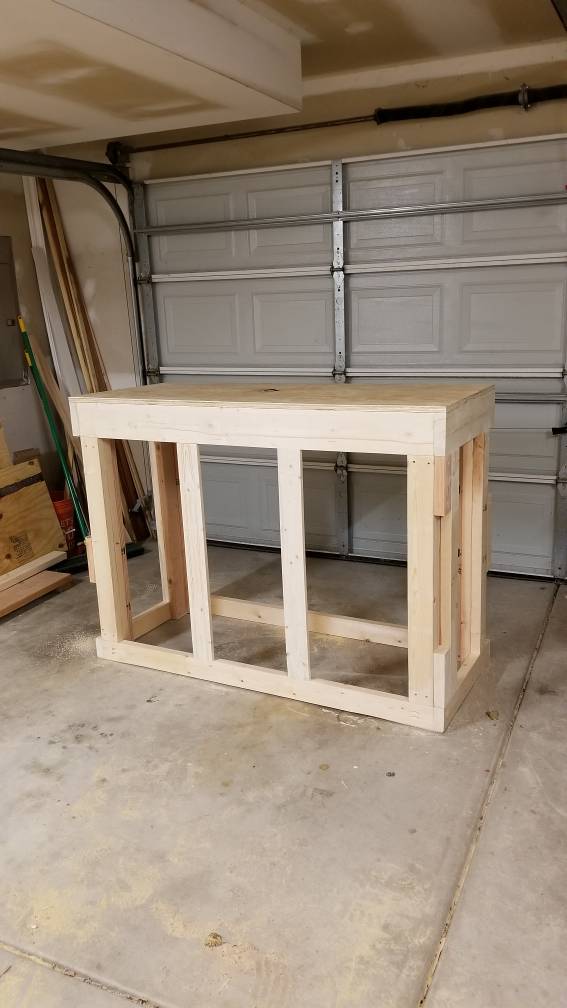
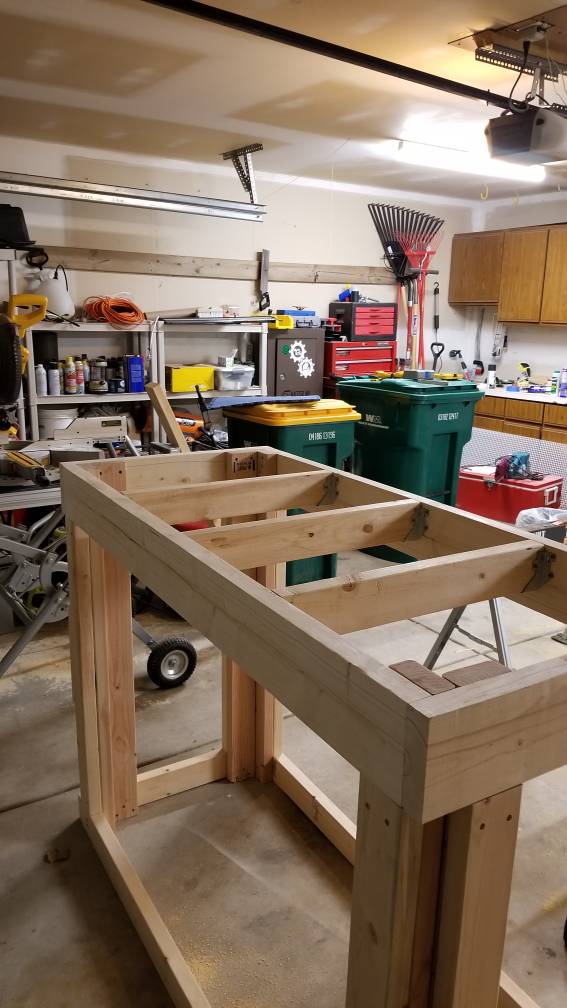
I've been meaning to start this build thread for awhile, but I wanted to get at least halfway done before I created the thread so I could make it somewhat interesting. The title implies a much larger tank than we have, but it is 150 gallon replacing our current 29 gallon biocube. We bought the new tank used and actually got a bigger one than the 120 gallon we originally planned on getting. We wanted to make the tank maintenance as streamlined as possible so I went outside the norm a bit on some of the things for this tank and I will try to explain them as I go along. I am an engineer, so I get kind of giddy doing stuff like this and being able to think outside the box. All comments/critiques are welcome, just make it constructive (i.e. if you aren't a fan of something, you can say that, but also provide what changes you would make to the particular design so others and possibly I can benefit). Enjoy!

I will follow up this first post with pictures and progress, but I wanted to make this first post a living post that I will update as needed.

Tank:
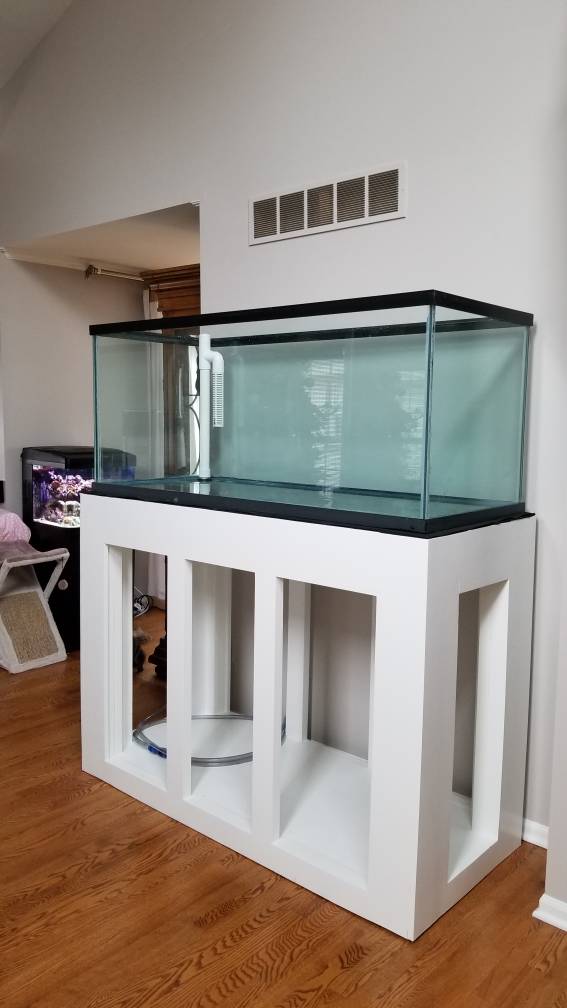
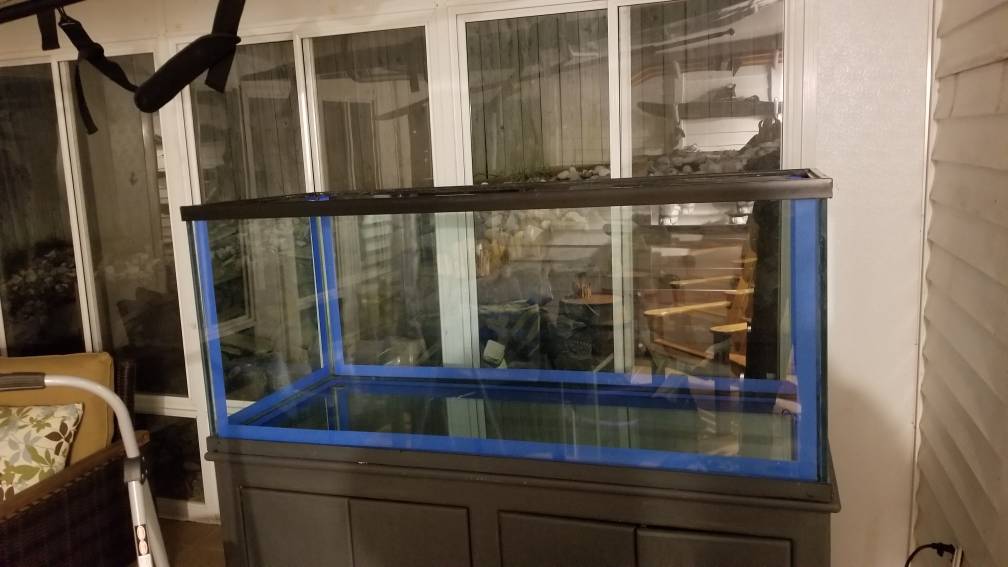
150gal custom tank with starphire glass on all sides
Single corner overflow
60" x 24" x 24"

Sump:
Repurposed 40 gallon tank
Jax.Racks sump baffle kit
Reef Octopus 110INT skimmer
DIY King overflow

RODI:
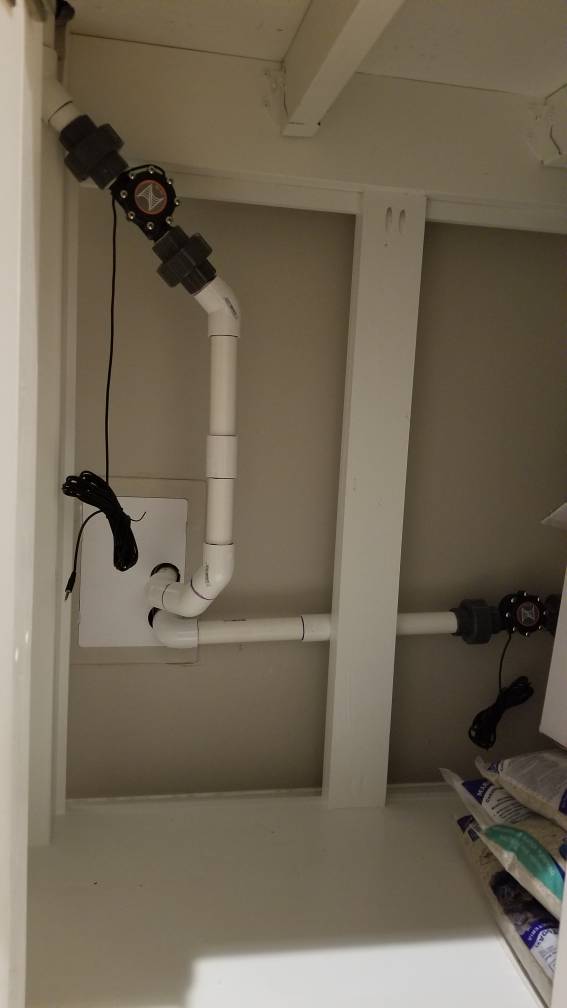
BRS 5 stage (we have Chloramiine treated water)

Return Pump:
Reeflo Yellowtail

Heaters:
800w Finnex Titanium
JBJ Heater controller

Lights:
3 x Ecotech Radion XR30w Gen4

Powerheads:
TBD

Aquarium monitoring:
Neptune Apex..?
 
OP
OP
wmhaupfear

wmhaupfear

Community Member
View Badges
Joined
Apr 12, 2018
Messages
52
Reaction score
133
Rating - 0%
0   0   0
Here is our current tank and the new tank. The new tank is sitting in the basement waiting to get re-siliconed and that current stand will be getting replaced with a custom one I am going to build. I think you can figure out which is which.
IMG_0923.jpg IMG_0925.jpg
 
OP
OP
wmhaupfear

wmhaupfear

Community Member
View Badges
Joined
Apr 12, 2018
Messages
52
Reaction score
133
Rating - 0%
0   0   0
Sump Build
Ok so this will be a lengthy post. Like I said up top, we wanted this tank and maintenance to be as streamlined as possible. I looked through countless build threads and ideas on water changes and sumps and then came up with idea that I think is unique. The idea is that there will be 2 barrels, a new barrel and a current barrel. The flow of water will go from DT to Sump to Current Barrel to Pump and back to DT. A water change will consist of making water in the New Barrel and getting it up to correct temp and salinity and then turn 2 valves. Then the Current Barrel becomes unused and the New Barrel becomes the Current Barrel and we can empty the one and the cycle continues. The plan is to do 1 water change a month of about 40 gallons, but we will use water parameters to be the judge of frequency.

To start this part of the build, we ripped out the jacuzzi tub in the basement and installed a floor drain and installed draining pvc tile. The draining tile is great stuff and will allow water to run underneath it to the drain. It is made by a company called ModuTile (https://www.amazon.com/Interlocking-Perforated-Drain-Floor-Tile/dp/B006QQFQ5G).

Next, we built a sump cabinet as both a test build for the aquarium stand and as a way to keep the sump setup tidy. The plans came from the DIY King youtube video. Being an engineer, I did do an FEA (Finite Element Analysis) on the aquarium stand to make certain it wouldn't fail and to know where the weak points were so I can reinforce it. I ended up modifying my original stand design and the sump stand is the taller version of the redesign.

I was given a 40 gallon tank for free that was used a freshwater tank for a couple years. I cleaned it up and re-siliconed it and water tested after letting the silicone cure for a week. We were tossing around ideas of how to make the sump baffles and my wife found Jax.Racks on ebay and he makes a sump baffle kit out of acrylic and can do custom cuts. It came out super nice and was easy to silicone into the tank. It has a separate chamber for the filter socks and drain pipe and then skimmer/refugium/overflow sections with an additional filter rack for the last section. I will have to build a stand for the skimmer, but I need to do some tuning and measuring first.

The barrels came from a distribution center in Detroit and were $25 each. I originally bought uniseals to run the pipes in but those leaked regardless of which side was facing out. I do kick myself for installing both the uniseals and bulkheads backwards the first time I installed each haha. As the previous sentence alludes to, I ended up replacing the uniseals with bulkheads. To install the bulkheads, I actually flame treated the holes first and heated up the surrounding plastic enough to deform and then tightened the bulkhead on so that the plastic deformed to the shape of the bulkhead creating a better seal. They don't leak now! I also made my own hinged lids using replacement plastic cooler hinges and pvc bolts and nuts because the pre-made ones are expensive and I can make the opening as big as I need if I did it myself. I also plumbed in a float valve for each barrel and connected the RODI line to each.

The RODI is from BRS and is a 5 stage 150GPD system since our water is treated with Chloramine. We have a water softener as well and it feeds the RODI unit. We also have an RODI unit for drinking water but that is separate from the aquarium setup. This was probably the easiest thing to install so far except for a leaking pressure gauge which BRS promptly fixed so I won't dwell on that too much. We also installed an auto flush valve on the RODI because who wants to manually flush during a 6 hour fill? It has a line connected to the barrels and a separate one for filling whatever we want and both have their own valves.

The plumbing took some searching and designing to make it function like we wanted. I tried to find L-Type valves, but found them to be expensive. I found T-Type valves on Amazon for $30 a piece and went with those, which actually turned out to be a better solution. For those that don't know the difference, an L-Type valve is a 3 way valve that will only ever open 2 of the 3 ports at any given time and a T-Type valve is a 3 way valve that can open 2 or 3 of the ports at a time. So that others can learn from my mistakes, PLEASE FOR THE LOVE OF ALL THAT IS HOLY INSTALL UNIONS AT ANY AND EVERY PLACE YOU CAN. The unions you see in the pictures were not there originally and were added after leaks were found and I needed to remove sections. I also added a check valve for the pump and a ball valve to adjust flow rate, which may not be used at all considering we have 24ft of head pressure that I calculated and possibly more in reality. Since the sump system is in the basement, we have to pump water a long way upstairs to the DT. I will be using braided hose to run from the pump to the DT and mostly hard line from the DT to the sump so that I can ensure a continuous downward slope. The pipe into and out of the DT is 1 inch (although the Durso in the DT is 1.25" necked down to 1" at the bulkhead to ensure maximum flow rate).

Electricity, my favorite! So we have Google Home and have been automating things around the house and the aquarium will be no exception. I bought a weatherproof electrical enclosure and mounted 4 duplex sockets to some PVC and mounted it inside the enclosure. Each socket is wired independently by breaking both tabs on each duplex outlet. Each outlet is them wired to a wifi controlled relay that works with Google Home (Sonoff is the brand and are on Amazon). From the relay, it is wired to a DJ switchboard. The idea is that whatever is plugged in can be controlled via wifi or hard switch. Everything will plug into the box with their own drip loops and the box will be sealed to prevent any water from getting in. Two of the plugs do not have wifi relays on purpose and will be for the things that we want on in the case of loss of wifi (the relays can be set as default ON or default OFF, but I have doubts).

I also did a structural analysis of my floor to know whether it would support the new tank. I had a design load of 3000lbs and calculated the necessary joists to support that loading so that the existing joists would be "additional" support to the new joists. Sistering in new joists to existing floor joists was much more labor intensive than we thought it would be. Thankfully I have a patient friend that helped and a scissor jack and a sledge hammer to persuade the joists into place. I used Laminated Veneer Lumber as the new joists since they are structurally superior to dimensional lumber. Now that I can park a small car in my living room, I am confident the tank will never relocate itself to my basement.

The water test was a success with no leaks, although this is like the 8th water test hahaha *incessant sobbing*
Next will be re-siliconing the DT and building the stand so stay tuned!
8646.jpeg 8647.jpeg 8648.jpeg 9137.jpeg 9139.jpeg 9140.jpeg 9141.jpeg 20180713_195525.jpg 20180819_161833.jpg 20180915_210744.jpg 20180919_231737.jpg 20180919_235456.jpg 20180919_235459.jpg 20180919_235504.jpg 37035585_10213492105037530_6260254449868996608_n.jpg 40666671_10213880176299069_3323681878191374336_n.jpg 40746405_10213880175979061_993845270401777664_n.jpg 40765078_10213880175379046_1185374749941825536_n.jpg 40868935_10213880194619527_2681400447134072832_n.jpg 40960910_10213880176979086_1776412200341078016_n.jpg
 
OP
OP
wmhaupfear

wmhaupfear

Community Member
View Badges
Joined
Apr 12, 2018
Messages
52
Reaction score
133
Rating - 0%
0   0   0
Worked on the stand a bit and got it leveled out and put 3/4 plywood on top. Next is painting the bones and facing it to make it look pretty.

Also got all the old silicone stripped off the tank and cleaned it up and taped it off. Next is re-siliconing the tank when it's a wee bit warmer than 35F outside. Its November weather here in Michigan apparently.

Along with stripping the silicone, I removed the overflow box that was siliconed in. We are going to make a new overflow box out of homemade live rock and plastic grating.
a8b8e7a4eaedd9a4b9374f2f7549c900.jpg
5308ab8fab4bd038708880f0784dea04.jpg
456b9a0cf23c8c2ba50a7a36ca32915e.jpg
9ea96084b3f8c675c58ba60397d081e4.jpg
 
OP
OP
wmhaupfear

wmhaupfear

Community Member
View Badges
Joined
Apr 12, 2018
Messages
52
Reaction score
133
Rating - 0%
0   0   0
Well with deer season going on here in the mitten state it's been a little slow going, but I got venison in the freezer now so back to work!

The stand has been faced with 1/2" poplar and sanded sanded sanded until the edges disappeared it's smoother than my, err a baby's bottom. I sprayed 2 coats of exterior primer and sanded it again. Then I sprayed the first of 2 coats of exterior trim paint. What's left is to make doors and section off the electrical partition. I also need to put trim on it and a marble ledge so the cats can enjoy the view as well.

We started on the background piece as well. We acquired about 300lbs of live rock for free from someone moving so we had plenty of choices to build the wall and the leftover will be used for the eventual scape. We zip tied the rocks to a plastic light diffuser grid for support and then used pond foam to seal it all together. The foam will be covered in a mixture of white portland cement, oyster shell, aragonite sand, and crushed coral. It'll be siliconed to the glass after it cures for a couple weeks (hopefully only a couple weeks). We also made the overflow part of the background.

Hopefully there won't be such a long wait for the next update because we are getting antsy! Enjoy!
685ba89db7a0ff2ba822464490015c0b.jpg
e344309153f9c32a3537d2be834fa587.jpg
e857df867417ab0f240897c3dec3d3ff.jpg
4366b2c943b109474bc20a6c8b4ffd95.jpg
b2de05796980e5ac1a97556b32be7ece.jpg
ca68eb1768368608c7ea2cedfcd6928c.jpg
 
Last edited:
OP
OP
wmhaupfear

wmhaupfear

Community Member
View Badges
Joined
Apr 12, 2018
Messages
52
Reaction score
133
Rating - 0%
0   0   0
Yay updates!

Moved the stand into the the living room this weekend using shoulder dolly straps and I have to say that these things are a life saver. Also started on the shaker doors and got them glued up and ready for sanding and paint. Bought the necessary stuff to make the electronics compartment as well but that'll come later.

Second project was to make the aquarium background. We did a lot of research on this before attempting it. There were 2 main methods we found that we wanted to try. Both required zip tieing dry rock to a plastic light diffuser grate and spray foaming it in. Option A was the first attempt and it didn't give the texture we wanted and it just crumbled apart after it set and it wouldn't stick to the cured foam. Option B worked much better and gave us texture and looked much better.
Option A: cover spray foam with a 1:1:1:1 mix (white cement: aragonite: crushed coral: oyster shell).
Option B: West Marine 2 part epoxy and cover epoxy in a 1:1:1 mix (aragonite: crushed coral: oyster shell).
32f32c4f7a39574c073478e3841aa3f1.jpg
63990e12c535d27f2012ec96b415b2d0.jpg
d48fd3bf530f5148f0dbc56138a95456.jpg
 
OP
OP
wmhaupfear

wmhaupfear

Community Member
View Badges
Joined
Apr 12, 2018
Messages
52
Reaction score
133
Rating - 0%
0   0   0
It's been a little bit since I've posted but we've been quite busy setting up the tank!

Moved the tank upstairs from its storage place in the basement and places it on the stand thanks to a gullible and taller friend haha. We test fit and adjusted the background and then siliconed it in place. We foamed in the seams as well to make it seamless.

We got about 300lbs of dry live rock for free from a guy breaking down his tanks so we cycled them in some bleach (10:1 ratio water:bleach) for 48hrs. We got some dechlorinator and cycled them again in freshwater and they are good to go. We then started figuring out a rockscape we liked. We set up swim throughs and tables and left spaces for our rocks in the current tank. We then set them up in the tank and cemented them in place with e-marco 400 cement, which is awesome stuff. It's hard to see depth in the pictures because everything is the same color, but the table on top is leaning against the wall and supported by the two islands on the right forming a sort of bridge. The island to the left will be a support for one of our big rocks in the current tank to make another bridge with a cool little cave in it.

Also shown in the picture, but not really showcased is that I put the cabinet doors on so it looks like a real cabinet now woo!
722ba4938eeae931d5b1b69992f7d219.jpg
ab80e843528e7202217a4ea727103056.jpg
9472d4dd7598beb72a24137709c495b0.jpg
85df8f9253edbebe3f65242f505fb01d.jpg
4501ae7f915ab38ff4172ec9657e8082.jpg
24a4cb67ccebd10e74716c0a08b9f55e.jpg
7456e6f21459a9818ed53425691936d2.jpg
a0021ee7ae3ad610fdaa6b9651ffd287.jpg
4291fdda4bf55d9d31d658f8fb2dfd74.jpg
b2af53cb7162cee6433356484d4cba96.jpg
 
OP
OP
wmhaupfear

wmhaupfear

Community Member
View Badges
Joined
Apr 12, 2018
Messages
52
Reaction score
133
Rating - 0%
0   0   0
In addition to all the above, we got the plumbing done. Its leak tested from the wall exit/entrance down to the basement and it works well with no leaks. The drain line has a slope of about 0.5" per foot on the horizontal sections so there is no trapped water and flow will be as free as possible. Since we are utilizing the neptune apex, we installed flow sensors to monitor for issues and to help initial setup. I wanted to hide as much of the plumbing as possible so I used plumbing access panels and drilled holes into the floor between the drywall. Thank goodness my measurements were spot on!

Stay tuned as I am working on the electrical housing next and mounting all the Neptune modules...
b4c94923e0a361d9efb44384ef82bb5c.jpg
73d6587766fdeee29987aa8f0512c09e.jpg
c2b9f54a77bb81ac8f9cee1bc9015568.jpg
8f59268843049467ba94ea403d03898c.jpg
 

Creating a strong bulwark: Did you consider floor support for your reef tank?

  • I put a major focus on floor support.

    Votes: 53 40.2%
  • I put minimal focus on floor support.

    Votes: 27 20.5%
  • I put no focus on floor support.

    Votes: 48 36.4%
  • Other.

    Votes: 4 3.0%
Back
Top