Jake's Ohio Reef - RSR 250

jakesweep

Community Member
View Badges
Joined
Apr 29, 2019
Messages
62
Reaction score
104
Rating - 0%
0   0   0
Current FTS (Sept 17, 2019):

fts-20190928.jpg


Well. I gave my initial deposit to the reef gods and they sent me a bunch of gear. So I guess it's time to get started.

I haven't had a reef tank since my oldest was a baby (12 years ago). Now I have 2 little humans running around that are stoked at the idea of building a reef tank and doing all the fun science-y stuff around it. I'm doing this "for the kids" (maybe that helped push my wife to be more agreeable).

So I've gathered some gear:
  • Red Sea Reefer 250 (scored this beauty off eBay for $500)
  • Noopsyche K7 Pro II 95W LED (x3)
  • Reef Octopus Classic 150 INT Protein Skimmer
  • Reef Octopus VarioS-6 Controllable DC Circulation Pump
  • EcoTech Marine VorTech MP10QD Propeller Pump w/ QuietDrive Driver (x2)
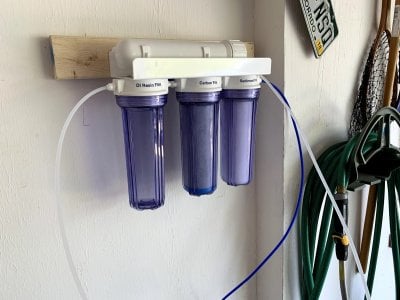
  • Marine Depot KleanWater 4-Stage Economy RO/DI System - 100 GPD
  • HMO 200 Watt Titanium Heater with Digital Controller - Finnex
  • Tunze Osmolator Universal 3155 Auto Top Off ATO
  • AquaMaxx Fluidized GFO and Carbon Filter Media Reactor - XS
  • Titanium Ground Probe
I bought a Seneye that I'll probably return. I told myself I didn't need an Apex, but then I talked myself into it. So I'll probably send the Seneye back. So now I have:
  • Seneye Reef Monitor
  • API Saltwater Liquid Master Test Kit
  • API Reef Master Test Kit
  • Neptune Systems APEX Wi-Fi Controller System
  • Neptune Systems Magnetic Probe Rack (MPR)
  • Neptune Systems DOS and DDR Dosing System Combo
What's all this without pics though?

rsr_initial.JPG

rsr_stuff.jpg


I think I have some work to do...
 
Last edited:
OP
OP
jakesweep

jakesweep

Community Member
View Badges
Joined
Apr 29, 2019
Messages
62
Reaction score
104
Rating - 0%
0   0   0
We're planning on ripping out the carpet and installing Bamboo flooring next year, so I figured I would get started a little early! I was a little apprehensive about having everything on carpet, so I cut out a footprint for the stand and installed a piece of MDF to take its place. This helped to level the tank and ended up looking pretty good. It's not going to make moving the tank next year any easier, but I think it's a good temporary solution.

tank_base_1.jpg

tank_base_2.jpg

rsr_on_base.jpg
 
OP
OP
jakesweep

jakesweep

Community Member
View Badges
Joined
Apr 29, 2019
Messages
62
Reaction score
104
Rating - 0%
0   0   0
I also installed some in-cabinet lighting, and added some door catches since the doors didn't always stay completely closed. Opening the door on the right-hand side opens a switch that turns the LED rope lighting on.

light_switch.jpg
door_catches.jpg
cabinet_lights.jpg
 
OP
OP
jakesweep

jakesweep

Community Member
View Badges
Joined
Apr 29, 2019
Messages
62
Reaction score
104
Rating - 0%
0   0   0
Awesome idea with the mdf board. I may copy that when I get my reefer 250, though I cant remove the carpet underneath. One of the downsides of apartment life

It worked out pretty well. I guess I'm getting ready to rip more out so we can build some built-in bookshelves on each side of the tank. The only issue os far is that the coating on the MDF is pretty slick. The tank slides around pretty easily, but I'm hoping when it's filled it will stay put.

Great start @jakesweep !!! Following. I have a RSR 250 too.

Awesome! Followed yours as well. So many RSR 250's around. :)
 
OP
OP
jakesweep

jakesweep

Community Member
View Badges
Joined
Apr 29, 2019
Messages
62
Reaction score
104
Rating - 0%
0   0   0
Lots of updates incoming. I've been slacking on keeping my build thread here up to date. We'll get all caught up here though.

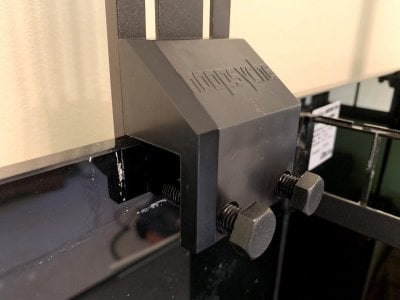
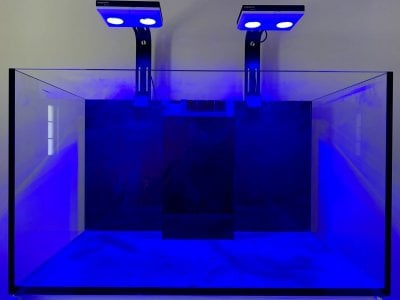
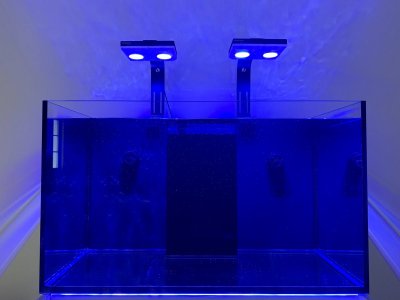
Got the lights installed. The arms are good quality and they adjust easily to different heights or horizontal extensions.

noop_mount.jpg light_test.jpg

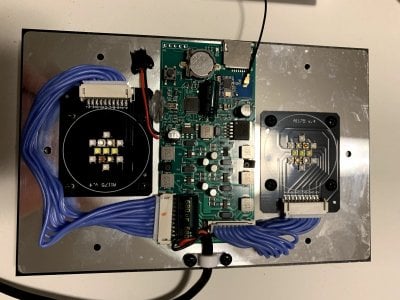
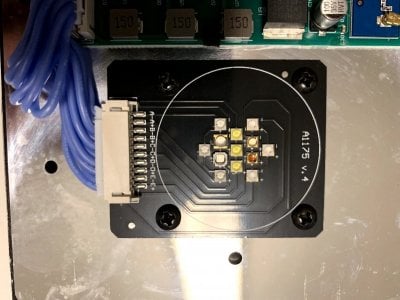
I am a tinkerer who loves to take things apart. I really wanted to see what the drivers and circuitry looked like to see if there was any chance of modifying them to take 1-10v. I'll figure that out later, but here are some pics of the internals:

noopsyche_internals.jpg noopsyche_led_array.jpg
 
OP
OP
jakesweep

jakesweep

Community Member
View Badges
Joined
Apr 29, 2019
Messages
62
Reaction score
104
Rating - 0%
0   0   0
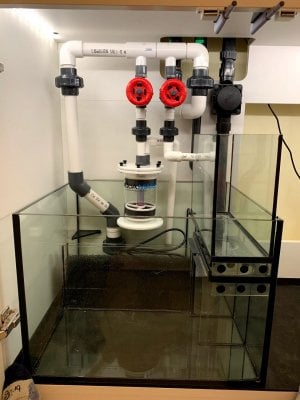
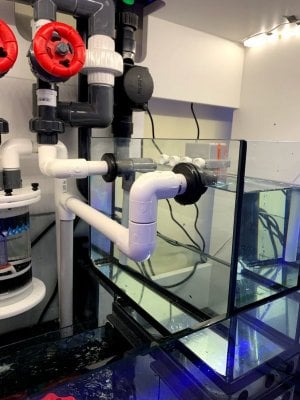
Dry fit the plumbing for the manifold which will serve the Aquamax reactor and the ATO which I will be turning into a mini-refugium. I might stub out one more valve for a future addition. I would love to get a bigger sump with a proper refugium, but this will have to do for now. Hard-plumbing the return pump was way more of a pain than expected. I'll be changing the last few inches out for a flexible tube.

plumbing_dry_fit.jpg
 
OP
OP
jakesweep

jakesweep

Community Member
View Badges
Joined
Apr 29, 2019
Messages
62
Reaction score
104
Rating - 0%
0   0   0
Filled the tank for a leak test! There was a slight leak in the manifold where the 1/2" pipe joins the T's. Not exactly sure how that happened, but I had a few extras on-hand, so I rebuilt the upper manifold. It's a hodgepodge of gray schedule 80 and white schedule 40, but I'm not concerned about that.

filling_leak_test.jpg
 
OP
OP
jakesweep

jakesweep

Community Member
View Badges
Joined
Apr 29, 2019
Messages
62
Reaction score
104
Rating - 0%
0   0   0
I hooked up the Varios 6 and the MP10s, turned on the lights, and let things run for a few days. No leaks in the tanks or plumbing, and everything seems pretty stable as far as flow to the sump goes. These lights shimmer nicely! I realized today that I'm eventually going to want to buy the wireless upgrade for the MP10s. You can get the new boards directly from EcoTech for around $50. This along with the WXM module will allow for Apex control.

water_test.jpg

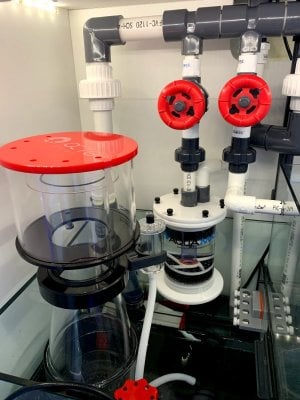
Here's the mixed pipe plumbing. Looks kind of janky, but it works for now. I really like the Schedule 80 unions and fittings much more than the schedule 40 stuff. I'll probably re-plumb it all in the near future anyway knowing me.

sump_plumbing_v2.jpg
 
OP
OP
jakesweep

jakesweep

Community Member
View Badges
Joined
Apr 29, 2019
Messages
62
Reaction score
104
Rating - 0%
0   0   0
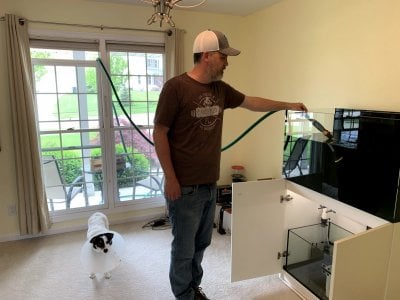
I started cooking some RODI water over the weekend and it did NOT go well. I followed the setup instructions to a T and made ~15 gallons of water. I pulled a sample and it tested at 220ppm TDS
default_sad.png


My tap water from the faucet is around 270ppm, so we're not getting very far here. I'm not sure if its a bad meter or a bad RO membrane. My DI resin is brown already because I didn't take a reading before putting it back in. I just assumed that the RO filter was doing its job. I also went to the store and grabbed some distilled water which showed 16ppm TDS.

I'm going to call Marine Depot this morning and talk with them about it. I did order a Smart Buddie booster pump and a pressure gauge which should be here this week.

ro_filter.jpg
 
OP
OP
jakesweep

jakesweep

Community Member
View Badges
Joined
Apr 29, 2019
Messages
62
Reaction score
104
Rating - 0%
0   0   0
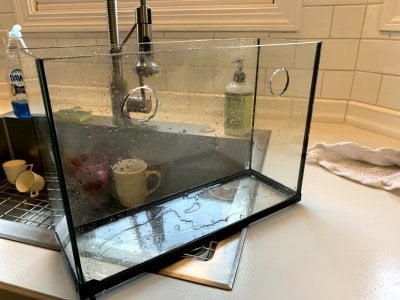
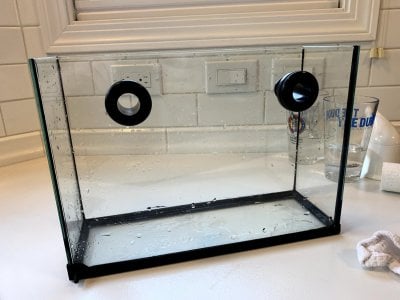
I also drilled and installed the mini refugium over the weekend. It was my first time drilling glass, and it was super easy. Got everything plumbed up and looking good!

After drilling:

drilled_fuge.jpg

Installed 1/2" bulkheads:

bulkhead_fuge.jpg

Plumbed into the system

plumbed_fuge.jpg
 
OP
OP
jakesweep

jakesweep

Community Member
View Badges
Joined
Apr 29, 2019
Messages
62
Reaction score
104
Rating - 0%
0   0   0
A few updates from May 27, 2019:

1. The dry rock should get here tomorrow. It's Billy Hays Dry Rock, which is from one of those ancient inland reefs in FL. Looking forward to playing with some scapes!

2. I ordered a custom lid for the Reefer from Clearview Lids! https://www.clearviewlids.com/colle...uarium-lids/products/reefer-250-clearview-lid

3. I bought a 5.5 gallon glass tank from Petco the other day. I'm going to drill it and use it for a refugium instead of the little 2.2g Red Sea ATO container.

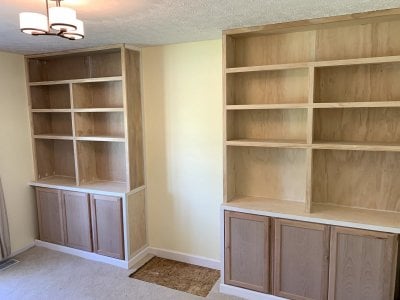
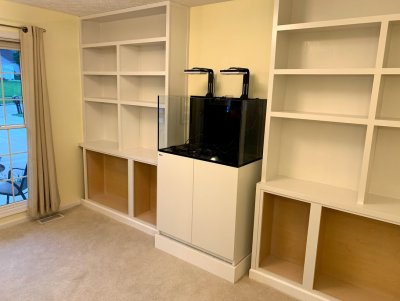
And finally my wife and I made a lot of progress on the room this weekend. We finished building out the built-in bookshelves and got the first coat of paint on them. The Reefer is going to live right between them. All of the electronics are going to live in the first cabinet to the right. Here's a pic before painting:

built-ins-pre-paint.jpg
 
OP
OP
jakesweep

jakesweep

Community Member
View Badges
Joined
Apr 29, 2019
Messages
62
Reaction score
104
Rating - 0%
0   0   0
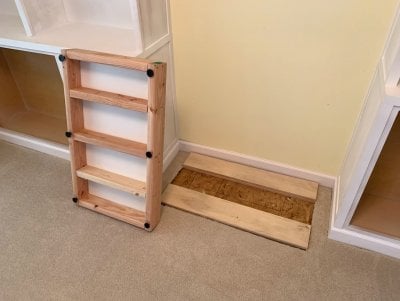
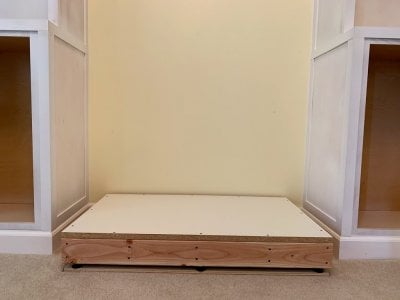
A few more updates! Things are moving along. I had trouble leveling the tank before, so I constructed a heavy-duty base with adjustable feet. I'll stick some trim around it when we finish painting the shelves. The first coats of paint are on, too (only the first coat is on in the pic). One more coat should do it.

base-pre-install.jpg
base-level.jpg

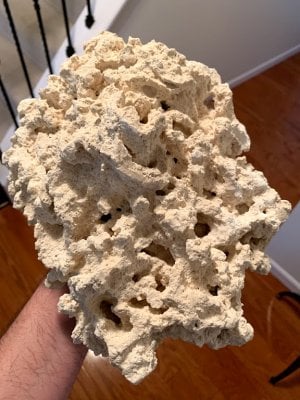
Also the dry rock came in! It looks really nice, clean, and porous. He shipped some good sized pieces too. I only pulled out a couple pieces from the smallest box, but here's a good sample:

dry-rock.jpg
 
OP
OP
jakesweep

jakesweep

Community Member
View Badges
Joined
Apr 29, 2019
Messages
62
Reaction score
104
Rating - 0%
0   0   0
Finished painting the shelves and couldn't help but to move the tank into place. My wife is a trooper for helping me lift that thing so many times. Just need to put the last 2 coats on the cabinet doors then re-hang them.

tank-in-place.jpg
 
OP
OP
jakesweep

jakesweep

Community Member
View Badges
Joined
Apr 29, 2019
Messages
62
Reaction score
104
Rating - 0%
0   0   0
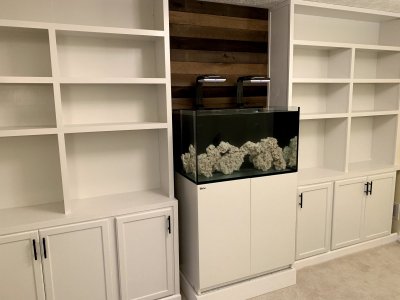
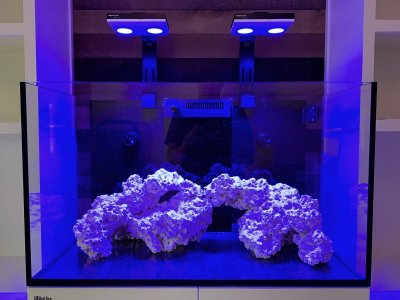
Finished up the shelves, played around with a scape or two, filled the tank with water and added salt. It's nice to finally have this thing wet! My wife had the idea to add the "barn" wood slats behind the tank. I think it adds a nice contrast to all the white. After things stabilize over the next day or two, I'll add the sand and the bottle of bacteria. Hopefully that will jump start the cycle so we can get this show on the road!

shelves-finished.jpg
scape1.jpg
 
OP
OP
jakesweep

jakesweep

Community Member
View Badges
Joined
Apr 29, 2019
Messages
62
Reaction score
104
Rating - 0%
0   0   0
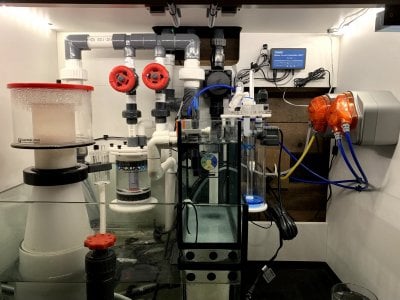
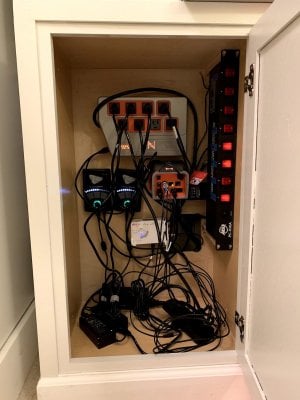
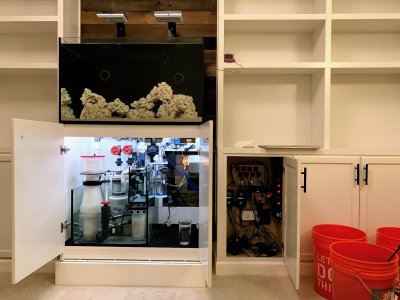
Got things pretty much set up and running over the weekend. Electronics were moved in and mounted in the right-side cabinet. There is still a mess of wires, but it will do for now. I got the Apex up and running. I'm really starting to wish I went with the GHL controller, but I can't return the Apex. Something about the company just rubs me wrong the more I look into it. The hardware seems kind of flimsy and toy-ish, and it takes up a LOT of unnecessary room.

I installed the ATO after getting the water station set up in the garage (which is conveniently just on the other side of the wall. I'm not sure what I'll do in the winter, but we'll cross that bridge later. I have 3 lines of RO tubing and the wires for the ATO going through the wall out to various containers. One for RO, one for fresh saltwater, and one for old saltwater. This allows for the DOS to to auto water changes (which I still need to configure). The Tunze ATO draws RO from a 5 gallon container that I will fill manually every few days (by simply turning a valve). I do this to make sure my sump can't overfill if the ATO goes haywire for some reason.

I also put sand in the tank. Too much at first, but removed some this morning and played around with the scape. Still not 100% happy with the rock work. I added a couple cubes of frozen Mysis that I had hanging around along with some Dr. Tim's in hopes it will kick off the cycle. I've been running my protein skimmer in order to break it in, just leaving the plug out so the water in the cup drains back into the sump.

Here are some pics:

sump-setup.jpg

electronics-setup.jpg

full-setup.jpg
 
OP
OP
jakesweep

jakesweep

Community Member
View Badges
Joined
Apr 29, 2019
Messages
62
Reaction score
104
Rating - 0%
0   0   0
And to wrap things up for now while we wait for the tank to cycle:

Potential disaster averted. I'm draining out a bunch of saltwater and exchanging it for fresh RO. I'm on my 4th 5 gallon bucket.

My refractometer is from another hobby of mine, Homebrewing. I didn't realize that refractometers for different applications were calibrated differently. 1.025 SG in beer wort is completely different than 1.025 SG in saltwater. The actual SG in the tank was about 1.037. Good thing the worst thing to come of this was a bit of wasted salt.

I wouldn't have known this until things were dying off if it weren't for the Apex I guess. I was getting some crazy readings from the salinity probe. I cross-checked it with a hydrometer I found hanging around, so i definitely know the refractometer reading was off. I ordered a new one off Amazon, so hopefully it all checks out after I get the salinity down.
 

Bubbles, bubbles, and more bubbles: Do you keep bubble-like corals in your reef?

  • I currently have bubble-like corals in my reef.

    Votes: 29 36.3%
  • I don’t currently have bubble-like corals in my reef, but I have in the past.

    Votes: 10 12.5%
  • I don’t currently have bubble-like corals in my reef, but I plan to in the future.

    Votes: 25 31.3%
  • I don’t currently have bubble-like corals in my reef and have no plans to in the future.

    Votes: 14 17.5%
  • Other.

    Votes: 2 2.5%
Back
Top