From 6/11 on RC: My re-build/pics - Constructive criticism welcome
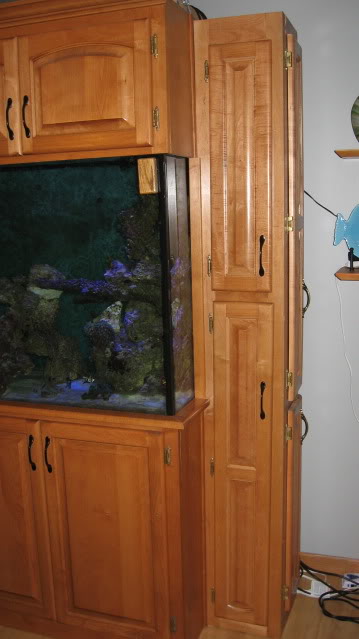
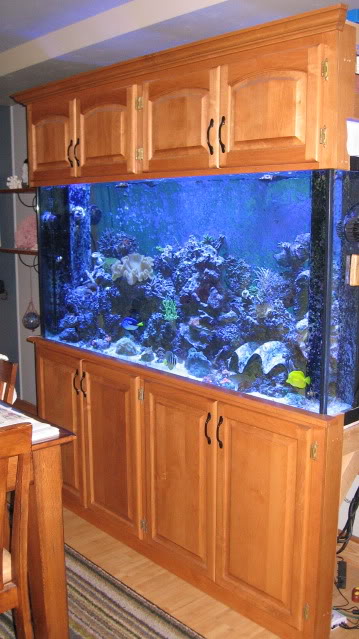
Okay, so when I moved to Green Bay a little over a year ago I snagged a good deal on a 260g Miracles tank, custom cabinet stand & canopy, along with 250W halides. I rushed to set it up in the middle of winter before moving all the rest of my stuff. This replaced my 150 FOWLR and got my passion burning once more. I've been a reefer from way back, and for the last 15 years I've had a small reef of some kind going at any given time. This new tank replaced everything and I sold/tossed/ and donated 20 years worth of the rest of the stuff I accumulated in the process.
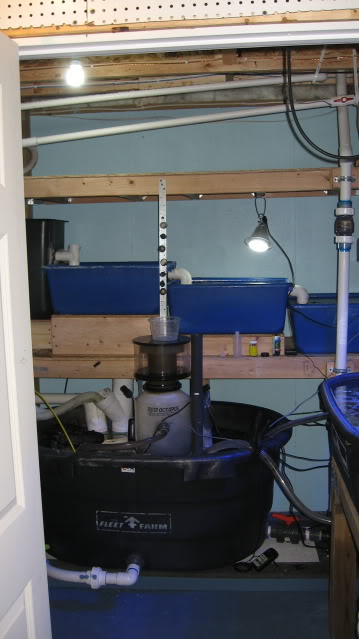
I've since expanded my little saltwater empire to include a big basement sump, 270 gallon basement reef, large refugium, and neat little DSB frag tank. Hey, it only counts as one if they're all connected right? Exploited that little loophole for all it's worth. Hope she's not reading this I am now officially embarrassed when asked how much I've spent thus far. As a result, it's turned into pretty much my only hobby.
Sump room:
270 Fiberglass Bonus Basement Reef. Use TBD in the future. Currently housing extra rock and fish that have been banished from the display for misbehaving:
DSB frag tub:
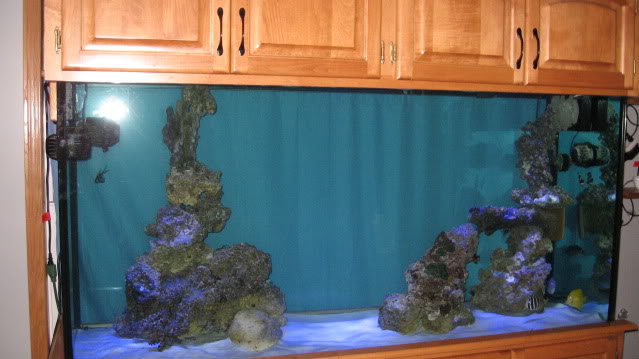
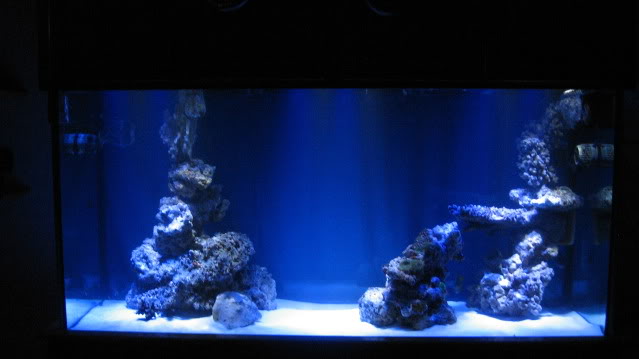
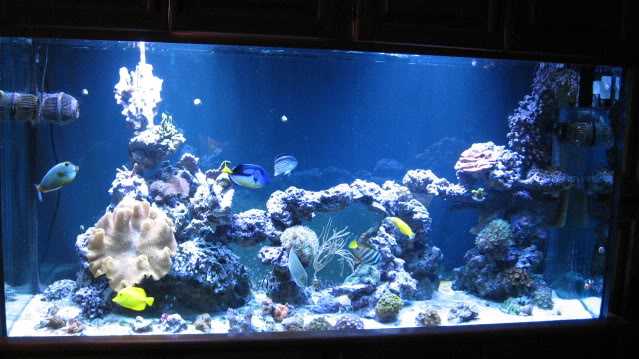
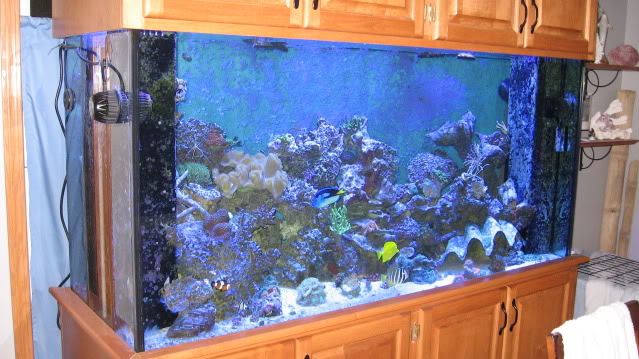
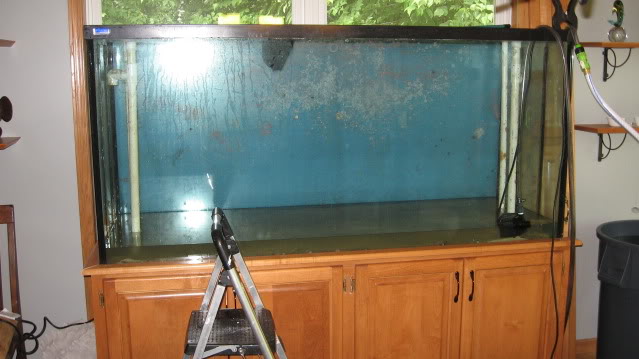
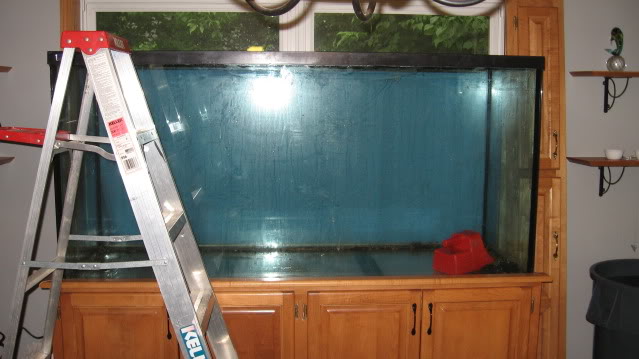
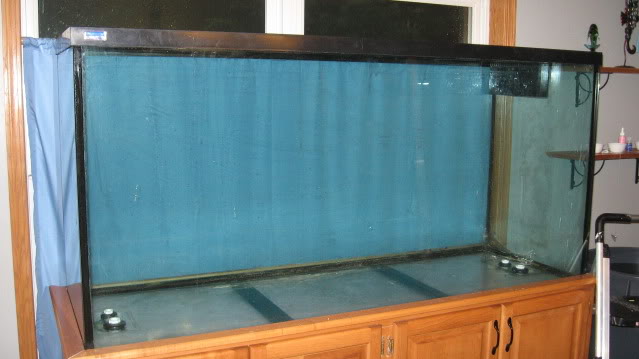
I love my setup, but due to the rush to get it going before the move, I haven't been super happy with the display. Out of necessity, I had to put up with the flaws and set it up as I bought it. The tank was built to be a room divider, with top to bottom overflows that were formerly covered by a wall and a beam. In my house it has to be located against a wall, so these overflows and plumbing are viewable from the sides and take up a lot of real estate.
You can also see where the stand wrapped around a beam here:
Large tower overflows clearly visible from the front:
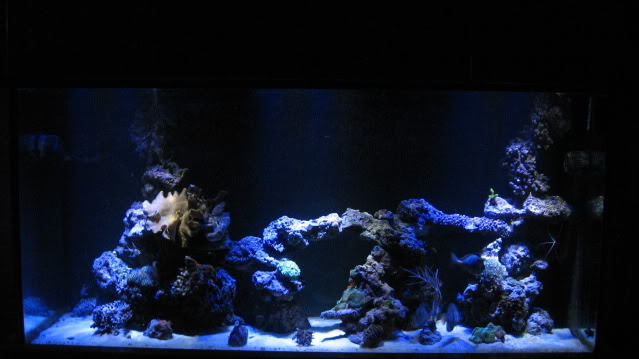
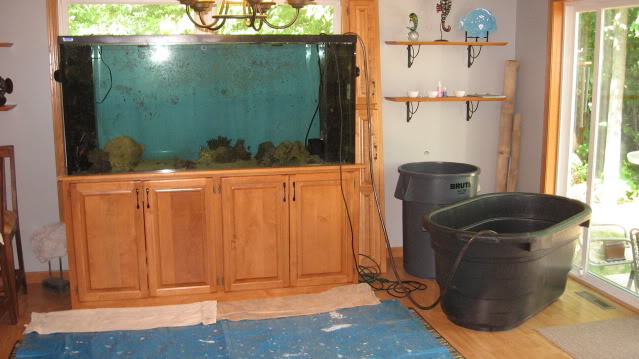
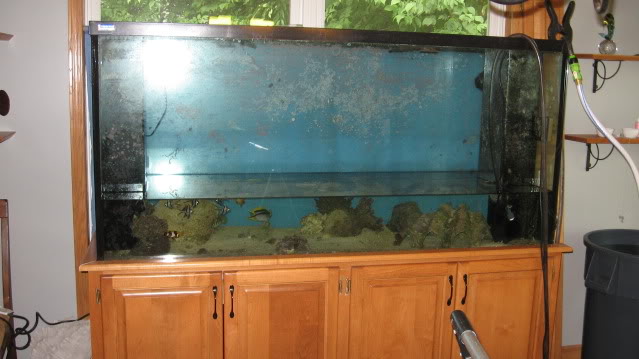
I recently discovered a major flaw in my heating system when an 800W heater failed and caused the loss of most of my SPS. Pics reflect coral and rock that has been removed and it looks a bit empty for the size of the tank. Here's what happened if you missed it:
http://www.reefcentral.com/forums/s...hreadid=1629470
Although discouraging, my sudden loss of corals has given me an opportunity to change what I do not especially care for.
Things I intend to change:
Add moving light rail with only two 400W lamps with Lumenarcs as opposed to three static lamps. Light rails will not only help save on lamp costs and electricity, but allow for more natural growth as the light reaches more area around branches, rocks, etc. The remaining lamp will be used on the almost square 270g downstairs.
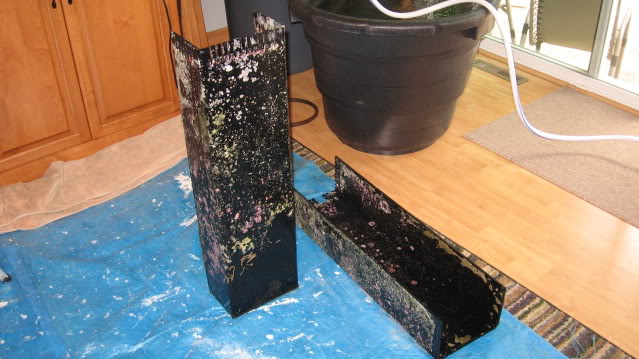
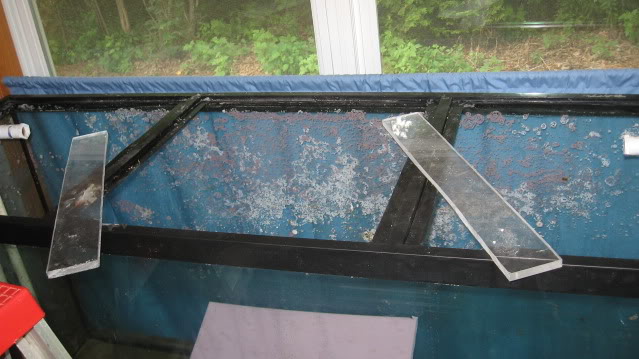
Cut out large plastic tank braces and replacing with PVC bolts and clear acrylic braces to avoid shadows on the back of tank. Acrylic is half inch.
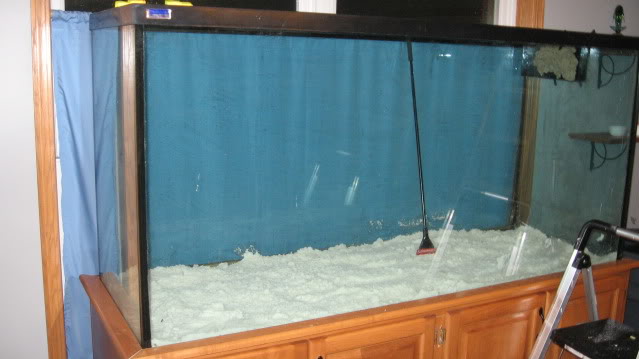
Replacing sand. The decorative sand bed is 1.5 inches and is okay, but appears dirty. Since it is purely for decoration, I am changing to a bright white variety for aesthetics and for its reflective properties.
I am currently experimenting with creating a light box like what is currently used on public aquarium displays. Basically translucent vinyl on an acrylic sheet that is backlit to create a depth effect. Tough to get it to look right, but hopefully it will pay off.
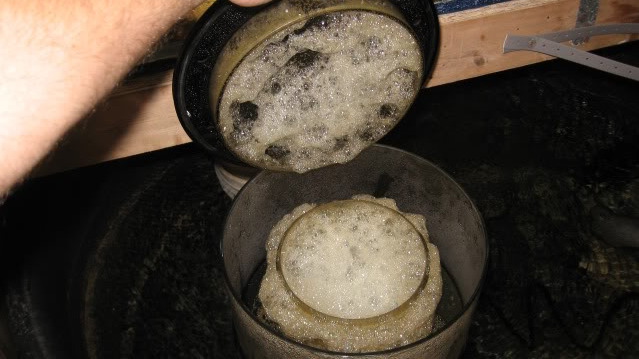
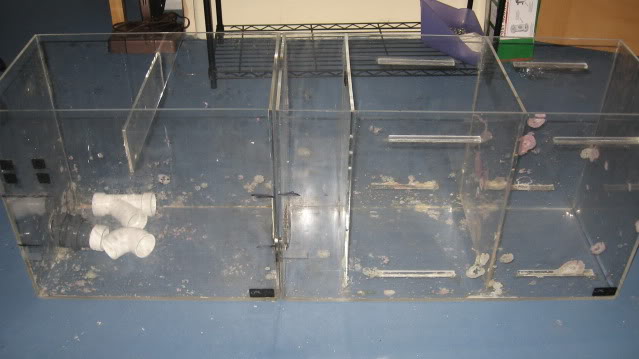
You can see the current refugium here. It consists of three large tubs. First is rubble and extra rock, next is mud and macro, and the third is housing evil hitchhikers. This is being replaced by a large sump purchased from MSUfan. These tubs are too shallow and the salt creep drives me crazy, as well as not being able to see what's going on inside.
New fuge:
And the biggest challenge: I'm going to empty the tank and all contents to remove the old overflows. I'll be inside the tank for a good amount of time removing silicone after I cut the braces out. Once this is complete I'll be installing a thin Glassholes overflow box. This thing looks fantastic and is promised to be near silent. The glass is 5/8 inch thick and I don't look forward to the task of drilling glass that thick, especially when it's vertical. All drain plumbing to be upgraded to 1.5 inch from the factory drilled 1 inch.
There are 4 holes in the bottom of the tank for current drains and returns. All bulkheads will be capped and not used, although the thought of making these holes a closed loop has crossed my mind. Another pump and yet more electricity use is not appealing though.
Lastly, and after what is sure to be a long day, I will be using epoxy and fiberglass rods to make a more permanent structure. The tank is 34 inches high and I've suffered more than one avalanche in the past year as well as a tuxedo urchin that tries my patience moving rock at least once a week. After an exhaustive search of aquascaping threads, I've decided to go with an open look and island structures over the traditional wall of rock. I love the way the fish can navigate the space and the more natural look it creates. Also a couple of my tangs will be eventually needing that space.
Should be a fun ride. My apologies for the long post if you've made it this far. I will update as I progress. Although I have thoroughly researched every mentioned change, tips and criticism are always appreciated.
Okay, so when I moved to Green Bay a little over a year ago I snagged a good deal on a 260g Miracles tank, custom cabinet stand & canopy, along with 250W halides. I rushed to set it up in the middle of winter before moving all the rest of my stuff. This replaced my 150 FOWLR and got my passion burning once more. I've been a reefer from way back, and for the last 15 years I've had a small reef of some kind going at any given time. This new tank replaced everything and I sold/tossed/ and donated 20 years worth of the rest of the stuff I accumulated in the process.
I've since expanded my little saltwater empire to include a big basement sump, 270 gallon basement reef, large refugium, and neat little DSB frag tank. Hey, it only counts as one if they're all connected right? Exploited that little loophole for all it's worth. Hope she's not reading this I am now officially embarrassed when asked how much I've spent thus far. As a result, it's turned into pretty much my only hobby.
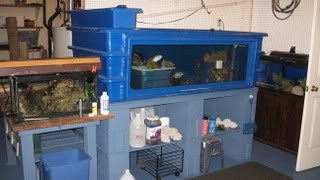
Sump room:
270 Fiberglass Bonus Basement Reef. Use TBD in the future. Currently housing extra rock and fish that have been banished from the display for misbehaving:
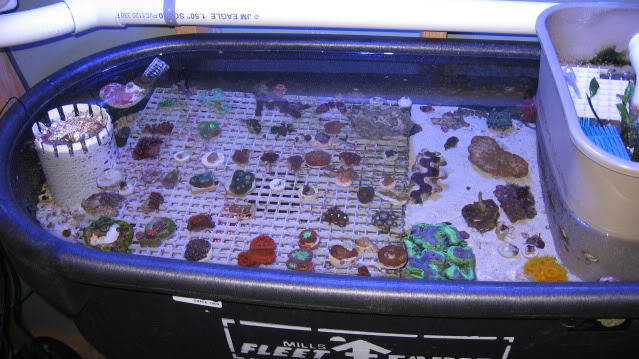
DSB frag tub:
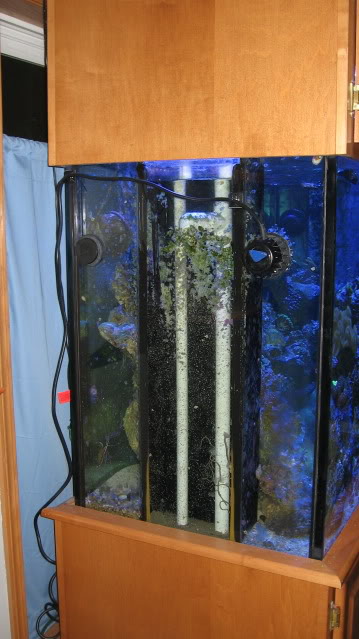
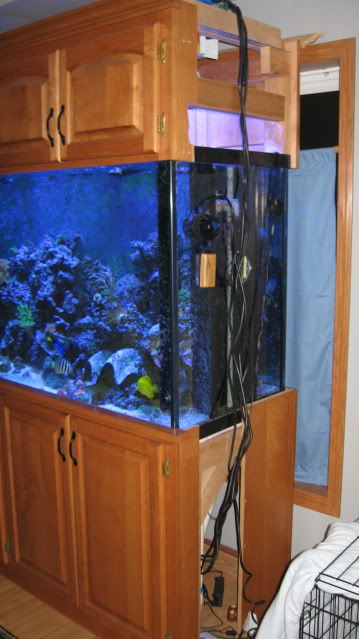
I love my setup, but due to the rush to get it going before the move, I haven't been super happy with the display. Out of necessity, I had to put up with the flaws and set it up as I bought it. The tank was built to be a room divider, with top to bottom overflows that were formerly covered by a wall and a beam. In my house it has to be located against a wall, so these overflows and plumbing are viewable from the sides and take up a lot of real estate.
You can also see where the stand wrapped around a beam here:
Large tower overflows clearly visible from the front:
I recently discovered a major flaw in my heating system when an 800W heater failed and caused the loss of most of my SPS. Pics reflect coral and rock that has been removed and it looks a bit empty for the size of the tank. Here's what happened if you missed it:
http://www.reefcentral.com/forums/s...hreadid=1629470
Although discouraging, my sudden loss of corals has given me an opportunity to change what I do not especially care for.
Things I intend to change:
Add moving light rail with only two 400W lamps with Lumenarcs as opposed to three static lamps. Light rails will not only help save on lamp costs and electricity, but allow for more natural growth as the light reaches more area around branches, rocks, etc. The remaining lamp will be used on the almost square 270g downstairs.
Cut out large plastic tank braces and replacing with PVC bolts and clear acrylic braces to avoid shadows on the back of tank. Acrylic is half inch.
Replacing sand. The decorative sand bed is 1.5 inches and is okay, but appears dirty. Since it is purely for decoration, I am changing to a bright white variety for aesthetics and for its reflective properties.
I am currently experimenting with creating a light box like what is currently used on public aquarium displays. Basically translucent vinyl on an acrylic sheet that is backlit to create a depth effect. Tough to get it to look right, but hopefully it will pay off.
You can see the current refugium here. It consists of three large tubs. First is rubble and extra rock, next is mud and macro, and the third is housing evil hitchhikers. This is being replaced by a large sump purchased from MSUfan. These tubs are too shallow and the salt creep drives me crazy, as well as not being able to see what's going on inside.
New fuge:
And the biggest challenge: I'm going to empty the tank and all contents to remove the old overflows. I'll be inside the tank for a good amount of time removing silicone after I cut the braces out. Once this is complete I'll be installing a thin Glassholes overflow box. This thing looks fantastic and is promised to be near silent. The glass is 5/8 inch thick and I don't look forward to the task of drilling glass that thick, especially when it's vertical. All drain plumbing to be upgraded to 1.5 inch from the factory drilled 1 inch.
There are 4 holes in the bottom of the tank for current drains and returns. All bulkheads will be capped and not used, although the thought of making these holes a closed loop has crossed my mind. Another pump and yet more electricity use is not appealing though.
Lastly, and after what is sure to be a long day, I will be using epoxy and fiberglass rods to make a more permanent structure. The tank is 34 inches high and I've suffered more than one avalanche in the past year as well as a tuxedo urchin that tries my patience moving rock at least once a week. After an exhaustive search of aquascaping threads, I've decided to go with an open look and island structures over the traditional wall of rock. I love the way the fish can navigate the space and the more natural look it creates. Also a couple of my tangs will be eventually needing that space.
Should be a fun ride. My apologies for the long post if you've made it this far. I will update as I progress. Although I have thoroughly researched every mentioned change, tips and criticism are always appreciated.
Last edited by a moderator:


")