I have used Lanthanum Chloride in the past, but I was always concerned about effective removal of the precipitate from my system. The common way is to drip the diluted LaCl into a filter sock to catch the precipitated LaCl. My frag tank had PO4 readings exceeding the Hanna ULR range (0.60+ ppm) after a series of vacation mishaps this past winter, so I decided to use LaCl to pull it down to around 0.1 ppm, and I wanted an easy way of dealing with the precipitate in the easiest way possible. I tend to be a bit lazy sometimes. If it was not easy, then I would not want to do it.
What started me down this path was that I had just finished replacing the filter media on my pool filter (on my pool). I had installed a MultiCyclone pre-filter and switched the sand filter over to Glass Pearls media. The reason I added the MultiCyclone was that I had been thinking about using it on my big tank build and wanted to test it in the real world. It works great, but that is for another thread, what caught my attention was the glass media that I switched my sand filter to. It is called Glass Pearls and filters down to 3 microns. Hmm, that would be enough to catch the precipitate from LaCl, I thought. Now if only I had a sand filter for my aquarium that I could use the glass beads with.
I looked around, but did not see any commercial units small enough to be used on a tank. I did a test using a 53 micron stackable sieve stuck on the end of a 4" length of pipe. The test was a success by all accounts. The glass beads did eventually clog up and the water level rose to the point where it would overflow the pipe. When I back flushed the filter media, the water was white and milky. Perfect, it was catching the LaCl as expected. But I was going to need a way to force the reacted water through the media as gravity was not doing it for me. The test sieve would overflow far too easy depending on the flow, even without LaCl being added.
What I settled on using was RODI 10" x 2.5" refillable canisters. I figured I could use an empty one as the reaction chamber for the flow through the reactor to react with the LaCl that would be added just before the chamber, and a second one to hold the glass media to catch the precipitate.
My first mock up of the reactor design used the translucent poly canisters that are used for DI resin. It worked, but the filter material at both ends, that is similar to what filter socks are made of, clogged way too fast. I need to be able to run the system for at least 24 hours before being cleaned, and these canisters would need cleaning after only a few hours due to the small surface area of the filter material and the fact it was filtering! These poly canisters would never work for this.
So I started looking for a refillable canister that did not have any filter paper on the feed and drain. Way back when I bought my RODI from BRS, they had included a canister for GAC made from polycarbonate that had a closely spaced grill on the feed and drain. That would be perfect. I was not sure if I had it still or where it was, but after a bit of searching, I dug it out of storage above the garage. The glass beads are 0.4 - 0.6 mm, and the grill spacing on the polycarbonate canister seems to hold the glass beads fine.
Now that I had a canister that would work as the filter, I decided to design a method of flushing the media without taking the canister out. I knew if I had to take the canister out during use, it was going to be messy, and I would not want to do it, so it would be too much of a PITA for me to use, and therefore I would not use it. I knew that I would need the means of isolating the media canister, a feed from the house water, and a drain to flush the now freed precipitate.
Part of the challenge in designing the reactor, was that the space this thing was going to take up was huge. Just piping the 2 canisters together with all the needed valves and tees for feeds and drains was going to be approaching 5 or 6 feet long! As well, because I expected to need to be able to flush the media mid cycle, I would have to use tank water to push the flush water, which is untreated tap water, out of the media and down the drain. This would require guesstimating how long to drain the media after restarting the feed pump, before reenabling the normal return to the tank. Every flush cycle would result in the loss of some tank water that would need to be replaced. There had to be a better way.
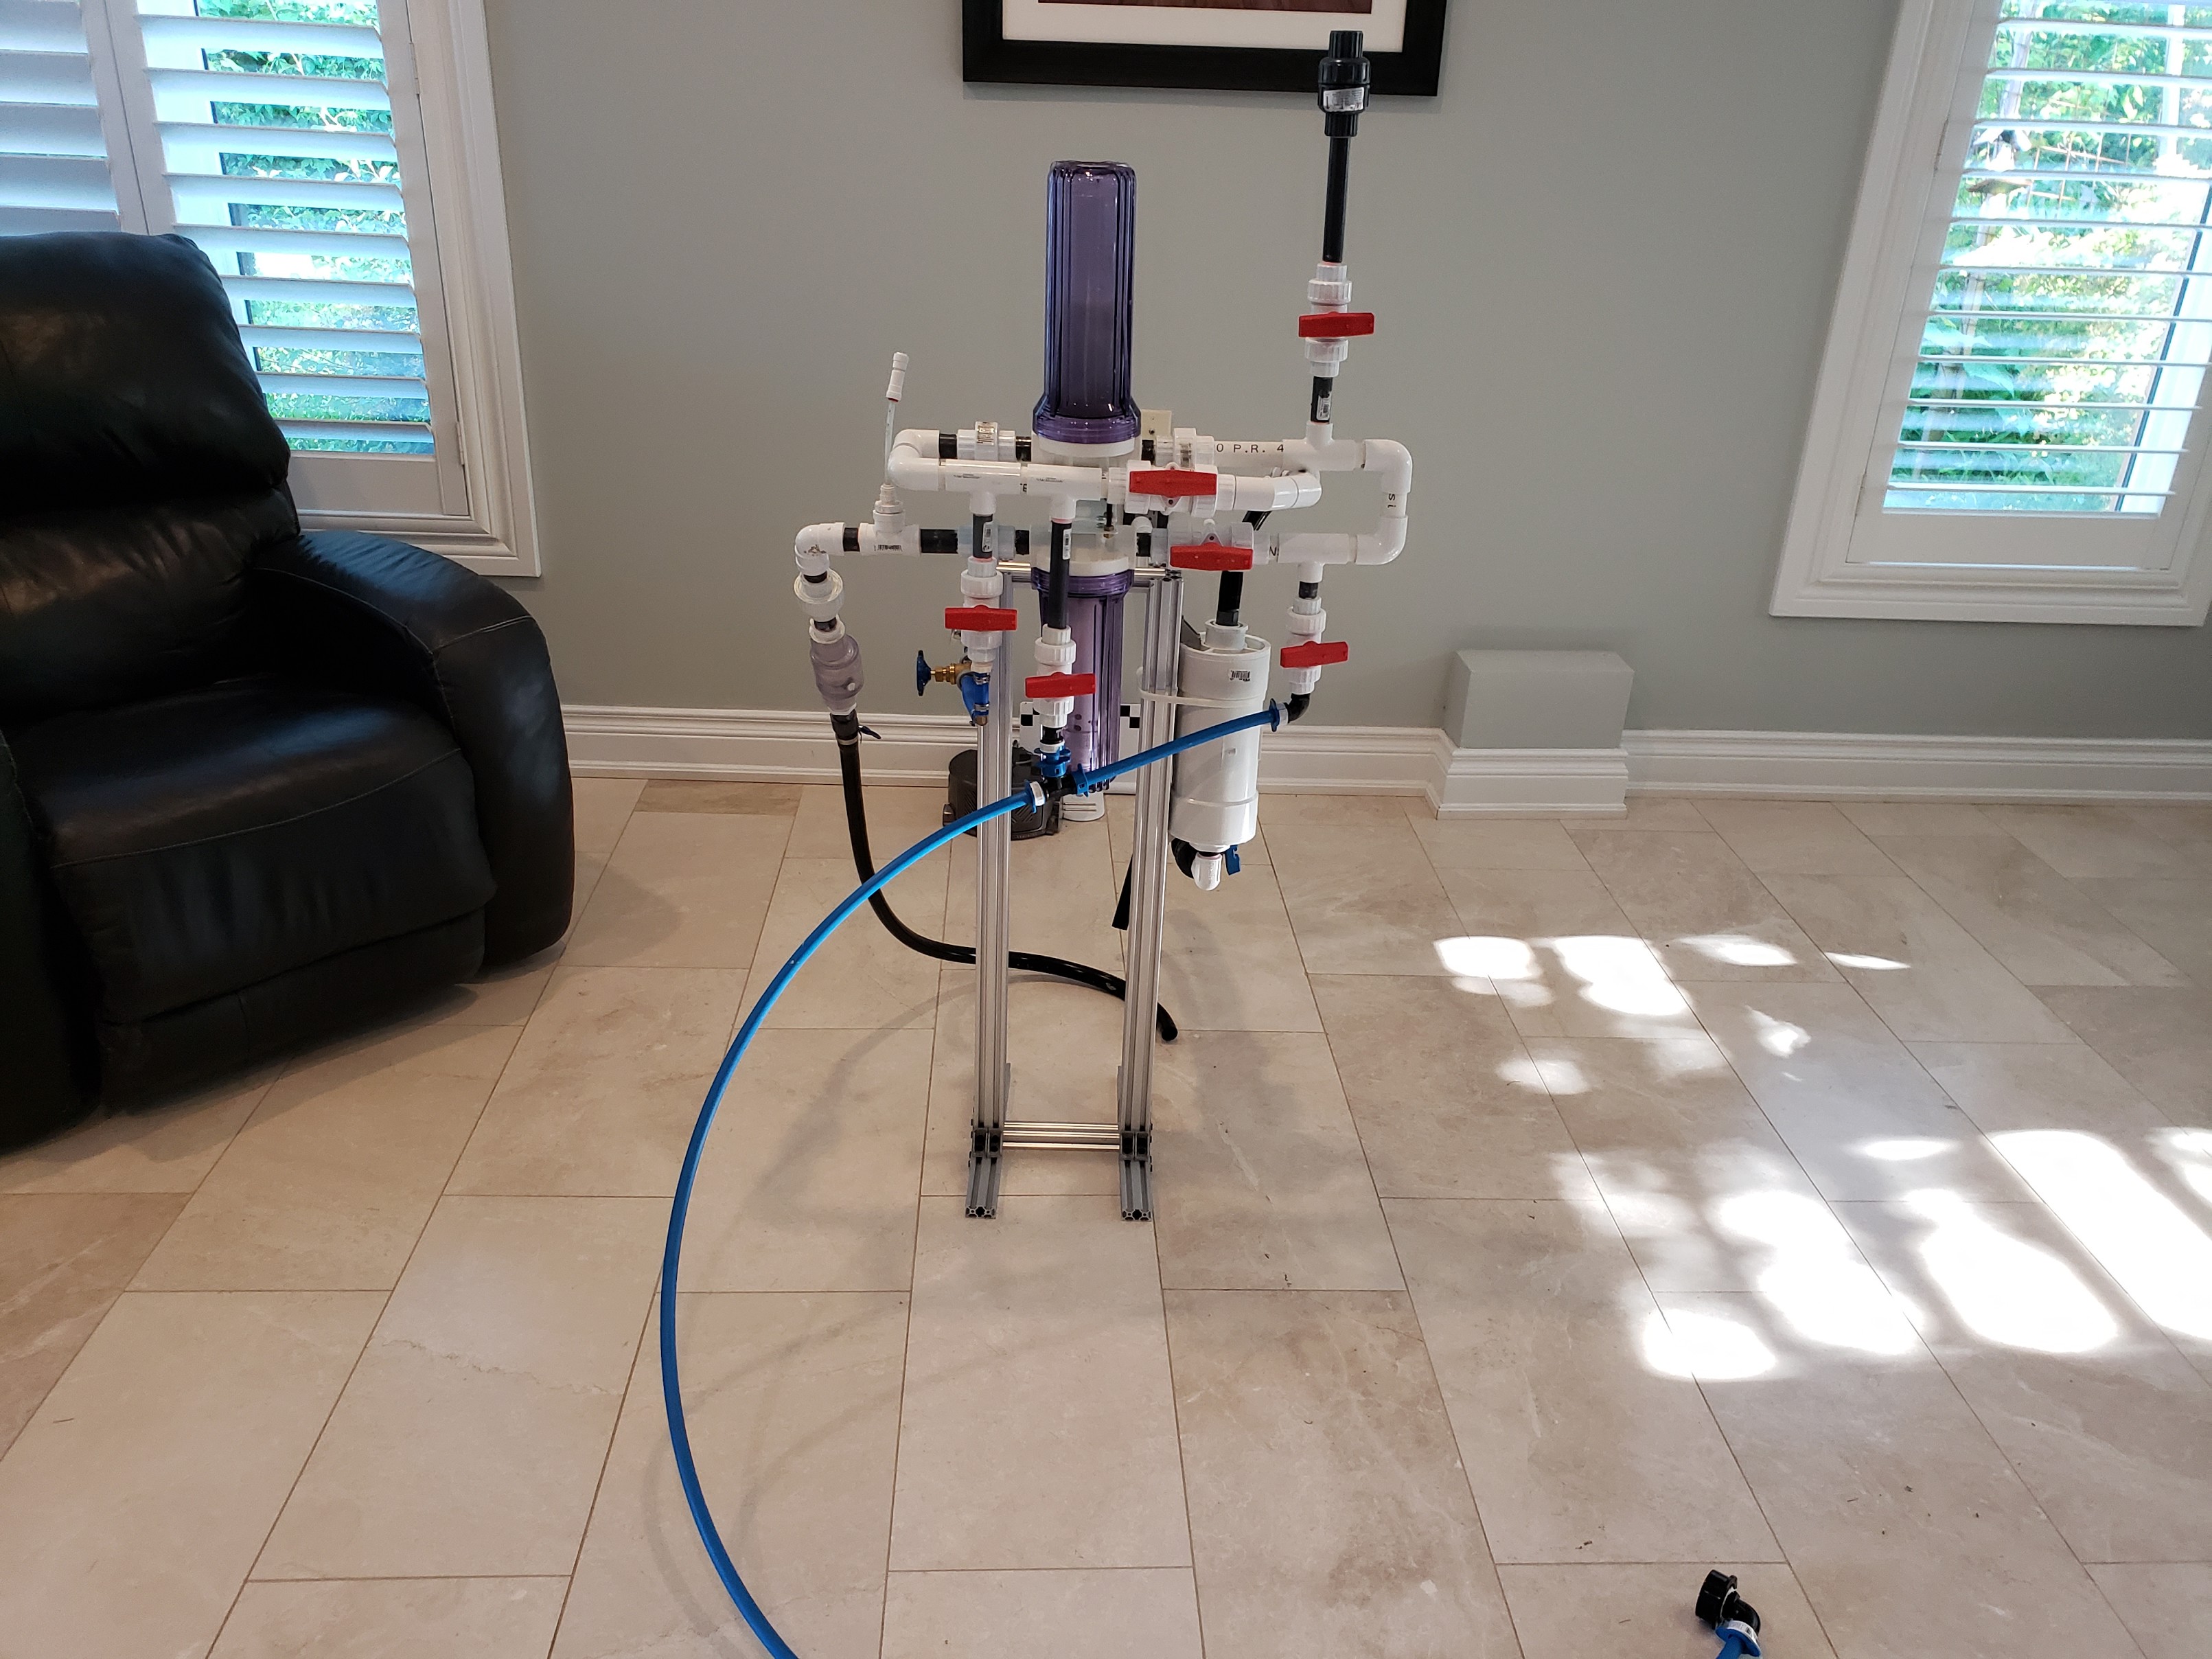
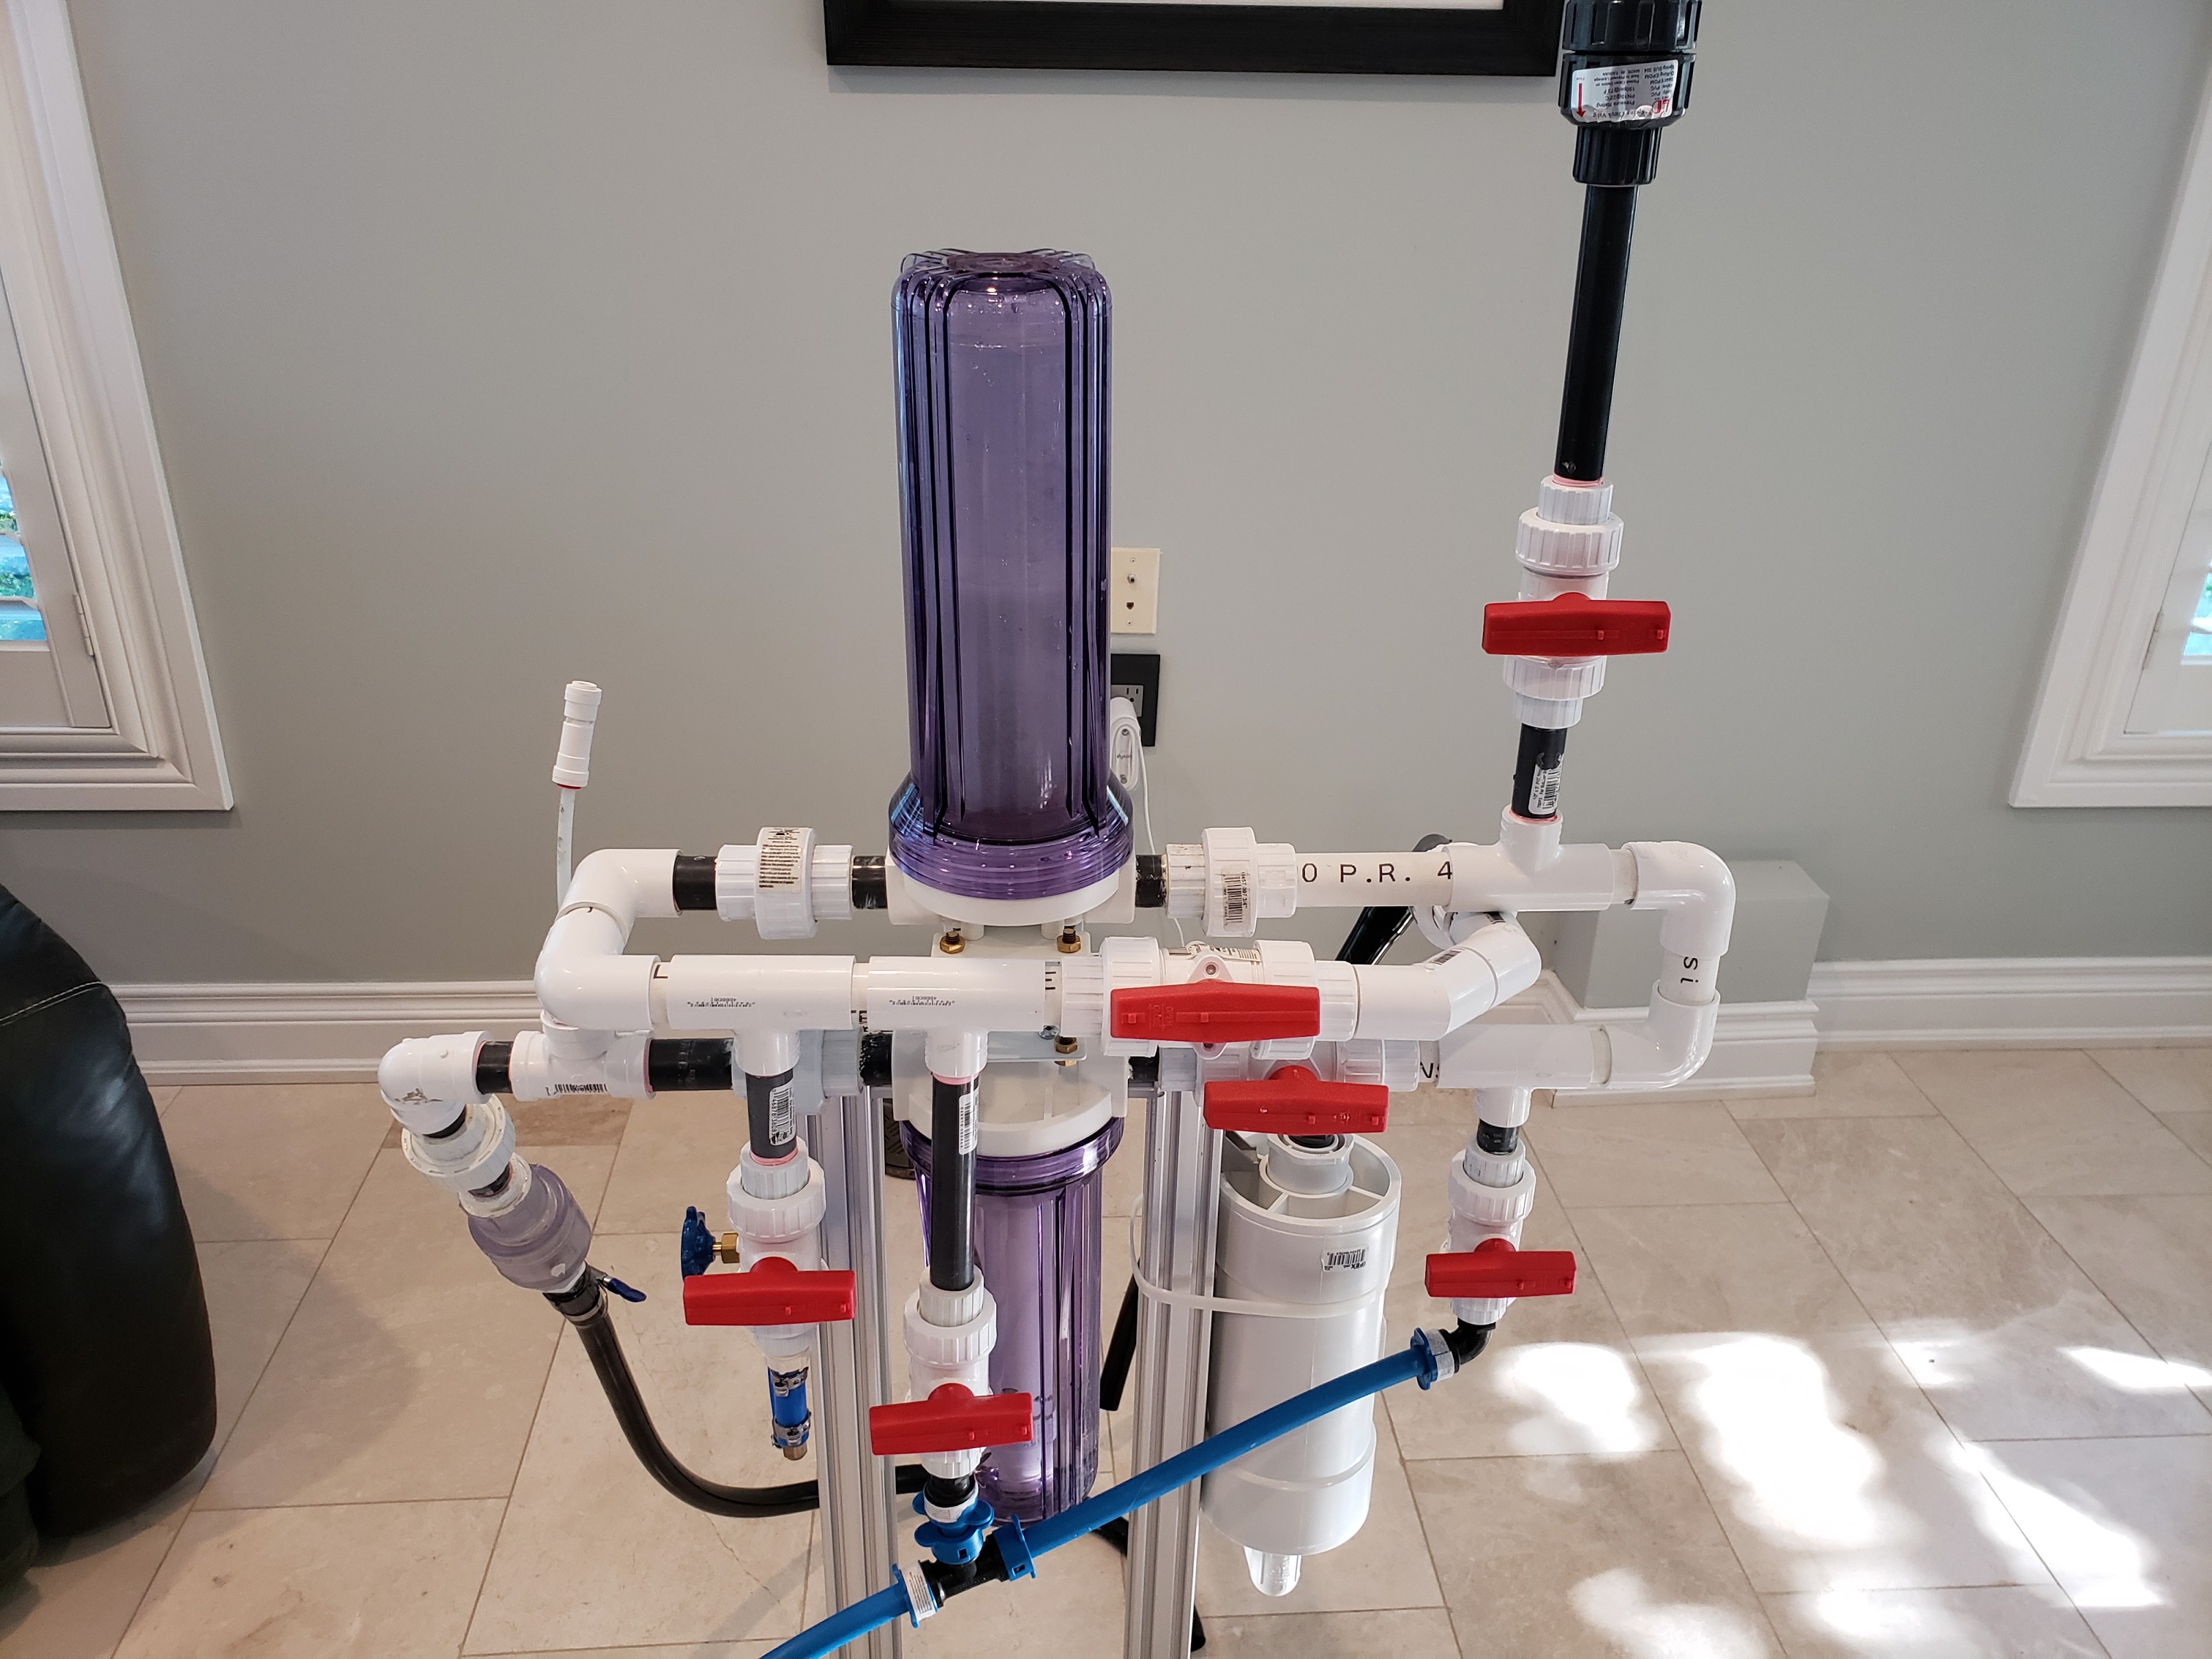
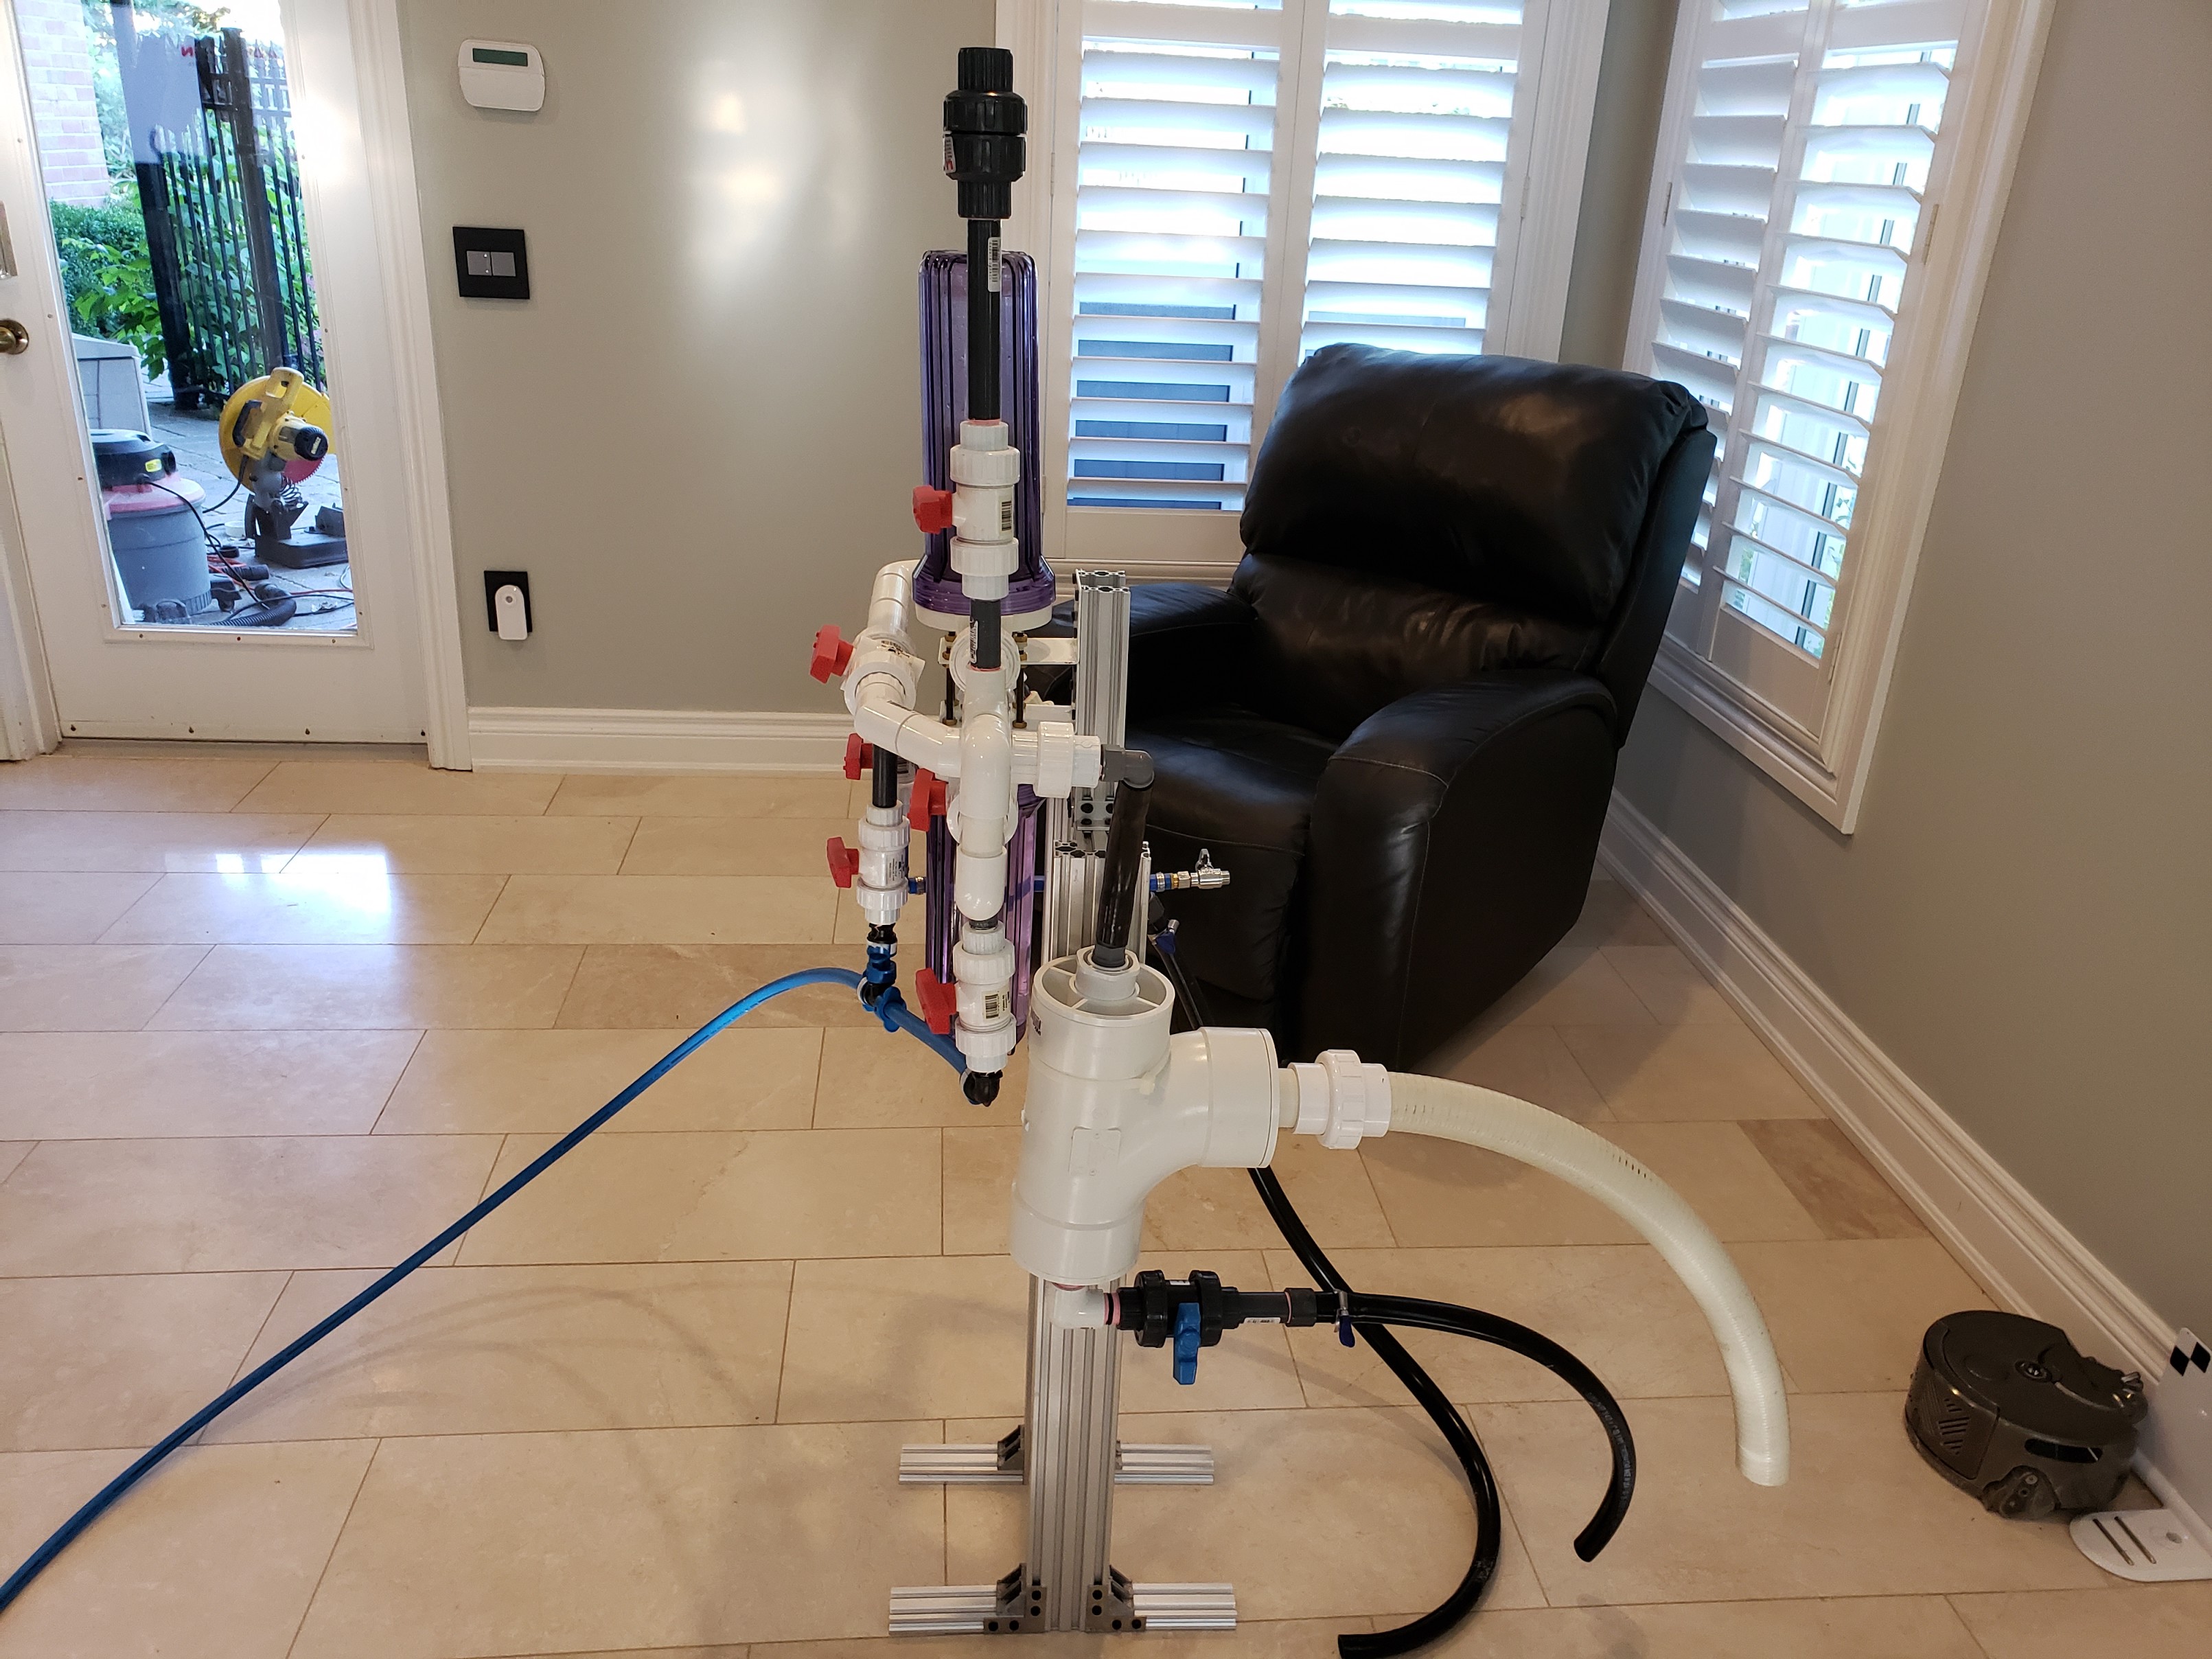
What I came up with was a design that folds the reactor back onto itself. Rather than being 5 or 6 feet long, it would only be 2 - 2.5 feet long and the media chamber would be upside down and would be drainable without using tank water to push the untreated water out the drain. This would solve the space requirements and make it easier to use. I settled on a design that has an input ball valve, a flush water valve, a drain valve, then the media reactor, followed by a drain valve, a venting valve and then an output ball valve. By setting the various valves, I can start it up, use it to slowly add the LaCl over several hours (or days) and then stop the feed pump(s), drain the tank water in the media canister back to the tank, flush the media using tap water, drain the tap water, and then restart the reactor pumps to continue the LaCl treatment. Down the road I plan on looking to 3D print some actuators for the valves to allow the flushing sequence to be automated. I don't have a 3D printer yet, and I have a long list of things to print, so automating the reactor may not happen for awhile.
The last challenge was how to support or mount the reactor. After considering various low tech means, I decided to re-task some of my off cut aluminum extrusions. It is a bit overkill, but It is SOLID and moveable.
This would be better with photos ...


More photos to come (3 seems to be the limit).
Dennis
What started me down this path was that I had just finished replacing the filter media on my pool filter (on my pool). I had installed a MultiCyclone pre-filter and switched the sand filter over to Glass Pearls media. The reason I added the MultiCyclone was that I had been thinking about using it on my big tank build and wanted to test it in the real world. It works great, but that is for another thread, what caught my attention was the glass media that I switched my sand filter to. It is called Glass Pearls and filters down to 3 microns. Hmm, that would be enough to catch the precipitate from LaCl, I thought. Now if only I had a sand filter for my aquarium that I could use the glass beads with.
I looked around, but did not see any commercial units small enough to be used on a tank. I did a test using a 53 micron stackable sieve stuck on the end of a 4" length of pipe. The test was a success by all accounts. The glass beads did eventually clog up and the water level rose to the point where it would overflow the pipe. When I back flushed the filter media, the water was white and milky. Perfect, it was catching the LaCl as expected. But I was going to need a way to force the reacted water through the media as gravity was not doing it for me. The test sieve would overflow far too easy depending on the flow, even without LaCl being added.
What I settled on using was RODI 10" x 2.5" refillable canisters. I figured I could use an empty one as the reaction chamber for the flow through the reactor to react with the LaCl that would be added just before the chamber, and a second one to hold the glass media to catch the precipitate.
My first mock up of the reactor design used the translucent poly canisters that are used for DI resin. It worked, but the filter material at both ends, that is similar to what filter socks are made of, clogged way too fast. I need to be able to run the system for at least 24 hours before being cleaned, and these canisters would need cleaning after only a few hours due to the small surface area of the filter material and the fact it was filtering! These poly canisters would never work for this.
So I started looking for a refillable canister that did not have any filter paper on the feed and drain. Way back when I bought my RODI from BRS, they had included a canister for GAC made from polycarbonate that had a closely spaced grill on the feed and drain. That would be perfect. I was not sure if I had it still or where it was, but after a bit of searching, I dug it out of storage above the garage. The glass beads are 0.4 - 0.6 mm, and the grill spacing on the polycarbonate canister seems to hold the glass beads fine.
Now that I had a canister that would work as the filter, I decided to design a method of flushing the media without taking the canister out. I knew if I had to take the canister out during use, it was going to be messy, and I would not want to do it, so it would be too much of a PITA for me to use, and therefore I would not use it. I knew that I would need the means of isolating the media canister, a feed from the house water, and a drain to flush the now freed precipitate.
Part of the challenge in designing the reactor, was that the space this thing was going to take up was huge. Just piping the 2 canisters together with all the needed valves and tees for feeds and drains was going to be approaching 5 or 6 feet long! As well, because I expected to need to be able to flush the media mid cycle, I would have to use tank water to push the flush water, which is untreated tap water, out of the media and down the drain. This would require guesstimating how long to drain the media after restarting the feed pump, before reenabling the normal return to the tank. Every flush cycle would result in the loss of some tank water that would need to be replaced. There had to be a better way.
What I came up with was a design that folds the reactor back onto itself. Rather than being 5 or 6 feet long, it would only be 2 - 2.5 feet long and the media chamber would be upside down and would be drainable without using tank water to push the untreated water out the drain. This would solve the space requirements and make it easier to use. I settled on a design that has an input ball valve, a flush water valve, a drain valve, then the media reactor, followed by a drain valve, a venting valve and then an output ball valve. By setting the various valves, I can start it up, use it to slowly add the LaCl over several hours (or days) and then stop the feed pump(s), drain the tank water in the media canister back to the tank, flush the media using tap water, drain the tap water, and then restart the reactor pumps to continue the LaCl treatment. Down the road I plan on looking to 3D print some actuators for the valves to allow the flushing sequence to be automated. I don't have a 3D printer yet, and I have a long list of things to print, so automating the reactor may not happen for awhile.
The last challenge was how to support or mount the reactor. After considering various low tech means, I decided to re-task some of my off cut aluminum extrusions. It is a bit overkill, but It is SOLID and moveable.
This would be better with photos ...
More photos to come (3 seems to be the limit).
Dennis


